• Please be sure to read the rules and adhere to them. Some banned members have complained that they are not spammers. But they spammed us. Some even tried to redirect our members to other forums. Duh. Be smart. Read the rules and adhere to them and we will all get along just fine. Cheers. :beer: Link to the rules: https://www.forumsforums.com/threads/forum-rules-info.2974/

Kristi KT7 restoration pictures

Big Al,

Man, I've really gotten behind on things, with the holidays and all. Spent the last two hours reading and catching up on your restoration project for the last month & 1/2. Wow, you've really been turning to on the Yetti :cool2:
You might have that rig running in the snow before the winter is over.....

Well, my KT3 is still sitting on my old flat bed, ready for a call-out. Had to put a new starter in her about a month ago. Start her up about every two weeks just to keep her exercised.

I'm sure liking the looks and the work you've done lately on the Yetti. Hope the instrument panel being in the overhead is not going to be too inconvenient to see. I assume your head will be back further than its location.
I really like that cool remote controlled spotlight. What was the cost of that?

Anyway, great work. I'll have to keep tabs on this thread more often....

Gary :tiphat:
 
wilkinsn1 said:
:blahblah::blahblah:

my KT3 is still sitting on my old flat bed, ready for a call-out. Had to put a new starter in her about a month ago.

:blahblah::blahblah:

Gary :tiphat:
Welcome back Gary, I've got a question for you about the starter. One of our Snow Trac members is having all sorts of problems with his starter and had it rebuilt twice. Is your KT3 engine an industrial engine or was it replaced with a regualr engine? The reason I ask is because there is apparently a difference in the starters?!? Is your starter new or did you have it rebuilt? Where did you find a starter for a VW industrial engine?
 
Good to hear from you again Gary !:tiphat:

I am glad you think I am moving along cause I think I am moving at a snails pace . Though I am really taking my time on the little details .
I picked up the remote search light through a little company out of Texas who also advertize on ebay . I don't buy through ebay, so I just called them and went direct . Cost was around $200 ,I believe with shipping charges .
The overhead console really works out well . It sits far enough in front of me that all I need to do is raise my eyes to see all the gauges . I think it is a much better setup than the factory had .There is no reaching for anything ! It is all right there !
I should be up and running in another month or less . I ordered a couple of special items I wanted and they are about 3 weeks out on shipping . So I guess we will just see .
I plan to take her up to the "Snow Cat Shoot" out at Yuba Gap , Cailfornia in late Feb.
The paint may get done today as it is clear skies today here .
Again thanks for dropping bye .

Ladies and Gentleman ..... The coffee pot is on and the door is open !
 
Allen, 2 serious questions.

#1 - Are you going to spray the roof rack with the same material you used (the 2 part epoxy bed liner material) to spray the center section of the KT7. I had bad experience with RUST on some aftermarket truck add ons that were powder coated. Water migrated under the powder coating at the joints & sharp edges where the metal parts slid together and it was a nightmare to keep it under control. It also seemed to migrate under the powder coating wherever it was fastened with screws.
#2 - What did you decide to do about the "Pearl" paint, are you adding that to customize the paint job or leaving it out so that it matches your truck?
 
Thats good advice on the rack . I was going to leave it as it came from the factory . They told me they use a two stage process when they powder coat to help stop the problem you mentioned . I think I will use clear silicone when I assemble it to help keep the water out .

The jury is still out on the pearl . I love the "Gold Pearl" look . It is so easy to shoot .It would not really change the main color of copper until the sun hits it and then it is dazzling . It would just add a ton of gold effervescense to the finish .

GIVE ME SOME OPINIONS HERE !!!! THIS MAY HAPPEN LATER TODAY!!! :confused2:
!!!!!!!!!!!!HURRY !!!!!!!!!!!!!!
 
Eric L said:
I vote "nay" on the pearl.. too much bling.

just my $.02

Eric

Well... I may have already passed into the "bling thing" . It does have a mini bar and gas Bar B Que .
 
Allen, just my 2 bits, but I would assemble the roof rack as you intend, then I would overspray it with the bed liner material to match the center section of the KT7. The bedliner material is slighly flexible, it will also provide an exterior waterproof seal for each of the seams, and it will provide abrasion resistance too.

As for the pearl tinting added to the paint, I may be mistaken but didn't you intend to paint it the gold/bronze color to match the Ford King Ranch truck you have? If you add pearl tint to the paint then won't it not match and almost look like a mistake when it is behind the tow vehicle? Obviously it would look great when not behind your Ford, but . . .

So I am not so much giving an opinion as asking a question that you may be the only one who can answer.
 
B_Skurka said:
Allen, just my 2 bits, but I would assemble the roof rack as you intend, then I would overspray it with the bed liner material to match the center section of the KT7. The bedliner material is slighly flexible, it will also provide an exterior waterproof seal for each of the seams, and it will provide abrasion resistance too.

As for the pearl tinting added to the paint, I may be mistaken but didn't you intend to paint it the gold/bronze color to match the Ford King Ranch truck you have? If you add pearl tint to the paint then won't it not match and almost look like a mistake when it is behind the tow vehicle? Obviously it would look great when not behind your Ford, but . . .

So I am not so much giving an opinion as asking a question that you may be the only one who can answer.

Thanks Bob ,
The guy I bought the rack from assured me it was well built and powder coated . I even told him what it was going on . I am going to have to take a look at it when it comes in to decide . I can tell you it will use a lot of bedliner if I do it .
Your right about towing the cat . It would sparkle compared to the Ford . Guess i'll make that decision when I get to that point in clear/coating .
Off to do a little more sanding before starting to paint . I really hope to show some great pictures tonight of a finished paint job on Yetti .

Have a Great Day Folks :tiphat:
 
Poobah,

For the color, do you have any samples that you can post/show us?

I for one am "color challenged" and work in primary colors only (although my kids are teaching me more with their 64-piece Crayola set :thumb: ).

I think Mrs. Zoom's car is pearl but I just call it white. :o
 
Ok .... I decided !!! No Pearl in the paint . The biggest reason why is... I can't find my jar of gold pearl in the shop :confused2:. Its out there somewhere ,but i can't find it:confused: !

Its also way to cold to shoot the finish paint today . 46 degrees and a lot of moisture in the air . The shop was dripping sweat all day and that is no good for painting . Maybe tomorrow . So I spent the entire day going over every body piece to make sure they are ready . Wet sanded to 400 grit so all the body parts are as smooth as a baby's butt .

Remember the smoother the prep finish the higher the gloss will be . That's why you see a lot of custom builders "wet color sand" a car after painting too. They usually finish up using 1500 grit paper . The hard part is not burning through the paint .

I did pick up my 1/4 " smoke plexiglass for the moon roof/sun roof . When I build it later this week I will show exactly "how to do it" so if anyone else needs to do it in the future on their cat they can reference the information I post . At $10 bucks a square foot you don't want to make mistakes:pat: .

I also got a line on plastic cleats for my Kristi tracks to replace the original hickory ones ,that are on it now . The outfit is in Reno and told me they can supply want I need ! :a1:
 
Well I won't be painting for a day or two . I just got home from working all day at Dads and water is running out of my shop !!!:confused: It was really cold here last night and the water pipe ,where it enters the shop froze . Water is everywhere !!!
I also want to thank everyone for viewing and posting to this thread . WE just passed 10,000 hits . I never thought I would see that . :cool2:
 
I also want to thank everyone for viewing and posting to this thread . WE just passed 10,000 hits . I never thought I would see that . :cool2:[/QUOTE]Congrats BigAL:cool2:
 
excellent rebuild, i enjoyed my morning coffee looking at the whole thread. i would suggest removing the allan keys on the little u-joints and replacing with a bolt with a square head and a hole thru the head. then you can wire the bolt so it will never come loose. plus the bolt can be tighterned tighter then an alan screw. you can find the bolts at a bearing store.

keep them pictures coming.


thansk
 
Evening all :tiphat: ,
Well I got my shop dryed out and started on the last pieces that needed painting . It went very well :thumb: .
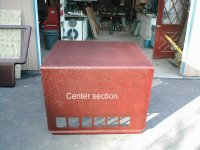
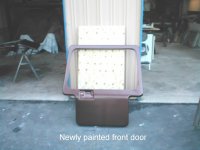
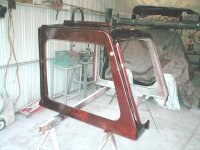
As some of you may know when Base coat dries , it will dry dull .It is the clear coat that produces the shine . In the one photo it appears that I painted the center cab section in a different color paint , but I can assure you that all pieces are the same color . The center section was in the direct sunlight when I snapped the picture . Tomorrow I will be shooting the clear coat because the temperatures dropped to fast to finish today and it was getting late . The paint color is a perfect match to the color combination on my "King Ranch" Ford truck . Overall I am pretty happy with the results so far . Tomorrow is when the pieces should really sparkle !!:cool2:
 

Attachments

  • pianted pieces 002.jpg
    pianted pieces 002.jpg
    121.7 KB · Views: 248
  • painted door.jpg
    painted door.jpg
    72.1 KB · Views: 246
  • pianted pieces 003.jpg
    pianted pieces 003.jpg
    100.4 KB · Views: 239
Al, awesome job on the paint. Are you going to be available to paint my Snow Trac when I finally get all the other stuff done and I'm ready for a respray?
 
B_Skurka said:
Al, awesome job on the paint. Are you going to be available to paint my Snow Trac when I finally get all the other stuff done and I'm ready for a respray?

Just name the time you want me there !:burp:
 
King of Obsolete said:
excellent rebuild, i enjoyed my morning coffee looking at the whole thread. i would suggest removing the allan keys on the little u-joints and replacing with a bolt with a square head and a hole thru the head. then you can wire the bolt so it will never come loose. plus the bolt can be tighterned tighter then an alan screw. you can find the bolts at a bearing store.

keep them pictures coming.


thansk

Thank you sir :tiphat: ,
I had thought about replacing the allen set screws when I was able to repair the damage . I realized that I could easily drill and replace them if need be so I left them alone . I do think they may have failed because the set screws were not tightened up properly by someone in the past . It appears that quite a bit of the Kt7 was reassembled wrong when it was worked on in the pass . Way to many "short cuts were taken !!!
 
Evening All,:tiphat:

It was a busy day at the old shop . The most important job was done today , the finish painting of the upper body pieces .

Right off this morning ,I had a body piece that would not accept any paint in one spot . I thought there must be a drop of oil or silicone spray on it . So I sanded it all down ,reprimed the area and then shot base color coat again . Same thing happen again:confused: !!!???? After 17 cuss words and 2 hours later , I finally got the panel color coated . Now it was time for the fun part .

The finish clear coat that makes everything sparkle !!!
Earlier in the day , I had noticed “3 Arab Terrorist gnats “ flying around in my shop . I expected they were up to no good and meant to do my American made Kristi KT7 harm . My suspicions were confirmed when just before spraying the clear coat I noticed the “leader” of the "rebel flying pack" making slashing marks across his throat and pointing down at my body part as I was getting ready to paint . I feared the worst ,and was sure at that point that they were “kamikaze Gnats” intent on diving into my new paint , destroying themselves and all newly sprayed paint within a ½” area .:mad:
I prepared my flyswatter just in case, and checked and made sure it was cocked and loaded , ready to fire . :gun1:
As I started painting the paint fumes started to overwhelm me and I happily forgot about the flying gnats and started doing a little flying of my own !!! :smileywac
About the time I finished ,I suddenly saw the 3 little SOB’s making a final “death dive” on my new paint . I had seen them too late, as they came out of the sun and it appeared all was lost :pat: At the very last second my old “stinky dog” “KnotHead” happened to appear out of the corner of the shop .He had been in there the whole time breathing fumes :smileywac .He was pretty damn happy too and fell over in a rage of giggles . It was too much of a temptation for the gnats and at the last possible second they pulled up and headed straight for “Knothead” . He stop giggling when I grabbed my flyswatter and headed towards him :eek: . He beat a hasty retreat out the door yelping with me right on his ass < (English for Arse )in hot pursuit , swinging at the gnats . I don’t think old “knothead ever even saw the gnats ,but he saved the day :thumb: . I wonder where he went ??? I haven’t seen him all day :confused2: ??
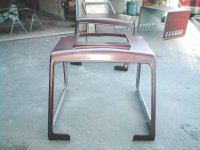
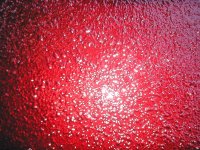
Anyway , All the pieces are painted now and tomorrow I start bolting it all back together . I have included a few pictures of the paint job and feel pretty good about how the old Barn yard paint job turned out !! The one picture is a extreme closeup of the center section that I sprayed with bedliner material to give it a pebbley finish .

Oh…. and if anyone sees “old Knothead “ , would you send him home !!
Thanks
 

Attachments

  • pianted pieces 016.jpg
    pianted pieces 016.jpg
    87.1 KB · Views: 222
  • pianted pieces 019.jpg
    pianted pieces 019.jpg
    121.5 KB · Views: 226
  • pianted pieces 020.jpg
    pianted pieces 020.jpg
    206.5 KB · Views: 225
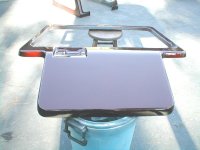
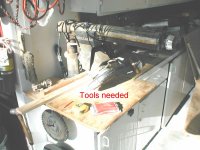
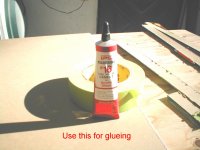
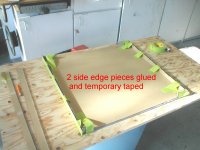
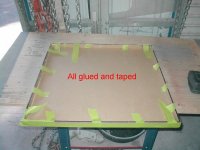
In between scaring the hell out of my dog ,:horsepoop: I also built my Moon roof today . I used 1/4 smoke plexiglass . I put a fine tooth plywood cutting blade on my radial arm saw to make the cuts with . I them angle the saw to 45 degrees so I could miter all the joints . Go slow because as you cut the saw blade creats heat and tries to melt the plexiglass back together . Sometimes you may even need a little spray bottle of water to cool it down . Leave the protective coating on until you are completely finished and everything is dry .This will protect the finish . They make a special glue just for plexiglass that will dry clear . USE IT ! I then used a sanding block to finish sand the 45 degree edges on the various pieces . Glue the pieces together and use a small right angle piece to insure that all is at a 90 degree angle when it dries .Use masking tape to hold it all in place . After the two sides dry you can glue the two remaining edge pieces . After the glue dries , remove the protective paper and clean the edges very carefully . Never use steel wool to clean Plexiglass !!!:pat:
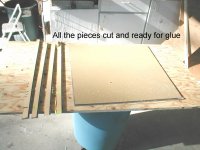
Here are some pictures as I went :
 

Attachments

  • pianted pieces 007.jpg
    pianted pieces 007.jpg
    102.7 KB · Views: 221
  • pianted pieces 008.jpg
    pianted pieces 008.jpg
    112.5 KB · Views: 224
  • pianted pieces 010.jpg
    pianted pieces 010.jpg
    80.7 KB · Views: 228
Last two
 

Attachments

  • pianted pieces 011.jpg
    pianted pieces 011.jpg
    96.7 KB · Views: 226
  • pianted pieces 014.jpg
    pianted pieces 014.jpg
    88.9 KB · Views: 225
BigAl said:
:blahblah: :blahblah: :blahblah: He beat a hasty retreat out the door yelping with me right on his ass < (English for Arse )in hot pursuit , swinging at the gnats . :blahblah: :blahblah: :blahblah:
First, given that you are American not English, wouldn't it be more correct to say "ass <(American for Arse)" rather than "ass <(English for Arse)" in this situation? :moon:

Second, I really need to learn how to paint!!! That paint really looks good :applause:
 
B_Skurka said:
First, given that you are American not English, wouldn't it be more correct to say "ass <(American for Arse)" rather than "ass <(English for Arse)" in this situation? :moon:

:applause:
Ahhhh!!!! You are mistaken my friend . The last time I was in Panama ,I was made a "Honorary Indian Chief" of the Bugle ( pronounced "Boog-lay") . So I really do not know what I am .
I am patiently waiting for my "Bogus Bob doll" to arrive so I can start sticking pens in it !!!! Let the "pains" begin ! Uh.... I mean "games" .
 
BigAl said:
Thank you sir :tiphat: ,
I had thought about replacing the allen set screws when I was able to repair the damage . I realized that I could easily drill and replace them if need be so I left them alone . I do think they may have failed because the set screws were not tightened up properly by someone in the past . It appears that quite a bit of the Kt7 was reassembled wrong when it was worked on in the pass . Way to many "short cuts were taken !!!

Al, another reason to replace the socket head cap screw with hex heads would be to make working on them easier. If you need to do field repairs, a nice large hex head is easier to deal with when it is covered with mud and crud and snow. The little hex socket on the SHCS is pretty much guaranteed to be filled with crap that is as hard as concrete.
 
DaveNay said:
Al, another reason to replace the socket head cap screw with hex heads would be to make working on them easier. If you need to do field repairs, a nice large hex head is easier to deal with when it is covered with mud and crud and snow. The little hex socket on the SHCS is pretty much guaranteed to be filled with crap that is as hard as concrete.
Good lord ! I hope not because that set screw is right under my front seat . If its full of snow and crap ,I got a lot more problems than a little set screw coming lose !!!:pat:
 
BigAl said:
Good lord ! I hope not because that set screw is right under my front seat . If its full of snow and crap ,I got a lot more problems than a little set screw coming lose !!!:pat:

LOL...ok, maybe not that one, but the theory still hold true for bolts that are exposed.
 
My dearest Grand Poobah,

I know how you restore vehicles then part with thm, How do I get in line for the "Yetti"?
 
bczoom said:
My dearest Grand Poobah,

I know how you restore vehicles then part with thm, How do I get in line for the "Yetti"?

I would suggest you show up early to get in the front of the line . My father-in- law, who never says anything about my little projects actually said he liked the KT7 and was really looking forward to a ride . Where in the hell did that come from ????? :confused2:
He is into his artwork, fine foods and traveling all over the world ,but he just has never been interested in Yetti ??????? I always figure that someday I would see his face on the back of a "milk carton " because he was lost or kidnapped in some "God for saken country" that I never heard of .
Actually as I look out the window it looks like a line is already started .:pat:
 
Good Morning all :tiphat: ,

You know where the coffee cups are,so get your own damn cup ! I wasn't put on this earth to wait on you hand and foot !
Oh Sorry ..... I had a "flash back" to the ex wife :pat: .

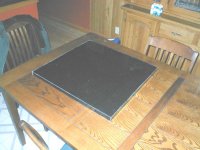
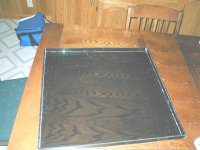
Ok , I peeled off the protective paper that covered the plexiglass, that I used for the moon roof cover . If you ever need to make a moon roof ,this is what it should look like when all the protective film is removed . All that is still required is to lightly sand the outside sharp corners with a 400 grit sand paper sanding block. I will probably lay a pin striping tape around the top edge to give it a little character .

Coffee is on , you know where the cups are :o !
Here's your picture!
 

Attachments

  • moon roof 002.jpg
    moon roof 002.jpg
    118 KB · Views: 198
  • moon roof 003.jpg
    moon roof 003.jpg
    119.1 KB · Views: 198
Evening folks,:wave:

It was a good day . Looks like I have found the new plastic HDPE cleats and I’m ready to order :a1: .

I started off this morning repositioning the electric fuel pump and installing the hydraulic oil cooler air supply ducting . The fuel sending unit is also wired up and the rear seats are now ready to be permanently installed . This was easier to do with the top cab pieces off .

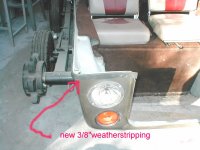
I them placed 3/8”x1” weather stripping where the two body sections bolt together .

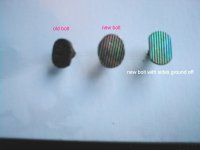
I have also been looking for new 1/4"x2" trim bolts and needed about 110 . No one at any parts house ,carried anything like it :confused2: . I finally decided that the ¼” trim bolts were very close to a ¼”x 2” toilet hold down bolt with the sides ground down . So off to the plumbing wholesaler where I purchased 110 bolts with chrome washers and chrome acorn nuts for $22 total . What a deal :thumb: ! When I got home, I just ground the sides down with my stationary belt sander . All Kristi’s models use these bolts so get them at the plumbing house and save a bunch of money !!:cool2:

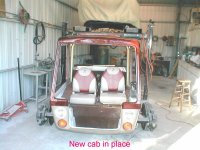
I started out by buffing the aluminum trim with my bench buffer to get it to look as good as possible . The wife then helped set the cab in place and I started running bolts .

So here are a few pictures of today’s progress . Tomorrow will see the rear cab go back on permanently .
Have a good one !!:burp:
 

Attachments

  • body 024.jpg
    body 024.jpg
    102.2 KB · Views: 181
  • body 029.jpg
    body 029.jpg
    51.1 KB · Views: 174
  • body 025.jpg
    body 025.jpg
    120.4 KB · Views: 178
Top