-
Please be sure to read the rules and adhere to them. Some banned members have complained that they are not spammers. But they spammed us. Some even tried to redirect our members to other forums. Duh. Be smart. Read the rules and adhere to them and we will all get along just fine. Cheers. :beer: Link to the rules: https://www.forumsforums.com/threads/forum-rules-info.2974/
You are using an out of date browser. It may not display this or other websites correctly.
You should upgrade or use an alternative browser.
You should upgrade or use an alternative browser.
Kristi KT7 restoration pictures
- Thread starter BigAl
- Start date
BigAl
Gone But Not Forgotten
bczoom said:SWEET!
2 questions:
- Why is the drivers seat higher the the passenger seat?
- Why is there dust on some parts of the Yetti?
Hey Boomer !
How you doin tonight ???
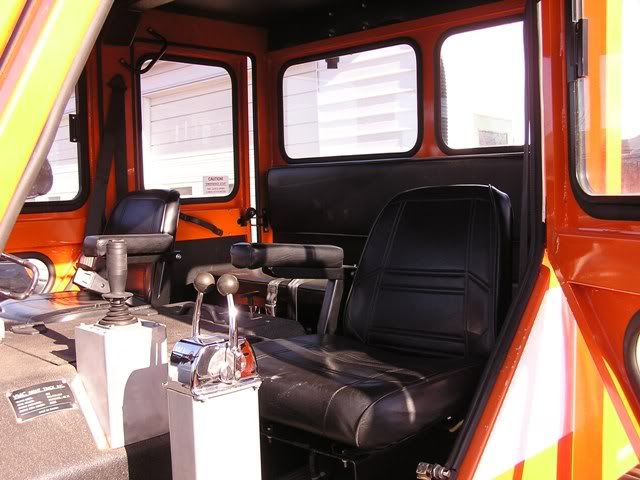
The drivers seat is higher because it is adjustable 6" in either direction . With Bogus Bob's little short legs he will need to adjust the seat if he is ever allowed to drive it .

 All the other seats are fixed in place .
I have no excuse for all the dust and yes .... there is a lot on Yetti . Forgive me
Doing just "OK". Paying the bills and figuring out taxes.BigAl said:Hey Boomer !
How you doin tonight ???
I have no excuse for all the dust and yes .... there is a lot on Yetti . Forgive me. Tomorrow I will try to get her Cleaned up ...
Don't clean it up for me. Take it out in the snow in a couple weeks and let that clean it off.

Eric L
Member
BigAl said:The drivers seat is higher because it is adjustable 6" in either direction . With Bogus Bob's little short legs he will need to adjust the seat if he is ever allowed to drive it .
All the other seats are fixed in place .
OK, I had the same question, then I noticed the sliders... but...Why does it need to adjust? I didn't think there were any pedals on the floor? And theres no steering wheel, so why would a persons height, or lack thereof, have anything to do with it?
Looks good...
I'd put a spacer under the passenger seat just for uniformity

Eric
mtntopper
Back On Track
Eric L said:OK, I had the same question, then I noticed the sliders... but...Why does it need to adjust? I didn't think there were any pedals on the floor? And theres no steering wheel, so why would a persons height, or lack thereof, have anything to do with it?
Looks good...
I'd put a spacer under the passenger seat just for uniformity
Eric
Eric,
With the hydraulic control levers you still need to find a comfortable position for the arm reach distance to the control levers. It will vary with different peoples size. I find if the length is too short or too long and not comfortable the hydraulic drive action of the machine will be jerky and the ride is uncomfortable for extended usage. Very small movements of the fingers on the levers control the complete motion of the machine. It is also best to be able to almost rest your arm as you control the hydraulic snow cats to prevent jerky/jumpy machine movement. I actually have to move my seat in my VMC to have the best feel and ability to control the hydraulic controls since I am height challenged.....
 and then, I can rest my arm as I operate the snow cat to achieve the best smooth response from the hydraulic drive system.
Al needs to keep the ability to adjust the operators seat for the best hydraulic drive smooth ride and performance.

BigAl
Gone But Not Forgotten
Eric L said:OK, I had the same question, then I noticed the sliders... but...Why does it need to adjust? I didn't think there were any pedals on the floor? And theres no steering wheel, so why would a persons height, or lack thereof, have anything to do with it?
Looks good...
I'd put a spacer under the passenger seat just for uniformity
Eric
Well I would say the biggest reason is some people want there feet firmly planted on the floor.It helps in stability . It also helps to adjust for arm placement as you run the controls with your left hand .
What is very comfortable for me would be very uncomfortable for my wife . I do not know of any operators seats on any machines that are not adjustable if they are done and engineered correctly .Putting a spacer under the passenger seat is a thought . Thanks
BigAl
Gone But Not Forgotten
mbsieg said:Hey, I have seen the inside of that rig somewhere before!!!!!!
??????

Mtntopper's rig!! Oh wait I didn't tell you I was checking your ride out last night!!!mbsieg said:Hey, I have seen the inside of that rig somewhere before!!!!!!
Eric L
Member
BigAl said:Well I would say the biggest reason is some people want there feet firmly planted on the floor.It helps in stability
OK, playing devils advocate here... why doesn't the passenger deserve the same stability as the driver? just let their stubby little legs flail about while the driver cruises along in sheer comfort?

If it were a Jeep CJ-5 you just weld the seat all the way to the back and thats as good as its gonna get... dont like it....
fine... WALK!
BigAl
Gone But Not Forgotten
Eric L said:OK, playing devils advocate here... why doesn't the passenger deserve the same stability as the driver? just let their stubby little legs flail about while the driver cruises along in sheer comfort?
Because the passenger might be old "Bogus Bob" flailing about and we would want pictures for FF of that .

Ok the main reason is the slide seat mechanism was only installed on the drivers seat from the factory, all the others were bolted in . If they had all come with slides , I would have installed them on the new bucket seat too .
Coffee's on ,doors open ,back hurts ....... Good Morning
BigAl
Gone But Not Forgotten
Ok ,I been on the phone all morning ,talking with the engineers at the plastic plant where they make HDPE Plastic .They think it will work fine for snow cat cleats and he told me the cleats will not clog with snow!
In fact, they can make any type of plastic I want, including having it mixed with fiberglass fibers !!! They reconmended against this as it is to brittle .
Anyway they can have it ready to ship tomorrow . this is what I need :
21 pieces of 1 1/2" x 1 1/2" x 96" ===========$230
shipping to my door =========== $90
Total cost $320
Seems like the way to go
 . Oh and they have it in diifferent colors !!
 . I am thinking woodtone color

SO .... anybody got and opinion ????????????????????????????????
In fact, they can make any type of plastic I want, including having it mixed with fiberglass fibers !!! They reconmended against this as it is to brittle .
Anyway they can have it ready to ship tomorrow . this is what I need :
21 pieces of 1 1/2" x 1 1/2" x 96" ===========$230
shipping to my door =========== $90
Total cost $320
Seems like the way to go

 . Oh and they have it in diifferent colors !!
 . I am thinking woodtone color

SO .... anybody got and opinion ????????????????????????????????
Go for it!!BigAl said:SO .... anybody got and opinion ????????????????????????????????
Eric L
Member
bczoom said:Go for it!!
X2
BigAl
Gone But Not Forgotten
Thanks for the postive reply . The plastic is ordered and should arrive next week .
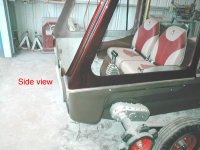
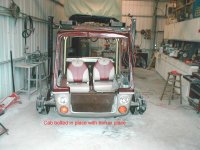
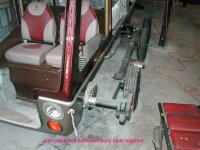
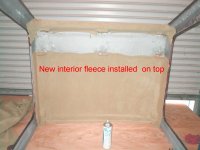
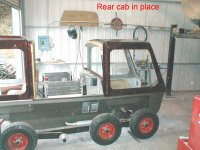
I also lined the interior ceiling with fleece before installing the cab ,as it is much easier to do now . The cab is now in place and I will finish the rear section after lunch .
I also lined the interior ceiling with fleece before installing the cab ,as it is much easier to do now . The cab is now in place and I will finish the rear section after lunch .
Attachments
BigAl
Gone But Not Forgotten
Evening Ladies & Gents ,
,
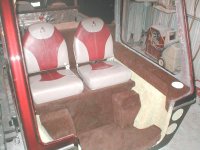
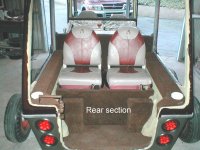
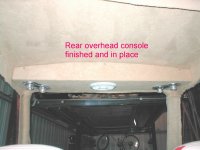
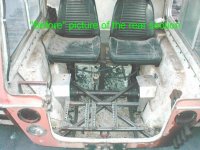
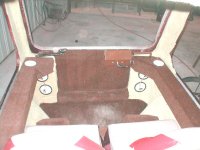
Well the back cab is all bolted in place . I also carpeted one arm rest and installed it .Electrical wiring was run up through the wire chase and it worked perfectly . I need to run a few more wires in the rear to the tail and brake lights and everything is pretty much wired up in the back .I will also permanently install the rear "over head console" tomorrow as well as the second arm rest . All that leaves is the door and windows to set in place . The windows will be delivered to the store to have the dark tint installed before permanently installing then in place .
Here's a picture of my "almost finished "rear section interior.
 ,
,Well the back cab is all bolted in place . I also carpeted one arm rest and installed it .Electrical wiring was run up through the wire chase and it worked perfectly . I need to run a few more wires in the rear to the tail and brake lights and everything is pretty much wired up in the back .I will also permanently install the rear "over head console" tomorrow as well as the second arm rest . All that leaves is the door and windows to set in place . The windows will be delivered to the store to have the dark tint installed before permanently installing then in place .
Here's a picture of my "almost finished "rear section interior.
Attachments
I hope part of the "almost finished" includes a floor mat. I'd probably be having a fist fight with the first person that got mud on the carpet...BigAl said:Here's a picture of my "almost finished "rear section interior.
DAP
New member
Al .. just wanted to add to the long list of wannabes with bad ideas ...
Was it just an oversite on your part to omit the built in video camera and LCD monitor?
Having never been in anything 'cept a toboggan unfortunately, I'd think KT7 home movies would be an absolute must.
Looks like a wonder full of fun. Have a ball .. and thanks for taking the time to make this thread .. I'll bet the hours spent posting have added up to at least another coat of paint.

Doug & Poobah,DAP said:Was it just an oversite on your part to omit the built in video camera and LCD monitor?
Check out the offerings by RAM-Mount www.ram-mount.com
They have all kinds of brackets made specifically for this sort of thing. They make brackets to hold just about everything for off-road, motorcycles, boats, planes... They're on a ball-type system so they're set to twist/turn in any direction wanted. I have a lot of their stuff and it's a fine product and well made.
On their site, type "camcorder" or "monitor" or "LCD monitor" to get a list of options available.
Brian
PS. If you do want to buy something, check out www.walleyesinc.com as I've found they quite often have the best prices, although I don't know if they carry the full product line.
BigAl
Gone But Not Forgotten
DAP said:Al .. just wanted to add to the long list of wannabes with bad ideas ...
Was it just an oversite on your part to omit the built in video camera and LCD monitor?
Having never been in anything 'cept a toboggan unfortunately, I'd think KT7 home movies would be an absolute must.
Looks like a wonder full of fun. Have a ball .. and thanks for taking the time to make this thread .. I'll bet the hours spent posting have added up to at least another coat of paint.


 Well the front door inside panel would be perfect for a LCD monitor . I do have a flat screen plasma tv that drops down for the rear passengers .... Does that count ???
 Oh and yes it has taken a bit of time to size pictures and do the posting to FF ,but I think it was worth it . 1st it gives me a complete breakdown with pictures for me or future owners to see what was done on the KT7 and 2nd , it gives me a place to insult Bogus Bob , Mtnpooper, Lyndon and the rest of those misfits .

BigAl
Gone But Not Forgotten
Update !!!! The overhead console is all finished and wired . I am also soldering all electrical connections because of the wet conditions the KT7 will operate in . I also then put shrink wrap over that . I have seen the results of poorly done electrical conditions . I once watched a Cal Trans mechanic search for two days looking for a bad electrical connection that had turned green and corroded at a bad connection  .This was on a 1 1/2 million dollar experimental snow machine !!!!! Turns out all the connections were crimped in place !!!
The rear section should pretty much be finished tomorrow . I also installed the rear seat belts . Its going well . No pictures to night .
 .This was on a 1 1/2 million dollar experimental snow machine !!!!! Turns out all the connections were crimped in place !!!
The rear section should pretty much be finished tomorrow . I also installed the rear seat belts . Its going well .
 No pictures to night .
BigAl
Gone But Not Forgotten
Good Evening Folks ,
It has been a long day in the old Yetti Cave . All my electrical parts I ordered are lost in shipment This includes 30 rolls of electrical wire in assorted colors and gauges, fuse blocks , connectors, relays, and a headlight flasher unit that will alternate the lights ,so they work the same as police cars.
So... I ended up going down to Napa Auto Parts and buying the stuff I needed to complete the rear section of the KT7 .
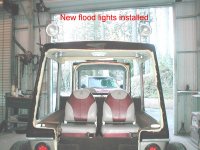
The rear overhead console is now installed as well as the other arm rest . Rear Bosch flood lights are also bolted in place .
I also got a price for tinting all the windows . There are 6 windows and they average 3'x3' on each window . The price is $400 ,which seems high to me . Anyone have this done ? Input please ....
Tomorrow Should see the rear entry door be reinstalled and Lord knows what else .
.
I am hoping to have the KT7 finished before the Feb28 Snow Cat shootout at Yuba Gap , Ca.
Here are a few pictures of today accomplishments ........
It has been a long day in the old Yetti Cave . All my electrical parts I ordered are lost in shipment
 This includes 30 rolls of electrical wire in assorted colors and gauges, fuse blocks , connectors, relays, and a headlight flasher unit that will alternate the lights ,so they work the same as police cars.
So... I ended up going down to Napa Auto Parts and buying the stuff I needed to complete the rear section of the KT7 .
The rear overhead console is now installed as well as the other arm rest . Rear Bosch flood lights are also bolted in place .
I also got a price for tinting all the windows . There are 6 windows and they average 3'x3' on each window . The price is $400 ,which seems high to me . Anyone have this done ? Input please ....
Tomorrow Should see the rear entry door be reinstalled and Lord knows what else
 .
. I am hoping to have the KT7 finished before the Feb28 Snow Cat shootout at Yuba Gap , Ca.
Here are a few pictures of today accomplishments ........
Attachments
BigAl
Gone But Not Forgotten
Well ... I spent the majority of the day working on and adjusting the rear entry door . I had the keyed locks repaired on both doors so they are now keyed alike and work properly  .
.
I also realized that when I orginially (at the start of the restoration) removed the front and back doors the hinges were on the wrong side of the door lip flange . I did not notice it until I was going over some old pictures before restoration, this morning. This may be why both doors were busted near the latch mechanism . Anyway the door hinges are now correctly installed and everything works very smoothly when it is closed and latched . I also had to weld up the interior latch cover where it had cracked in two places . Probably caused by trying to slam the damn door shut to get it to latch
 .
.
I also carpeted the lower half of the interior door area because of boots and such hitting it . Fleece would never hold up well in this area .
All the wiring to the rear is completed and attached to the body with hold down clamps .
My lost shipment of electrical parts is out there somewhere with the USPS so tomorrow means another trip to the auto parts store so I can keep poking along .
.
I really have no idea what I will work on tomorrow until I enter the shop .
I have a few wires to run in the engine compartment before it is finished . More than likely I will start on the front cab securing the wiring in place and locating a convenient place to install the fuse panel .
Here's the only picture I took today . It shows the carpeted lower door area . I am also waiting on my finish edge molding to arrive to give it a finished look .
 .
.I also realized that when I orginially (at the start of the restoration) removed the front and back doors the hinges were on the wrong side of the door lip flange
 .
.I also carpeted the lower half of the interior door area because of boots and such hitting it . Fleece would never hold up well in this area .
All the wiring to the rear is completed and attached to the body with hold down clamps .
My lost shipment of electrical parts is out there somewhere with the USPS so tomorrow means another trip to the auto parts store so I can keep poking along
I really have no idea what I will work on tomorrow until I enter the shop .
I have a few wires to run in the engine compartment before it is finished . More than likely I will start on the front cab securing the wiring in place and locating a convenient place to install the fuse panel .
Here's the only picture I took today . It shows the carpeted lower door area . I am also waiting on my finish edge molding to arrive to give it a finished look .
Attachments
BigAl
Gone But Not Forgotten
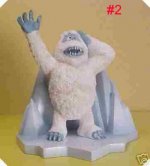
This morning ,while enjoying my coffee , I started looking at different decals I would like to use on "Yetti" . I have found 3 decals , that I like . These will go on the side windows of the KT7 .
Your choices are #1,#2 or #3 . Here are the decals in that order : So give me your thoughts ????????
Since there is not a single exterior emblem identifying the KT7 any where on the KT7 body ,I thought I would make my own . The"Kristi name" is no where to be found other than the small serial number plate which is screwed to the inside body . I am thinking of having two chrome or stainless steel plates made up the say "Kristi KT7" to mount on each side of the cargo rack .
Attachments
BigAl
Gone But Not Forgotten
Spent the day working on the front cab section.
The mirrors and fog lights are permanently installed . I also mounted the choke and throttle controls on the operators arm rest . I used a tee handle design on both the choke and throttle . The choke is a standard push/pull type control , but the throttle control is "twist lockable" in place at any RPM I wish to run the V-4 motor at .
A 12 volt plug in adapter with on/off switch was added to the passenger arm rest also .
It looks like it is about time to upholster the front cab section ,install the remote spot light , install the front entry door and complete the wiring to the front overhead console .
I still have the intercom system to install ,but will treat this as a separate electrical system . That should take about 4 hours to install and test .
I do believe it is about Miller Time . I'll try to get some progress pictures tommorrow night .
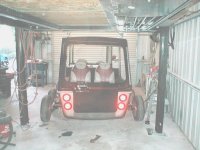
Here is one picture of the rear of the cat with the LED tail lights turned on .
The mirrors and fog lights are permanently installed . I also mounted the choke and throttle controls on the operators arm rest . I used a tee handle design on both the choke and throttle . The choke is a standard push/pull type control , but the throttle control is "twist lockable" in place at any RPM I wish to run the V-4 motor at .
A 12 volt plug in adapter with on/off switch was added to the passenger arm rest also .
It looks like it is about time to upholster the front cab section ,install the remote spot light , install the front entry door and complete the wiring to the front overhead console .
I still have the intercom system to install ,but will treat this as a separate electrical system . That should take about 4 hours to install and test .
I do believe it is about Miller Time
 . I'll try to get some progress pictures tommorrow night .
 Here is one picture of the rear of the cat with the LED tail lights turned on .
Attachments
BigAl said:This morning ,while enjoying my coffee , I started looking at different decals I would like to use on "Yetti" . I have found 3 decals , that I like . These will go on the side windows of the KT7 .
Your choices are #1,#2 or #3 . Here are the decals in that order : So give me your thoughts ????????
Since there is not a single exterior emblem identifying the KT7 any where on the KT7 body ,I thought I would make my own . The"Kristi name" is no where to be found other than the small serial number plate which is screwed to the inside body . I am thinking of having two chrome or stainless steel plates made up the say "Kristi KT7" to mount on each side of the cargo rack .
Geez Al, Don't you think it's a little vain putting self portraits all over the thing?


