• Please be sure to read the rules and adhere to them. Some banned members have complained that they are not spammers. But they spammed us. Some even tried to redirect our members to other forums. Duh. Be smart. Read the rules and adhere to them and we will all get along just fine. Cheers. :beer: Link to the rules: https://www.forumsforums.com/threads/forum-rules-info.2974/

Kristi KT7 restoration pictures

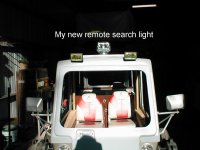
OK ,I changed directions this morning and got my new spotlight ordered . Still looking for some new headlights but I need to wrap this up . Here's what I got :

12 volt Golight Stryker remote control spotlight - chrome color
Wireless handheld remote control and wireless dash mount remote control effective to 150 feet
360 degrees of motorized rotation and 140 degrees of motorized tilt
65 watt bulb draws 5.5 amps - 6.5 million adjusted retail candlepower - 500,000 initial candlepower
1 foot cord for power connection to existing vehicle or boat harness or additional 16 gauge wire you provide to reach fuse box
[FONT=arial, helvetica, sans-serif][FONT=arial, helvetica, sans-serif][FONT=arial, helvetica, sans-serif][FONT=arial, helvetica, sans-serif][FONT=arial, helvetica, sans-serif][FONT=arial, helvetica, sans-serif][FONT=arial, helvetica, sans-serif][FONT=arial, helvetica, sans-serif][FONT=arial, helvetica, sans-serif][FONT=arial, helvetica, sans-serif][FONT=arial, helvetica, sans-serif]
[/FONT][/FONT][/FONT][/FONT][/FONT][/FONT][/FONT][/FONT][/FONT][/FONT][/FONT]
 

Attachments

  • spotlight.jpg
    spotlight.jpg
    2.6 KB · Views: 250
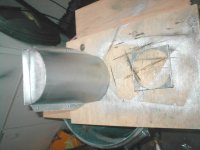
After getting my new spot light ordered I decided to attack my headlight problem that I posted in another thread . The problem is there are no headlight housings and I was afraid of creating a fire hazard the way it was just shimed in place as before .The headlights rested against the fiberglass body . If it caught fire there is no way on God's green earth I could put it out in time to keep the whole rig from going up in smoke . Since it is raining and cold here today ,the last thing I wanted to do was crawl around in some junk yard trying to find something I could make work .:confused2:

Anyway , I made a two piece sheet metal setup . The inside piece holds the light away from the body and the cover piece hides the wires on the inside . Pictures will not load ,so i'll try later
 
Here's the pictures
 

Attachments

  • head lights 002.jpg
    head lights 002.jpg
    91.3 KB · Views: 240
  • head lights 003.jpg
    head lights 003.jpg
    121.3 KB · Views: 239
  • head lights 004.jpg
    head lights 004.jpg
    105.2 KB · Views: 241
Glad to see you went "all out" on the plating:yum:

so how does the light mount to that?, and how will you aim the lights?

Eric
 
Yes ,thank you . That is my Mexico chrome finish . Now don't be a smart mouth youngin ! I just do not know now the inside light covers will get finished yet. Paint, Chrome, carpet, human flesh from your ole hide .....:confused2: who knows:yum: ?????
The little sheet metal piece in front of the cover on the first picture gives me the abilility to adjust my lights . If that don't work I will just kick it with my size 13's .

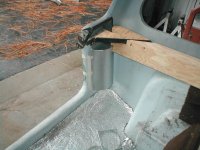
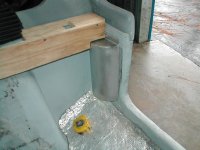
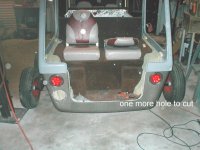
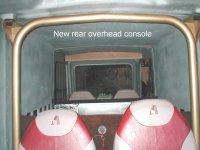
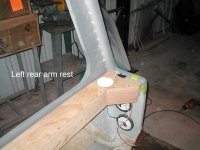
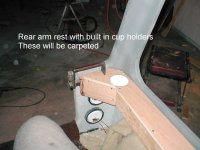
Anyway .... on to more important stuff !!!! :a1: I temporary set the rear cab back in place so I could build the new rear overhead console and the arm rest . I glassed in the mounting blocks and should finish tomorrow . This console will only contain the 2 rear dome lights and the radio speaker .
By the weekend I should be pulling both cab sections and painting them in the T-5 Ford Copper color .
I am also going to glass over the old gas filler hole on the rear cab section . It was moved to the middle section to give the rear area a cleaner look . Time for my medience :burp:
 

Attachments

  • rear cab 001.jpg
    rear cab 001.jpg
    110.1 KB · Views: 239
  • rear cab 002.jpg
    rear cab 002.jpg
    122.4 KB · Views: 234
Al, Do you ever get confused as to which end the cab(s) go on? what was that llama with the 2 heads from Dr. Dolittle... push me pull me? or something like that?

:confused2: :yum: :confused2:
 
Eric L said:
Al, Do you ever get confused as to which end the cab(s) go on? what was that llama with the 2 heads from Dr. Dolittle... push me pull me? or something like that?


:confused2: :yum: :confused2:
Eric ,Your right about that !!! Sometimes I want to lead and sometimes I want to follow ,but I always want to be comfortable !!!! When I was doing the body work ,the only way I could tell which was which ,was by the moon roof .
That reminds me ..... My cover blew off while returning from Colorado so I need to go get some smoked Plexie glass to build a new one .Geez ! I'll never be done ....
 
Evening all:tiphat: ,
In between going up and seeing Pop at the hospital I got a little done on ole "Yetti" . I guess this ole rig has become my therapy to keep my mind busy from all that is going on .
I cut the new arm rests for the back seats and put a second "Glass " coat on the mounting blocks that will secure the overhead console. I also positioned and drilled the Bosch Flood lights for the rear cab . I will end up with 3 lights to see the area behind me .I also have a new set of fog lights to install ,but I have just about decided that I do not need them . The kT7 already has a set in the front below the headlights .
I also recessed the mounting holes where the doors bolt to the cab frame . I am hoping to completely hide the mounting bolts under the new upholstery when it is done .
I somehow managed to completely screw up cutting out the new rear armrest . So now I am salvaging my 3/4 " plywood for another attempt tomorrow . I think I may head down to the local Heavy truck parts house tomorrow to look at the new LED tails lights that are so popular . I really like the amount of light they throw out . They are not cheap but may be well worth the money if it can caution other people that I am a slow moving rig . SHould I look at installing a flasher unit so these always flash when they are turned on ???:confused2: Seems like the logical thing to do ....

One last question ..... I am about ready to get the window glass tinted . Should I go for the darkest tint avalible or somewhere in between ???
It high sunlight conditions the dark tint would be great ,but I wonder about night driving ??? Never having had tinted windows ,I have no idea ..
 
Ok ,i'm back :tiphat: ,
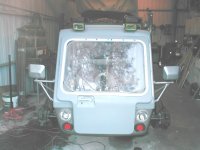
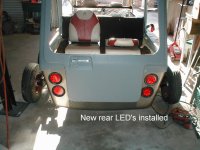
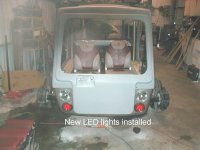
Picked up the new rear LED tails lights yesterday . They are rubber mounted and fit in the existing body holes perfectly :thumb: . I decided to do away with the old back up light and add two more flasher LED's in the rear . I already have the new Flood lights mounted in the rear ,so the little back up light would not really do much ,besides I want all the flashing lights I can put on this thing . I think the fog light holes in the front ,are going to get the amber LED's and I will add a set of new Fogs lights with higher output on the roof cab .

Also ordered up my new "Smoked 1/4 " plexi glass for the moon roof and picked up the new hinges for it . It is to be completely made of Peliglass with no metal so it will look very modern .:cool2:
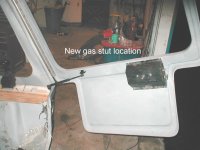
Also I did away with the cheesy slide bars that keeps the doors open . All they were good for was breaking the door and let the door hit me in the head when it would prematurely release :mad: !!! I replaced these with gas stuts that are now connected at the center of the door where it is stronger and there is less flexing of the fiberglass . It seems to work and gave it a real clean look .
I am now working on the door locks to get them to work correctly . The doors have been reinstalled on the body and adjusting is a real pain in the asre (< English for Ass).:confused2:
Camera needs new batterys and then I will most a ton of pitures for your inspection .
On another note I may have just picked up a Rebuilt Corvair engine for my KT4 restoration project that is coming up soon. That would sure make life easier .
 
real pain in the asre (< English for Ass).

The proper spelling would be 'Arse' ;)

But us English would never speak that way. We refer to it as ones 'bottom', though such subjects of discussion are actively avioded. We are posh you see!


:yum: :yum: Yea, I can dream!
 
Evening Folks ,:tiphat:
Sorry about the bad spellin there ole boy . I'll try harder next time .

Decided to go with red LED's lights on the front cab also as it will show up better . Boy !! They don't give those things away !!:pat:
Somehow the damn front door adjusted itself last night and works perfectly with the door latch now:confused2: . I am still not quite sure how that happen ,but who cares . While I had the door latch mechanism apart I cleaned and lubricated the internal parts .Man I love silicone spray. I'll paint the latch cover to match the interior colors.

I have a few pictures to add in to the thread showing the front door with the new gas stut in place .

Dad got to come home today from the hospital , so I plan on spending the major part of tomorrow working on the last few details that need to be done before I can start painting the upper cab pieces .

This KT7 project is starting to get close to finishing and as always, I am already looking forward to the next restoration project :respect: . My enjoyment is not in the operation of the KT7 but the Restoration of it :thumb: . I just love to repair and redesign stuff .
The KT7 will be a "one of a kind " for sure . I just hope that it will perform as well as I think it may . Getting my return on investment is impossible as I am approaching a 1000 hours restoration time before I am done . Thank goodness my labor is free . The original cost in 1973 was $11000 not including extras for a "Bare Bones" KT7 . I just wonder what it would cost in todays dollar especially with the upgrades that have been added . I have kept pretty close track of material investment and it is amazing how fast it can add up . :pat:
Who knows ...:confused2: Maybe some Hollywood Movie Star type with more money than sense ,will see it and decide he just has to own it .:whistle:
 

Attachments

  • doors and lights 001.jpg
    doors and lights 001.jpg
    108.5 KB · Views: 309
  • doors and lights 002.jpg
    doors and lights 002.jpg
    88.8 KB · Views: 309
  • doors and lights 004.jpg
    doors and lights 004.jpg
    116.8 KB · Views: 315
Al now you have put red tail lights on both ends? As if that thing wasnt hard enough to tell if it was cummin or going. Maybe some amber lights for the front would be better, they make them in leds that will fit in the rubbers you already installed. Have you tried running yhe lights with a flasher? in my experience it takes more than two led lights to make the flasher flash. They just dont draw enough amps to make it flash, but an electronic flasher might work.
 
mlang2005 said:
Maybe some amber lights for the front would be better,
I'll 2nd that thought.

Red denotes the rear of the vehicle. You couldn't even register a vehicle with red lights in the front.

Regarding the window tint, I would probably match the laws for a vehicle. Check for your state but in most, they require 70% of light to come through the windshield and drivers left/right windows. For the rear, tint as dark as you want. It's not hard to see though at night.
 
mlang2005 said:
Al now you have put red tail lights on both ends? As if that thing wasnt hard enough to tell if it was cummin or going. Maybe some amber lights for the front would be better, they make them in leds that will fit in the rubbers you already installed. Have you tried running yhe lights with a flasher? in my experience it takes more than two led lights to make the flasher flash. They just dont draw enough amps to make it flash, but an electronic flasher might work.

I originally wanted Ambers for the front but the auto parts store did not have any and were not sure if they were avalible in this brand . I will check with the main clerk tomorrow .I had not thought about the flashers ....I figure it will take me about two full days to wire the KT7 up with the new wiring, fusible links and fuse panel

I can't believe we finally have a partly sunny day here !!!! It has been miserble for a week .
I jury is still out on the window tint ....?????:confused2: :confused2: :confused2: I need to get the windows down to the local glass shop to see if they can replace the old dried out rubber trim inserts that retain the glass in place .
About all I have left to do in the front is drill the new hole for the Windshield wiper, drill the new overhead fog light mounting holes and build the front door console that will house the GPS, 12 volt adapter , compass ,search light remote and cell phone . Oh yea:confused2: :confused2: .... and build the new Moon roof when I get my smoke plexie glass .

Good God !!! Now I'm tired again just thinking about it !!! I think i'll take a nap .:confused:
 
BigAl said:
Decided to go with red LED's lights on the front cab also as it will show up better . Boy !! They don't give those things away !!:pat:

Ok BigAl, The truth for the red lights in the front are so when you are being pulled backward by a SnoTrac, LMC or Tucker after being broken down/stuck, you are going to claim you had to push the broken down/stuck SnoTrac, LMC or Tucker out of your way. Right???? :yum:
Confess Allen, you have been caught in your little deceptive plan...:confused2::moon:
 
mtntopper said:
Ok BigAl, The truth for the red lights in the front are so when you are being pulled backward by a SnoTrac, LMC or Tucker after being broken down/stuck, you are going to claim you had to push the broken down/stuck SnoTrac, LMC or Tucker out of your way. Right???? :yum:
Confess Allen, you have been caught in your little deceptive plan...:confused2::moon:

Damn ! Your good Bill !
I did not think anybody would ever have figured it out with all the little pee brains we have on this site :confused: . I bet you rode the short bus to school too .:cool2:

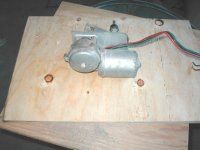
Ok ,on to more important stuff . I'm gettin close .... real close . And now I want to make a change . When Kristi set up the front windshield wiper they used a wiper motor that looks like it belongs on a Mack Truck ! The damn thing is huge . The arm itself is not that long and it does not clean off the passenger side at all . I want to "Poo Poo can" it and get a wiper motor for each side that is smaller in size but capable of cleaning both halves of the window . I am thinking about something like this :


ELECTRIC WIPER MOTORS


  • <LI type=circle>Ensures clearer viewing and greater safety in all driving conditions <LI type=circle>Replaces vacuum motor perfectly
  • Maintains a constant, even sweep of windshield
Single-speed motor has full 90° swing. 1-3/4" from center of shaft to side mounting hole, 3-1/4" long in—line center shaft. Adaptable to all top and cowl installations. With switch, seals, washers, nut and instructions. Fits passenger's or driver's side. Must be used with stainless steel arm and blade, available separately. For negative-ground systems only.​


Also ,what do you guys think about installing a couple in the back window ??? I don't think I will need them but now is the time if I do need to install them .
Here's a picture of the front end and the killer wiper motor from hell .


Attachments

  • wiper 002.jpg
    wiper 002.jpg
    92.9 KB · Views: 293
  • wiper 001.jpg
    wiper 001.jpg
    87.9 KB · Views: 299
Al,
Maybe you stated this already in one of your earlier post but, what make and model of head lights did you go with? Do they have a high and low beam? Do you know what there wattage would be?
 
SkiDozer 302 said:
Al,
Maybe you stated this already in one of your earlier post but, what make and model of head lights did you go with? Do they have a high and low beam? Do you know what there wattage would be?

I'll have to check .
They are the original ones that came with the KT7 . I do not believe they are dual function . I'll check the wattage and let you know . I also sent you a PM .
Tomorrow should find me on the rear cab section and finishing up the last few details before they are removed to prepare for painting . Other than the wiper I believe the front cab is basically done and ready for prep and paint .
I'll also need to order up the Gas Bar-b-que and weld the bar-b-que reciever hitch on the track assembly .
I am kinda leaning toward a Yakima Roof Rack but I may also just build one from light weight steel tubing .
The new spot light should arrive tomorrow .
I still am looking for a plastic to make the track cleats from or go with a Oak wood material . I will be using a steel channel in place of the straight bar stock that was originally used .
I will also build the new front door console tomorrow .
Its Miller time :burp:
 
Al I would use reset breakers instead of fusible links. In the event of a short circuit or over load (hot tub heater and blender being used at the same time)it will simply trip the breaker instead of burning a fusible link, much easier to reset a breaker than replace a burnt link:myopinion:
 
mlang2005 said:
Al I would use reset breakers instead of fusible links. In the event of a short circuit or over load (hot tub heater and blender being used at the same time)it will simply trip the breaker instead of burning a fusible link, much easier to reset a breaker than replace a burnt link:myopinion:

Damn good point ! Can I get them at a Napa dealer or are they a special order item only ???
 
Allen, here is a link to some different types of 12V circuit breakers available:
http://www.wiringproducts.com/?target=dept_11.html

I picked up the Cole Hersee 30 and 50 amp breakers at my local parts store. They are pretty standard stock. Watch the stud length and cut them off if they will contact any other metal after being installed. I had a replacement wiper motor that was installed on the BR before I bought it and the studs in some of the circuit breakers would actually hit the motor and sparks would fly. I cut the studs off to a shorter length and put heat shrink on the ends of the studs. They are great for larger electrical loads that you need to protect such as a 12 volt auxillary heater. Just size them to your needs and make sure you use the proper size wire to carry the load.
 
Oh Man ! What a day !:tiphat:

Nothing has gone according to plan ?????:confused2:
Started out working on the rear door adjustment . Then had to stop and drive halfway across the county to look at a corvair engine I found for the KT4 . It looks like it will work so I bought it .:cool2:

Decided to name the Kristi KT4 "Dumbo" , because it looks like a Dumbo !!! You take a look at my avatar and see what you think ....

Back to the house then I realize I need to go get more bolts and stuff at the parts house . Ended up also picking a set of amber lights up for the front cab so all them whiny snowcatters;) would stop giving me a bad time about my red front cab lights .:moon:

Ok, back to the door and realize that the opening has grown in width and I need to move the door hinge over a 1/4 inch:confused: . It does not sound like much but it is a major amount when working with a door and latch system .

Cut another 4 1/2" hole in the back to accommodate a second tail light and installed all the LED lights in the rear . It looks pretty sharp and I think it will throw out a lot of light . One set will work in unison with the headlights and one set will be tied to the front amber flashers .

Installed the new Amber lights in the front and set up and marked the placement for the new wiper motors in the front section .

Forgot I ran out of Dr. Pepper so I don't have no medience for tonight !!!:mad:

Tomorrow should finally see the rear arm rests and overhead console constructed and installed .


Pictures tomorow .

Hey did I ever get my apology from Lyndon about my 29 pages of crap :confused2: ........
 
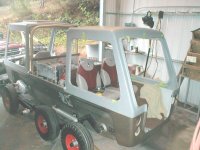
I know your not going to believe this, as I sure as hell don't believe it and I was the one who took the picture , so someone has got to believe it !!! I hope that makes sense !!!

I set the center cab section in place today and it actually fit !!!!! Damn near dropped it off the other side of the snow cat as I was putting it on . I went whizzing around to the other side , cussing the whole time . I bet you guys did not even know a fat man could go whizzing .... Its a art I learned when I was about to screw up one time . Whizzing is something a fat dude can do .
This is not to be confused with "taking a whiz" as that is a whole nother type of whizzing that should only be demostated after many beers .
Watch your mouth Bob ... I know what you are thinking !!!:horsepoop:


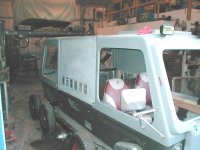
OK ! The interior wood work is all done ! Armrest and all .
Remote search light was installed . Man that thing is cool :cool2:
Gas stut on rear door installed . Latch assembly cleaned ,lubed and working . It's as smooth as cat fur !!! All the little "doo dads" have been checked and fitted as neccessary . The temperature , snow cat angle gauge, GPS ,12 volt adapter and search light remote switch all fit in the overhead console ,so I did not need to add a door console . :respect:


Found some hidden Dr Pepper in the back of the pantry , so I am back on my medience :burp: .

Tomorrow I will adjust the center cab section ,set up the heater and fans ,install the center engine cover and make up the new tool and emergency kit storage area whiuch is to be built in the top .
Lots of pictures !!

Were gettin closer !!!
Life is good
 

Attachments

  • cab 011.jpg
    cab 011.jpg
    123.5 KB · Views: 245
  • cab 012.jpg
    cab 012.jpg
    103.4 KB · Views: 246
  • cab 002.jpg
    cab 002.jpg
    82.9 KB · Views: 243
More pictures
 

Attachments

  • cab 003.jpg
    cab 003.jpg
    108.9 KB · Views: 243
  • cab 013.jpg
    cab 013.jpg
    95 KB · Views: 238
Last two
 

Attachments

  • cab 009.jpg
    cab 009.jpg
    102 KB · Views: 242
  • cab 010.jpg
    cab 010.jpg
    99.5 KB · Views: 241
Nice work, Al... Really!!!:a1:

One thing that I will warn you about that I understimated from my previous experiences with cats - they VIBRATE alot!! I'm sure my Tucker is worse than others because of the solid bogies but I'm sure they all do to some degree.

Be sure to bolt everything tight and locktite/nyloc everything!!

Vance

Hmmm from the looks of that thing you're gonna need some kind of horizontal dumbwaiter to pass coctails from the rear to the front!!!:burp:
 
Vance said:
Hmmm from the looks of that thing you're gonna need some kind of horizontal dumbwaiter to pass coctails from the rear to the front!!!:burp:

I think he plans on using Bob.....:yum:
 
mtntopper said:
I think he plans on using Bob.....:yum:

Oh Man !!! That was a good one Bill !!! I just about spewed Dr. Rum all over my moniter :yum:
 
Well I disassembled the heater and plugged off the two hose vents that will not be used .I also checked the heater core and motor . Seems to work fine . I also repainted it to closely match the carpet that will be used on the engine cover where the heater is to be mounted .

I am not sure what the engine cover fits ,that I have on the KT7 ,but it sure as hell does not seem to fit the KT7 :confused2: . I tied it every way I can think of and it is about 6 inches to short .Something is missing . It is way too heavy !!!

"So I have decided to just scrape it and build a whole new light wieght cover with built in covered doors enclosures" for the Mini Bar , Survival kit , tool kit, first aid kit and a small storage area for my tow rope that I will use to tow out all them stuck snowcats wanna bees .:cool2: .

I will then carpet the top side so it can be used for temporary storage ( coats, gloves,hats ,etc.). There has never been a easy way to access the engine compartment without removing the entire cover ,but that will be changed with access doors for checking fluids,oils and such . I think it should work much better !!:thumb:
Off to town to pick up my needed parts .
 
Another small issue but I'm sure you can overcome it.
BigAl said:
Off to town to pick up my needed parts .
Don't forget Dr. Pepper!!!
 
Top