• Please be sure to read the rules and adhere to them. Some banned members have complained that they are not spammers. But they spammed us. Some even tried to redirect our members to other forums. Duh. Be smart. Read the rules and adhere to them and we will all get along just fine. Cheers. :beer: Link to the rules: https://www.forumsforums.com/threads/forum-rules-info.2974/

Kristi KT7 restoration pictures

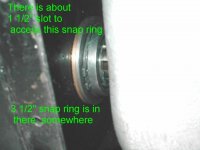
Taking a quick lunch break . The snap rings are now in place !!!:thumb: I revised the snap ring pliers and talked the little woman into helping hold the back side of the ring in place . Worked slicker than hell !

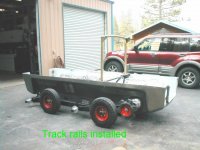
I am now reattaching the track rails in place after lunch . Sure wish their was a chrome shop close by ,and I would have the bogie wheels done in chrome as a custom look . Maybe later . Lots of pictures tonight !
 
Congrats on the snap ring.


BigAl said:
Sure wish their was a chrome shop close by ,and I would have the bogie wheels done in chrome as a custom look .
Chrome? What about RUST!?! Now a niced polished alloy might be nice! :thumb:
 
B_Skurka said:
Congrats on the snap ring.


Chrome? What about RUST!?! Now a niced polished alloy might be nice! :thumb:

Rust !!!!:eek: That is something that I do not allow . Sorry but that is the way it is . I just refuse to accept rust . Not on my KT7 !!!
 
Sorry guys and gals , no pictures . :(

I ran outta poop and did not finish today . I should be done tomorrow with the track system , I removed the rear axle assembly again this afternoon ,because I did not like the way it lined up . That took most of the afternoon to get corrected . The good news is I have been able to eliminate some factory shims that were put in to compensate for this track alignment problem . I have one track rail in place and one to go .

Interior materials are arriving everyday now . The new marine grade carpet showed up this afternoon and it looks like it will work well in the interior .

Until Tomorrow ......
 
Evening everyone :tiphat: ,
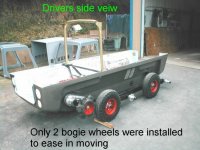
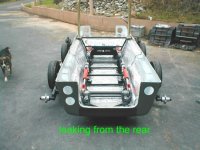
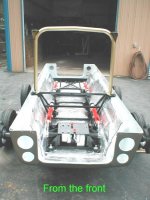
After a little over 2 ½ months the rolling chassis is complete on the KT7. :5boobs:

A lot of things were corrected and a lot of items were added to make a better overall machine .

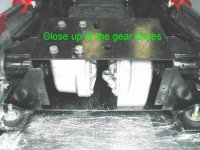
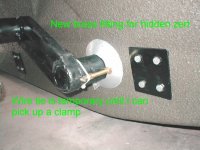
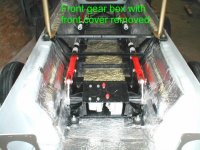
The whole floor is now insulated and the tilt rams are in place and operate correctly . At some time in the past, the lift arms had been reversed and were rubbing on the inside of the body . This has been corrected also . The zert fittings that were hidden behind the sheet metal shields have been extended with brass fittings ,so that bushing can be greased as necessary . Rubber mounts have been added to the gear box to lessen the vibration . Every piece of the rolling chassis has been cleaned , inspected ,repaired or replaced and painted as necessary .:thumb:

This is about as far as I go until after I return from vacation .

It was important to me to get this phase completed before too much time passed . Even with pictures it was difficult to reinstall everything correctly the first time . The rear axle that holds the lift arms ended up being removed 6 times before everything was in the correct order . It would have helped if they were in the correct order when I took them apart :eek: ! I have had the lift arms off and on ,more times than I can count .:confused:

We all know my trouble with the welded u joint yokes and how lucky I was to correct that :pat: . I can also insert a 3 ½ “ snap ring in a 1” hole if necessary :smileywac !


Was it worth it ???? You bet it was ! Every bruise , scrape , poke , cut and burn taught me more about this machine :thumb: . At least I feel confident that when I head into the high country ,I know I have done everything possible to make me and my passengers as safe as possible and not break down .

I still have a ways to go, before I will be done , but the worst is now over . Thanks for sticking around to watch and listen to my daily adventures in “snow cat rebuilding 101” :moon:

Pictures are included below .
 

Attachments

  • motor 004.jpg
    motor 004.jpg
    90.7 KB · Views: 346
  • motor 006.jpg
    motor 006.jpg
    45.5 KB · Views: 342
  • motor 007.jpg
    motor 007.jpg
    92.6 KB · Views: 337
More pictures
 

Attachments

  • motor 010.jpg
    motor 010.jpg
    88 KB · Views: 329
  • motor 008.jpg
    motor 008.jpg
    99 KB · Views: 339
  • motor 009.jpg
    motor 009.jpg
    87.4 KB · Views: 338
Last two pictures
 

Attachments

  • motor 013.jpg
    motor 013.jpg
    81 KB · Views: 332
  • motor 011.jpg
    motor 011.jpg
    81.2 KB · Views: 330
Allen, I have to give credit when credit is due. You have done an amazing job so far and I have confidence in 2 things. One is that going forward the job will progress with an equal level of skill. The other is that you will always receive a large dose of insults from me as you progress.
 
Allen, because you are doing such a great job, I figured I would send you a little gift. Just like the low riders who have the little doggy in the rear window with the head that bobbles up and down, I figured I would get your low-snow rider a fitting bobble head toy to display in the rear window of the KT7.

I just ask that you mount it up high so it can see over the snow because when that bathtub of yours sinks in the powder, the only thing the Snow Trac drivers who come to rescue you will be able to see is this little bobble begging for help :yum:
 

Attachments

  • 64620.jpg
    64620.jpg
    43.4 KB · Views: 345
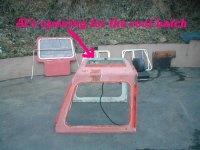
Hey Allen, when you are ready to reinstall the top hatch over the drivers seat I found one that will work purrfectly for you. :yum:
 

Attachments

  • 1attachment.jpg
    1attachment.jpg
    84.2 KB · Views: 338
  • 111--93_1.jpg
    111--93_1.jpg
    26.6 KB · Views: 337
Snowcat Operations said:
OUCH! Man you guys dont pull ANY punches!

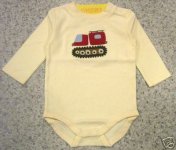
You know I have been feeling pretty bad :whistle: about picking on BigAl lately and figured I would send him a little gift to make up for all the humor that has been tossed his way. As he is now on vacation, I'm not really expecting a response anytime soon, but since he traveling from California back to his house in Idaho, I figured that I'd send this little gift to Idaho for him.

Think they will fit?

You will notice that the "onesie" has snaps so he can more easily use the "roof hatch" that is pictured a few posts above!
 

Attachments

  • 8c_1.JPG
    8c_1.JPG
    15 KB · Views: 288
  • af_1.JPG
    af_1.JPG
    23.7 KB · Views: 287
BoB S .
Recieved the gift and thanks alot . I think they fit and look quite lovely . A little tight between the old legs ,but that is the way it is when one is built (or hung) like a horse :whistle: .

Ok , so much for being nice . I'm Back for a little bit from my vacation . Had a nice little package waiting when I arrived . The new emergency brake calipers for the KT7 arrived after 6 weeks and they are perfect . Give me a few days to relax from the drive home and i'll start posting again .
Al
 
I second that! Hear Hear! I was beginning to miss the spark of scarcasam that pumps real life into this site.
 
Wait till he gets a Snow Master! Can you imagine what it will look like when its done? And of course the crap BOB and I will give him.
 
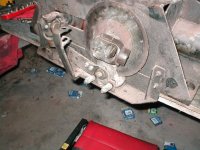
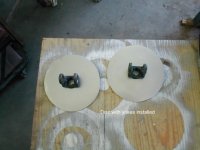
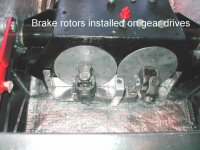
Well , today saw me getting after the emergency brake system on the KT7 . It basically is a 8” disc welded on the yoke where it connects the gear drive to the Hydro unit and has a brake caliper which grips it to make it stop .One brake on each yoke ,controlled by a single brake level . The brake caliper is manually operated and took 6 weeks to arrive from Hayes Brake .


I headed to the welding shop to cut two 8” brake disc and while drilling out the center ,the bit exploded into my hand . This was a first for me . I have had them break before but never explode . I was lucky and no serious harm was done , other than a little red stuff that leaked out .
Tomorrow, I plan to install the disc on the yokes and attempt to set the engine and hydro in place .

I’ll grab some pictures tomorrow of my home built brake rotors and the entire brake system complete . Here is one picture of the old set up . It is missing one brake and disc that was taken off ,sometime in the past .
 

Attachments

  • Emergency brake.jpg
    Emergency brake.jpg
    75.7 KB · Views: 266
Evening Folks ,:tiphat:

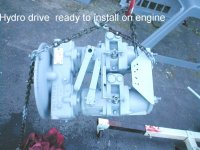
Well…. I should have know it would not go smooth . I cleaned up the hydro drive and found the seal was bad and the linkage that controls the speed control was broken :confused: . So back to the welding shop to make repairs and also pick a new oil seal .

The new seal is installed and the linkage repaired . Motor mount brackets are painted and installed on the engine and everything is ready to install in the morning .

The rotor disc I cut for the emergency brakes were a little large so I chucked them up on a lathe and turned them down another 1/8” . This helped immensely .

So the new plan is to try again tomorrow to connect the hydro drive and engine together and then set it in place as one unit .
 

Attachments

  • drivers license 002.jpg
    drivers license 002.jpg
    59.8 KB · Views: 267
  • drivers license 003.jpg
    drivers license 003.jpg
    91.7 KB · Views: 262
  • drivers license 005.jpg
    drivers license 005.jpg
    89.8 KB · Views: 261
:pat: Oh I forgot to mention that because of the broken hydro linkage ,I believe the KT7 could have only been obtaining about 50% of its avalible power . I guess I will find out when it all gets back together and I can actually test drive it .
Ok ,I now return you back to your previously recorded program ...:tiphat:
 
BigAl said:
I guess I will find out when it all gets back together and I can actually test drive it .

If you need a cornfield to challenge that plastic tub of yours, I might be able to arrange a test in my back yard. I'm sure you can get down the slope to get to the cornfield, you'll have gravity on your side. :moon:
 
AHHHHhhh. It good to feel the insults again . How I missed that . So Are you working on your "Cornfield Flyer" ? Last I heard ,you were talking about new paint .
 
Top