• Please be sure to read the rules and adhere to them. Some banned members have complained that they are not spammers. But they spammed us. Some even tried to redirect our members to other forums. Duh. Be smart. Read the rules and adhere to them and we will all get along just fine. Cheers. :beer: Link to the rules: https://www.forumsforums.com/threads/forum-rules-info.2974/

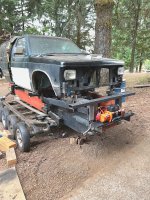
Astro van cat conversion

Winch is here YIPPPPPPY......SWEEEEEEEEEEEEEEEEEET

Got the LH mount for the winch tray all drilled this morning......We had bizz in town so had to put stuff on hold.
But the winch was sitting by the cat when we got back.

The LH side mount went far better....Worked the Bulge in the tub over with the 10# hammer and when the big angle was bolted up things all sucked up real nice and flat.....

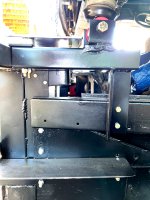
Ended up with Four 3/8" bolts on the side angle and one of the 7/16" bolts that had been in the tub getting used.....Added a bracket up front under the winch tray with two 3/8" bolts.... Total of 14 bolts holding the angles on and 8 bolts holding the Winch tray to the angles...(Four 1/2 and four 3/8") I decided to add a brace on the end of the assembly from the top tube down to the upright tubes.

A nice 1" Square tube 18" long....Had the material....It needed a job...


The total of the current materials and the winch are nowhere near as heavy as the combined weight of the 14 foot blade, brackets, cylinders and sundry other crap that was up on the front..........THIS IS GETTING TO LOOK NICE NOW.

Soon it will be time to get the radiator and go after getting it in the rig and it's brackets built.

A tedious piece to deal with....Gonna foam rubber mount the radiator in a top and bottom tray....
The universal aluminum radiators do not have mountings.....


Will figure it out.....

Tomorrow I will unpack the winch and get it sat up in the tray for a photo shoot....
 
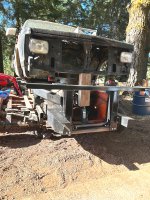
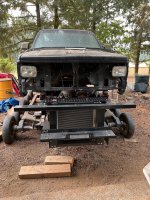
Looking over things up front of the cat....
Behind the winch is the two upright tubes.
The area is where the original radiator was fitted....
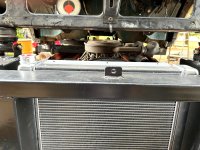
Now.....The area above the cross tube and between the S-Wagon Core support/Grille is a large opening....
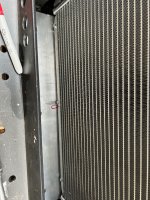
I am thinking about adding a piece of aluminum tread plate to fill the area behind the winch.....And use the area over the top of the tube right below the Grille in the S-WAGON core support to channel air to the radiator.

There is a large opening in this area.

The low stance of the 2100 and the radiator right in the nose was at times problematic with getting jammed with snow after hitting a snow drift.

Over the top of the Front structure is about 4 feet plus off the ground.....
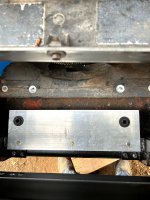
Sure....some snow will flow into the air stream to the radiator but nothing like jamming the nose into the snow. and packing it full.....
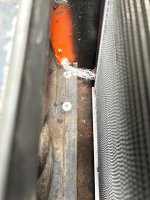
The cooling stack can easily be isolated so the cool air flows down into the area just ahead of the radiator.....

This plan will certainly keep brush from getting into the radiator....

No need for a perforated grille panel

Could add an electric pusher fan just below the top tube to feed the air into the plenum area ahead of the radiator.

The belt driven clutch fan should be quite adequate to gitterdone as far as moving as lot of air.......


What say ye folks.....Sound reasonable ????
Yes you need a very good cooling system, You wouldn't think heat would be a problem in the snow, but it is. Be thankful the engine isn't sharing the same space with you. The 603 was too hot inside when it was 0 and both doors tied open. The other issue caused by the heat is vapor lock, so no steel fuel line around the engine and a plastic spacer under the carb.
 
Yesssss...Back in the day when I ran the Spryte grooming for the Club.....That little 6 cylinder would roast you out of the cab ....

The position of the cab on this build being as high as it is and an insulated floor (Carpet and pad) plus a pretty good air space under the cab with moving air .....I don't think the cat will be a Sauna box like some......

Actually I am worried about getting heat to the carb on this engine.

The vortec Chevy heads do not have an exhaust cross over so feed the intake like the older Gen one SBC did

The Vortec intakes (OEM) were plastic ( Some aluminum parts) and passed air only....Fuel injected at the ports

After market Aluminum and a couple Cast iron carburetor type intakes are available......Almost all of the info I have read on these setup's is complaints about issues with carburetor icing in cold damp weather.

Edelbrock sells a Vortec type manifold with a cast in coolant passage to get heat to the carburetot area to help stop the icing issue.

I have an air cleaner that came on the S-Wagon that has a long flexible plastic tube about 4" or so in diameter that was connected to the Core support area to bring cold air to the intake.....

This air filter fits the Qjet carb well and the air tube will connect backwards toward the rear and can be hooked up to a air heater stove off the exhaust head pipes to help warm the incoming air above carb icing temps.

Easy to set this up with an on/off flap to regulate the temps


My 1976 Ford 4x4 with the 427 engine was a bit of a problem child in cold damp weather until the engine bay got warmed up.

The Holley carb would ice up big time......

Keeping that Chevy 406 cool under load should not be an issue.....The Aluminum radiator I have chosen is designed to handle bigger engines.....

The original radiators used in the 2100 with the Ford 391 were sketchy at best.
A couple of the snow parks on Mt Hood had swapped 428 engines into their 2100's trying to get more ooooomph

They had heating issues in the spring up at high altitude.......I never got a good look at them back then to see what they did,,,,I assume the stock radiators were just too small....
The radiators were a down flow type copper brass and the cat has limited room in the nose....

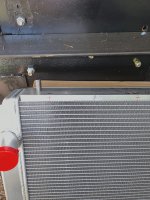
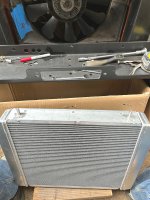
The Radiator I have chosen is an Aluminum 2 row (1-1/4" tubes) 19" high x 24" wide

With the changes that have happened in the front end area recently I may be able to get a much taller radiator in the beast....Width is limited to 24" max width (Tank outside to outside)

We are at a critical point now on this area.....Rethinking the radiator might be a very good plan.

I wanted to stick with standard sizes offered by the after market cooling outfits and stay away from a one off custom job.


I had wanted to use the fan shroud from the S-Wagon.....May need to rethink this and build a custom shroud.....
May be enough room for a set of electric fans.


Really wanted to use the big propeller off the L31 Vortec....11 blade IIRC
Issues arise with using the Vortec water pump......The Vortec pump uses an entirely different bypass system on it as opposed to the GEN ONE 400 block

We modified the RH head and added the bypass port to work with the Gen one block and to use the early style Serpentine water pump that was in the S-Wagon

These pumps are the same flow as what was used in the 350 engine that had the Serp drive.....

At any rate.....Once the Front fab work is complete the radiator issue is next on the hit list.....

There had been some talk about mounting the radiator in the original core support .....I really do not want to deal with the plumbing of doing that...A major PITA.....

We shall see how it works out.....At any rate.....With the cost involved in a radiator....I do not want to do it twice
 
Got some more work done.....

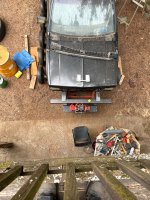
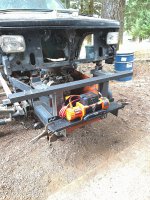
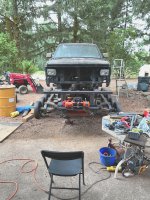
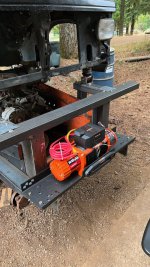
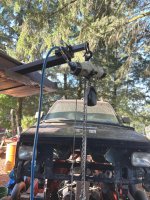
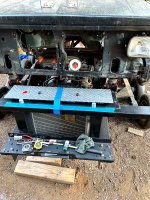
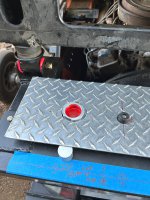
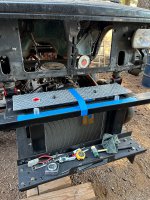
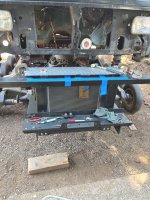
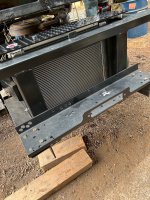
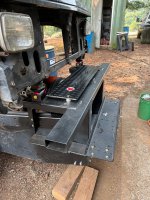
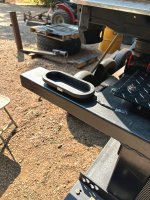
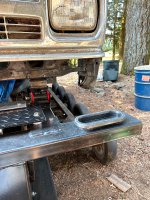
Winch outta the box and on the mount channel for a show and tell.

This bad boy bolted up really well.....No issues at all.....

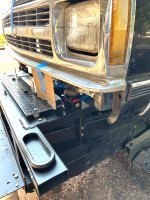
Still some brackets to add to the drivers side of the mount angle.....
Lots of finish welding

The radiator plans have changed a bunch too.

Going to go with a down flow radiator that has the bolt on flanges.....We can fit a nice sized radiator of 24" tall by up to 27" wide at the outside of the brackets.

A wide aluminum core with 2-3 1-1/4" tubes

A cross flow is just problematic to say the least......

Several options with the down flow.......The cooling ability is about the same when comparing apples to apples ya know
The cross flow limits what is available in a core....

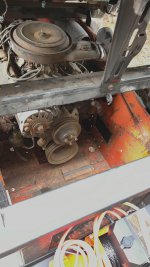
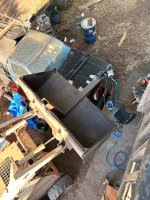
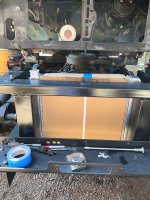
Piccy 5 shows the area we have for the radiator to fit in......

I want to finish up the fabrication we been working on and get it painted......May get rain in a few days.....Not much....Just don't want rain on the bare steel.

Once this is done it's time to thrash on getting a radiator fitted in the beast....

Little orange winch looks pretty good sitting in the cradle.....

Going to round over the corners on the angle brackets real well and call it good for now.

Thinking about some hooks up front too....I may make provisions for a couple clevises...??????????? Not sure..
 

Attachments

  • Winch mounted5.jpg
    Winch mounted5.jpg
    470.7 KB · Views: 56
  • Winch mounted6.jpg
    Winch mounted6.jpg
    680.2 KB · Views: 64
  • Winch mounted1.jpg
    Winch mounted1.jpg
    668.5 KB · Views: 70
  • Winch mounted2.jpg
    Winch mounted2.jpg
    634.4 KB · Views: 60
  • Winch mounted3.jpg
    Winch mounted3.jpg
    674.1 KB · Views: 55
  • Winch mounted4.jpg
    Winch mounted4.jpg
    702.1 KB · Views: 61
Weather is a bit goofy today....Showers around....Going to head down in a bit to do some more welding.

Removed the winch and stored it on the shelf for now.....It fits great....had to do the photo shoot.

Ordered up the Griffin aluminum radiator a bit ago...

The cost of the tall flange mounted down flow units were waaaaaaaaaaay too high....Went back to the original plan with a universal cross flow unit rated at 600HP.....

I want to get the Fab work done on the front mount and then get it apart and painted....

Then things can deal with whatever weather we get...

The radiator will be here in a few days and then we can figure out how that is all going to stack up and fit together

Once the radiator and shroud are done I will be happy with whats been done so far for the summer.....

Then depending on the weather....I can fool around with loose ends and some little stuff to finish up until the weather closes in for the fall

I still have one of the CV joints on the drive shaft to rebuild.....

Plenty of work on the engine and tranny......


Seeing this front end coming together is making me very happy.....

My long range plan is to get the engine built and test run as well as getting the tranny done.....Then we can tear the cat down and finish up getting the drive shaft in and the OC-12 back in and ready to go.

Then swap in the new power train.....Put the cabs back on and things will be off to the rodeo....
 
Got a bit more welding done this afternoon once the showers went away....

Tomorrow The entire assembly will come back off the cat for final welding and some paint.

Going to get the water pump from the S-Wagon engine bolted to the engine and the fan and clutch bolted on....Then the location of the shroud can be located and we can move ahead when the radiator gets here........


More news as it happens.....
 
  • Like
Reactions: PJL
Fabrication off the cat and welding finished....
All the parts cleaned up and ready to shoot some paint on them.

Gotta head to town and get the paint.

After all the finial holes were drilled and ready....40 bolts holding this bad boy on the cat....That includes the 4 that fasten the Winch channel on....


Damned sure not gonna come off without one helluva fight....and a lot of broken parts.

OH

And this bad boy is heavy too....Without the winch tray and the side angles it is all I want to do to carry it off the cat.


Gonna use the tractor bucket to hang it back on the cat...

I added a lifting lug on the top tube for just that purpose......


Later troops
 
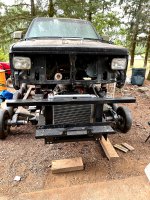
The weldment for the front of the cat is done, painted and rehung on the Kitty.

Was a walk in the park.....46 bolts hold this bad boy on.

The 1/2 ton air hoist hung on the skid steer bucket extension boom


That was yesterdays job....

Today was SHROUD DAY
Removed the old V-belt type water pump and swapped on the serpentine pump
Bolted the fan and clutch on and it was off to the rodeo...

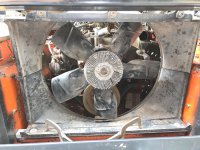
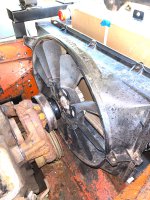
Got after the Shroud with a vengeance.....The shroud from the S BLAZER WAS PERFECT.

Had to trim the LH side a bit to get things to slip into the 2100 tub.
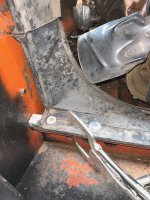
Required removing the inner bolt and clip from the LH side where the top and bottom part of the shroud bolt together.
Will likely add a metal piece to secure the spot where the bolt had to be removed.....

Spaced the bottom of the shroud up 3/4" to get the fan centered in the shroud.

Worked out very well.....


Drilled 4 holes in the bottom of the shroud (2) bolt the spacer (3/4" x 1-1/4" aluminum) to one of the original cooling stack brackets in the bottom of the tub and the shroud has the holes relieved to allow access of the bolts to the spacer only...

Two bolts more centered fasten the shroud through the spacer and lower bracket...

Had to run and get some 3/16" x 2 flat bar to bolt to the top of the shroud top piece.

Got some angle that will bolt the assembly to the angle upright on the front weldment.

Almost too good to be true...Where material to bolt to was needed it was there...

The pictures show the various views.....The top of the shroud needs to tip rearward a bit.....When I add the flat bar and the other angle piece it will all fall into place level with the world...
 

Attachments

  • Fan shroud install1.jpg
    Fan shroud install1.jpg
    325 KB · Views: 59
  • Fan shroud install2.jpg
    Fan shroud install2.jpg
    512.5 KB · Views: 60
  • Fan shroud install3.jpg
    Fan shroud install3.jpg
    613.1 KB · Views: 55
  • Fan shroud install4.jpg
    Fan shroud install4.jpg
    460.6 KB · Views: 54
  • Fan shroud install5.jpg
    Fan shroud install5.jpg
    442.3 KB · Views: 54
  • Front weldment painted3.jpg
    Front weldment painted3.jpg
    681.6 KB · Views: 62
  • Front weldment painted2.jpg
    Front weldment painted2.jpg
    588.1 KB · Views: 62
  • Front weldment painted1.jpg
    Front weldment painted1.jpg
    792 KB · Views: 61
Last edited:
The Shroud is all in and completed.

Will pull the top shroud brackets off and shoot some paint on them.....

Radiator should be here tomorrow.....

Things look good......

Getting the radiator mounted will be time consuming....Not a bad job....Just gonna take a bit of finesse to get things spot on...

The lower hose will have to go through a hole in the lower half of the shroud...Due to the size of the radiator as compared to what was in the S10 PLUS the strange mounting we are doing here....it's gonna take a bit of creative plumbing.....

Best part is...There is room to work on stuff....
 
Radiator is here.....came yesterday.

Looking over the original fan and fan clutch that was on the Blazer.....It had a severe duty fan clutch and a 19" 5 blade fan

All materials I can find specs out an 18" fan and standard fan clutch.

Either somebody switched things ....or it was a special order heavy duty cooling package.......

I want as much cooling potential as can be wrangled on this beast...
Considering the fact that the engine is going to be spinning some pretty serious RPM I am not really happy with the idea of the heavy steel fan blade......

The later S10 had a 6 blade steel fan .....The same cooling parts (Water pump, fan and clutch) were used on the 4.3 V6 the 5.0 and 5.7 V8 SAME PARTS......

Further snooping seemes to indicate that the L31 vortec (Engine we got the heads from) has a 19" fan....
These are an 11 blade plastic fan and SHOULD fit the fan clutch used on the earlier CCW rotation serpentine setup

I saved the fan, water pump and clutch from the L31 ......Decided to go with the Gen 1 water pump as it mates up easier to the 400 and we modified the RH head to use the Gen 1 coolant bypass on the RH cyl bank.

The Vortec uses a different coolant bypass system and mixing and matching can be done....But decided to stay old school on this....

So this morning I will dig out the Vortec 11 blade fan and see if it fits the clutch off the Blazer

Having the lighter weight fan make far more sense in this application .....

I did not get an opportunity yesterday to look at the new radiator....

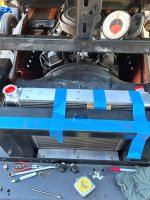
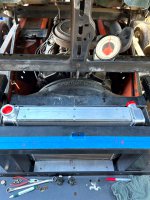
First order of BIZZ is to cut a couple thin protective panels and cover the fins on the new radiator.

I do not want the fins boogered up during the many test fittings while the mounts are getting built......

So we shall see where this Rabbit hole takes us....

So far the plan seems to be looking good.

Will get some pics when I can......
 
Last edited:
  • Like
Reactions: PJL
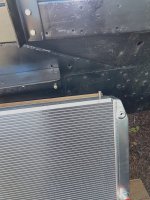
Got the radiator out of the box today and to my delight the core was wrapped with light card board to protect it.

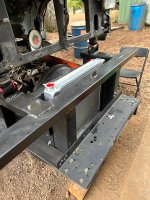
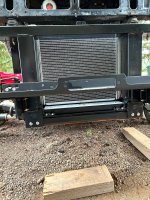
Got the radiator sitting in the slot on a block of wood ...A 4 x 6 was perfect for the test fitting.

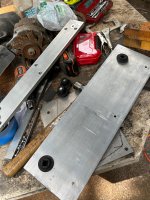
Need a piece of 10 gauge aluminum 6" x 18" to fasten into the front fabrication and fit the rubber mounting grommets....

Sunday.....No material today.....The rubber grommets will be at the post office in the morning.....

Gonna be a "one piece at a time show" on this bad boy.....

The fan from the Vortec will fit the clutch from the Blazer....Fan is a touch too big for prime time.

19-1/2".....No room for the engine to move at all....We need the 19".....The 11 blade fan from the 1996 Olds Bravada 4.3 is the right one at 19".....Will get a new fan later on....The 19-1/2 is fine for the setup work....

Weather is hotter than !@#!@#$ out there.....call it a day.....

The lower hose access to the radiator is gonna be creative....Gotta cut an access hole in the shroud.....

The next step is to get the materials needed to mount the radiator....1/2" x 2-1/2 aluminum flat bar to slip into the top and bottom channels on the radiator.....Then drill and tap the holes for the pins that go into the rubber grommets.....

A bit of a slow slog to get this one built.

This show is a one piece at a time deal.....
 

Attachments

  • Radiator mounting4.jpg
    Radiator mounting4.jpg
    306.3 KB · Views: 53
  • Radiator mounting3.jpg
    Radiator mounting3.jpg
    452.8 KB · Views: 51
  • Radiator mounting2.jpg
    Radiator mounting2.jpg
    444 KB · Views: 53
  • Radiator mounting1.jpg
    Radiator mounting1.jpg
    487.8 KB · Views: 58
Another hot day coming today.....
Plan for today is to get the materials for the radiator mounts.

The Griffin "Universal" radiators are designed with the DIY builder in mind....There are no mounts on the radiator.....Clean slate...Imagineering at it's finest...

As with all things on this build...I want to use as much off the shelf items as possible

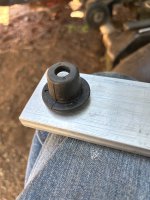
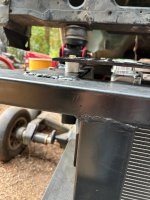
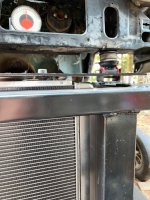
GM has used some nice little Grommet style bushings to mount the radiators in various vehicles.....Their solution was to use a plastic tank radiator with arms extending off the tanks (Part of the tank) These arms have a "Prong" or stud that sticks down at the end of the arm....The grommet/bushings are slipped into holes in the sheet metal core support and the radiators little stud mounting prongs slip into the rubber.....The top is held with a rubber cradle..

Well.....These bushing are easy to find (2003 to 2013 Impala)
Using two for the lower mounts and two for the top was a no brainer.....Easy fab exercise....

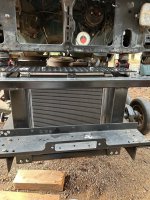
The radiator has a 1/2" deep x 2-1/2" wide channel top and bottom......Easy place to insert an aluminum flat bar and pop rivet in place.
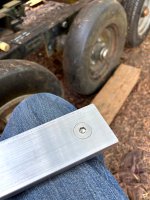
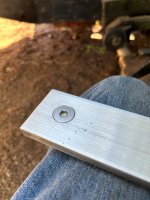
Two flat head Allen screws (Stainless steel) threaded through from the side of the flat bar that contacts the radiator channel gives us the needed prongs/studs to go into the rubber.....

Pop riveting the bar into the channel of the radiator is easy as well....Riveting into a blind hole...not good.

We will drill 6 holes in the radiator channels flange and then transfer the holes to the flat bar....

Next we drill the holes into the bar about 3/4"....Then drill a 9/16" hole from the face of the bar through a 90 degrees to the rivet hole for clearance......Now the rivet can expand and can be removed by drilling out the head and tapping the body into the 9/16" relief hole....


This plan will be for both top and bottom aluminum plates......

The finished assembly can slip into the mounting plate that sits directly under the radiator and is fastened to the front weldment assembly.......
There is a 1" x 2" steel tube welded into the assembly that is there to fasten the carrier plate for the radiator to......

The tube was welded in to make sure the weldment did not move when the finish welding was done....Also it was in a perfect place to be able to bolt the lower mount plate .......Easy to get in....Easy to get out.......The plate will be drilled for the grommet holes using the lower 1/2 x 2-1/2 bar that rivets to the radiator.....This way the holes will line up perfectly and the assembly will fit well....


The plan is to have a good secure fit for the radiator without placing unwanted stress on the aluminum core.

The area in the front of the cat should not flex ....BUT giving the radiator these four mounting points with a little wiggle room will certainly take us into an area of good safety factor on the radiator structure.

Aluminum radiators do not like to be bolted solid in a chassis that can flex......I know....folks do it.....Still not a good plan.....

The big boys in the auto building world have used the little rubber goodies a long time.

The issue is not only the chassis moving.....but the aluminum radiator expands and contracts with hot and cold.....The rubber mounting will allow a lot of free movement without stressing the radiator......


I will get pics as it comes together......

The area is tight and nearly all of the parts have to come out to assemble things......It is a stack it up from the bottom thing....

Just like Legos....

Sounds complicated....Actually not.....Just took a bit of studying to get the plan figured out......And make it work with off the shelf parts......
 

Attachments

  • Radiator mount.jpg
    Radiator mount.jpg
    77.4 KB · Views: 42
TOO HOT....100f OUTSIDE.....Not conducive to working outside.

Buttt...Headed across town and got the aluminum pieces.....No 1/2 x 2-1/2 available.

1/2 X 3 was the only tune in town. Gonna toss them in the mill and cut them down.

Found the 3/16" x 6" for the mounting plate

Both pieces in the short stock rack.....Cheaper...plus no $5 per cut fee.....

In and out in about 15 minutes

Picked up the rubber mount bushings at the post office....

Stopped at Ace hardware and got Four 1/2-13 Flat head Allen bolts.

Get a bit of cooler weather and we are golden.....

With these parts we can get the radiator part done and the lower mounting plate

Gotta wait until we have the radiator in it's real time spot to finish the design on the upper hold down plate.

THE UPPER PLATE NEEDS TO HAVE A COUPLE BENDS PUT IN IT....

The location of the bends and a couple relief cuts are critical and so....Gonna do it real time and not guess at it...
You gotta get out there at daylight to get anything done now, its hotter here I feel your pain.
 
Just jumped online a few minutes ago...... 80F ( 3:30 am)
Going to cool off starting tomorrow and more so into the weekend......MAYBE A FEW SHOWERS OVER SAT/SUN

Yeah...yesterday by the time we were able to get the materials needed it was just "COOKIN"

We get a few days each summer that get HOT....We had a couple days last summer....maybe summer before that it hit 115 F here.....This is really rare.....
90's are common summer stuff......I prefer 70's with puffy white clouds and a breeze......I can do a T shirt at 50 F if it's not raining and the wind is calm....

Today is busy all day with domestic stuff that has to get done...

Tomorrow will be a good day to get back on the cat....


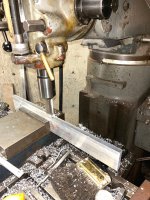
Materials to cut and machine.....Sadly the 1/2" aluminum bar was not available in 2-1/2" so will just need to whack the stuff down in the mill......Band saw does not have a deep enough throat to do 18" pieces.....

Oh well....It is fairly cool in the basement.....

The work needed to make the mounting plates for the radiator, while not difficult is just tedious......

Pretty much looking like the entire plan on the radiator mounting, the hoses and connections as well as the shroud, fan, fan clutch and water pump are all good to go.....I do not see any snags at this point.....

Will need to replace the fan with the 19" version and a fresh clutch is in order as well as a fresh water pump during the engine build......


My goal for this summer was to get the front sheet metal, front mounting, the radiator and related goodies wrapped up.

Looking like we are going to giterdone.

Actually the shifter cable project....Shifter mounting and getting the bucket seats in the cab got tossed in as well...

Picked up that extra TH350 Tranny too......More winter stuff to fool with....

For now....Once the radiator mounting is wrapped up the radiator can go back in the box and get stored away where it won't get damaged.....

The front sheet metal can stay where it's at through the winter....

One last thing I need to do is power wash the cat.....Stinking Fir trees have been weeping all summer....Never seen that before.....Stuff washes off easily...Cat is just gross with crap on it.....BETWEEN GREEN JUNK FROM A COUPLE WINTERS SITTING PLUS ALL THE TREE GOOP.

Once this summers work is finished the chassis work is nearing completion.

Yeah....There is tid bits here and there....But the major work is done.

I still need to build 4 more wheels (We have all the parts)
All the hubs were freshened up last season and 4 new tires and wheels are on.. (New bearings and seals done)

Front axle completely redesigned and all fresh.....
OC-12 mostly complete....Just need to put the axle tubes on and redo the outer axle bearings.

Drive shaft is still in flux....One CV joint still needs to be rebuilt on the long section....Short section needs to be cut to the needed length and the yoke welded back on.

I will get the shaft ready and then get it to the drive line shop for the final weld and have the entire assembly balanced for high speed running.......

I marked all the yokes on the Double cardan joints so they all went back in the same relation......

Still a good deal to get this entire unit balanced up.....AND YES...I AM GOING TO INSTALL DRIVE LINE LOOPS....PROBABLY 3 .....I DO NOT EVEN WANT TO THINK ABOUT THAT BEAST GETTING LOOSE AT HIGH RPM

The drive shaft assembly is the TWO PIECE shaft used on the extended cab S10 ......The rear shaft section has a double cardan u joint on both ends ...Then the carrier bearing followed by a slip yoke and then the short front shaft that's behind the tranny.

We do not need any great amount of movement in the slip yoke.....Just enough to connect the 4 bolt flange at the OC-12

I built a custom pinion yoke with a 4 bolt flange....The OC-12 has a 10 spline yoke.....It is the same size and spline as the units used on the old 1953 ARM 6X6 trucks.....I scarfed up 2 new units in the box.....
I machined an adapter to connect the S10 flange to the new yoke.

Plan is to add an aluminum spacer/plug in the slip yoke at the tranny and also a plug in the intermediate slip yoke at the carrier bearing....Just enough movement to allow connection at the OC-12.....The rear axle is pretty much a solid mount as it was from Thiokol....
I have new soft mounts and shims for the OC-12 at the frame mounting.

Then comes the wiring and that stuff.

I have the factory wiring shop manual for the S10 pickup and Blazer......Also made a complete video of all the engine connections as they came off......

The Blazer has electric windows on the rear doors....locks too.

All the wiring is cut loose at the floor near the new front bulkhead installed last season.

Easy to reconnect all the wires per their color code for the rear cabin.....This includes the rear body lights, the fuel tank sender and tailgate lock

There is also the trailer light wire harness too......Not sure if we will fool with that.

Everything is there ready to reuse.....

Rear windows and door locks are a must have.....Other than the electric locks there is no way to unlock the rear doors.

Front cab is all manual stuff ....U CRANK EM....

I do need to replace the door lock key locks.....No keys that work came with the truck.....

Just one little piece of the puzzle at a time.....
 
  • Like
Reactions: PJL
Got after the radiator mounting plates this morning UNTIL IT GOT TOO STINKING HOT.....

Several pictures of the process.

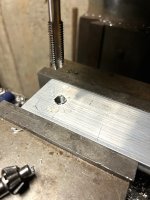
The lower plate getting chopped down to 2-1/2" wide....And it fits the channel on the radiator too.....

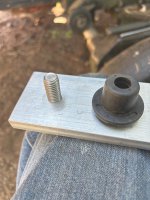
Holes for the locating pins (1/2" flat head stainless bolts) drilled, tapped and countersunk
Bolts fitted.

I need to drill the radiator channel for the fasteners to secure the 1/2" plate assembly

Will transfer the holes to the 2-1/2" plates and then add the relief holes in the plate to allow the tap to clean itself and not be dead end holes.

The 3/16" aluminum plate that the radiator sits on is cut, fitted and bolted to the weldment.....Need to get the 2-1/2" plates fitted to the radiator and fastened in....Then sit the radiator in the cat and locate the assembly witness mark on the lower plate so the holes can be drilled for the rubber bushings to sit in.


Was in town and picked up the fasteners to secure the 1/2 plates to the radiator.

TOOOOOOOOOOOOOOOOOO.DAMNED HOT OUT THERE THIS AFTERNOON TO FOOL WITH ANY MORE...
BUT THE PLAN IS LOOKING GOOD
 

Attachments

  • Radiator mounting14.jpg
    Radiator mounting14.jpg
    457 KB · Views: 42
  • Radiator mounting13.jpg
    Radiator mounting13.jpg
    448.9 KB · Views: 45
  • Radiator mounting12.jpg
    Radiator mounting12.jpg
    460.9 KB · Views: 39
  • Radiator mounting11.jpg
    Radiator mounting11.jpg
    426.7 KB · Views: 48
  • Radiator mounting10.jpg
    Radiator mounting10.jpg
    433.4 KB · Views: 40
  • Radiator mounting9.jpg
    Radiator mounting9.jpg
    416.8 KB · Views: 38
  • Radiator mounting8.jpg
    Radiator mounting8.jpg
    438.4 KB · Views: 40
  • Radiator mounting7.jpg
    Radiator mounting7.jpg
    457.8 KB · Views: 38
  • Like
Reactions: PJL
Late yesterday after it cooled off a bit (Relative term) I spent some time drilling the flanges on the lower radiator channel.

Transferred the holes into the 1/2" mounting plate .....Drilled the relief holes at the end of the screw holes .

Still too hot out to really get enthused much.....

Daughter and I have to go drag in a load of hay for the horses this morning.....This will take away any work in the cool of the morning hours.....


Ah well...The hot spell is coming to an end .....Tomorrow will be MUCH cooler and far more conducive to working outside.....
 
Made our hay run this morning....Then got after the radiator....

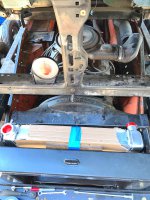
Made some good progress on the lower mounting.....

Came together real nice.

Radiator sits down on the new rubber mounts sweeeeeeeeeeeeeeet

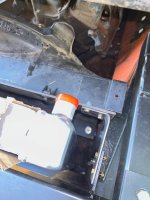
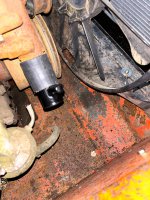
One piccy shows a shot down behind the radiator at the drain fitting.
I painted in.... in white....Small drain hose to a through hull fitting....Add a round pipe shield to cover the drain cock on the outside of the tub....Easy solution to the drain....

Now we do the top 1/2" plate that fits in the channel of the radiator
The actual retainer plate is still a sketch on paper....

It needs to mount to the two inside bolts that fasten the mounts that hold the front clip.....

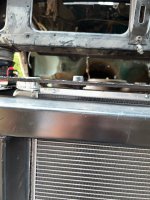
I want it made from aluminum.....Needs a 90 degree flange on the rear of it that meets to top of the fan shroud...(Keep air flow going through the top section on the radiator)
Needs an angle clip that bolts to the center lift lug on the cross tube.....

Has to have a clearance hole to fit around the radiator cap.

The cap will not be the fill point....A 1 gallon tank mounted up high on the firewall above the heater core inlet/outlet will be the fill point and the return from the heater core/cores....

Radiator cap may get modified to be a permanent air vent to the fill tank.....Fill tank will have a radiator pressure cap.....
There will be a couple "Burp hoses" connected to the fill tank to assure the system is air free....


Some imagineering in the works.....
 

Attachments

  • Radiator mounting15.jpg
    Radiator mounting15.jpg
    606.1 KB · Views: 47
  • Radiator mounting16.jpg
    Radiator mounting16.jpg
    355.6 KB · Views: 50
  • Radiator mounting17.jpg
    Radiator mounting17.jpg
    552.5 KB · Views: 48
  • Radiator mounting18.jpg
    Radiator mounting18.jpg
    331.5 KB · Views: 46
  • Radiator mounting19.jpg
    Radiator mounting19.jpg
    620.3 KB · Views: 49
  • Radiator mounting20.jpg
    Radiator mounting20.jpg
    597 KB · Views: 45
  • Radiator mounting22.jpg
    Radiator mounting22.jpg
    567.7 KB · Views: 47
  • Radiator mounting24.jpg
    Radiator mounting24.jpg
    356.3 KB · Views: 44
  • Radiator mounting23.jpg
    Radiator mounting23.jpg
    652.3 KB · Views: 46
  • Radiator mounting 21.jpg
    Radiator mounting 21.jpg
    538.2 KB · Views: 46
  • Radiator mounting28.jpg
    Radiator mounting28.jpg
    543.5 KB · Views: 47
  • Radiator mounting26.jpg
    Radiator mounting26.jpg
    673.7 KB · Views: 52
  • Radiator mounting25.jpg
    Radiator mounting25.jpg
    926.1 KB · Views: 48
  • Radiator mounting27.jpg
    Radiator mounting27.jpg
    792.4 KB · Views: 41
Had a late night "Imagineering" session last night (Snow cat dreams) on how to build the upper radiator hold down plate...

I need to critical dimensions this morning scratched on paper....And head off to the steel yard.

Going to use 3/16 (Give or take depending on whats available) aluminum....

We need to cover the top of the radiator all the way back to about 1-1/2" past the front of the fan shroud and add a 90 degree bend to the material so the piece will more or less seal the area and allow the fan to pull air MOSTLY through the radiator and not from elsewhere.

The entire setup surrounding the radiator mounting (AS FAR as air flow) is not perfect .....But it will be fine once a few "Seals" are added to block off some areas that the shroud does not cover.....

The front of the 2100 was never meant to mount a cross flow radiator....And the down flow type that was in there was marginal at best......Warm spring weather would in some cases cause over heating issues....

The radiator we have is supposed to be able to cool 400-600 HP 2 ROWS OF 1-1/4" TUBES WITH A 19" X 19" CORE
...

Let us hope that Griffin Company knows their Chit...

Looking at the area just ahead of the Radiator (Just behind the winch) is getting pretty busy.....

Started thinking about the tranny cooler......

The open area in the original Core support above where we are working has two big holes where the air passed through the radiator in it's former life....

A great place to mount a big azz cooler and an electric fan.....

This plan will keep the added heat out of the cooling stack too....

And that spot is easily accessible as far as getting fluid lines (Hydraulic hoses) to and from the gear box....

The hoses can come forward a few different places and not be an issue as far as mounting....

We shall see......

Going to do a bit of snooping for tranny coolers......
 
Yesterday saw things get going well on the top radiator hold down plate.

Got the aluminum plate cut and fitted to the area....
Machined the top 1/2 x 2-1/2 bar to fit the radiator channel and added the retaining screw holes....

Then the fun began.....Getting the retaining plate situated within the area so it was equal dimensions side to side and front to back (So it looks proper and not crooked)

Then getting the holes laid out for the rubber grommets and transferring the location onto the plate in the upper radiator channel.

Cut the hole for the radiator cap fitting ******This gets an aluminum slug machined and drilled and tapped for an air bleed...slug gets tig welded into the radiator.....Radiator fills from a high mounted surge tank under the hood and connects to the lower radiator hose down by the water pump inlet*****

I did not want it so the cap could be removed and a gallon or more coolant could blow out all over.....

Was too costly to get the radiator made without a fill cap fitting and have a 1/4" NPT bung added
Easier/less costly to use the standard universal radiator and modify it after the fact..

Grommet holes drilled (1" hoke saw) and the mating 1/2" stainless bolts added to the 1/2" plate in the radiator channel

Assembly fits well.

One piccy shows a couple aluminum rounds....They need to be machined to 1" long and have a 3/8" hole drilled through.

The two inner bolts on the hood/core support mount brackets need to be transferred to the hold down plate and the little round spacers fit between the hold down plate and the little bracket.....Need to get a couple 3/8" x 4-1/2" bolts to replace the ones in there now.....

An aluminum angle will fasten to the top hold down plate and a bolt through the front weldment lift lug will stiffen up the center of the top hold down plate...

Considering a couple aluminum brackets to fasten on the rear of the hold down plate and attach where the 9/16" bolts hold the front clip mounting mounts.

This area is still in the design stage.....It looks good in theory.....Will see if it is doable....

Blue masking tape and sharpie pens are a great tool.....Brakleen washes sharpie ink off in a hurry

Once the final bolts/mounts are in.....Then we have to wrangle adding the needed "Flashing rubber" to close off the unwanted areas that air can get past the shroud without going through the cooling stack.

More imagineering.....I do not want things to get too busy....But these areas need to be dealt with ....Hopefully without making it a nasty job to get at things......

I am the first one to call smack on how mfg's build stuff and how nasty some rigs are to work on....Don't want to step on my own tail here......But some things are just difficult to modify and keep simple....
 

Attachments

  • Radiator mounting35.jpg
    Radiator mounting35.jpg
    857.2 KB · Views: 44
  • Radiator mounting34.jpg
    Radiator mounting34.jpg
    592.3 KB · Views: 53
  • Radiator mounting33.jpg
    Radiator mounting33.jpg
    713.6 KB · Views: 47
  • Radiator mounting32.jpg
    Radiator mounting32.jpg
    202.1 KB · Views: 53
  • Radiator mounting31.jpg
    Radiator mounting31.jpg
    535.1 KB · Views: 47
  • Radiator mounting30.jpg
    Radiator mounting30.jpg
    587.1 KB · Views: 42
  • Radiator mounting29.jpg
    Radiator mounting29.jpg
    587.6 KB · Views: 47
  • Like
Reactions: PJL
Got this bad boy pretty well wrapped up....
Odds and ends still needed.
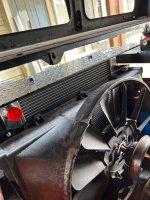
Need to close the area behind the top of the radiator down to the shroud to keep air moving through the stack...
Overall.....Came out well........

The area behind the radiator at the top ....I think we can close this with an aluminum angle.....

As long as the air can flow through the core....Good to go..
 

Attachments

  • Radiator mounting43.jpg
    Radiator mounting43.jpg
    262.1 KB · Views: 53
  • Radiator mounting36.jpg
    Radiator mounting36.jpg
    383 KB · Views: 52
  • Radiator mounting37.jpg
    Radiator mounting37.jpg
    212.1 KB · Views: 46
  • Radiator mounting38.jpg
    Radiator mounting38.jpg
    241.3 KB · Views: 43
  • Radiator mounting39.jpg
    Radiator mounting39.jpg
    300.2 KB · Views: 45
  • Radiator mounting40.jpg
    Radiator mounting40.jpg
    447.3 KB · Views: 41
  • Radiator mounting41.jpg
    Radiator mounting41.jpg
    433.6 KB · Views: 43
  • Radiator mounting42.jpg
    Radiator mounting42.jpg
    340.8 KB · Views: 45
  • Like
Reactions: PJL
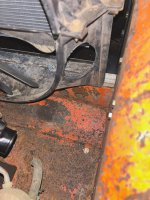
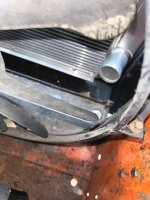
Now the fun begins with the plumbing.

Upper radiator hose is piece of cake.....1-1/2" x 24" long flex hose....Done deal...spot on.....

Lower hose ....Not so easy..NOT EVEN.

The cooling system fill needs to be into the lower hose (Common on a lot of rigs)

The angle of the radiator outlet pipe is/was an issue....The straight outlet put the hose right through the edge of the shroud...I decided to go with the angled outlet....

This was better...But still creates a set of issues that need to be dealt with.....

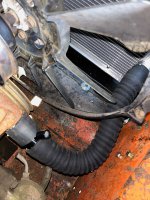
Getting the system fill port in looked easy...A "Kat's 1-3/4" x 5/8" T fitting seemed perfect.....Almost.

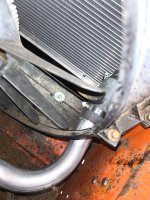
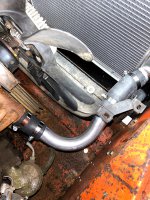
The 1-3/4" flex hose to connect things seemed perfect.....ALMOST.....But no cigar......Getting things together was possible and as seen in the picture...Yeah it can be done.......But when the hose is bent to fit into place it puts a lot of stress on the outlet pipe....I am not liking this at all......I want a "NEUTRAL MOMENT" on the parts.....

Building this with a bunch of stress on the outlet is almost a sure bet to cause trouble down the road....
We have time to build whatever is needed to attain a decent fit.

Going to stop off at the exhaust shop this morning and get some 1-3/4" tube.....

The tube can slide through the hole in the shroud much easier than the hose (Due to the smaller size) and connect to the outlet pipe with a short angled hose.....(2 clamps)

The T fitting.....As good as it looks...Easy too...is not going to work.....The T takes up too much space and makes connecting things a real odd angles !@#$%

I am thinking that a 3/8" NPT weld bung in the steel tube coming off the outlet pipe is going to be a better choice..

Thread in a brass hose barb and good to go....This will also get the system fill hose away from the fuel pump and clear of the aluminum alternator and serpentine tension bracket that mounts on the RH head.......


A formed hose with all the proper bends and angles would be sweeeeeeeeet....Fresh out of anything even close.

Take a walk down The hose aisle at the parts house and it will create a sense of wonder considering all the myriad weird snake creations that are hanging there....

Sadly they do not have anything for a "Frankencat"

Getting this creation to the point that we can use some standard 1-3/4" straight and angled hose pieces (Off the shelf stuff) to get things hooked up will be a blessing......

Trying ideas cost $$$$$$....So far under $50 and at least we know what is not going to work.......

The narrow nose of the 2100 has created some issues along the way.........But the lower radiator connection is about the worst as far as getting a decent setup....

We are close though......Worst case scenario is a piece together welded lower steel pipe assembly.....
I hope we can keep the fabrication to a minimum and gitterdone with a couple angled hoses connected to the steel pipe.

More as it happens
 

Attachments

  • Radiator mounting47.jpg
    Radiator mounting47.jpg
    555.6 KB · Views: 45
  • Radiator mounting46.jpg
    Radiator mounting46.jpg
    442.8 KB · Views: 42
  • Radiator mounting45.jpg
    Radiator mounting45.jpg
    694.6 KB · Views: 49
  • Radiator mounting44.jpg
    Radiator mounting44.jpg
    420.7 KB · Views: 47
  • Like
Reactions: PJL
A lot of creative folks out there...

I deliberately went with the higher mounting to allow ease of access for getting the cab/s on and off...Plus to allow a free flow of air from the engine down the length of thew tub and then out...

Every build on these things is full of great ideas.....

Today we got the lower radiator hose handled.....

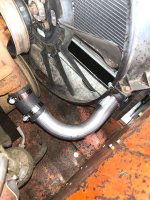
Stopped off at the Muffler works and Todd bent up a chunk of 1-3/4" tube.

Got it home, trimmed it a bit and then went after some hose and clamps.

The fit....WHILE NOT PERFECT....is good...Bending curves in close proximity to one another on a standard exhaust tube bender is just not what they were meant to do...

Some hose with some slight curves got us the "Wiggle room" we needed and got things sitting free of the bind we had with the flex hose.....

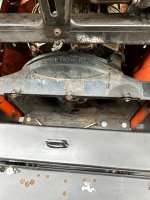
The steel tube passes through the shroud near perfect.....No interference where the tube passes through....

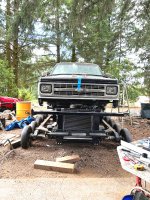
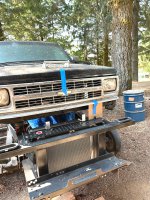
Looking at the front of the rig....A tread plate flashing just below the grille will cover up the view of the engine under the original core support.

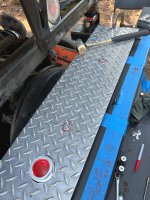
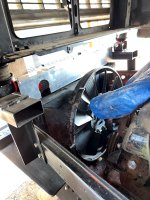
A few other pieces of tread plate will cover the few odd holes around the fabrication....This will help to keep the air directed through the cooling stack.

Some pieces to cut tomorrow and fasten to the radiator hold down plate on top.

I will grab pics as I can.....

I have the need to do some tig welding...Hard to get anyone to do anything for hire around here....At least without long lead times...

Decided to check out some small tig welders.....

Been many years sine I have done any tig work....But It's like riding a bicycle....Ya never forget how....May take a few practice burns to get back into the groove.

I am certainly not interested in dropping big coin on a machine....Several small "Home shop" grade units that seem to have good reviews are available .....WE SHALL SEE.
 

Attachments

  • Radiator mounting46.jpg
    Radiator mounting46.jpg
    452.3 KB · Views: 48
  • Radiator mounting49.jpg
    Radiator mounting49.jpg
    423.1 KB · Views: 50
  • Radiator mounting48.jpg
    Radiator mounting48.jpg
    529.7 KB · Views: 48
  • Radiator mounting50.jpg
    Radiator mounting50.jpg
    959.3 KB · Views: 51
Good things happening

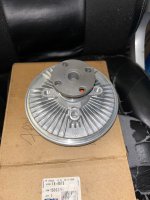
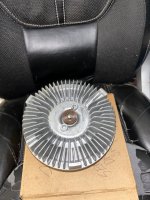
Snooping in a storage room and found a spanky new Fan clutch that was for a project years ago.

New in the box CCW Severe duty clutch...I took things apart on the cat and checked to make sure it fits.....Perfect.
GM...AC DELCO PART TOO....$135 today......

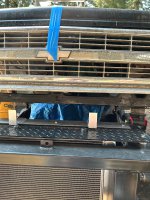
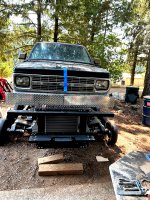
The plan is to make a valance panel to fit below the grille....Originally the bumper was down there and the Park/turn signals were in the bumper.

I was looking to see if I had any of the rubber mount commercial oblong amber lights left from the trucking days.

Found some new rubber mounts....But only red lights...I want LED lights.
That is when I found the Fan clutch.....


Need to pick up a piece of 1/8" Aluminum tread plate 7-1/4" wide and 64" long for the valance.....

Easy to form the aluminum to fit the shape of the grilles lower edge...Then wrap the corner around....
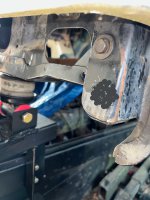
A good spot (BLACK DOT) to bolt in a stand off to bolt the corner to....

The aluminum angles near the center get tig welded to the angle that formed the air dam over the fan shroud.

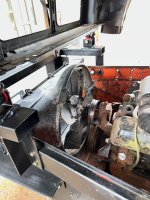
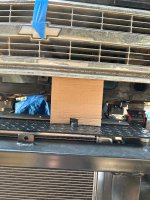
A piccy of the front corner with the big opening....Bolt a piece of tread plate on both sides to close the gaping hole into the shroud.

Getting most of the unwanted air gaps plugged will be pretty easy.....


I have decided to get an ALPHA TIG 203Xi machine.....200 amps AC/DC comes with the foot pedal.
Great reviews.....Home Depot offers them online.....I can get it shipped to the store close to us...20 minutes away.

No extra shipping...

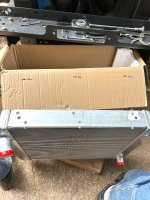
The cardboard is the test piece to check out the idea of the tread plate...
1/8" tread plate will be easy to form with a soft hammer over some round pipe.....A bit of thumping and a tweak here and there....
 

Attachments

  • Radiator mounting57.jpg
    Radiator mounting57.jpg
    856.1 KB · Views: 44
  • Radiator mounting51.jpg
    Radiator mounting51.jpg
    316.4 KB · Views: 45
  • Radiator mounting52.jpg
    Radiator mounting52.jpg
    381.9 KB · Views: 51
  • Radiator mounting53.jpg
    Radiator mounting53.jpg
    649.8 KB · Views: 42
  • Radiator mounting54.jpg
    Radiator mounting54.jpg
    622.3 KB · Views: 41
  • Radiator mounting55.jpg
    Radiator mounting55.jpg
    603.9 KB · Views: 45
  • Radiator mounting56.jpg
    Radiator mounting56.jpg
    682.8 KB · Views: 48
  • Radiator mounting58.jpg
    Radiator mounting58.jpg
    651.7 KB · Views: 50
  • Radiator mounting60.jpg
    Radiator mounting60.jpg
    430.5 KB · Views: 44
  • Radiator mounting61.jpg
    Radiator mounting61.jpg
    399.2 KB · Views: 44
  • Radiator mounting62.jpg
    Radiator mounting62.jpg
    286.2 KB · Views: 48
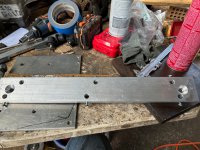
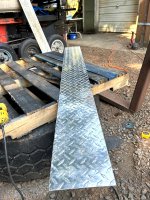
Did some snooping for a piece of 1/8" Aluminum tread plate for the front valance.

BIG yard wanted to charge me a metric buttload for a 7" x 66" piece.....Arrrrrrgh
Tried the local yard and they had some interesting stuff in the MADE WRONG RACK....

An odd piece with a 7-1/2" wide area....a couple other bends and the chunk was 8 feet long.

Absolutely gonna take somebody with ambition to fool with it....$50...Take it home as is...

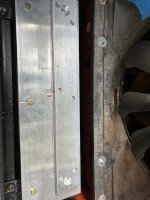
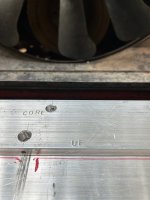
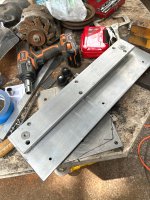
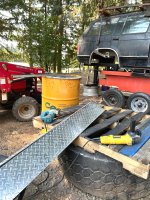
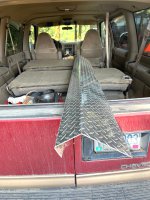
Well.......It was a workout....but we now have a piece that is close to 7" wide and 66" long.

Going to clamp the beast in the mill vise between a couple chunks of 2x6 lumber to get hold of it and run a mill cutter down the rough sawed side to get the part spot to size....AND SMOOTH..WITHOUT WIGGLES....

Some pics.

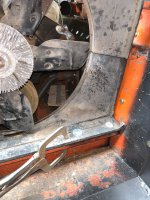
The lower flange on the grille is warped....Age, heat....GAWD knows....Gonna fudge things a bit to make stuff look good.

The grille is too good to scrap it.....A new one is $$$$$$$$$$$$$$$.....Another used one is likely going to be very little better and maybe worse....
 

Attachments

  • Radiator mounting66.jpg
    Radiator mounting66.jpg
    869.4 KB · Views: 46
  • Radiator mounting65.jpg
    Radiator mounting65.jpg
    632.4 KB · Views: 46
  • Radiator mounting64.jpg
    Radiator mounting64.jpg
    698.5 KB · Views: 46
  • Radiator mounting63.jpg
    Radiator mounting63.jpg
    486 KB · Views: 45
Top