• Please be sure to read the rules and adhere to them. Some banned members have complained that they are not spammers. But they spammed us. Some even tried to redirect our members to other forums. Duh. Be smart. Read the rules and adhere to them and we will all get along just fine. Cheers. :beer: Link to the rules: https://www.forumsforums.com/threads/forum-rules-info.2974/

Astro van cat conversion

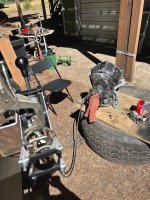
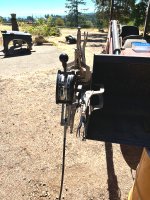
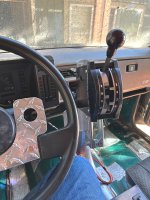
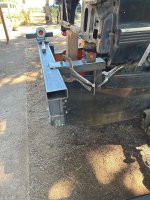
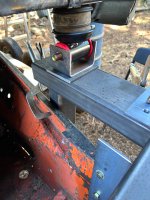
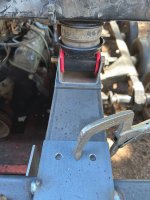
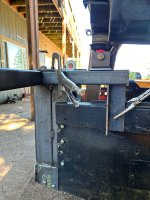
Wrapped up the shifter set up this morning....
That McGyver dude came by with some tools and we figured out a way to hold the shifter for the test runs and adjustments... HAAAAAAAAAAAAAAAA....
5 Vice tongs and a bit of fooling.....

The adjustment was close.....Added a few washers behind the quick connect ball on the shift lever to get it spaced out a bit.
The new aluminum blocks made the distance out from the bracket a bit farther out than the thin metal strap that came in the kit.....

The shifter glides through all the ranges without fault......

I have mentioned setting up a full manual valve body.....I am thinking that it may be better to keep the tranny in Auto mode....Simply shifting down into the "Business gears" when needed will be simple....
Not sure what has been done to this tranny as far as a shift kit or ?????

Will know more once we get into it......

Adding a full manual VB is just $$$$$ and really not going to gain much....

So for now the Shifter, cable and its brackets are done.....
Painted the adapter bracket where the shifter mounts on the upright tube in the cab.

Letting that dry good and will get it back in the cab.....

Need to drill one 1/4" hole in the shifter lower rail where the Ignition switch mounts..

Back to work on getting the front end mounted up on the cab.....Then on to getting the radiator mounting done and the front end tilt finished.....


One step at a time......


The tranny will be winter work.....That and the engine.....

Ahhh..The sun angle was low this morning....The one piccy got too much sun ...I tried to fudge it with the piccy editor....Can't go enough to really help...
 

Attachments

  • Shifter setup2.jpg
    Shifter setup2.jpg
    681.6 KB · Views: 56
  • Shifter setup1.jpg
    Shifter setup1.jpg
    825.6 KB · Views: 50
Got the shifter bracket all painted and back on the shifter....

Cable all put away for now and the tranny in the shop and covered up until its time to get into it...

Put the shifter back in the cab on the pedestal.....

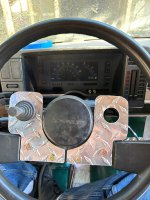
Got to thinking about the steering control joy stick......Had an idea

The aluminum steering wheel is really an open design and a really good place to mount the joy stick came to mind.....

Sort of out of the way and easy for just about any operator to work with..

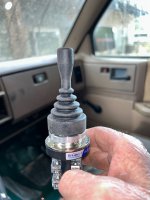
The stick is a 4 position unit....LEFT AND RIGHT can work for the steering valves...Fore and Aft can possible be used for other functions.....

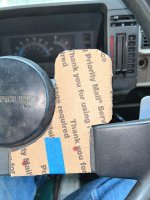
Made a cardboard pattern.....Cut this bad boy from some 1/4" aluminum and add a couple 1/4" bolts to hold it to the wheel.....Good to go.....
 

Attachments

  • Steering Joystick and bracket1.jpg
    Steering Joystick and bracket1.jpg
    444.5 KB · Views: 47
  • Steering Joystick and bracket2.jpg
    Steering Joystick and bracket2.jpg
    298.8 KB · Views: 51
Decided to take this idea and go one better..

Going to make two of the little brackets and use two joy sticks instead of one.

One stick on either side of the wheel AND use two position switches instead of the four way

Wire up the switches so each switch can operate both left and right turn functions.....When your right hand is busy you can steer with the left hand on the left joy stick.

Also....With two joy sticks the bands can be used in the braking function mode (Factory 2100 was set up for that function)

I really want to use the outboard disc brakes on the factory brake pedal as the service brakes.

Things always change as time goes by and the AH HA moments pop up...."Gee WHIZ ...that looks like a good idea"

There are so many things I wish we could do with the steering....But the availability of off the shelf parts are just not there.....

The original steering valves on the 2100 were custom built for Thiokol/DMC/LMC and have long since been discontinued ....To get back there is just not possible.....A long conversation with the original supplier was interesting....But gained nothing....

Standard electric spool valves and some readily available Hydraulic mods to the GM steering pump will get us the 400 psi oil pressure we need....


And so it goes.

I want to fool with these two switch brackets and stuff....Then back to getting the front sheet metal up onto the cat....


More stuff soon
 
Finished the Joy stick brackets and got them installed...
The left side will get the 4 way Joy stick.....LH----RH .....UP runs the air horns....Down Applies both bands for a hard stop...
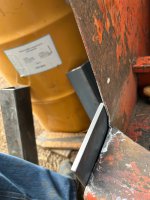
The RH Joy stick is a redundant switch to steer with.....Can free up the left hand....OR ?????
 

Attachments

  • Steering controls2.jpg
    Steering controls2.jpg
    494.6 KB · Views: 47
  • Steering controls1.jpg
    Steering controls1.jpg
    531.5 KB · Views: 50
Sort of a boring day....Wrapped up the mods needed on the lift rig to handle the front clip.
Then needed to modify the bottom hook on the air hoist to allow the link connectors to connect safely to the rigging.

Looks like we should be good to go for a lift tomorrow.....
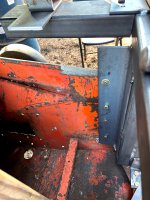
I am getting excited to see the front clip on the cat.....Once this bad boy is in place it will tell a big story as to how the radiator mounting will all fit in place......What I can see looks good.....Will know more once things are actually bolted onto the cab...........
Been doing a little shopping for tranny parts....
A long way out on this stuff....but still need to figure out what is available in clutches and other parts for the tranny....

I want the best goodies we can get going into this box.....WITHIN REASON....

Don't need frivolous doo dads...Just parts that will give the box longevity....
a good shift improver kit should be first on the list
 
One of the MANY p[arts on the list.
I am no stranger to the Turbo 350......Back in the day.... many of these little jewels saw my bench...
Shift kit
All new high performance clutches
5 clutch direct clutch drum
New bushings throughout
New torrington thrust bearings.
Performance stock stall converter
New band

Will have to get the beasty on the bench and apart....Then make the shopping list.....

TODAY WAS A GREAT DAY

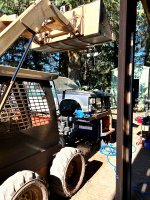
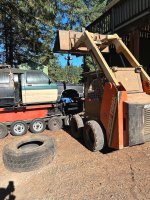
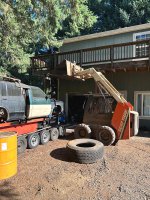
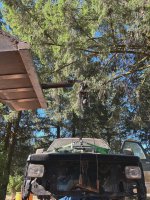
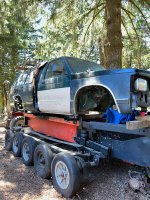
Grabbed the Skid steer this morning and got the rigging all in it and hooked up....

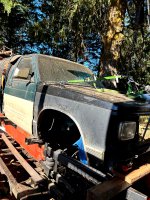
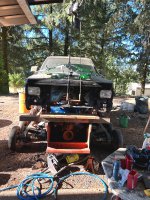
Grabbed the Front clip and got it level....

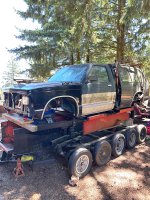
Got an extra pair of hands to help and we wiggled that bad boy onto the cab.....

I have never done a remove/replace on a complete front clip in one chunk before....Watched a You tube of a couple guys doing it on a GEN 1 S10....So i knew it was possible.....


Went very smooth.....Got it in past the heater body and onto the top of the cowl....The rest was easy....

Checked the position on the pivots down front to see how things aligned side to side

DAMNED GOOD....Less than 1/8" error....Or less.....

The best part is that there is plenty of room under the lower edge of the clip by the pivots.....Plenty of room for the radiator and its mounting frame and the fan shroud.

Overall I think the Font end will be decent looking with the radiator inlet grille down low where it was originally.

But I am very pleased too with the ability to add some panel to cover the engine bay all the way up from the top of the 2100 tub up under the S10 HOOD ASSEMBLY......

Some quick removable panel should do the trick..
 

Attachments

  • Front clip mounted8.jpg
    Front clip mounted8.jpg
    713.5 KB · Views: 63
  • Front clip mounted7.jpg
    Front clip mounted7.jpg
    691.3 KB · Views: 57
  • Front clip mounted6.jpg
    Front clip mounted6.jpg
    696.6 KB · Views: 56
  • Front clip mounted5.jpg
    Front clip mounted5.jpg
    548.5 KB · Views: 56
  • Front clip mounted4.jpg
    Front clip mounted4.jpg
    763.7 KB · Views: 55
  • Front clip mounted3.jpg
    Front clip mounted3.jpg
    831.5 KB · Views: 58
  • Front clip mounted2.jpg
    Front clip mounted2.jpg
    775.9 KB · Views: 58
  • Front clip mounted1.jpg
    Front clip mounted1.jpg
    891.4 KB · Views: 57
One of the MANY p[arts on the list.
I am no stranger to the Turbo 350......Back in the day.... many of these little jewels saw my bench...
Shift kit
All new high performance clutches
5 clutch direct clutch drum
New bushings throughout
New torrington thrust bearings.
Performance stock stall converter
New band

Will have to get the beasty on the bench and apart....Then make the shopping list.....

TODAY WAS A GREAT DAY

Grabbed the Skid steer this morning and got the rigging all in it and hooked up....

Grabbed the Front clip and got it level....

Got an extra pair of hands to help and we wiggled that bad boy onto the cab.....

I have never done a remove/replace on a complete front clip in one chunk before....Watched a You tube of a couple guys doing it on a GEN 1 S10....So i knew it was possible.....


Went very smooth.....Got it in past the heater body and onto the top of the cowl....The rest was easy....

Checked the position on the pivots down front to see how things aligned side to side

DAMNED GOOD....Less than 1/8" error....Or less.....

The best part is that there is plenty of room under the lower edge of the clip by the pivots.....Plenty of room for the radiator and its mounting frame and the fan shroud.

Overall I think the Font end will be decent looking with the radiator inlet grille down low where it was originally.

But I am very pleased too with the ability to add some panel to cover the engine bay all the way up from the top of the 2100 tub up under the S10 HOOD ASSEMBLY......

Some quick removable panel should do the trick..
I see why you tilted the hood, so you don't need a ladder to get down to the engine from the top of the fenders
 
YEAH BUDDY.

Tilt the hood....Remove the yet to be fabricated side shields and the engine is easy to get to....


No way am I at 70 + Years gonna stand on my head to work on things.....Nope.....

The original cab on the 2100 was fairly tall....But the hood was very little higher than the sides of the tub....Maybe a foot or so... And the hood came off

Grabbed a few better pics....Early morning sun makes it tough to get good pics....

Too bright.

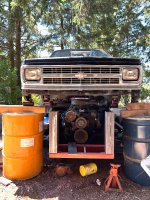
I stuck the grille back in (Sort of) to get an idea on how things will look.

Looking like a valance panel that comes up between the tilt mounts under the core support will be in order.

I see a cardboard and scissors day making a pattern in the near future maybe....

A chunk of Aluminum tread plate would work well maybe...

We need to get the radiator mounting in and that stuff sorted out first
 

Attachments

  • Front clip mounted13.jpg
    Front clip mounted13.jpg
    946.7 KB · Views: 56
  • Front clip mounted12.jpg
    Front clip mounted12.jpg
    760.9 KB · Views: 53
  • Front clip mounted11.jpg
    Front clip mounted11.jpg
    638.7 KB · Views: 48
  • Front clip mounted10.jpg
    Front clip mounted10.jpg
    541.7 KB · Views: 55
  • Front clip mounted9.jpg
    Front clip mounted9.jpg
    848.7 KB · Views: 55
Last edited:
Yes....Its up there pretty good but doable..

Tomorrow is going to be a time to get the outer edges of the front fenders blocked up so I can remove the blocking that's there now.
Then we start designing the brackets to support the tilt points under the Core support.

I will take a look at the left over 3-1/2" square tube used on the rear cabin supports in the tub...

I found one 20" piece of that tube....Maybe we have more....If so those can become the uprights in the front end of the tub....

The entire radiator and support is gonna be a complex arrangement....Hold the radiator and allow the original fan shroud to fasten onto the mount as well...

Should be a good amount of space up in front of the radiator core to mount a good tranny cooler and filter.

I will use the brass screen in the trans pan and then a good spin on filter in the oil line from the trans to the cooler.....

I want a good filtration system on the gear box....
I have also thought about a remote oil filter for the engine......Not sure about a cooler on the engine oil.....Maybe....

Be easy to use the remote filter system to add a cooler too.....

Now is the time to sort this stuff out.....

Running this 406 cube beast at high RPM can certainly churn up some heat in the oil....

Not sure if many of the early cats ran coolers on the engine oil......

The Thiokol 2100 had a hydraulic oil cooler....but not an engine oil cooler.....The tranny ( Ford C6 back then) had a large cooler.....
We have room for these things if we think it through now....
 
Got after the front clip mounting this morning.

There was enough 1/8" x 3-1/2" x 3-1/2" box tube for the two uprights (One on either side of the tub)

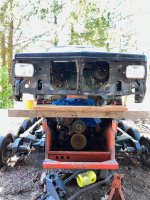
Measuring things up and getting ready to stick a couple drums under the front corners of the fenders so I can get the timbers out of the way....

Then a revelation.....I walk round and step under the wheel house opening.....OMG...There is literally enough room above the engine to have a family reunion picnic in there without the hood assembly tilting....

Went over the other side and looked over the access to things that might need to be accessed....

Alternator, water pump, power steering pump and a lot more.
Distributor and the ignition wires, plugs and such....Far easier than any GM car/truck I have ever owned.

Absolutely a total waste of time, materials and $$$$$$$$$$$$$$$$ to do the tilt.....

A pair of panels to close off the wheel house openings will make life good....Simple design to make these field accessible easily and we are golden

One little caveat.....Getting the grille at the base of the windshield in requires the hood be open or off...

The grille assembly clips into a slot in the fender by the windshield and uses the forward most bolt in the top of the fender where it bolts to the cowl.

Once the AC box is swapped out for the non AC heater box the one (Former) hinge bolt will be accessible once the assembly is on the cab.
I will be honest....I was not looking forward to cutting the fenders and dealing with that....

So this is a wonderful chain of events....

The two upright tubes will bolt to the front of the tub at the lower edge and the sides of the tub.

A 2"x4" steel tube will weld across the top of the uprights.....A couple weld on brackets will extend rearward and be supported by plates bolted through the top edge of the tub flange....These will catch the mounts under the core support.

This arrangement will be removable if need be.....

Plenty of room for the radiator.....

Will need to get the radiator in there and the fan shroud stuck in to see what all needs to happen....But plenty roomy.

The shroud is a split upper/lower type....Makes getting stuff apart easier...

A great day it has been....

The picture on the RH side of the pics is looking through the wheelhouse opening on the driver side.....
 

Attachments

  • Front clip mount change order3.jpg
    Front clip mount change order3.jpg
    712.2 KB · Views: 47
  • Front clip mount change order2.jpg
    Front clip mount change order2.jpg
    571.5 KB · Views: 47
  • Front clip mount change order1.jpg
    Front clip mount change order1.jpg
    516 KB · Views: 52
Last edited:
one thing I have learned from sooooooooo-manyyyyyyy woodworking projects,,,,
the first attempt rarely works like one thought.

if I'm going to build something using expensive woods, I now built it first - a "prototype" - from el-cheapo pine/popular/whatever.
on the up side, the proto-type makes good firewood . . .
 
You got that one straight.....

I have a pile of grand ideas that cost $$$$$$$$$$$$$$$ sitting in the corner on this project.....

Thankfully the biggest part of this project are coming together.....
The power train parts are pretty much all sorted out.

Diffy is done
Drive shaft is all sorted out
Body stuff just about finished.
Exhaust is done

TRACKS ARE PRETTY STRAIGHT FORWARD.

A bit of hydraulics to deal with....But this is pretty simple.

Getting the S10 PARTS to talk to the Thiokol 2100 has had it's twists and turns for sure.

But honestly....Most of the major changes have been for the better.....

A pine snow cat....interesting idea Haaaaaaaaaaaaaaaaa...
 
Picked up some materials this morning....2x4x1/8 Rect tube for the top piece of the assembly
Some angle and a couple short pieces of tube to reach back and support the core mounts.

A bit of work.

The core support is pretty well aligned fore/aft and side to side....Just need to fabricate the uprights as bolt on pieces and get those lined up so they look good in relation to the front of the clip.

Then the top tube can go on and get welded in place....

Two short pieces of tube weld onto the main top tube and have a bolt on piece that will bolt to the top rail on the cat tub.

A bunch of fooling around to get all the pieces fit well and looking good.....

With only the cat tub and the S10 core support to go off....Going to take some time to fabricate things and then bolt it together.....

The top tube can serve multi functions..... Clip mounting.....Outer ends can be a place to mount some amber/yellow LED lights (Ditch lights)

May even fasten a tubular grab bar up across from the tube to fender for getting up on the track to get aboard....


Lots of ideas....
 

Attachments

  • Front clip support3.jpg
    Front clip support3.jpg
    691 KB · Views: 52
  • Front clip support2.jpg
    Front clip support2.jpg
    513.9 KB · Views: 52
  • Front clip support1.jpg
    Front clip support1.jpg
    589.9 KB · Views: 52
Last edited:
Weather turned off much cooler today....
VERY VERY nice working weather....Got a pile of parts all cut and ready to layout and drill and then start getting things tacked up.....

The passenger side of the tub (Up front...very top edge) is tweaked out just a Bit...Looks to have been done during the time before the guy I got it from had it...The tore the 391 engine out and ???????????

The sheet metal between the top flange and the bottom of the tub is a long enough spread that it allowed the top edge to bow out a bit....

The new uprights are getting an angle welded to the inside edge that will bolt to the sheet metal tub to tie things together and stiffen the area....

I did not get the original nose piece....It was not in the pile of goodies.....Ah well....


The modifications going on now will give us a good foundation mounting for the front of the S10 clip.
Also the new radiator will get a home.....

Trying very hard to get things situated so standard GM radiator hoses (Off the shelf tech ya know) can be used.

Not sure exactly what model rig.

Mid sized car that used a small block.....

Hopefully we can make some metal chips and make some holes in stuff ....Maybe get some parts welded together too.....Never know.....
 
Well.....We made metal chips and welded things and had a great time.

Getting all the parts cut and ready to go got done before breakfast....
Getting stuff fit up and level....straight....A challenge....Trying to get common reference points on the S-Wagon and the 2100 can drive ya nuts at times.....But it's getting there....

Lots of left over holes in the 2100 chassis that were used for the blade mounts and cylinder brackets....These lost souls need a job.....So we are going to give them one...Maybe two.

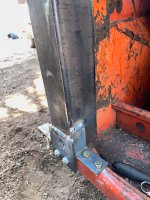
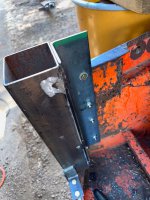
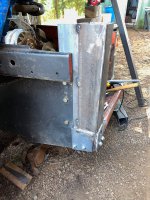
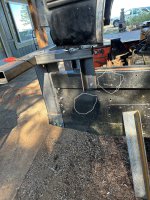
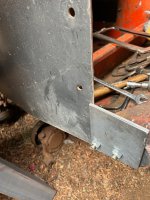
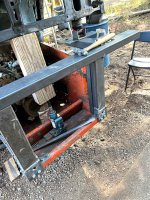
The lower part of the tub has two holes on each side ( First piccy on the left #11) .......Perfect spot to bolt on the first of the three plates/angles that anchor the upright (Right side)

Then the front of the area below the upright got a couple holes....An angle welded on the inner face of the upright got two holes through and bolted to the lower part of the tub nose.....

This part of the tub is heavy .....at 1/4" thick....The tub is 10 gauge mostly.

Once the corner upright was in....An angle piece came in handy to grab the side of the tub sheet and using existing bolt holes fasten everything all together....( Once the complete assembly is built..... it is an ALL BOLT IN UNIT....)

Still a fair bit of finish welding on the RH upright....But that can wait until the unit is farther along.

The side sheet on the RH side was tweaked a bit as mentioned earlier.....

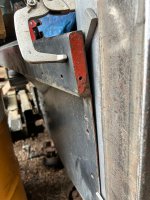
The piccy shows a chunk of steel clamped between the side sheet and the angle piece behind the upright.

This was to force the angle to where it needed to fit .....Welded in and then the bolts were tightened up and things just look great....Stuff is where it should be....I have no idea how the sides got tweaked.....The FOLKS that worked on this cat did a lot of hinky stuff.....A LOT....

Tomorrow we can go after the LH side.

Care and a bit of finesse will be needed to get both uprights in and in line with each other and in line with the S-WAGON front clip....I am hoping that the distance between the front of the core support frame and the new upright tubes will fall within + - 1/16"

Nothing on cars/trucks is perfect....Close...maybe.....As long as the eye does not catch errors....Good to go...Well sort of...

I really like fabrications to come in under 1/16".....1/32" is even better.....

I do not know if Thiokol used fixtures to locate the parts of the frame or just bolted stuff together...

I have not found large errors in the 2100....But there is some stuff that was changed by previous owners...Who knows....

Some weldments added that I know were not factory....But they were too hard to cut out....Left them alone.

An X Brace assembly in the area just ahead of the OC-12....This tied into the framework that controlled the compactor bar...


ANYWAY.....Good things got done today....
 

Attachments

  • Clip mount fab11.jpg
    Clip mount fab11.jpg
    444.6 KB · Views: 56
  • Clip mount fab10.jpg
    Clip mount fab10.jpg
    481.5 KB · Views: 54
  • Clip mount fab9.jpg
    Clip mount fab9.jpg
    392 KB · Views: 55
  • Clip mount fab8.jpg
    Clip mount fab8.jpg
    515.3 KB · Views: 52
  • Clip mount fab7.jpg
    Clip mount fab7.jpg
    450.5 KB · Views: 51
  • Clip mount fab6.jpg
    Clip mount fab6.jpg
    385.4 KB · Views: 50
  • Clip mount fab5.jpg
    Clip mount fab5.jpg
    464.8 KB · Views: 50
  • Clip mount fab4.jpg
    Clip mount fab4.jpg
    431.6 KB · Views: 51
  • Clip mount fab3.jpg
    Clip mount fab3.jpg
    504.2 KB · Views: 51
  • Clip mount fab2.jpg
    Clip mount fab2.jpg
    367.1 KB · Views: 52
  • Clip mount fab1.jpg
    Clip mount fab1.jpg
    449.5 KB · Views: 56
Started fabing up the Left side post....Got interrupted way too many times today....Butttttttttttttttttttt....With all the new iron going on the front of the cat.....A winch has been discussed for this build.....I great time to get the winch mount plate mounted is now...Before painting up the new fabrication .....

Looking at a couple mid size Jeep front winch bumpers.....Real easy at this point to get this stuff done.

Don't need a winch laying around now....But the bumper and such should go on since some mods will need to be done to bolt it onto the cat......

Gonna take a little time and sort this out....Beats going back and burning the new pain off later.........
 
a post or two back had a statement, " find common points between....."

I cracked a smile.

Keep up the good work.
 
Thanks Sqwrl

Yeah.....A labor of love......Until the morning after the night before and you have to work through all the stiff joints and nurse all the other hurting parts.......

I started getting nervous about a ready made winch bumper and CAN I MAKE IT FIT.....??????????
We hopped in the Burb and tooled on over to a 4x4 shop about 30 miles away....

I wanted to get first hand EYES on some of the Jeep winch bumpers and lay a tape measure on how they stack up with the measurements of the cat......

The shop had 3 brands of a couple different styles on the showroom floor to look at.

The shorty type winch bumper with the brush hoop and a couple bolt on clevis's/tow hooks was perfect.....

The tow hook mounts bolt through the winch bumper and then fasten to the frame (Jeep frame)

Easy to make a good herky adapter and then center the new goodies up and transfer the bolt holes.....Drill the adapter and put it together.......Best part is I will not have to modify the new bumper (Read this as BURN OFF THE PAINT WELDING ON IT) The OFF THE SHELF goodies area tad light by my estimation ....No worries...A little bit of heavier iron under the pretty bumper will gitterdone.....Bumper then becomes the "Lipstick on the pig"
I tend to lean towards 3/8" plate for a winch bumper mount plate.....And sheet metal is a minimum of 3/16" thick
Most of the ready made stuff is 10 gauge if you are lucky......

A side note...

I watched a couple dudes reefing on a big tree a while back with a nice looking winch mounted on a badass looking 4x4 rig
NO NAMES HERE ...TO PROTECT THE INNOCENT.....
The truck was anchored firmly.....Winch line run out to the beastly tree laying on the roadway......Chainsaws had cut the tree off at the edge of the road......Winch is engaged.....Winch went GRRRRRRRRRR.....Tree went OOOMMMMMPH
Large bang came from the winch and pieces fell on the ground......

Copious quantities of profanity issued forth from the cab of the truck and the other participants in this exercise.....

After the air cleared.... I wandered over to get a look at the carnage ...The winch mount plate had buckled a bit and caused the aluminum winch case to literally explode from the stress being applied in the wrong place.....

Lesson to be learned here....The winch mount plate must remain flat and not flex....The bumpers I looked at are very nice aesthetically speaking......NOT NEAR BEEFY ENOUGH TO WITHSTAND SOME SERIOUS REEFING

The price of steel at the yard is far more $$$$$$$$$$ than the stuff coming in from across the pond already built....

Bad news.....Everything has to be ordered......

One is on it's way.........

In the mean time....Back to the fab work......

After getting this area wrapped up.....Definitely time to do the radiator thing.

Time wise......

By the time the front mount assembly.... winch bumper ..../and the radiator stuff is done we will be just about done with summer...

Sadly these old bones do not work fast or long any more.....But we are having a lot of fun anyway.......

My grandson is into Dirt bikes....Not very interested in snow cats......Too bad....He could learn a lot about welding and "Imagineering" on this project.......

Ah well....
 
Last edited:
Thanks Sqwrl

Yeah.....A labor of love......Until the morning after the night before and you have to work through all the stiff joints and nurse all the other hurting parts.......

I started getting nervous about a ready made winch bumper and CAN I MAKE IT FIT.....??????????
We hopped in the Burb and tooled on over to a 4x4 shop about 30 miles away....

I wanted to get first hand EYES on some of the Jeep winch bumpers and lay a tape measure on how they stack up with the measurements of the cat......

The shop had 3 brands of a couple different styles on the showroom floor to look at.

The shorty type winch bumper with the brush hoop and a couple bolt on clevis's/tow hooks was perfect.....

The tow hook mounts bolt through the winch bumper and then fasten to the frame (Jeep frame)

Easy to make a good herky adapter and then center the new goodies up and transfer the bolt holes.....Drill the adapter and put it together.......Best part is I will not have to modify the new bumper (Read this as BURN OFF THE PAINT WELDING ON IT) The OFF THE SHELF goodies area tad light by my estimation ....No worries...A little bit of heavier iron under the pretty bumper will gitterdone.....Bumper then becomes the "Lipstick on the pig"
I tend to lean towards 3/8" plate for a winch bumper mount plate.....And sheet metal is a minimum of 3/16" thick
Most of the ready made stuff is 10 gauge if you are lucky......

A side note...

I watched a couple dudes reefing on a big tree a while back with a nice looking winch mounted on a badass looking 4x4 rig
NO NAMES HERE ...TO PROTECT THE INNOCENT.....
The truck was anchored firmly.....Winch line run out to the beastly tree laying on the roadway......Chainsaws had cut the tree off at the edge of the road......Winch is engaged.....Winch went GRRRRRRRRRR.....Tree went OOOMMMMMPH
Large bang came from the winch and pieces fell on the ground......

Copious quantities of profanity issued forth from the cab of the truck and the other participants in this exercise.....

After the air cleared.... I wandered over to get a look at the carnage ...The winch mount plate had buckled a bit and caused the aluminum winch case to literally explode from the stress being applied in the wrong place.....

Lesson to be learned here....The winch mount plate must remain flat and not flex....The bumpers I looked at are very nice aesthetically speaking......NOT NEAR BEEFY ENOUGH TO WITHSTAND SOME SERIOUS REEFING

The price of steel at the yard is far more $$$$$$$$$$ than the stuff coming in from across the pond already built....

Bad news.....Everything has to be ordered......

One is on it's way.........

In the mean time....Back to the fab work......

After getting this area wrapped up.....Definitely time to do the radiator thing.

Time wise......

By the time the front mount assembly.... winch bumper ..../and the radiator stuff is done we will be just about done with summer...

Sadly these old bones do not work fast or long any more.....But we are having a lot of fun anyway.......

My grandson is into Dirt bikes....Not very interested in snow cats......Too bad....He could learn a lot about welding and "Imagineering" on this project.......

Ah well....
Your lucky your grandson is into anything now a days thats remotely normal, get him a timber sled.
 
His little brother wants nothing to do with Dirt bikes....Little dude (13 NOW) is a GEEK all the way.

The older kid loves the dirt....He and his Father and grandfather just did the Idaho State ride last week.

Well I am toying with getting a winch for the cat NOW.....I want to be sure it fits and we don't get any surprises ...As in OH CHIT.....something does not fit right...

I have read winch reviews until I am ready to scream.

All the big names....plus all the stuff we love to hate.....

Reviews always have at least one soul that IMHO should probably not use machinery......IT BROKE RIGHT OUT OF THE BOX....WOULD NOT WORK....A POS....AND ON IT GOES

Then there is the guy trying to lift a tree twice the size of a house and has his rig tied off to an even bigger tree.

And the bumper shears off or some chit....

I have owned Warn in past years....Had one of the original 8000 warn winches on my Ford F250 4x4 (New then in 1976)

Had an 8000 # newer style on a K5 blazer and a 10K Warn on a 2500 4X4 BURB

Broke the cables a few times.....Always used reasonable common sense and did not wind the winch until it stalled.

The reviews are all over the map......

Buy this brand or that brand..."Cause anything else is junk" .....
I have some Jeep freak buddies that have XBULL winches....Warn ......Badland by HF.....Smittybilt and a couple others I have never heard of......

OMG

Warn has always been a top end unit.....So I watch a shootout video.....The Warn takes a Chit right outta the gate.

It's a crap shoot.....

I own a lot of stuff from Harbor freight (Electric tools, saws wrenches an air compressor and much more....Treat them decent and they have done a great job)

I am thinking seriously on going with the ZXR 12000 from HF........It will fit the bumper we have coming....

Just burnt out on watching reviews.....and watching folks doing stupid stuff and breaking things or wrecking their rigs trying.....


And so it goes.....
Have a Harbor freight winch on my dodge truck, I put it on because I already had it as a trailer winch. Have been abusing it for a few years and it still works. Its a 8000# winch bit I have a snatch block on the line and a couple more in the toolbox, so instead of maxing out the winch, part the line and double the pulling power. Save the money on an expensive winch and spend it on something else like the transmission that needs to be strong.
 
Well I tripped the trigger on a Winch
XBull 13000#
Orange beast with the Poly line
These have a pretty good review
Australian company
Made across the big pond of course
 
Back at the fab work on the front end.

Got the LH upright pretty well done....Some welding yet to do once the parts come off after the fab work is complete.
Top tube tacked on now....Started working on the extensions that will support the front clip.....

Everything must be bolt on and easily removable.

Winch bumper will be here tomorrow.
Will be some work to make a bracket to bolt the bumper to that welds to the new uprights

I want to add a thicker plate under the winch mounting plate......And a beefier cross tube where the bumper bolts on...

The ready made stuff tends to be a tad on the light side....A bit stiffer is better,,,,,The 13K winch should have a good base....

Winch will be along soon....Within the week hopefully.

I want to be sure everything will fit properly........

We can get the new weldment done and then remove and store the bumper and he winch for the winter.

Once the weldment is done we can move to the radiator support and the shroud mounting.
 

Attachments

  • Clip mount fab16.jpg
    Clip mount fab16.jpg
    578 KB · Views: 54
  • Clip mount fab15.jpg
    Clip mount fab15.jpg
    850.1 KB · Views: 50
  • Clip mount fab14.jpg
    Clip mount fab14.jpg
    682.3 KB · Views: 52
  • Clip mount fab13.jpg
    Clip mount fab13.jpg
    620.8 KB · Views: 51
  • Clip mount fab12.jpg
    Clip mount fab12.jpg
    773.4 KB · Views: 51
Did not get much time today to work on things.....But a bit of progress.

Winch bumper just showed up....I will look at it tomorrow

Cut the supports that go under the Clip mount portion....
Got the 9/16" hole drilled in the U bracket that carries the Front clip mount bushing itself.

Trying to get a few more pieces cut....Bzzzzzzzzzzzzzzzzzz....pooooooooof ..switch on my Jet band saw burns up.....

Metal shavings (Fine dust shorted things)

Ripped that apart....Will get a metal switch box and a good switch and mount in a place up front that is protected from debris tomorrow.....

No biggy....just annoying is all.
 

Attachments

  • Clip mount fab20.jpg
    Clip mount fab20.jpg
    623.8 KB · Views: 55
  • Clip mount fab19.jpg
    Clip mount fab19.jpg
    470.9 KB · Views: 49
  • Clip mount fab18.jpg
    Clip mount fab18.jpg
    395.2 KB · Views: 50
  • Clip mount fab17.jpg
    Clip mount fab17.jpg
    461.8 KB · Views: 53
Saw all fixed and back up usable again.
I have not used the miter function so I did not worry about the wire layout at this time.....Likely add a slinky cord so the saw head can swing once the need for the saw slacks up this fall.

The saw is wired to allow European 240 Volt wiring or US 120 Volt Both legs are switched....So I picked up a DPST switch instead of a SPST......

Decided to get the switch away from all the debris and metal dust......The Little arm that shuts the saw off when the cut is through was not on the saw when we got it.....So no worries.

Now on to the winch bumper....

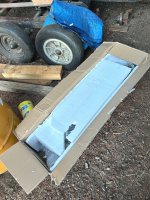
All excited about the new bumper.....Excitement was short lived though.....Get the box open....packaging was good and no damage at all....Well packed

I am in there with my pocket knife cutting the tape and bubble wrap....(Small parts are individually packed in zip lock bags)

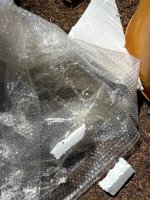
All of a sudden my hands are getting sticky and something stinks.....Nasty....OMG....Some ~!@#$%^ had pissed all over the inner bubble wrap and it had filtered down onto the bumper and other parts.....F'ing disgusting....

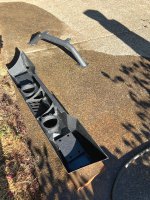
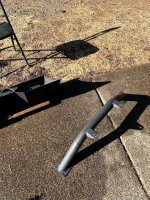
Got the parts all out and on the slab....Sprayed with detergent and washed off with the hose.....

Not a happy camper.....
Sent a note to the seller with pictures.....Waiting to hear back


The box was fine.....The parts were wrapped in bubble wrap and then the bundle stuck in a heavy plastic bag......The Pissing must have been done before the stuff was boxed up..

I suspect this was done overseas and arrived here this way.......


I have been doing bizz on ebay since they opened the doors in the late 90's....I have had some crappy boxes after they had been shipped.....But never anything like this......Disgusting mess......


So.....Not exactly sure whats gonna happen with this mess....

So for now.....Moving on with the project......More fab work to do....

Looking over the bumper....Not real pleased with the design of the winch plate.....Supposed to handle a 12/13K winch....

The plate is waaaaaaaaaaaaaay too flimsy to handle any serious reefing.

I may cannibalize the bumper and use the clevis mounts, clevises and the little Pre-runner light bar and just build by own winch plate and mount by incorporating it into the structure that is done so far.....

The winch plate needs to be 1/4" minimum thickness.....The one on the bumper is 10 Gauge....That is going to fold up in a wad with any serious reefing....


All feedback on these bumpers had been good.....Obviously those folks have not gotten serious about using their winch as yet....


Ahh well....All in a days work eh ???

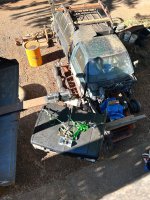
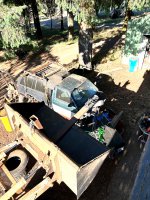
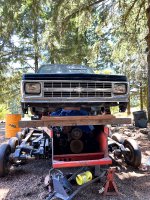
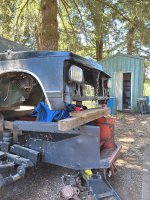
Pics show unboxing, Bumper and light bar .....Parts on the slab after washing.....Plastic with a puddle of piss showing yellow........

Rubber gloves needed when buying parts now... Haaaaaaaaaaaaaaaaaaaaaa....

I am waiting to see how the seller wishes to deal with this little mess before I leave feedback....If I get the brush off I will call trash......
I have only left smack on a couple items over the decades....We shall see....
 

Attachments

  • IMG_6464.jpg
    IMG_6464.jpg
    822.1 KB · Views: 46
  • IMG_6463.jpg
    IMG_6463.jpg
    875.4 KB · Views: 47
  • IMG_6462.jpg
    IMG_6462.jpg
    1,022 KB · Views: 45
  • IMG_6461.jpg
    IMG_6461.jpg
    890.4 KB · Views: 45
Last edited:
I got the pissy little bumper issue dealt with yesterday....Seller refunded a decent chunk of the $$$ for having to deal with that mess.
Also bumper has a new home....Not a bad looking bumper.....But nowhere near strong enough for my needs.....

Got to work trying to get the mountings for the Front clip wrapped up.....Turned into a chasing my tail for a while to figure things out.

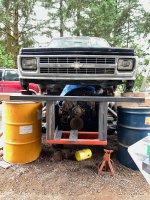
The Drivers side mount looked great.....Moved to the other side and it became obvious that the Front clip was not centered on the cat chassis.

String lines down the two body sections all looked sweet.....Cab is perfect (Relative term) and all the measurement are spot on.

The Right side front clip mount was off nearly 1 inch.....NO WAY.....NOT GONNA HAPPEN

Loosened up the mounting bolts on the front clip at the cowl enough to allow things to move a little.
Grabbed the core support with a winch strap....Gave a little tug and things came right in.....

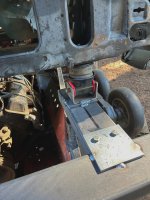
I had the bolt in brackets off the top main tube tack welded where I wanted them....So ended up shifting the U channel under the urethane bushing assembly and the 1/4" shim a little to even things up.....Sweeeeeeeet....Got the mounts all tacked up well...


Moved on to the upright angle under the mounting that bolts to the top rail of the cat tub.....Driver side came in perfect.

Drilled the mounting holes and tack welded up under the short tube and u channel......

Sitting back for a quick cup of coffee and feeling really smug.....Turned out things were gonna get ugly....Very soon.

Moved over to the right side and located and tacked in the plate on the top tube where the Clip mounting tube goes...

Drilled the short tube and installed some spacers inside the tube so the bolts do not crush the tube when tightened.....

Get things ready to install the angle upright to the top rail of the tub (Made it the same as the LEFT SIDE.

Stick that bad boy up in place and clamp it with a vice tong......~!@#$% the angle is not where it needs to be

The top of the angle under the tube is sticking out 1/2" instead of being flush.

Arrrrrrrrrrrrgh..

Started searching for answers......Which were not forthcoming ....At least not real soon anyway.


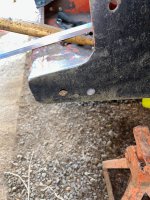
Grabbed my chair and head back to the Left side....Sitting there staring at the beast......I noticed a bulge in the sheet metal (See one piccy with White circles...Lower circle) Closer inspection revealed that what likely happened was the original blade lift cylinders had over time and hard use had caused the side sheets of the tub to deform a bit (4 bolt holes in the one circle on the top rail were lift cylinder mounts)


Back over to the RH side....The area where the original Blade lift cylinders had mounted needed scrutiny...

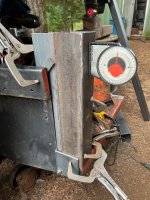
Indeed....The bolt holes were elongated from heavy use......Grabbed the magnetic protractor and stuck it on the top rail of the tub.....Sure enough.....The area right around where the cylinder bracket had been was deformed just enough that the top rail was not straight up and down.....TOP OF THE RAIL was out a few degrees....


This anomaly explains why the front of the tub was tweaked.....
The Blade and it's mounting hardware were NOT a Thiokol part....The blade and its parts were an add on after market set up....

The area where the lift cylinder bracket was mounted should have had a stiffener added to the tub to handle the load...

So...THE FIX

At this juncture straightening that area is /was going to be a royal PITA... Decided to get the angle upright in where it needed to be and then add a shim under the lower end of the upright to compensate for the error in the tub.


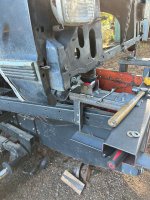
As I moved on to bolting in the RH winch mount rail I had to deal with the bulge in the tub.....A 10 pound hammer and a few thumps put the side of the tub back pretty close.....

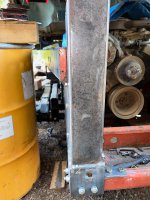
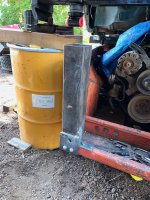
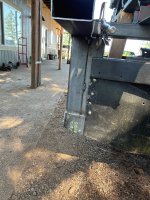
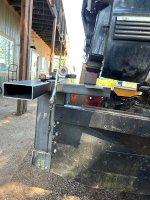
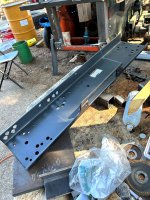
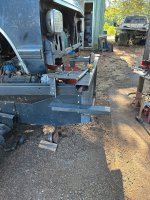
The RH winch mount rail bolts in with one of the 7/16" bolts that were originally in the tub on both sides....Added two 3/8" bolts at the rear of the rail......One more 3/8" bolt will go in above the existing 7/16 bolt.....

Two angle brackets to weld into the upright tubes and bolt to the angle rail that supports the winch mount.

A total of 8 bolts on each side will fasten the rails to the cat tub


The winch mount bolts across the rails with two 1/2" bolts on each side....There are several holes in the HF winch mount I ended up with

The HF mount is 1/4" steel...Formed nicely and accepts the standard 4.5" x 10" hole spacing on the winch


We are gaining on it..

I wish the old Kitty could tell me her story of use and abuse......Like all old cats that have seen hard use....The facts are at times tough to come by......


Should have more progress today......

I think (Hope) that there are no more snags.....

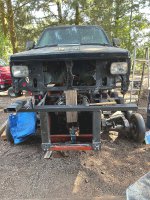
Big thing though is the grafting of the S-Wagon to the Thiokol 2100 is looking very good (My opinion anyway)
 

Attachments

  • Winch mount1.jpg
    Winch mount1.jpg
    652.5 KB · Views: 42
  • Winch...clip mount1.jpg
    Winch...clip mount1.jpg
    736.1 KB · Views: 42
  • Winch...clip mount2.jpg
    Winch...clip mount2.jpg
    585.3 KB · Views: 42
  • Winch...clip mount3.jpg
    Winch...clip mount3.jpg
    441.9 KB · Views: 45
  • Winch...clip mount4.jpg
    Winch...clip mount4.jpg
    866 KB · Views: 44
are you concerned about the overall weight of the build?

are you concerned about it being top heavy?

are you concerned about the cooling the transmission?
 
Not concerned about being top Heavy at all.

The engine, tranny, OC-12 Diffy, Axles, tires/wheels tracks and a lot of other materials are LOW in the build.

Each track is about 1000 #

The original cab was about the same height....YES it was smaller...

There have been several Cats put together using the 2100 chassis.

One that comes to mind is called "Dank Durango" A Dodge Durango on a 2100

One our past members had a full size GM Van on a 2100...It worked really well.

The sheet metal in my build is pretty light actually....The rear cabin is about 800# and the front cab is about 400#

The winch and all the steel in the bracketry is low as well.....Winch is down low too......

A lot of air space.

Another thing is the width of the cat.....Outside to outside on the tracks is at...11'-4"

The 2100 was originally at about 12'-6" wide

I will not say that it's impossible to roll it over....I do think you would need to get really crazy...

Cooling the tranny ??????No worries....A good sized air to oil cooler in the cooling stack.....She be fine.......


I think most all of the issues as far as the power train have been looked at....

The low gears will allow the stock stall converter to do a good job and not build a lot of extra heat....

I thought about a lockup converter but decided against it.....There were TH350C tranny's.....HARD TO FIND....

Just more to go wrong........

This cat is not any taller than some of the later Tucker cats....Plus the engine in mine is as close to the bottom as possible.....


Guess we will find out eventually how it all works
 
Last edited:
Top