-
Please be sure to read the rules and adhere to them. Some banned members have complained that they are not spammers. But they spammed us. Some even tried to redirect our members to other forums. Duh. Be smart. Read the rules and adhere to them and we will all get along just fine. Cheers. :beer: Link to the rules: https://www.forumsforums.com/threads/forum-rules-info.2974/
You are using an out of date browser. It may not display this or other websites correctly.
You should upgrade or use an alternative browser.
You should upgrade or use an alternative browser.
Astro van cat conversion
- Thread starter Snowy Rivers
- Start date
Snowy Rivers
Well-known member
Still fighting crap weather....but getting a few things sorted out...
Dragged out all the switches and relay for the electric door locks and the power outside mirrors.
The door switches from the S-Wagon are used up JUNK.
The style was nice but these are no longer available and no luck scarring up anything NOS online.
Found some great switches "NOS" for late 90's GM pickups......Great prices.
I have an auxiliary panel to go between the front bucket seats to mount the door lock switch for the rear cabin doors and the switch for the large outside mirrors from a 2005 Dodge 2500 4x4
The stock s-Wagon mirrors are just too small to see well as wide as this cat is....
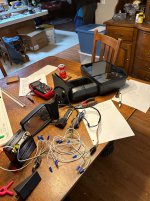
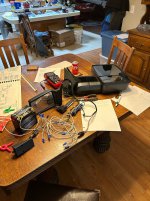
Scared up a roll of test wire to wire things up on the living room floor to test out the operation of the Dodge mirrors using GM control switch......
I have the Original GM schematics as well as one from the Dodge to trace out the wires.
I do not want to spend a buttload of time wiring things up in the cat and then find out we have issues.
Should not be any....But some short leads temporarily connected to the switch and the mirrors and then hook up a small ATV battery to power things will make sure it all works.
Then I can get a length of 16/21 conductor rubber covered cable and get that entire system ready.....
The door locks on the rear doors are not a worry.....Just a momentary on..off..on switch .....Another GM switch from NOS.
With the auxiliary panel going in between the seats there is a possible issue in that area.
Going to install a WINTERS SIDEWINDER Tranny shifter on the hump.....Not sure exactly how this is going to sit.....So we need the shifter in hand to be able to mock things up.
Also need to snake a chunk of #2 wire down out of the rear of the cab and back forward to the tranny shifter to get the length of cable needed.
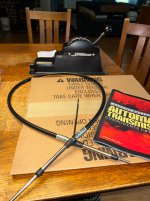
The Winters shifter comes with an 8 footer.....NOT EVEN LONG ENOUGH.....The cab sits high above the engine and trans......I want a good close dimension so I can order the right push pull cable.....THE FIRST TIME....
Getting the shifter JUST RIGHT is important...Since I am planning on a manual "Select shift" calibration on the valve body.....I want the operation of the shifter to be very comfortable.....AND NOT hindered by the switch panel.....
The cab originally had a center console....POS tossed it in the trash......
The shifter MUST BE easily removable in case under dash work is needed.....
The various mounts offered by Winters are nice.....But not what I want....Will mock up with cardboard and or.....Then form up in sheet metal to bolt to the shifter and to a low floor bracket....
The old carpet on the floor is toast....Will go with a full rubber mat.....Much easier to take care of.
Just an FYI
The outside mirrors are mounting to a tube steel upright on each side of the cat chassis with cross tube over the cab to mount the Light bar on as well as the air horns and other work lights
Looked at several light bars with various LED lights and such......Got the basics in mind.....Other than allowing power wires in the same cable as runs the mirrors .....( The 16/21 cable) Way too soon to worry about the lights.
Definitely going to go LED....Amber rescue type config......Multi strobe pattern capable.....Will see when we get closer
Probably a 5 foot bar........Some White LED work lights to cover the sides and possibly a white LED bar facing forward too....
Am considering a visor for the cab to help keep the light bars from glaring into the cab......
Again.....A bit far out at this juncture.......
But things need to be considered so wiring can be dealt with early on........
I do not want to have to go back after the fact and redo stuff......The 21 wire cable should gitterdone.....
Fun stuff
Last edited:
Snowy Rivers
Well-known member
Today was a good day.
I had planned originally on using the GM factory shifter
I had hoped to use the factory shifter WITH SOME MODS....
Just not going to work.....the location of things just makes it a tough shot at best due to where the exhaust head pipe comes down into the belly of the cat...
Plenty of room by the tranny shifter shaft.....and on back to the rear.....
The Winters sidewinder has been on my radar for several months and I had spoken of it in the previous post and before......Just more $$$$ than I wanted to fork out......
I found one today (OPEN BOX) on ebay that somebody had purchased and then decided to use a different tranny.
They went with a 700R4 and had purchased the shifter for a TH350....These are not interchangeable .....
It was listed at a very very good price....
I grabbed that bad boy up....
The cable that comes with the unit is 5' IIRC
I need a 10' to get a nice gentle bend down into the cat belly.
Local outfit up in PDX can make me one reasonable $$$
So we will have this in a few days and be able to get the layout setup for the shifter and auxiliary switch panel to set in the cab between the bucket seats......
There are a buttload of shifters on the market...The Winters sidewinder is a very simple and study unit...
Made to work with most popular tranny's....
Can be had with standard shift pattern, reverse pattern, rock gate (Drive to reverse open through for quick back and forth)
Several mounting options from the maker too....Then folks like me that come along and will probably make their own brackets.
The cable is a standard 1/4-28 morse type cable.......Winters offers it in 4,5,6,8,10 foot and likely others....
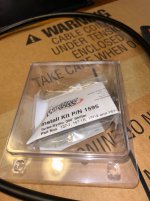
Comes with the needed hardware....
Switch kits available for Neutral/park starter control.....as well as backup lights....
The backup lights are probably a go....I intend on having LED lights that cover the sides and rear of the cat....But a switch to activate the original BU Lamps....a nice touch.....
A good day...
Last edited:
Snowy Rivers
Well-known member
Some of the materials showed up for the side mirror lash up....
I had ordered a small sealed battery to use to wring out the various wiring set ups without having to drag a big azz auto battery into the house.
Got the battery yesterday.
The door lock switches came too....Still waiting on the mirror switch.....BUT I GOT EXCITED and decided to wire things up using the original S-Wagon switch so I could finally see if swapping GM and Dodge parts was going to work.
The wiring is slightly different between the two.....
The Dodge uses a common wire between the two mirror motors and the the other two wires are connected up such that the switch reverses polarity to the motors..
GM did that too.....BUT....The GM switch is slightly different inside as far as how the contacts open and close to reverse the direction of the motor..
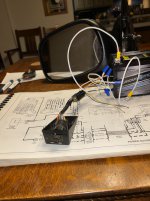
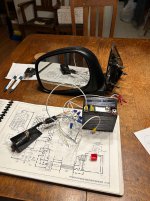
Bottom line....After laying out all the goodies on the dinning room table and wiring things up the way it seemed likely to work (The wire nuts were just for testing )
Plugged stuff in AND THEN..........Up/Down is perfect.....In /Out is backwards
I tried swapping the two NON COMMON wires.....Then In/Out is fine and Up/Down is backwards
The switch is the issue......
The switch mounts in the center switch panel between the seats and is not oriented such that the switch motion would indicate direction of the mirror.......The fact that everything works is the big deal.....Will just label the panel and call it good
The other option is to scare up a set of GM mirrors and go that way....Still the orientation of the switch in relation to the mirror is not like it was in the donor vehicles either way.......
The door locks for the rear cabin are GM all the way and the switches I have will do what they are supposed to do.....
Even the GM mirrors did switch the wiring some over the years....But it looks like only the colors changed in later rigs....
Sadly I can't seem to find a factory schematic for the Dodge mirrors
Back When I started this project I knew I was going to be using A GM cab (Van first...then to the S-10) So I scrounged up the factory wiring books for the various chassis to make all the wiring a simple deal to put stuff together .....
GM BODY....GM ENGINE.....Seemed simple.....Well sort of........But it sure helps when doing the swaps........
Easier to make changes and know what you are doing ......NO MAXIMUM SMOKE THAT WAY.....
I had ordered a small sealed battery to use to wring out the various wiring set ups without having to drag a big azz auto battery into the house.
Got the battery yesterday.
The door lock switches came too....Still waiting on the mirror switch.....BUT I GOT EXCITED and decided to wire things up using the original S-Wagon switch so I could finally see if swapping GM and Dodge parts was going to work.
The wiring is slightly different between the two.....
The Dodge uses a common wire between the two mirror motors and the the other two wires are connected up such that the switch reverses polarity to the motors..
GM did that too.....BUT....The GM switch is slightly different inside as far as how the contacts open and close to reverse the direction of the motor..
Bottom line....After laying out all the goodies on the dinning room table and wiring things up the way it seemed likely to work (The wire nuts were just for testing )

Plugged stuff in AND THEN..........Up/Down is perfect.....In /Out is backwards
I tried swapping the two NON COMMON wires.....Then In/Out is fine and Up/Down is backwards
The switch is the issue......
The switch mounts in the center switch panel between the seats and is not oriented such that the switch motion would indicate direction of the mirror.......The fact that everything works is the big deal.....Will just label the panel and call it good
The other option is to scare up a set of GM mirrors and go that way....Still the orientation of the switch in relation to the mirror is not like it was in the donor vehicles either way.......
The door locks for the rear cabin are GM all the way and the switches I have will do what they are supposed to do.....
Even the GM mirrors did switch the wiring some over the years....But it looks like only the colors changed in later rigs....
Sadly I can't seem to find a factory schematic for the Dodge mirrors
Back When I started this project I knew I was going to be using A GM cab (Van first...then to the S-10) So I scrounged up the factory wiring books for the various chassis to make all the wiring a simple deal to put stuff together .....
GM BODY....GM ENGINE.....Seemed simple.....Well sort of........But it sure helps when doing the swaps........
Easier to make changes and know what you are doing ......NO MAXIMUM SMOKE THAT WAY.....
Attachments
Last edited:
Snowy Rivers
Well-known member
Grabbed up the RH side mirror and wired it up for a test run .....
Same anomaly in the internal wiring ....The IN/OUT works backwards....
Ran the mirror through it's paces a few times....The it went crunch......I had run it out towards the end of its travel.
Sounds like a gear on the side to side motor failed......
PLAN B.....
Not going to fool with Dodge mirrors......LOOKS LIKE THE BEST PLAN is to grab a set of GM TOWING MIRRORS with the heated feature as well as the turn signal and the backup light feature too...
Used mirrors from the Dodge were not the great deal.....
Oh well
Plastic parts just do not last forever The dodge mirrors were 2005 vintage.......
Anyway....
The basic plan is a good one.....The switching all works fine.........
The garage sale deal was of very minimal $$$
NOTE TO SELF
Don't fool with used electric mirrors......
I have a mirror on the 95 Burb that failed about the same way ,,,,,Just set it by hand and forget it....
Snowy Rivers
Well-known member
Ordered up a set of GM style towing mirrors for the project...
Heated....Powered.... Has turn signal and backup light (LED that lights up aft and to the sides)
Much larger than the Dodge mirrors AND the wiring will interface readily with the GM switches...
Looking over all my GM schematics for the various rigs.....THESE ALL include the various RPO CODES in the schematics (Regular production option)
These are USUALLY on a printed sticker in the glove box.....STILL PRESENT AFTER 30 YEARS...NOT LIKELY
After studying all the various difference it boils down to some added plugs for different mirrors (With signals and heaters)
The RPO tag is long missing on my donor rig.....We have a standard wiring harness.
The basic power mirror harness is all the same with the exception of the added wires IF the heaters and signals are present.
The other difference is wire color.
The S-Wagons used the older standard color codes through the GEN 1 rigs.....Gen 2 was all together different
The mirrors I ordered up are for GMT 400 trucks (1988-1999) (With a couple odd ducks)
The wiring plugs are all the same ......Wire colors changed but the locations in the plugs are the same...
CONFUSED YET ?????
After several cups of coffee and comparing the schematics of the S-wagon, The GMT 400 trucks and the Square body rigs......I got it scoped out..
Bottom line is to have parts that are replaceable, available and to be able to get all things functioning easily......
STANDARD OFF THE SHELF STUFF
Some parts look great....until you go to find them.....So many have been discontinued by the mfg and NOT picked up by the after market.
Even though the S-Wagons are popular.....The Gen 1 parts like switches and such are tough to locate......
Lots of parts like sheet metal and such are readily available in the after market...AND the bone yards.
So this little adventure is coming along nicely.
The last thing I want is to have the cat with parts that can't be readily replaced......Especially electrical stuff.
Looking at tracking....Looks like the new mirror switch is at the post office and the shifter should be here today .....
I want to get the new mirrors on the table and TEST wire them up and make sure we have proper function.
Then make up the wiring diagram accordingly to allow the wires to all connect easily at assembly
Ordered up a good chunk of 16/21 cable (16 gauge with 21 colored conductors)
This will allow wiring the mirrors, rear door locks and a few other items into the new switch panel
Stuff like the factory lighting will all be kept pretty much as GM had it with a few exceptions....
The tilt hood will require some rerouting and lengthening of the front wires.
Wires to the rear cabin will jump across from the front cab and then connect via a multi wire plug (Tail lights, dome lights, signals and such.....also the fuel gauge wiring is in that bundle.
Two tanks going in......So will add a switch valve to swap tanks and change the sending units from Left to Right
I hope some extra time thinking this through will allow for stuff to go smoothly.
All engine controls will use existing factory under hood wiring....so no worries.
Dash controls and things like ignition switch, signals, head lights.....interior controls are all right where MA GENERAL put them.
Really pretty simple.....Just a lot of midnight oil and coffee to get it RIGHT ......OH YESSSS....There will likely be a few change orders.....BUT THE EXTRA THOUGHT should keep it to a minimum......
The new shifter has the switches for the neutral safety (N&P) as well as backup lights
The TH350 tranny does not use any electrical stuff at all....
I think the tail gate on the S-Wagon (Rear cabin) has an electric gate latch release.....Will need to see if it's worth fooling with.......I know the rear window has a heated glass.....Not sure if it is in good order......
Might be a good plan to make provisions in the new wiring to pick up those options.......We will see....
Heated....Powered.... Has turn signal and backup light (LED that lights up aft and to the sides)
Much larger than the Dodge mirrors AND the wiring will interface readily with the GM switches...
Looking over all my GM schematics for the various rigs.....THESE ALL include the various RPO CODES in the schematics (Regular production option)
These are USUALLY on a printed sticker in the glove box.....STILL PRESENT AFTER 30 YEARS...NOT LIKELY
After studying all the various difference it boils down to some added plugs for different mirrors (With signals and heaters)
The RPO tag is long missing on my donor rig.....We have a standard wiring harness.
The basic power mirror harness is all the same with the exception of the added wires IF the heaters and signals are present.
The other difference is wire color.
The S-Wagons used the older standard color codes through the GEN 1 rigs.....Gen 2 was all together different
The mirrors I ordered up are for GMT 400 trucks (1988-1999) (With a couple odd ducks)
The wiring plugs are all the same ......Wire colors changed but the locations in the plugs are the same...
CONFUSED YET ?????

After several cups of coffee and comparing the schematics of the S-wagon, The GMT 400 trucks and the Square body rigs......I got it scoped out..
Bottom line is to have parts that are replaceable, available and to be able to get all things functioning easily......
STANDARD OFF THE SHELF STUFF
Some parts look great....until you go to find them.....So many have been discontinued by the mfg and NOT picked up by the after market.
Even though the S-Wagons are popular.....The Gen 1 parts like switches and such are tough to locate......
Lots of parts like sheet metal and such are readily available in the after market...AND the bone yards.
So this little adventure is coming along nicely.
The last thing I want is to have the cat with parts that can't be readily replaced......Especially electrical stuff.
Looking at tracking....Looks like the new mirror switch is at the post office and the shifter should be here today .....
I want to get the new mirrors on the table and TEST wire them up and make sure we have proper function.
Then make up the wiring diagram accordingly to allow the wires to all connect easily at assembly
Ordered up a good chunk of 16/21 cable (16 gauge with 21 colored conductors)
This will allow wiring the mirrors, rear door locks and a few other items into the new switch panel
Stuff like the factory lighting will all be kept pretty much as GM had it with a few exceptions....
The tilt hood will require some rerouting and lengthening of the front wires.
Wires to the rear cabin will jump across from the front cab and then connect via a multi wire plug (Tail lights, dome lights, signals and such.....also the fuel gauge wiring is in that bundle.
Two tanks going in......So will add a switch valve to swap tanks and change the sending units from Left to Right
I hope some extra time thinking this through will allow for stuff to go smoothly.
All engine controls will use existing factory under hood wiring....so no worries.
Dash controls and things like ignition switch, signals, head lights.....interior controls are all right where MA GENERAL put them.
Really pretty simple.....Just a lot of midnight oil and coffee to get it RIGHT ......OH YESSSS....There will likely be a few change orders.....BUT THE EXTRA THOUGHT should keep it to a minimum......
The new shifter has the switches for the neutral safety (N&P) as well as backup lights
The TH350 tranny does not use any electrical stuff at all....
I think the tail gate on the S-Wagon (Rear cabin) has an electric gate latch release.....Will need to see if it's worth fooling with.......I know the rear window has a heated glass.....Not sure if it is in good order......
Might be a good plan to make provisions in the new wiring to pick up those options.......We will see....
Snowy Rivers
Well-known member
OK
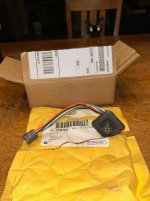
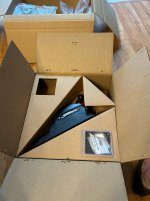
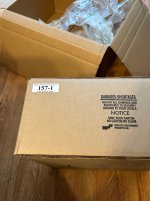
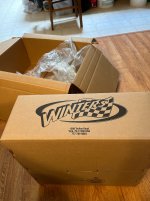
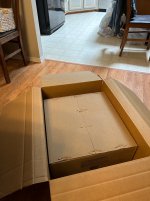
Goodies showed up today....
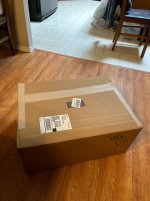
Of all the posts at various forums over the years....I HAVE NEVER DONE AN UNBOXING BEFORE
I see so many you tube videos of an UNBOXING
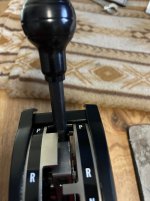
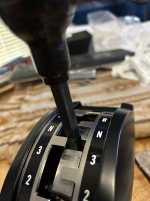
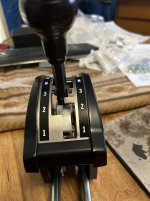
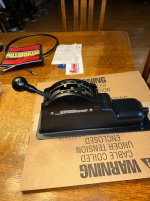
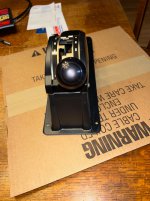
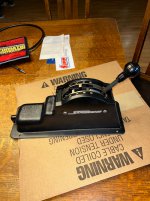
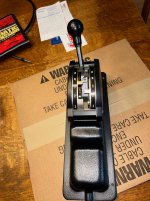
Well the shifter for the cat showed up..
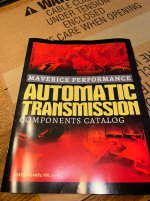
So here is the unboxing...
I have been as mentioned before looking at shifters, reading write ups/reviews and sundry other blather about shifters....
There are enough shifters out there on the market to choke a damned horse.....
I wanted rugged...simple....reliable and without any stinking magic box to make it work...
The off road magazines have had great reviews on the Sidewinder.....
Now it takes a lot to impress me much any more....So much crap out there on the market.
You had better get up early and really have the collective chit together......
This bad boy has definitely got it together....
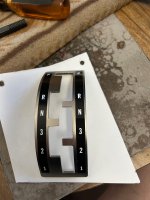
Rugged, well designed, simple......AND....IF YOU WANT A CUSTOM LAYOUT.....Parts can be changed to add a pull up safety catch on the lever to keep the shifter from going into reverse or park without pulling up on the safety....
Reverse order gates....Rock gates that allow fast Reverse to Forward for the crawling maneuvers.....
I may not use the plastic housing....THE SHIFTER CAN BE MOUNTED WITHOUT THE CONSOLE....
Once I can get it in the cab....We shall see how things can mount and work well.....
Attachments
-
 IMG_5994.jpg265.2 KB · Views: 56
 -
 IMG_6008.jpg354.8 KB · Views: 61
 -
 IMG_6007.jpg312.1 KB · Views: 61
 -
 IMG_6006.jpg365.6 KB · Views: 57
 -
 IMG_6005.jpg382.2 KB · Views: 56
 -
 IMG_6004.jpg379.3 KB · Views: 51
 -
 IMG_6003.jpg264.7 KB · Views: 47
 -
 IMG_6002.jpg358.4 KB · Views: 52
 -
 IMG_5999.jpg356.4 KB · Views: 54
 -
 IMG_5998.jpg347.2 KB · Views: 55
 -
 IMG_5997.jpg361.9 KB · Views: 52
 -
 IMG_5996.jpg355.5 KB · Views: 49
 -
 IMG_5995.jpg389.7 KB · Views: 55
Snowy Rivers
Well-known member
Decided to massage the new switch panel for the Cat.....Needed a collective spot to have all the extra controls available in a neat and tidy fashion.
Plenty of room between the bucket seats to add a pedestal of some sort to mount the little box/
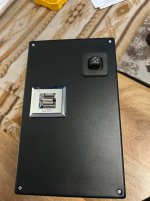
I grabbed the box a bit ago and laid out the location of the mirror control and the door lock/unlock switch for the rear doors.
Masking tape and a bit of finesse to get the holes cut to fit the switches.....These switches have spring clips that snap the switch neatly into the box.....
Other switches to follow for the Amber overhead light bar/s
Snowy Rivers
Well-known member
The new BIG AZZ HERKY mirrors arrived today....
Very excited to get these bad boys out of the box and see how the work.
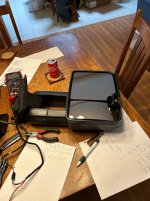
The plug is identical to the original from the S-Wagon....Sweeeeet....I plug the new mirror in and grab the switch.
NO DAMNED JOY
Ok......
The colors on the mirror are not even the same.....
I grab the VOM and check things....The motor wires are diagonal in the mirror plug..(A quick check until I got a reading between pairs)
BUTTTTTTTTTTTTTT....I still don't know which pair is up/dn and which is in/out
Hot wire the pairs to my little battery and get that debacle sorted out.....
Then.....There is a common wire and two others for each mirror....
A bit of trial and error and soon the new mirror is doing just what it should
The GM common wire is good to go.....and the rest just fell into place...
Typed up a fresh "Who's Who" schematic that will make the final assembly a breeze later on....
There mirrors are nice looking.....Beefy beasts......
Will be simple to mount them....A bit of a slight angle bracket on the upright on each side of the cab to get the mirrors level.
The GMT400 rigs have a slight tilt in in the door....No problemo...
Another step in the right direction......
A few pics
Attachments
Snowy Rivers
Well-known member
Hooked up the LH mirror to the wiring.....All good to go.
All apart and back snug in the box
I must say...the packaging was superb...Mirrors were in a nice clothe bag all fit into a white foam cradle with a lid....
Ready for the install when we get there.....Now the wiring schematic for the cab can be laid out and materials planned.
A junction box under the hood seems like a good idea.....
The shifter mounting and a place to mount the control panel/box for the extra stuff (Mirrors...rear door locks and likely other stuff) is all on the drawing board.
The top of the tunnel seems like a good place to fasten a mount that can hold the shifter as well as the panel box
At present I am thinking about using some exhaust tubing and bending it to form the needed places to anchor stuff....
We are a bit away on that.....But it needs to be done.
Current plan is to swap out the front cab for a much nicer one I scared up down south...Good windshield without cracks and everything is intact
I removed the bucket seat mounts from the S-Wagon so they can be welded into the front cab as the cab has a bench seat.....
Good there.......
Revisited the rear outboard brakes a couple days ago.
Looking over the caliper mounting and the bearing assembly to allow the rotor to turn and the caliper to stay stationary......
The machine work needed was adding up......Not that I can't do it....Far from that.....Just a lot of time and fooling around.
The thought popped up that a front wheel bearing cartridge from the S-10 4X4 will give everything needed and ready to go to work.
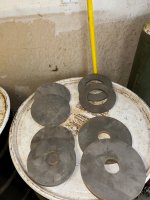
The same 6" long pedestal to bolt to the sprocket lug studs and the the brake disc (Same parts I had water jet cut) all will fit up.
A small bit of adaptation for the caliper mounting ears will be needed to fasten them to the rear of the bearing cartridge....
Now we will have a standard assembly that can be replaced easily if need be and readily available......
Always a better idea comes along.....Just try to get the best we can without spending $$$$$$$$$$$$$ too many times.....
As Kicker has seen on his Cat project.....These roll yer owns can present a lot of twists and turns and what was a gran plan yesterday turns out not such a good one.....CHANGE ORDERS RULE...
Attachments
Snowy Rivers
Well-known member
Grabbed up the new shifter and took the plastic box off.....
Yesterday I snooped around and looked at the accessory mounts available for custom apps.....NOT WHAT I NEEDED
Best plan is to build my own from scratch.
The shifter is going to mount on a pretty steep angle with bright metal part pointing down at the floor so the cable can have a nice gentle bend down in the belly of the cat and then connect to the tranny.
The exact location is still a little fuzzy.....Decided to do some cardboard engineering here and get an idea.
The plan is to use 3" exhaust tube with a 90 degree bend on it and the end expanded to fit over another piece of the same size tube.....
The assembly lays on the tunnel in the cab.....with the one tube basically straight up and down just about where the original stick shift came up......
The second tube lays front to back on the top of the tunnel with a 90 degree bend and a leg facing upward.....
The rear upright will offer a great place to mount the auxiliary switch panel .
The front section can slip over the rear section at the floor level and allow a light bit of rotation to adjust the shifter attitude...Then weld in place
The entire assembly bolts to a couple small brackets on the floor so it can come out easily in case under dash access is needed.
A couple pics
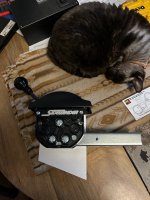
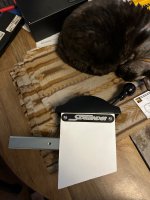
White cardboard (Will be a piece on each side...14 or 16 gauge sheet steel) formed to snuggle up to the steel tube ....The attitude adjusted and then welded to the tube....
Two 1/4" bolts (Came with shifter) fastens shifter to the bracket. (The name plates are cool...will leave them)
NOTE THE HEAD ENGINEER SLEEPING ON THE JOB
Attachments
Last edited:
Snowy Rivers
Well-known member
Got to fooling with the Sidewinder shifter yesterday.
The thing is simple as hell...BUTTTTTTTTTTTTTTTT..The shifter must by pushed into every position....It does not auto lock into park and other important places.
You must rock the shaft back and forth and the spring loaded balls roll over the little black piece and cause the shifter shaft to stay where you put it
The shaft could be bumped out of park or accidentally shoved where you do not want it to be...
Got to reading a couple articles and watched a YOU TUBE Video on it....RADESIGN in Spokane makes a replacement piece for the black part from aluminum that centers the shifter....The gates hold the thing where you put it.....
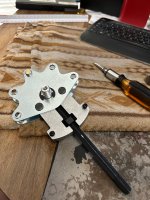
BUT....Ya gotta rip the little puke apart .....
The only part that sucked with driving out the roll pins they used to capture the shifter rod and keep the springs and 3/8" balls in the assembly
Getting those pins out was a PITA.
I switched things around and modified things just a touch to add Allen screws with nylock nuts.....I hate using a club on fairly delicate stuff....Those pins were a real azz hole..I even soaked them with lube too....
The new aluminum centering part will be here in a few days.....
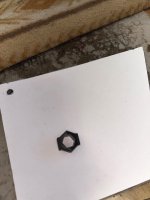
The new part slips on the hex shifter shaft and then the assembly goes back together..
The shifter then catches the gates in the center LOCKING the unit where you put it...
You must move the lever left or right to allow it to pass the gates.....
This little mod was well worth doing.....Will make a good shifter a bunch better....Safer too.
Attachments
Snowy Rivers
Well-known member
I have examined the shifters every part.....I made the statement that this was a great looking piece......
It does have a few areas that do not make me feel warm and fuzzy......
Some internal mods are happening.
Beside the screws being added to the main internal frame....Took the pin out the connects the cable attaching end and tossed it....The pin had a cotter pin in it....This is a PITA to get out to assemble the cable to the shifter when getting things put together.....Decided to replace this with a stainless 5/16 Allen screw and a Nylock nut.
A small mod to the shifter frame was needed to allow a socket to fit in and access the nut.....Waaaaaaaaaay easier to work on now.
The new detent should be here soon.....Then the unit can go back together.
The main pivot shaft is aluminum......It rides in the aluminum housing....Alloy on alloy is a bum jump ....Galling is a possibility.....
For now I lubed the parts well.....I may machine a brass shaft to make sure things don't get hinky.......
My feeling is that the shaft should have been anodized .....Would have been perfect...
Dry is great for a dirt buggy.....But the cat can allow some lube...even graphite would be sweet.
Last edited:
Snowy Rivers
Well-known member
Yesterday was HOT
We have had cold rainy weather for many days and snow on the 19th.....and then 90F yestertday
Was time to service the central AC here in the house.....Clean the filter, check the condenser unit for crap that may have been blown into the fan area, clean the moss that comes every year to the fins on the damned thing.
Make sure the fan turns easily.....Fire the unit, check the pressures and the delivery air temps....
Filter was filthy.....Washed it out.. (Polymer static type reusable)
UNIT RAN GREAT....29 YEARS OLD NOW......."Fingers crossed"
Then off to the post office to get my Cat parts.
The little upgrade for the shifter arrived.....
The "centering modification" was very well made.
Slipped right onto the shifter hex shaft.
The shifter hex shaft was originally held in by a roll pin (A real BEOTCH to remove)
Also the detent springs and balls were held in by roll pins......Also a pain to get out.....
Decided to oversize the retainer holes in the spring/ball passage to allow using an 8-32 Allen screw retained by a nylock nut.
A 10-32 Allen screw replaced the roll pin on the shifter shaft.
NOW
The assembly goes together very easy and without thew need for a CLUB.
The shifter stays where you put it and can't easily get knocked into someplace you don't want it.....
MUCH SAFER
Well worth the time and few $$$ for the parts needed....
We have had cold rainy weather for many days and snow on the 19th.....and then 90F yestertday
Was time to service the central AC here in the house.....Clean the filter, check the condenser unit for crap that may have been blown into the fan area, clean the moss that comes every year to the fins on the damned thing.
Make sure the fan turns easily.....Fire the unit, check the pressures and the delivery air temps....
Filter was filthy.....Washed it out.. (Polymer static type reusable)
UNIT RAN GREAT....29 YEARS OLD NOW......."Fingers crossed"

Then off to the post office to get my Cat parts.
The little upgrade for the shifter arrived.....
The "centering modification" was very well made.
Slipped right onto the shifter hex shaft.
The shifter hex shaft was originally held in by a roll pin (A real BEOTCH to remove)
Also the detent springs and balls were held in by roll pins......Also a pain to get out.....
Decided to oversize the retainer holes in the spring/ball passage to allow using an 8-32 Allen screw retained by a nylock nut.
A 10-32 Allen screw replaced the roll pin on the shifter shaft.
NOW
The assembly goes together very easy and without thew need for a CLUB.
The shifter stays where you put it and can't easily get knocked into someplace you don't want it.....
MUCH SAFER
Well worth the time and few $$$ for the parts needed....
Attachments
Snowy Rivers
Well-known member
Looked over the package of goodies to connect the Morse cable to the shifter......The parts to connect the cable to the tranny is OK...BUTTTTTTTTTTTTTTTTTTT....Room for improvement.
The connection at the shifter was not gonna cut it....NOT EVEN
Too many small parts to try and fight together in the confines of the cab......The pin in the shifter where the cable connects is a BEOTCH to deal with and a cotter pin to fight with.......
NOOOOOOOOOOOOOOOOOOOO
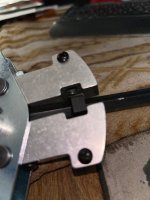
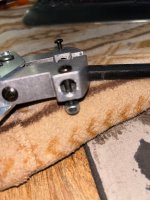
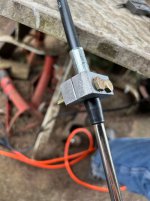
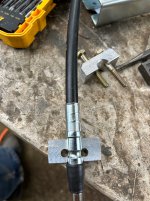
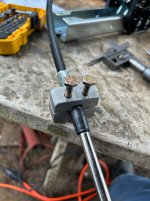
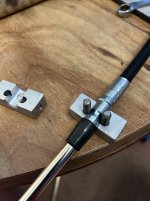
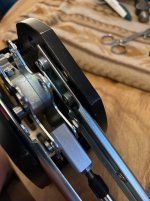
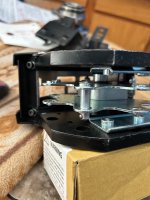
Decided to design a split clamp with two bolts that slide into the groove on the Morse cable.....Far better than the stamped steel half strap that came with the kit.
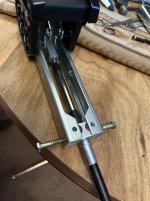
Ended up with an aluminum block that fits into the shifter.....Two flat head 1/4" screws slip down past the groove in the cable and the assembly slides in the rear of the shifter and is fastened by two 1/4" Allen screws.....I DID NOT HAVE THIS IDEA TOTALLY WORKED OUT....I stuck a couple hex bolts in....Will get bolts tomorrow.
Easy to buckle up and slip together.
Went with a custom 5/16" button head Allen with a THIN nylock nut to hold the screw (Had to cut the head down a touch so it could pass through the holes in the shifter frame.....
Very easy to get together.
The cable must be hooked up to the tranny and then slipped up through the hole in the floor of the cab as it is set down onto the cat frame.....Then the cable can be be buckled up to the shifter......
Much more robust connection.
Some pics
I will admit......Some of the setups in the mill to get the center hole were pretty hinky.......
I had the alloy bar....It was a touch too wide to go into the rear of the shifter.
I laid out the holes for the bolts that go along side the cable.
Then cut the block in half.....Machined the halves to allow the block to slip into the shifter....
Bolted the halves together and laid out the center hole....Drilled the pilot hole (3/8") Then removed the bolts and with a 3/8 pilot pin in place got the parts back in the mill vise.
Opened the hole up to 1/2" (Cable end size)
Counter sunk the bolt holes to allow the two Allen screws to sit flush when installed.....
With the assemble in place....laid out and drilled the two 1/4" holes in the end of the block to fasten it into the shifter.
Tapped the holes 1/4-20
Asked THE Snowcat Gods for their blessing......It all fit together......
Once the Short 1/4" Allen screws are in place....It will be Complete.....
Unfortunately the manufactures can't make their goodies work perfect for everybody.....Custom parts are always an
option..
Some of the stumbling block are common to the 2100 chassis....With the full closed tub design ...Getting into the belly of the beast was always an issue.....
My cat did have the tilt cab....which made access very easy.....Sadly doing a tilt with the S10 cab is not in the offing.
With the tilt front end the engine will be easy to service......
Tranny.....????? Gotta yank the cab off........
Having the split cabin setup.....Will make removing the front cab pretty easy.....
All wiring and plumbing will be easy to unhook.......
It was great being in the shop today and working on the cat again.....
Cool day...but comfortable....After the 90F Friday....Very nice......
Attachments
Last edited:
Snowy Rivers
Well-known member
Weather still crappy.
The shifter mods are just about done.
Getting the cable connected to the shifter is a real NO GO
The new cable end clamp/mount is splendid..
The little block that connects the actual cable to the shifter has a "Clevis pin" with a cotter in it.....With the shifter mounted...getting at the pin to deal with the cotter....ESPECIALLY after bending the cotter is a game stopper.....
Need needle nose pliers or two and a lot of vile language.....
The new mounting bracket has a hole in each side in the front lower quadrant to access the pin hole.....But nearly zero access.
Sooooooooooo....There had to be an easier way....
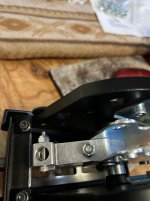
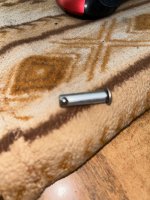
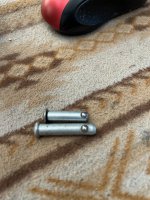
I scared up some clevis pins that have a spring loaded ball bearing that secures the pin after it is pushed through the shifter inner arms..
Sadly....all the looking did not find any pins that were the proper length....Waaaaaaaay too long mostly
I need a working length of 7/8" to slip in and lock.....The head diameter is about .450"
As is the norm on this project....If ya can't buy it....YA MAKE IT
So I tossed the pin in the lathe....machined the head off ...shortened the pin...then drilled and tapped the pin for 10-32 threads to accept a pan head screw.
Screws are on the way.
I will make up a few of these special pins just in case.....
These mods will allow the shift cable to be fitted to the shifter with a 7/16" box wrench and a small screw driver to use to shove the pin through.....
Quick and simple assembly......
I don't anticipate having to work on the shifter out on the trail.....But I absolutely hate stuff ya have to fight.....
The shifter is so very simple.....lets keep it that way.....
Last fall when we were mounting the S-Wagon on the rear of the cat we had a slip in the rigging and we FUBAR'D the RH rear door handle....
Just ordered one of those up...
After we messed up that handle It was obvious we needed to modify the lift rig a bit to keep from having another handle get broken OR WORSE.....
And it was so......
The winter winds had turned the front part of the S-Wagon upside down during the ice and snow.....Got it right side up and things such that I can scavenge the bucket seat mounts off the floor pan....
Seat mounting bolts are the same on the outside (Bench and bucket) but the buckets have the inner bolts that are part of a bracket that spot welds to the floor pan.
Drill the spot welds out and these come right off.....
Had planned on rubber floor covering.....But the complete factory type carpet WITH PAD ATTACHED is much less $$$$
The carpet and pad in the cab is trashed and stinks......Burn pile stuff....
I think a piece of aluminum sheet with the seat track holes transferred to the sheet can work sweet to locate the inner seat bolt brackets for welding into the front cab.... So we don't set the seats on fire
Once the seats are located the shifter mounting can go ahead.......
Snowy Rivers
Well-known member
The adventures of shopping on ebay......
Does not matter what you are looking for...be it car parts, Snow cat parts...household goods, electronics....ebay has it all..
I have been using ebay since it came to be a looooooong time ago...
Every once in a while shipping goes Hinky.
I ordered some fasteners the other day and they were supposed to be here Saturday.....Yeah Right...
The tracking showed "In process...Arriving late"
This morning I checked the tracking .....The items were in Guam and being rerouted back here.
Shipped from Minnesota ....Hmmmmmmm...Somebody tossed the package in the wrong bin me thinks.....
So it will be a few more days until I see my parts........
I have purchased stuff for this project off ebay that came from Europe (Bearings) Took a while to get here.....Worth the wait though....
I often wonder if the long journeys are on account of bored postal workers ?????
Snowy Rivers
Well-known member
Grabbed some tools and took advantage of somewhat decent weather this morning.
Removed the bucket seat brackets from the front section of the S-WAGON.
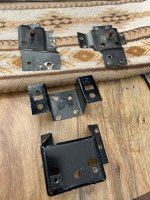
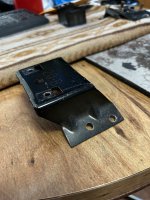
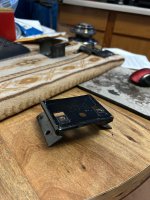
Drilled out the spot welds and got all the needed seat brackets as well as the center console mounting brackets.
The rear console bracket is pretty sturdy and can weld into the front cab....The forward mount is not so much....Will scare up a chunk of suitable sheet metal channel or tube to build the front mounting platform for the shifter mount assembly.....
Using the factory seat mounts is a real plus....These go right in and allow the Blazer seats to bolt right in where the bench seat was mounted......
I have all the nuts and other hardware all saved from the dismantle last summer....
Just a piece at a time....
Attachments
Snowy Rivers
Well-known member
I decided to head on down to the local steel yard and snoop through their One area in the shop where they have "Over runs"....Stuff that was made wrong....and other oddities .....
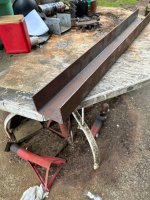
The rear bracket that was spot welded to the hump was really pretty sturdy....Needed a piece of sheet metal channel....maybe 14 gauge or ????? 3" to 3-1/2" wide by maybe 2" on the legs
It was worth a look.
Found a 2 foot chunk of 3-1/4" 10 gauge channel with 2" legs
The rear part shown in the piccy is nearly the same width...Within 1/16"
PERFECT TO MAKE THE FORWARD MOUNTING TO THE FLOOR PAN FOR THE SHIFTER MOUNT......Also will hold the extra electrical panel/s
Way more material than needed....But for $15 .....good deal....
Attachments
Snowy Rivers
Well-known member
Good weather is getting started.
Spent some time on the cat this morning getting after a few things.
The center supports (Center mount on the S-WAGON CABIN) are not really needed as far as holding the rear cab in place...But having a support under that section seems like a great idea....Soooooop...Got measurements and drew up a sketch so these can be built.
The next plan was looking at the original side moldings on the doors and rear quarter panels...The cab had chrome plated finished ones that are YUCKY.
The S-Wagon doors (Rear) and the rear quarter panels are also pretty skunky looking.....
Aside from being mismatched (Blazer was a different year than the front cab.....
This crap needs to go away.....
Sun was warming up the body nicely this morning and a little coaxing with a plastic trim tool and they were loosened up and ripped off...The west facing side was still cold....Not so much fun there.
I had thought about replacing.....A$$$$$$$$$$$$$$...WHY...NO NEED FOR THIS STUFF
I got a rubber tool that will buff the old sticky tape off of the area.
The plan now is clean the body sections well....especially the roof the the S-WAGON and treat the rusty spots......
Going to do a roll on finish with Bed liner over the entire body parts.....Rugged and easy....
Some stripes down the side.....Orange or lime green and some complimentary stripes elsewhere are also in the offing....
I have no desire to do any sort of fancy paint job on this beast......Brush whipping as may certainly happen will be far better tolerated by the bed liner.
I had considered removing the top rack off the S-Wagon.....The rack is bolted through the roof and any likelihood of getting the bolts loose are slim to none.....The rack will not hurt a thing....
I was inside the S-Wagon this morning and it is nice a dry...even after the long wet winter......
The new bulkhead we built last summer did well and no leaks......
As soon as it can be arranged the S-Wagon portion is coming back off....Will set it back on the large truck tire .....This will allow the cleanup work on the sides as well as other needed work to be done easily without the need for a ladder to get inside.
Over the summer the wiring can be sorted out and connected to a junction box as well as replacing the door handle we ripped off while mounting the Wagon portion last summer.....
The outer body panels can be cleaned and prepped for the bed liner coating.....
The forward windows in the bulkhead can be added too....
The head liner that has spent the winter calling our spare bedroom home can be shortened and reinstalled in the cabin..
Also the interior plastic trim panels can be put back in.......
Depending....We may be able to reinstall the folding seat in the Wagon .....Hopefully the weight will not be too much extra for the Skid steer to lift..
I am getting sort of excited about the "Black and lime green" finish.....Will be easy yo see...
The front cab, fenders and the tilt front end can be finished up where they are...At least the tilt front end needs to be fabricated so it works.
With the rear cabin off... the drive shaft can be squared away.....
I need to get the axle tubes on the OC-12 and at least temporarily mount it so the drive shaft can be cut to length and the center support bearing bracket fabricated and added.....
The rear portion of the exhaust system can also be finished up....
The addition of the S-Wagon did make a bit of a change order necessary as to where the exhaust would exit the chassis....
A minor change is all.... Basically out the rear corners instead of straight out the back.....
Still thinking about doing a veranda around the rear to allow easy access to the rear tail gate area.....
Will see how that goes.
I can see that it looks like the rear cabin can stay off the cat now for quite a while.....Allowing other work to progress.
Still looking for a better front cab....We will see what shakes out....
The 2100 chassis is pretty much good to go now.....All the wheel bearing hubs are fresh and good to go.....
Still have several new tires to mount up......
The big deal on the chassis is the radiator and mounting for the 406 Chevy and in this portion of the project will be the tilt front end too......
The nose of the cat will wind up looking similar to the original 2100 style.....
The original hood was gone when Kitty came here....The S10 CAB AND TILT HOOD will add it's looks...
Original grille is in good shape.....Gonna stay...
Getting excited again after the long cold winter.......
Last edited:
Snowy Rivers
Well-known member
Great Weather..
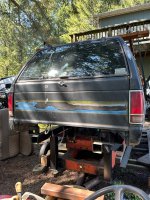
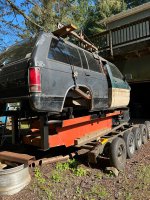
Getting ready to yank the S-Wagon cabin off the cat now so I can clean up the surface rust on the roof and finish getting all the crap off the sides left from the side moldings.
Then clean the entire cabin and refinish it with the Bed liner.
Sooooooooooooooo....
Getting the cabin off is easy.....Getting it back on and all lined up so it sits exactly proper....NOT SO MUCH
The original body mounts have about 1/2" of movement in the nut plates to allow adjusting things to fit (In it's original application)
Took a long time of fooling to get the S-Wagon (Rear cabin) set perfectly so the rear cabin and the front cab were such that all the seams and body forms looked like they should.....
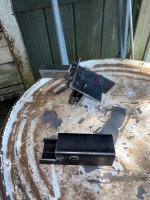
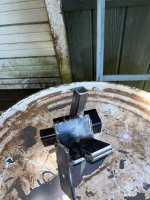
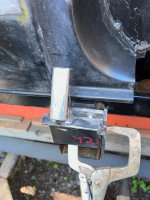
Decide to build a couple jigs so I can set the body back on the chassis and just lightly sit it where it goes.....Screw in the bolts and then have a couple positive stops that will place things exactly where they are now.....Without having to spend a buttload of time with a measuring tape .....Working alone makes it twice as hard.......
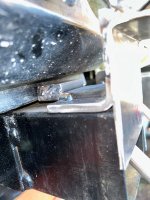
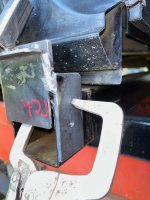
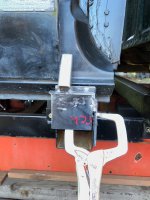
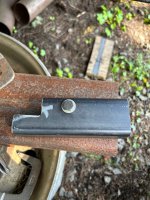
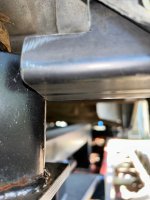
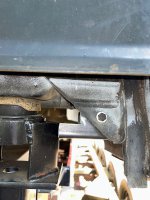
So here are the pics of what was "Cobbled together" to accomplish the needed task.
The rear fixture bolts to the rear body and when it contacts the rear mount platform.....Good to go....
The forward fixture bolts to the cross tube that supports the front of the cabin.....One area registers on the lower pinch weld to locate side to side.....A small tube extends in and registers on the front edge of the door.
These will make my life far easier......Will need to build a pair of fixtures similar to locate the front cab in the same manner.
The front cab can stay for now as the tilt front end has to be fabricated.....
Some pix
Attachments
-
 IMG_6100.jpg424.1 KB · Views: 66
 -
 IMG_6099.jpg409.4 KB · Views: 61
 -
 IMG_6098.jpg361.9 KB · Views: 61
 -
 IMG_6097.jpg342.6 KB · Views: 56
 -
 IMG_6096.jpg330.5 KB · Views: 55
 -
 IMG_6095.jpg348.9 KB · Views: 60
 -
 IMG_6094.jpg504.6 KB · Views: 62
 -
 IMG_6093.jpg261.8 KB · Views: 60
 -
 IMG_6092.jpg366.6 KB · Views: 65
Snowy Rivers
Well-known member
Hot weather is here with a vengeance .....Had to replace the tail gate lift Cylinders on the 05 Burb we picked up back in Feb....
Decided to get a bit of work done in the shop (Much cooler in there)
The self locking clevis pins arrived.....
Had to machine the head off the pin and shorten the effective length up to 7/8" and shorten the nose end a bit so the pin will not hit the inner parts of the shifter.....
Machined the pin to length, drilled and tapped the pin for 10-32 threads and installed a pan head screw.....
Checked the dims and did a trial fit.....
Added loctite to the threads.....Good to go.....
Some pics
I have been looking for a better cab for the front of the Cat.....The one I have had seen tough times....Some clown shorted out the electrical system and I am not sure what all got fried......
Been looking for a donor rig that had not been violated so much...
Got a call from a fella down state about 250 mile trek from here that has a fairly decent 84 S10 single cab
He is heading to Goldendale Washington next week and offered to bring it almost here....
We have a meeting Scheduled about 30 minutes from me right on the interstate Hwy at the Scales....
Beats the hell outta driving 500 miles to get this Wretched little truck........
Gonna be sweet getting a donor rig that is decent......
The one we have has served a good purpose....GETTING THE CAB MOUNTS BUILT AND LOCATED ON THE CAT.....
Attachments
Snowy Rivers
Well-known member
The donor rig down state turned out to be UGLY MESS
Gonna keep the one we have.
Got after the cab with gusto today.
PLAN....
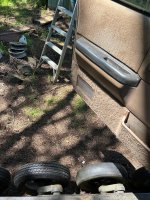
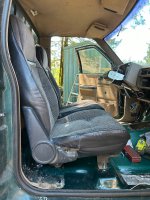
Get the bench seat out
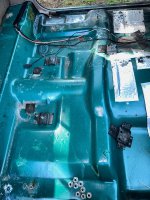
Yank the carpet out and toss on the burn pile (NASTY MESS)
The first snag was getting the seat belt winders unbolted.....The T50 torx bit broke.
Took the die grinder with the cutt off wheel and cut the bolts off just below the floor in the spot welded nut assembly.
Will use a nut when these go back in.
I had removed the inner seat mounts from the S-Wagon last fall and recently salvaged the other mounts.
Got these all sitting on the floor pan.
Once the bucket seats are in the cab the outer two bolts (Same as for the bench) will locate the seats.....Will get the inner mounts located and weld them to the cab floor....
Once the seats are in....Then the mountings for the shifter go in.
Got to get a piece of sheet metal and fit it to cover the original gear shift hole.
Getting the seats fit will take a bit of time......
I saved the tilt column from the S-Wagon.....It can go in the cab to replace what I had started some time ago.
The Good column is in great shape....All the controls work too.....
Getting he shifter in and mounted is important......The shift cable access port out through the floor can be located and cut in......
The plan is to clean up the cab.....Seating......Shifter.....Get the column in and all the wiring back in place.....
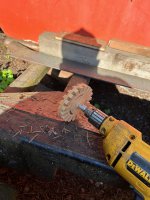
I went after the side moldings with a rubber wheel to get the sticky goop off the cab.
Removed the CHEVROLET trim panel off the tailgate of the S-Wagon.
Not going to leave any of this stuff on the rig......
Getting that goop off the paint is a real PITA......The rubber tool does pretty good.......
The rear trim panel was loose near the top and full of dirt......
The gate had been swapped on from a different rig.....BLUE
I replaced the heater core back when I first got the cab.....It had been leaking.
Carpet pad was soppy wet with green juice......
Got a complete set ot new outside door handles....
The originals are worn badly....When we lifted the S-Wagon last fall we hooked the RH handle on the S-Wagon and broke it...
These are cheap....Might as well fix all of them now.....
A lot of the crud on the body is just dirt and green junk from sitting over the winter....
Had a good day today.....
Attachments
Snowy Rivers
Well-known member
Yesterday was a good day.....
Grabbed the drivers side bucket seat and tossed it in the cab....The two outer bolts that ARE SUPPOSED TO BE THE SAME ....THEY ARE...The seat fit perfectly.......
Set the inner brackets in place and snugged the nuts up ....The brackets from the S-Wagon body fit the floor perfectly....
Decided not to weld these in.....No sense in burning the paint off ....I have a super heavy duty POP RIVET TOOL with LOOOOOOONG handles that can handle 1/4" steel rivets.
Going to use the holes where I drilled out the spot welds and rivet the brackets to the floor.....This will see 4 rivets on the rear inside brackets and as many as 8 on the front inner brackets...
Once both seats are fitted.....Then the shifter hole can be fitted with a cover plate......
THEN comes the fun stuff.....Getting the shifter mounting stuff in.
That nice formed channel (Post 1549) can be cut to make mounts that fasten to the floor to hold the shifter as well as other apparatus such as electrical switch boxes and ???????????????
The floor brackets needs to be such that the carpet can be cut to allow the legs on the channel to protrude into the cab and allow other parts to be fastened......
This is a design as you go thing.
One major change was to totally go away from having the steering controls on the steering column.
Sitting in the drivers seat yesterday it was very obvious that once the Tilt column is back in and the padded wheel attached NOTHING should interfere with the visual of the dash gauge panel.
All the gauges are in what appears to be good order and they are placed well for a good visual
The steering wheel (Shaft anchored solid/NO TURN)
This will give the operator a good place to grab getting in and out of the cab as well as a point to keep from getting tossed around while operating.
Mounting the single Electric JOY STICK on the soon to be center bracket assembly may be a sweet plan.
A nice padded rest that allows good access to the control stick and do so comfortably.
An adjustable arrangement may well be a plan too..... A slider to allow the control to be moved LEFT/RIGHT as well as fore/aft
This could allow for different sized folks to get things comfortable......Pretty simple me thinks.....
Will see as things move forward.
As soon as the seat brackets are in I will get pics.......
Today I need to get after some domestics (Cutting grass and weeds around the house) Weed whacker needs a tune up.
NOT WHAT I WANT TO DO.....BUTTTTTTTTTTTTTTTTTTTT.....
Snowy Rivers
Well-known member
Domestics done....Did a tune up on the Husqvarna weed whacker....Got a complete tune up kit....Carburetor, spark plug, new fuel hose, air filter, gaskets.
Runs like new.....Alcohol in the fuel is rough on the little engines.....Fouls those tiny carbs
After getting some blackberries whacked ...it was cat time.
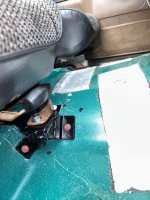
Got the drivers seat in and the seat brackets (Inner) temporarily screwed down until the pop rivets get here
Seat is great....Comfy.....55" from the ground to the seat cushion....
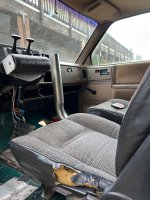
Got some nice views from the command chair.....Fore and Aft.
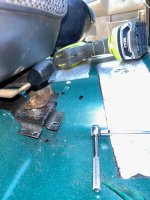
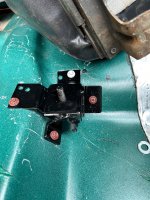
The Right seat inner bracket will need a little modification.....The floor pan on the S Blazer is slightly different than the Standard cab pickup....The piccy shows the two front ears on the bracket just hang way off the floor.....
A bit of cutting and adding some new metal....Be good to go....
Overall....Not too bad....
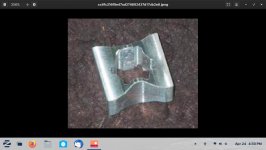
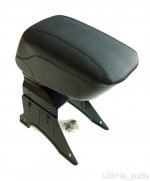
I scared up a cool little UNIVERSAL arm rest that seems as though it will work sweet to mount the steering Joy stick...
Soon as its here I will get it up in the cab .....Having full steering controls on one joy stick should be sweeet...and a cushy place to lay your arm ....."MORE GOODER"
A piccy from the ad....
The arm rest is a universal....Should be able to fasten to the floor and allow the operators right arm to lay comfortably and grasp the steering control
Attachments
Last edited:
Snowy Rivers
Well-known member
A good day....
Got after the one passenger side seat bracket early this morning.
Gave the mods needed some good "Sleep on it"
Took the bracket to the ANVIL and went after it with a healthy club....
Straightened out the two front tabs....The after rummaging through some little parts left over from one of the earlier CHANGE ORDERS I found two little angles that were perfect...
Tacked them up....Did a trial fitting....made a couple small tweaks....
JUST LIKE DOWNTOWN.....
As soon as the steel pop rivets are here....BLAM....NAIL THINGS TOGETHER....
Got after the one passenger side seat bracket early this morning.
Gave the mods needed some good "Sleep on it"
Took the bracket to the ANVIL and went after it with a healthy club....
Straightened out the two front tabs....The after rummaging through some little parts left over from one of the earlier CHANGE ORDERS
 I found two little angles that were perfect...
Tacked them up....Did a trial fitting....made a couple small tweaks....
JUST LIKE DOWNTOWN.....
As soon as the steel pop rivets are here....BLAM....NAIL THINGS TOGETHER....
Attachments
Snowy Rivers
Well-known member
I used pole building screws for the temporary fitting,.....
The nuts are just 10mm flange headed nuts....Once the carpet is in and whatever S10 seats end up gracing the cab....The locking nuts will go back in then........Waaaaaaay too many times tight and loose to fool with the lockers during the build up........
Now on to the floor brackets for the shifter......
Tomorrow the shifter gets it's first trip to the cab....
Do some butt dyno engineering now that the seats are in stable...
Need to cut and fit the cover for the original factory shifter hole in the floor.....Then the new shifter mounting can start taking shape.....
The arm rest gizmo is on it's way from across the pond (Europe)
I really want to get a good visual on that item before getting too far into the shifter mount....I DO NOT WANT A TRAIN WRECK.....Do it right the first time...

Snowy Rivers
Well-known member
Got onto the base for the shifter mount.
Tedious work with a lot of climbing up and down in and out of the cab....Arrrrrrgh
I had originally planned to install some 5/16" Rivet nuts into the floor pan to anchor the base rail.
Nobody had any of the Rivet nuts....No way am I waiting 3-7 days to order them in.
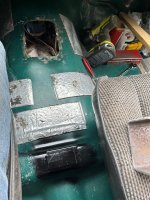
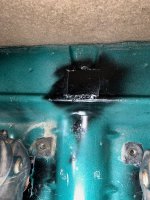
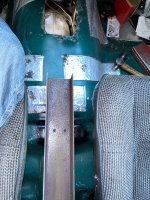
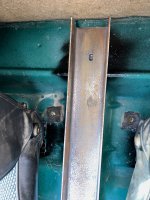
Rifled through the short stock and found some suitable material (1"X 2" BOX TUBE WITH 1/4" WALL) and some 1/4" flat bar to weld to the floor.....Drill and Tap 5/16"-18 ..... (Carpet gets holes cut allow the new steel items welded to the floor to clear)
Not going anywhere...
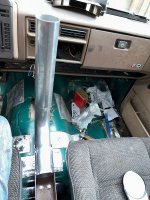
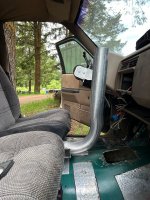
The shifter mounting tube welds into the base rail......(3" exhaust tube) Perfect size to fit the application.
Tube has a 12" leg that welds into the base rail....A nearly 90 degree bend and rises 24" up to just above the dash.
The shift itself fits in it's bracket that welds to the upright tube..
The shifter cable will drop through the floor close to the drivers side of the tunnel.....
The seats are not exactly evenly mounted from MA GENERAL.....Had to fudge the base rail to get it centered between the seats....
I would think these cabs would be very close as far as dimensions go....???? NOT
Some pics of the base rail front and rear.
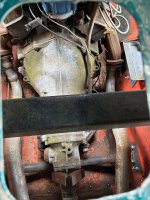
A shot down the old shifter hole looking at the tranny....
Tomorrow will stop off at the exhaust shop and get the 3" tube (Bent to fit) .....
Thius will get things looking pretty good.....The entire assembly will be stout.....May mount the auxiliary switch panel above the shifter......Will need to see just how it all looks as we get closer.....
Attachments
Snowy Rivers
Well-known member
I was able to get the Tubing for the Shifter mount bent today....
Did a little trimming and a couple test fittings.....
Set the tube in the base rail and welded it in place.
This stout addition to the cab gives us a great platform to mount the transmission shifter in such a way that the cable has a good angle towards the floor and on down to the belly of the beast and to the transmission.
The Morse cable used on these type of shifters are rugged...but DO NOT like sharp bends....
At this juncture things are looking quite favorably toward having a very nice cable routing down to the transmission.
The only caveat being the close proximity to the LH exhaust pipe.
Not a big deal....BUT...A heat insulator sleeve will be a good thing to use on the cable just to be sure the heat does not damage the cable.....
After getting the mounting tube in and welded (Base rail and the tube can be removed easily by removing three 5/16" bolts from the base rail.....
After looking at the proximity of the mounting tube and how close things are to one another......The column that was put in 2 years ago to replace the damaged column that was in the donor rig needs to come out and the tilt column from the S-Wagon needs to be installed.
While the S-Wagon column is in good shape as is the wiring....The only repair is to replace the ignition switch lock cylinder and get that all working smooth again......and replacing the switch....BECAUSE IT IS OLD.....
The stock ignition switch is a real plus as it controls all the electrical equipment in the cab.......
Having all the original wiring working will be sweet...The connections can feed all the sensors and such on the engine.
The dash cluster is in good shape as well....This is another plus...
Sooooo
We need to get the column in so the steering wheel can be where it will end up (Fastened stationary ......NO ROTATION...simply a nice place for the operator to grab getting in and out....The column also has all the multi use switches...(Windshield wiper controls.....Turn signals....Ignition switch....Head light dimmer switch)
The outer rim location of the steering wheel will effect the exact location of the shifter itself ....at least it will dictate the exact location on the mounting tube the shifter sits and the clocking.....
Since the steering wheel will not be rotating the issue is minor....but it needs to be dealt with to allow the shifter to have proper access on the side next to the wheel.....
Seems reasonable to get the wiring and little repairs dealt with now and then install the column and be done with it....
Then finish the install on the shifter.....
The arm rest unit is still in transit.....Another item to deal with.....Then the steering joy stick can be addressed.....
So far it looks great....The plan will solve several issue related to "Needed space in the cab"
Attachments
Snowy Rivers
Well-known member
Got a tracking number on the little armrest for the cat.....PASSING THROUGH Great Britain ....Heathrow Package sorting.....
Arrival is pegged at June 12th....My guess is a tad earlier.
We can work around this item for now.
Came up with a simpler idea to mount the shifter bracket to the tube upright.....
It needs to be super simple and able to easily install the cable into the unit.
Do to the location in the cab this is easier said than done.....
This mornings plan is to get the steel plates that bolt to the shifter cut to size and all holes drilled.....
Then a bit of welding to make it fasten to the upright tube.....AND BE ADJUSTABLE UP/DOWN....and ROTATE A BIT....
The new outer door handles arrived yesterday (The handles were a mix of Chrome and Black) Some badly worn and some just plain junk.....Decided to replace all and make them the same.
Door panels will be off at some point to clean up the window regulators and lubricate things, and also to replace the rubber "Sweeps"
Handles are easy to get to with the panels off.
I rebuilt the door hinges back when we first bought the donor cab....Good to go....
Still looking over the wiring on the column......
Studying the schematic until my head aches
Not really...
There are a few differences between the 91 S-Wagon Donor and the 92 Cab up front.
So far all I see is that the Blazer had cruise control....The single cab did not.
Wipers are the same style (Pulse ...intermittent function)
Ignition switch wiring on the plug is all the same.....(Color codes and what they do)
Turn signal controls are the same.....
Dimmer switch the same.
The neutral safety switch is a tad different.....The Blazer was an auto trans....The single cab was a stick.
The stick used a clutch switch......We have the 2 wire bundle and it's in a handy spot.....
A switch mounted to the Winters shifter will take care of the Neutral/Park safety......Thinking about a panel mounted momentary over ride switch to deal with any need to want to start in Neutral or ????
The switches that are offered for the shifter are not handy to get to in the shifter.....Decided to mount a simple single arm switch on top of the shifter (Will see as we get down the road)
Having a fail to activate the starter is not something I'm gonna deal with.....At least not willingly.
The starter is in a tough spot to access......
Possibly may add a starter relay with a manual button in the engine bay....Or ????
In case of a malfunction.....Be able to start up and gitterhome....Easy to think this through now rather than out on the trail as a SHOULD HAVE DONE IT...
All the wiring under the dash is tight.....Very little room to get at stuff.
All the wires going to the column assembly are gonna get an addition of about a foot added to them to make acesss easy.
Dropping the column down is not bad.....TWO bolts....Unplugging stuff....A royal pain in the butt......
Extra wire length will allow much easier access....
At the factory level the entire dash is assembled as a separate unit and stuffed into the cab....plugged in and done....Doing repairs afterwards.....Tough...
Heater controls on this unit are basic.....A single cable for the heat adjustment and a vacuum switch to control the various doors in the heater box....... About as simple as it gets.....ALMOST
Later rigs all had/have electronic servo motors to adjust things.....Not bad....Just very tough to service......
Simple is good
The donor cab had AC...Removed all that and installed the non AC heater box (Engine bay side)
Earlier posts showed the mods made to this on the Blazer (S-Wagon) before we cut the body in half to allow easy install on the 2100 chassis ....This material will go on the single cab as things move ahead....A CHANGE ORDER YA KNOW....
Arrival is pegged at June 12th....My guess is a tad earlier.
We can work around this item for now.
Came up with a simpler idea to mount the shifter bracket to the tube upright.....
It needs to be super simple and able to easily install the cable into the unit.
Do to the location in the cab this is easier said than done.....
This mornings plan is to get the steel plates that bolt to the shifter cut to size and all holes drilled.....
Then a bit of welding to make it fasten to the upright tube.....AND BE ADJUSTABLE UP/DOWN....and ROTATE A BIT....
The new outer door handles arrived yesterday (The handles were a mix of Chrome and Black) Some badly worn and some just plain junk.....Decided to replace all and make them the same.
Door panels will be off at some point to clean up the window regulators and lubricate things, and also to replace the rubber "Sweeps"
Handles are easy to get to with the panels off.
I rebuilt the door hinges back when we first bought the donor cab....Good to go....
Still looking over the wiring on the column......
Studying the schematic until my head aches

Not really...
There are a few differences between the 91 S-Wagon Donor and the 92 Cab up front.
So far all I see is that the Blazer had cruise control....The single cab did not.
Wipers are the same style (Pulse ...intermittent function)
Ignition switch wiring on the plug is all the same.....(Color codes and what they do)
Turn signal controls are the same.....
Dimmer switch the same.
The neutral safety switch is a tad different.....The Blazer was an auto trans....The single cab was a stick.
The stick used a clutch switch......We have the 2 wire bundle and it's in a handy spot.....
A switch mounted to the Winters shifter will take care of the Neutral/Park safety......Thinking about a panel mounted momentary over ride switch to deal with any need to want to start in Neutral or ????
The switches that are offered for the shifter are not handy to get to in the shifter.....Decided to mount a simple single arm switch on top of the shifter (Will see as we get down the road)
Having a fail to activate the starter is not something I'm gonna deal with.....At least not willingly.
The starter is in a tough spot to access......
Possibly may add a starter relay with a manual button in the engine bay....Or ????
In case of a malfunction.....Be able to start up and gitterhome....Easy to think this through now rather than out on the trail as a SHOULD HAVE DONE IT...
All the wiring under the dash is tight.....Very little room to get at stuff.
All the wires going to the column assembly are gonna get an addition of about a foot added to them to make acesss easy.
Dropping the column down is not bad.....TWO bolts....Unplugging stuff....A royal pain in the butt......
Extra wire length will allow much easier access....
At the factory level the entire dash is assembled as a separate unit and stuffed into the cab....plugged in and done....Doing repairs afterwards.....Tough...
Heater controls on this unit are basic.....A single cable for the heat adjustment and a vacuum switch to control the various doors in the heater box....... About as simple as it gets.....ALMOST
Later rigs all had/have electronic servo motors to adjust things.....Not bad....Just very tough to service......
Simple is good
The donor cab had AC...Removed all that and installed the non AC heater box (Engine bay side)
Earlier posts showed the mods made to this on the Blazer (S-Wagon) before we cut the body in half to allow easy install on the 2100 chassis ....This material will go on the single cab as things move ahead....A CHANGE ORDER YA KNOW....

