-
Please be sure to read the rules and adhere to them. Some banned members have complained that they are not spammers. But they spammed us. Some even tried to redirect our members to other forums. Duh. Be smart. Read the rules and adhere to them and we will all get along just fine. Cheers. :beer: Link to the rules: https://www.forumsforums.com/threads/forum-rules-info.2974/
You are using an out of date browser. It may not display this or other websites correctly.
You should upgrade or use an alternative browser.
You should upgrade or use an alternative browser.
Kristi KT7 restoration pictures
- Thread starter BigAl
- Start date
BigAl
Gone But Not Forgotten
villi said:Hi Al(l)
I dont see face mask on your list ! Very imported to use, you can get stone lungs !!!
Your right villi,
I already had a mask and eye protection that I use when I am working in body and paint work so I did not include those items on my list .
BigAl
Gone But Not Forgotten
Today I sealed and primed the interior of the front and rear door .These will be covered in fabric on the top half and the lower half will be carpeted . I also started building the overhead console for my AM/FM/CD player , speakers , person to person communications system , head set jacks and interior lights .
Since this is a mid engine snowcat , I felt the noise db level might be too high for occupants and also it might be very difficult to talk to each other so I plan to install a intercom much like the fire department's use in their trucks or is used on private aircraft . It will be voice activated and have the stereo system interfaced to cut out when someone starts talking and then slowly return in volume to its preset position .
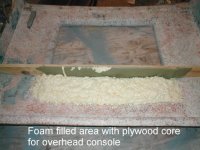
I ended of losing about 5” of the opening of the moon roof /hatch in building the overhead console . Since space is so limited inside the snowcat I really had no other placement choice .I used a ¾“ plywood core and foam and will overlay everything with a layer of fiberglass tomorrow .
I will be using ¼” thick deep tinted Plexiglas to build the skylight and set up a piano hinge and adjustable brackets to make it operable .
I have to bring the lower body section back in the shop tomorrow to temporary reinstall the two ends of the upper cabs . I need to make a wire chase route up one corner in the front and back to access the overhead consoles and want these to line up exactly when the two halves of the body are reattached together .
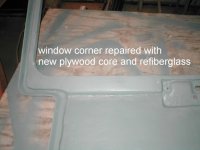
#1 picture shows the repaired door panel where the rotten plywood was removed.
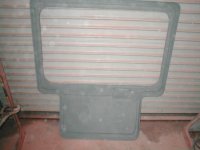
#2 picture is of the interior side of the doors ready for fabric and carpet .
# 3 picture is of the overhead console being constructed
 Big Al
Since this is a mid engine snowcat , I felt the noise db level might be too high for occupants and also it might be very difficult to talk to each other so I plan to install a intercom much like the fire department's use in their trucks or is used on private aircraft . It will be voice activated and have the stereo system interfaced to cut out when someone starts talking and then slowly return in volume to its preset position .
I ended of losing about 5” of the opening of the moon roof /hatch in building the overhead console . Since space is so limited inside the snowcat I really had no other placement choice .I used a ¾“ plywood core and foam and will overlay everything with a layer of fiberglass tomorrow .
I will be using ¼” thick deep tinted Plexiglas to build the skylight and set up a piano hinge and adjustable brackets to make it operable .
I have to bring the lower body section back in the shop tomorrow to temporary reinstall the two ends of the upper cabs . I need to make a wire chase route up one corner in the front and back to access the overhead consoles and want these to line up exactly when the two halves of the body are reattached together .
#1 picture shows the repaired door panel where the rotten plywood was removed.
#2 picture is of the interior side of the doors ready for fabric and carpet .
# 3 picture is of the overhead console being constructed
 Big Al
Attachments
Snowcat Operations
Active member
Very nice restoration project! I am very impressed with it. Are you going to paint your unit yourself as well? This is what I am planning on doing this summer with three of my units.
BigAl
Gone But Not Forgotten
Snowcat Operations said:Very nice restoration project! I am very impressed with it. Are you going to paint your unit yourself as well? This is what I am planning on doing this summer with three of my units.
Yes ,
I will be painting the Kristi myself . I am way to "picky" when it comes to paint jobs .
We finally got a decent sunshiney day with some higher temperatures , so I started early this morning and just finished fiberglassing in the hatch/moonroof area for the front overhead console . It turned out great . Pictures tonight! I now have the upper cab outside curing while I concentrate on the lower body half and get it ready to prime/seal the interior .
Al
BigAl
Gone But Not Forgotten
Evening folks  ,
,
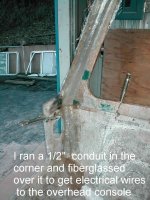
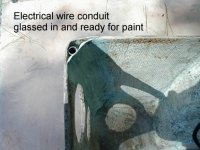
I got the electrical wire conduit pipe fiberglassed in the corners of the snow cat for the overhead consoles . I hate exposed wires . I used Aluminum foil tape to hold the conduit pipe in place while I fiberglassed over it .
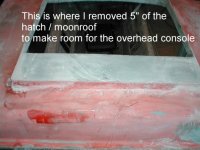
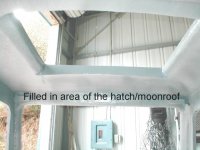
Also finished the fiberglass "fill in" to the front hatch / moonroof area . This needed to be done to make additional room for the overhead console .
Finish sanded the interior floor where I had reglassed it . It is now ready for primer / sealer . Also resealed any openings that were cut through the plywood core so no moisture can effect it .
Picture#1 shows the filled in area of the hatch / moonroof.
Picture#2 shows the fiberglassed conduit in the interior corners that lead to the overhead console .
OK !!! The pictures will not load ! Bob S. is messing with me again !!!
I'll try later .
 Big Al
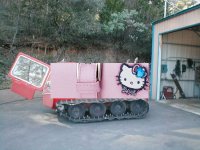
Edited by Bob: YUP Allen, I live to mess with you. I will just put this photo of your KT-7 here for you. I do like the new pink paint. And the kitty logo really looks good too.
 ,
,I got the electrical wire conduit pipe fiberglassed in the corners of the snow cat for the overhead consoles . I hate exposed wires . I used Aluminum foil tape to hold the conduit pipe in place while I fiberglassed over it .
Also finished the fiberglass "fill in" to the front hatch / moonroof area . This needed to be done to make additional room for the overhead console .
Finish sanded the interior floor where I had reglassed it . It is now ready for primer / sealer . Also resealed any openings that were cut through the plywood core so no moisture can effect it .
Picture#1 shows the filled in area of the hatch / moonroof.
Picture#2 shows the fiberglassed conduit in the interior corners that lead to the overhead console .
OK !!! The pictures will not load
I'll try later .
 Big Al
Edited by Bob: YUP Allen, I live to mess with you. I will just put this photo of your KT-7 here for you. I do like the new pink paint. And the kitty logo really looks good too.
Attachments
BigAl
Gone But Not Forgotten
OK! Here are the pictures I was trying to post earlier .
And Bob ,quit messin with my Attachments .
Oh ! And by the way Bob , I am not the one looking for "coconut tree" upholstery for my snow cat .....
And Bob ,quit messin with my Attachments .
Oh ! And by the way Bob , I am not the one looking for "coconut tree" upholstery for my snow cat .....
Attachments
Snowcat Operations
Active member
Damn man. It almost looks like you know what your doing! So when is the project projected to be done?
BigAl
Gone But Not Forgotten
Hi Mike ,
If everything keeps moving along I should be done by the time I am 95 .
Actually ,I am hoping in about 1 1/2 months to be finished . Alot of this is or has been "trail and error" since there are no manuals on this KT7 avalible .
A lot depends on my Dad's health . I try to work around the time I spend out at his place . With Summer coming on his yards and rose garden will be getting a lot more of my attention soon. He has been able to stay out of the hospital for about a month now so I have been able to get a few things done . I am thankful to have this project as it helps to keep my mine busy .
I still think the V4 motor is going to be the time consumer ! I am looking for a qualified Machine shop to do the engine machining work now .
The body work is pretty much completed and ready for paint .
The frame comes in the shop next for some strenghtening , custom hitch , rounding off all sharp corners, sand and new paint . That should only take 2 days .
Then it will be time to rebuild the drive system and hydraulics . YUCK!!!
Last will be the new interior and radios,instruments,tinted windows etc.
Allen
If everything keeps moving along I should be done by the time I am 95 .

Actually ,I am hoping in about 1 1/2 months to be finished . Alot of this is or has been "trail and error" since there are no manuals on this KT7 avalible .
A lot depends on my Dad's health . I try to work around the time I spend out at his place . With Summer coming on his yards and rose garden will be getting a lot more of my attention soon. He has been able to stay out of the hospital for about a month now so I have been able to get a few things done . I am thankful to have this project as it helps to keep my mine busy .
I still think the V4 motor is going to be the time consumer ! I am looking for a qualified Machine shop to do the engine machining work now .
The body work is pretty much completed and ready for paint .
The frame comes in the shop next for some strenghtening , custom hitch , rounding off all sharp corners, sand and new paint . That should only take 2 days .
Then it will be time to rebuild the drive system and hydraulics . YUCK!!!
Last will be the new interior and radios,instruments,tinted windows etc.
Allen
BigAl
Gone But Not Forgotten
Ok ! I'm quittin early today so fire me , I don't care !
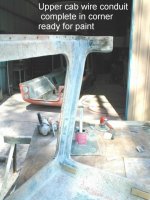
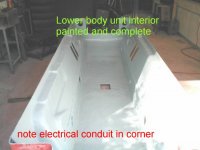
I finished up the "fill in" of the corner electrical conduits for the overhead consoles .It's hard to even tell there is even a wire chase route in the corner .
Went ahead and painted the inside of the lower cab and it is now complete . I used 4 coats of a "heavy solids" primer/ sealer . Everything will eventually be covered in fabric,carpet or insulation but this way I will have a good surface for the spray glue to grab hold of .
Here are the latest pictures .
Big Al

Attachments
Allen, that is awesome looking so far.  The idea of the wire chase is a excellent one, it sure makes for a clean look that is virtually invisible and should blend into the corner when painted. I'm really curious to see how the steel frame sits inside the bottom tub and attaches. The frame obviously needs to carry the weight and transfer it to the tracks, but are the attachment points heavily reinforced with wood blocks? Even with the frame carrying the weight of the engine, seats, etc, the floor is going to have people standing on it . . . or does the frame have floor pieces too?
I'm looking forward to the photos of it stuck in the snow next winter when Mike has to pull out out of the drift with his Snow Master.
 The idea of the wire chase is a excellent one, it sure makes for a clean look that is virtually invisible and should blend into the corner when painted. I'm really curious to see how the steel frame sits inside the bottom tub and attaches. The frame obviously needs to carry the weight and transfer it to the tracks, but are the attachment points heavily reinforced with wood blocks? Even with the frame carrying the weight of the engine, seats, etc, the floor is going to have people standing on it . . . or does the frame have floor pieces too?
I'm looking forward to the photos of it stuck in the snow next winter when Mike has to pull out out of the drift with his Snow Master.
BigAl
Gone But Not Forgotten
Bob ,
Where the body bolts to the frame is reinforced 3/4" plywood . This is at 6 points on the body . The back floor section will be changed so the steel frame carries the floor section . This extended frame section will be bolted to the rear of the body unit and a bolt on 2 "reciever hitch tube will be installed on the outside .I am also planning on making a Aluminum expanded metal step that will slide into the reciever hitch so it will be easier for passengers entering or exiting from the rear . When I need a pintle hook or tow ball I can just change it out as needed .The front floor area will remain as it is .
Oh ! And Mike won't be pulling me out I will be pushing him !!!
Al
Snowcat Operations
Active member
That will hard to explain when yank starp is attached to you vehicle! But it sure will be the prettiest damn Kristi being pulled out anywhere!
BigAl
Gone But Not Forgotten
Evening folks ,
,
Not much got done today.
Got a phone bill from ATT for $857 and spent a lot of time on the phone , trying to convince a idiot that a local call is not long distance toll charge . I finally gave up and told her to take me to jail !!! And I don't even have ATT !!!! Is ATT using India for there complaints and Billings .
I finished sanding the two upper halves of the cab and painted the interior . Headed back to the paint store and picked up another 360 bucks worth of paint supplies !!! Ouch! I now have everything but the Base coat / Clear coat paint material and the bed liner material .The paint guy told me the spray on bed liner material which is a two part epoxy material is much better than the Rhino liner or Line X . Geez ! What to do !!!
Talked with a airplane electronics tech on the communications system today and will head over to the airport to get a wiring schematic for the intercom/stereo set up in a few days . I'll save this and post it for anyone who may want to set up there snow cat in the future for intercoms .
I'll try to get some pictures up tomorrow .
BigAl
 ,
,Not much got done today.
Got a phone bill from ATT for $857 and spent a lot of time on the phone , trying to convince a idiot that a local call is not long distance toll charge
 . I finally gave up and told her to take me to jail !!! And I don't even have ATT !!!! Is ATT using India for there complaints and Billings .
 I finished sanding the two upper halves of the cab and painted the interior . Headed back to the paint store and picked up another 360 bucks worth of paint supplies !!! Ouch! I now have everything but the Base coat / Clear coat paint material and the bed liner material .The paint guy told me the spray on bed liner material which is a two part epoxy material is much better than the Rhino liner or Line X . Geez ! What to do !!!
Talked with a airplane electronics tech on the communications system today and will head over to the airport to get a wiring schematic for the intercom/stereo set up in a few days . I'll save this and post it for anyone who may want to set up there snow cat in the future for intercoms .
I'll try to get some pictures up tomorrow .
BigAl
pixie
Well-known member
For the bed liner stuff --- I used the roll-it-on-yourself stuff on the rusted floor of my backhoe. It has survived 5 years of chains and metal tools thrown on it without a blemish. Was still $90/gallon and it only came in black. Another option might be the diamond tread sheet goods sold for boats.
Allen, as Pixie just pointed out, there are alternatives.
I got a bid for a pickup truck from Rhinoliner and the dealer wanted about $400 for a basic black coating. For just under $100 I sprayed in a 2 part epoxy. I even got it in a light grey color that matched the interior of the truck. I bought a kit that included everything including the spray gun, all I needed to do was mix the epoxy, connect the gun to my air compressor, and spray. Fast, easy and reasonably mess free (just make sure you mask off what you don't want sprayed!).
I'm sure you can find something that will work well for you without spending a fortune.
Here you go Al.BigAl said:Oh ! And Mike won't be pulling me out I will be pushing him !!!
I'll try to get some pictures up tomorrow. I've made tons of progress but am having problems loading the photos again.
BigAl

Attachments
BigAl
Gone But Not Forgotten
Good Lord Bob ! Where do you find this stuff ! LOL. You know the pink is starting to grow on me ......B_Skurka said:Here you go Al.
BigAl said:Good Lord Bob ! Where do you find this stuff ! LOL. You know the pink is starting to grow on me ......
I just peeked into your workshop

BigAl
Gone But Not Forgotten
HI All ,
It was a good day . No ... strike that, It was a Great Day !!!! I headed out to the shop after recieving some great emails ! You know who you are and thank you !!!
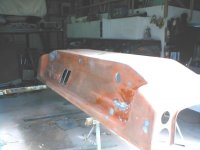
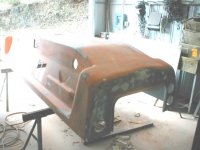
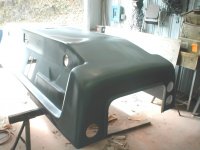
I decided to 320 sand the exterior of the cabs and get them ready for paint . It was becoming very hard to see the imperfections on the fiberglass and where I needed to apply filler .
Anyway , I hand sanded and applied filler putty as I found areas that needed attention . It went very well and I would putty one cab while repairing the filled areas on the other section .
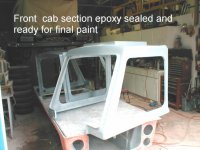
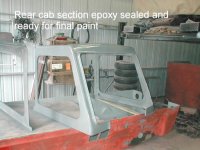
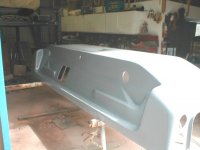
I broke out my old trusty paint spray gun that I use only for primer/sealer . It looks like it got run over by a truck but it works well .I would clean it ,but I am afraid that would ruin it for good !!! Blew out the shop and all the dust that was in it . I then mixed up 1 quart of epoxy sealer/primer material , wiped everything down with a tack rag started at the top and headed for the bottom .I used a fairly "fast setting" additive in the expoy because the temperture was quite cool when I sprayed . I do not like runs in my paint jobs . It makes me cranky ! Put on 2 coats with a dry time of 20 minutes between coats . The finished results on shown .
Tomorrow looks like the bottom section will get the same !
And yes !!! It is Miller Time !!
Big Al

It was a good day . No ... strike that, It was a Great Day
 !!!! I headed out to the shop after recieving some great emails ! You know who you are and thank you !!!
 I decided to 320 sand the exterior of the cabs and get them ready for paint . It was becoming very hard to see the imperfections on the fiberglass and where I needed to apply filler .
Anyway , I hand sanded and applied filler putty as I found areas that needed attention . It went very well and I would putty one cab while repairing the filled areas on the other section .
I broke out my old trusty paint spray gun that I use only for primer/sealer . It looks like it got run over by a truck but it works well .I would clean it ,but I am afraid that would ruin it for good !!! Blew out the shop and all the dust that was in it . I then mixed up 1 quart of epoxy sealer/primer material , wiped everything down with a tack rag started at the top and headed for the bottom .I used a fairly "fast setting" additive in the expoy because the temperture was quite cool when I sprayed . I do not like runs in my paint jobs . It makes me cranky ! Put on 2 coats with a dry time of 20 minutes between coats . The finished results on shown .
Tomorrow looks like the bottom section will get the same !
And yes !!! It is Miller Time !!

Big Al
Attachments
looking good!
+1
B_Skurka said:Allen, I will give you credit where credit is due. That looks awesome.
+1

Snowcat Operations
Active member
B_Skurka said:Allen, I will give you credit where credit is due. That looks awesome.
OK, ok, I also agree with BOB! What kind of beer are you drinking? It seems to be working pretty damn good!
BigAl
Gone But Not Forgotten
Mike,
"Balboa Ice" from Panama is my beer .Really good stuff!!!
Ok, the lower cab body is epoxy sealed. YIPPEE!!!!
I am posting a few "before and after" shots . Off to town to pick up the base coat /clear coat and one "other" neat little "surprize" that I will be adding on .
Just wait .... You will see it soon enough, but I think you will like it !!!
Ok!!! the damn attachments is not working again!!!!!
BOB S.!!! whats wrong now???

I'll try again later
"Balboa Ice" from Panama is my beer .Really good stuff!!!

Ok, the lower cab body is epoxy sealed. YIPPEE!!!!
I am posting a few "before and after" shots . Off to town to pick up the base coat /clear coat and one "other" neat little "surprize" that I will be adding on .
Just wait .... You will see it soon enough, but I think you will like it !!!
Ok!!! the damn attachments is not working again!!!!!
BOB S.!!! whats wrong now???
I'll try again later
Allen, in all seriousness, I never mess with your ability to post photos and I posted some earlier today without any problems! If there is something wrong, I'd honestly suspect it is on your end of the transmission. File size, pixel size, etc.
Snowcat Operations
Active member
Man that must be some good beer! Great work Al!

