-
Please be sure to read the rules and adhere to them. Some banned members have complained that they are not spammers. But they spammed us. Some even tried to redirect our members to other forums. Duh. Be smart. Read the rules and adhere to them and we will all get along just fine. Cheers. :beer: Link to the rules: https://www.forumsforums.com/threads/forum-rules-info.2974/
You are using an out of date browser. It may not display this or other websites correctly.
You should upgrade or use an alternative browser.
You should upgrade or use an alternative browser.
Kitchen Reno
- Thread starter NorthernRedneck
- Start date
NorthernRedneck
Well-known member
NorthernRedneck
Well-known member
A little tedious work today on the kitchen in preparation for the new cabinets. There was a fresh air return to the furnace above the cabinets. Since the new cabinets will go to the ceiling, the fresh air had to be swapped to the other side of the wall.

I sealed it up with aluminum tape. The cover is now installed.


I sealed it up with aluminum tape. The cover is now installed.

NorthernRedneck
Well-known member
Oh heck, why not add another big expense for the house. Our boiler started giving us issues in January when the control module died on it. We had it replaced to make the winter but a month ago it started leaking all over the floor so we had to shut it down. After getting a couple different quotes and options, we settled on a boiler combi unit that's mounted up high on the wall instead of the bigger floor unit it replaced
Here's the old one.

We have in floor heating downstairs and an air handler unit for upstairs that takes heat from the boiler system and blows it through ductwork to heat the upstairs. For backup, we have 2 gas fireplaces upstairs which we've been using for a month to heat along with mini furnaces downstairs. Remember that I'm in northwestern Ontario Canada where there's still freaking snow on the ground and nighttime temperatures are below freezing. So heat is still on.
Another nice thing about the new boiler combi unit is we were able to ditch our 12 year old hot water tank as well as it's also hot water on demand.
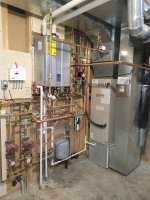
Here's the old one.

We have in floor heating downstairs and an air handler unit for upstairs that takes heat from the boiler system and blows it through ductwork to heat the upstairs. For backup, we have 2 gas fireplaces upstairs which we've been using for a month to heat along with mini furnaces downstairs. Remember that I'm in northwestern Ontario Canada where there's still freaking snow on the ground and nighttime temperatures are below freezing. So heat is still on.
Another nice thing about the new boiler combi unit is we were able to ditch our 12 year old hot water tank as well as it's also hot water on demand.

Geez, I have seen industrial machinery with less piping going on, even looks like a pressure expansion tank in there.Oh heck, why not add another big expense for the house. Our boiler started giving us issues in January when the control module died on it. We had it replaced to make the winter but a month ago it started leaking all over the floor so we had to shut it down. After getting a couple different quotes and options, we settled on a boiler combi unit that's mounted up high on the wall instead of the bigger floor unit it replaced
Here's the old one.
View attachment 164696
We have in floor heating downstairs and an air handler unit for upstairs that takes heat from the boiler system and blows it through ductwork to heat the upstairs. For backup, we have 2 gas fireplaces upstairs which we've been using for a month to heat along with mini furnaces downstairs. Remember that I'm in northwestern Ontario Canada where there's still freaking snow on the ground and nighttime temperatures are below freezing. So heat is still on.
Another nice thing about the new boiler combi unit is we were able to ditch our 12 year old hot water tank as well as it's also hot water on demand.
View attachment 164695
NorthernRedneck
Well-known member
NorthernRedneck
Well-known member
I will say the new boiler passed the first couple tests. Firstly, even before the old one bit the bullet, it was struggling to hold the temperatures in the house. It was nice not waking up to a cold house for a change. Secondly it passed the shower test. We have a car wash like shower in our bathroom and had everything turned on for a half hour and no lack of hot water.
NorthernRedneck
Well-known member
Gas boiler. 3 separate zones. 2 zones are downstairs in floor heating. That's an air handler unit. The pipe going into it and out circulates the hot water from the boiler through the unit and a blower fan blows the heat through it same thing as a regular high efficiency furnace. Only difference is that with a high efficiency furnace, there's a natural gas burner to create the heat. The combi unit just means that the house water supply also runs through the boiler to give hot water on demand. No storage tank.
NorthernRedneck
Well-known member
We just spoke with the cabinet guy. He said we're about 2 weeks away from the cabinets being done.
NorthernRedneck
Well-known member
Upper cabinets are mostly empty and half removed. I also removed the two smaller lower sections. Removing the quart counter without damaging it is a little time consuming using a heat gun and scraper knife along the edges to break it free of the cabinets. Then I have a length of heat tape that will be used to separate the 3 remaining quartz sections that are glued together.

We had this old shelf unit sitting in storage in the loft above my shop thinking one of the kids might need it. It's 2'x2'. Perfect for temporarily holding the kitchen plates and other things while I remove the cabinets.


We had this old shelf unit sitting in storage in the loft above my shop thinking one of the kids might need it. It's 2'x2'. Perfect for temporarily holding the kitchen plates and other things while I remove the cabinets.

chowderman
Well-known member
NorthernRedneck
Well-known member
NorthernRedneck
Well-known member
NorthernRedneck
Well-known member
More progress. The kitchen is quickly disappearing. Once the remaining countertop is separated and plumbing disconnected, the rest will go quickly. Just in time too as our cabinet guy called yesterday to schedule the installation of the new cabinets. My inlaws are here so we put them to work emptying and removing cupboards as my wife is working.


NorthernRedneck
Well-known member
That upper corner cabinet is now down against my wishes and almost caused ww3 in the house.
Here's the scenario. My father in law and I are sitting in the living room. I say my back is done for the day. He gets up, heads to the kitchen and grabs the drill and starts unscrewing the upper cabinet from the wall. Ok...in pain, I struggle to my feet and before I know it I'm twisted like a pretzel pinned underneath the cabinet trying to hold it up with my left shoulder while trying to remove the screws from the bottom he had missed. All the while the cabinet which is pressboard and held together with staples is now separating at the top and heavy shelves inside are topling down one by one on top of each other. We got it down in semi one piece but wobbly as heck. I'm in extreme pain with my back on fire and pissed off about the whole situation so I did the best that I could and walked away to our room and relayed the whole ordeal to my wife who is working from home. Then head outside on the deck to cool off for a few minutes.
That was around 4pm yesterday. I got changed and hobbled my now hurting self to the car and went to the dirt track races where my wife later dropped off our daughter after piano lessons for our weekly daddy daughter date to the races. It was cold and windy and started to drizzle so we left halfway through the features.
Today is our second oldest son's grade 12 graduation. They're doing a morning church service and an evening ceremony. I skipped the church service to rest my back but ended up spending an hour with a nail gun and drill reassembling the corner cabinet so I can save the sale of them. All is well again. Better than new. Lol. Now back to resting my back.

Notice the fragile handle with care sticker. I sent that to my wife to show her dad.
Here's the scenario. My father in law and I are sitting in the living room. I say my back is done for the day. He gets up, heads to the kitchen and grabs the drill and starts unscrewing the upper cabinet from the wall. Ok...in pain, I struggle to my feet and before I know it I'm twisted like a pretzel pinned underneath the cabinet trying to hold it up with my left shoulder while trying to remove the screws from the bottom he had missed. All the while the cabinet which is pressboard and held together with staples is now separating at the top and heavy shelves inside are topling down one by one on top of each other. We got it down in semi one piece but wobbly as heck. I'm in extreme pain with my back on fire and pissed off about the whole situation so I did the best that I could and walked away to our room and relayed the whole ordeal to my wife who is working from home. Then head outside on the deck to cool off for a few minutes.
That was around 4pm yesterday. I got changed and hobbled my now hurting self to the car and went to the dirt track races where my wife later dropped off our daughter after piano lessons for our weekly daddy daughter date to the races. It was cold and windy and started to drizzle so we left halfway through the features.
Today is our second oldest son's grade 12 graduation. They're doing a morning church service and an evening ceremony. I skipped the church service to rest my back but ended up spending an hour with a nail gun and drill reassembling the corner cabinet so I can save the sale of them. All is well again. Better than new. Lol. Now back to resting my back.


Notice the fragile handle with care sticker. I sent that to my wife to show her dad.
NorthernRedneck
Well-known member
That's as far as she goes today. We have to let all the silicone sealant dry before installing the new faucet.

Sent from my SM-G965U1 using Tapatalk
"If I knew then what I know now." If you look at the second picture of the single cabinet between the refrigerator and wall, look at how tightly they fit the counter to the refrigerator. What you don't see and what I discovered this week is that they actually cut slits in the drywall for the counter to slide into in order to be able to fit the counter in. Meaning that someone f'd up cutting the slab and cut it too wide back at their facility and instead of driving 20 minutes back to the city to their shop to recut the piece, they just hacked a hole into the drywall and used whatever saw they had in the back of the truck to cut a sliver off the edge of the slab to squeeze it into place.
And this is a supposedly well-known reputable company in a city of 115000 people.
NorthernRedneck
Well-known member
NorthernRedneck
Well-known member
NorthernRedneck
Well-known member
I've been working on the plumbing removing the faucets and plumbing below. BUT, I didn't want to wash dishes by hand for a week or however long it's going to take to install the new cabinets. I capped off the cold water line going to the sink and cut off the sink drains then picked up a few plumbing pieces and glued them together. When it comes time to install the new sink, I'll just cut it off and install a new drain and p trap.


NorthernRedneck
Well-known member
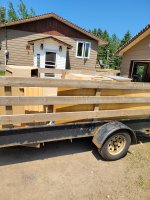
The old kitchen is going to be picked up this afternoon. I have offered to help haul it over with my trailer as the buyers only have a smaller utility trailer. The remaining cabinets and counter are completely ready for removal. Everything else is downstairs ready to load.
NorthernRedneck
Well-known member
The old kitchen is gone. Today I have to.....
Pull the backsplash
Do some touch up drywall mud
Carefully try to remove a few slate tiles where the new cabinets will be sitting.
I already reconnected the dishwasher successfully without any flooding as even that required shutting off the main water to the house and draining the water lines so I could separate the water line where it came up from downstairs under the sink so I could remove the water line. I knew I had to cap the line temporarily so I had a sharkbite end cap ready to slip
on the end of the water line so I could remove the dishwasher beforehand and have water to the house turned on for a few hours while I worked.


Last edited:
NorthernRedneck
Well-known member
What's the saying? Jack of all trades, master at none. 
Add removing slate tile to my repertoire. We realized last night that some tiles needed to come up for the cabinets to sit flush to the floor. Ok... call the flooring company we hired to install the slate where we need a few installed. No guarantees on when they can get here. Call back Friday. Ok. Cabinets are supposed to be coming Friday. We need the tiles up NOW so we don't slow the install schedule. I jump on YouTube. Watch a few videos. Doesn't look that hard. Oscillating tool to chew up the grout and a couple paint scrapers and a pry bar and a hammer to pry them up. Got all that stuff in the kitchen already. I got to work at 720am figuring that my wife who is working from home has a meeting at 10 and needs quiet.
The Oscillating tool worked along the grout line and I was able to successfully remove the first four tiles.

I had another four tiles to remove by the refrigerator but this was a little more difficult as the Oscillating tool just wasn't working cutting directly through slate. A light bulb went off and minutes later I was back from the garage with a grinder and cutting disc. Pro tip...if you ever need to cut through slate, a grinder with cutting disc works well to get a straight edge. By 830am I was done cutting and grinding.
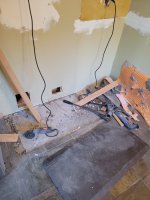
Add removing slate tile to my repertoire. We realized last night that some tiles needed to come up for the cabinets to sit flush to the floor. Ok... call the flooring company we hired to install the slate where we need a few installed. No guarantees on when they can get here. Call back Friday. Ok. Cabinets are supposed to be coming Friday. We need the tiles up NOW so we don't slow the install schedule. I jump on YouTube. Watch a few videos. Doesn't look that hard. Oscillating tool to chew up the grout and a couple paint scrapers and a pry bar and a hammer to pry them up. Got all that stuff in the kitchen already. I got to work at 720am figuring that my wife who is working from home has a meeting at 10 and needs quiet.
The Oscillating tool worked along the grout line and I was able to successfully remove the first four tiles.

I had another four tiles to remove by the refrigerator but this was a little more difficult as the Oscillating tool just wasn't working cutting directly through slate. A light bulb went off and minutes later I was back from the garage with a grinder and cutting disc. Pro tip...if you ever need to cut through slate, a grinder with cutting disc works well to get a straight edge. By 830am I was done cutting and grinding.

Or rent a floor tile remover. As I recall, I rented for around $15/day. Did a complete floor in a couple hours and returned it the same day.If you have a rotary hammer with a flat bit it will tear tile/stone/ceramic whatever right off the floor pretty quickly
NorthernRedneck
Well-known member
Good tips.  I only had about 8 tiles to remove. The putty knives actually worked very well at getting underneath using a hammer and light tapping.
NorthernRedneck
Well-known member
Today is electrical day. No, not I. I called an electrician to come install the ceiling lights and add a plug in and a few other things. I'm not crawling up into the attic to run wiring. I can do basic electrical when the walls are opened up and I can see everything and make sense of it. I know my limits. Lol.
Here's the pot lights.

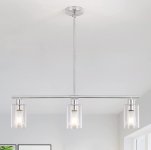
Here's the island pendant. The sink will be a single pendant light repurposing one of the ones we have currently and installing 4 matching glass globes. Once the cabinets are installed, we will get under cabinet lighting as well.
Here's the pot lights.

Here's the island pendant. The sink will be a single pendant light repurposing one of the ones we have currently and installing 4 matching glass globes. Once the cabinets are installed, we will get under cabinet lighting as well.
Attachments
NorthernRedneck
Well-known member
Part of the electrical we're doing is prewiring a switch in the wall for under cabinet lighting. We're getting a power line run up from the basement for the island. 6 pot lights will be installed. A box for the pendant light over the island installed. Remove the boxes and electrical for the existing lights. Install an extra plug in over the counter.


