• Please be sure to read the rules and adhere to them. Some banned members have complained that they are not spammers. But they spammed us. Some even tried to redirect our members to other forums. Duh. Be smart. Read the rules and adhere to them and we will all get along just fine. Cheers. :beer: Link to the rules: https://www.forumsforums.com/threads/forum-rules-info.2974/

Astro van cat conversion

Big leap today.
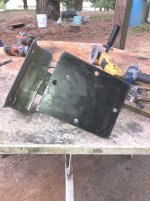
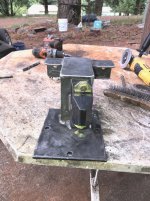
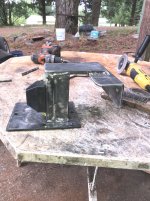
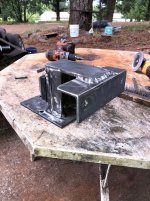
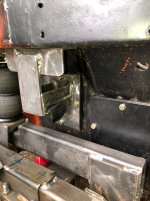
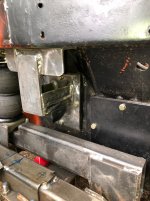
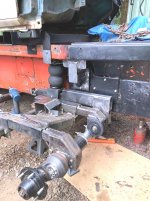
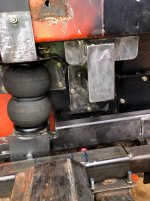
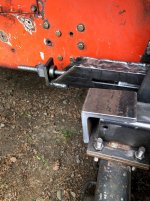
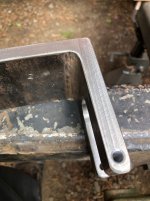
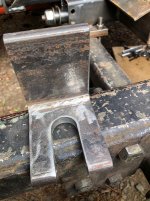
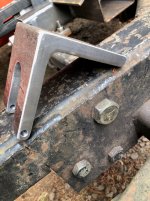
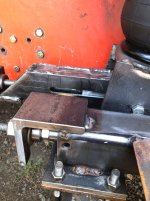
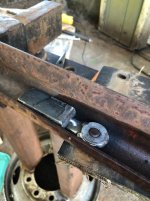
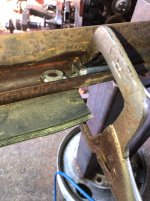
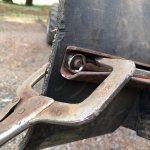
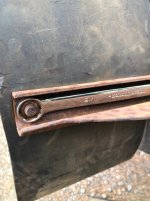
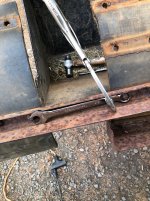
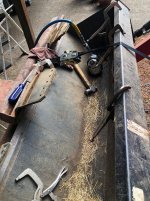
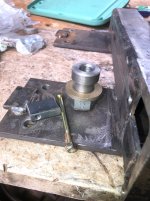
Got the upper bump stop bracket completed (Except paint)
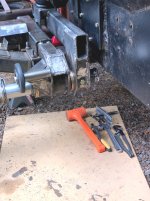
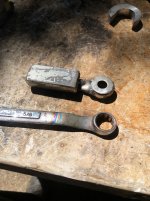
Some pics of the bracket on the table after welding done.
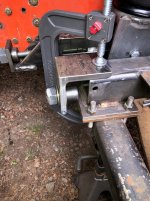
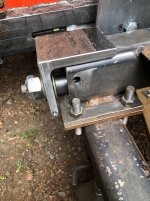
The bracket bolted back in with zero issue.

Took a 3/8" x 2" bolt and cut the head off....thread it into the forward bolt hole on the cover plate portion of the bracket...

This pilots the assembly right into place easily.

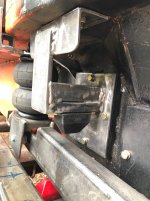
Got the assembly all bolted in.....looks sweet......Rounded off the nasty sharp corners.....Ready for prime time now.

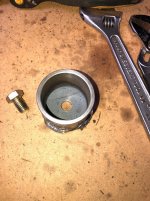
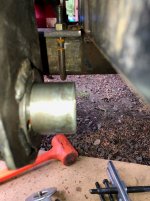
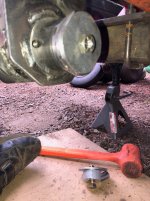
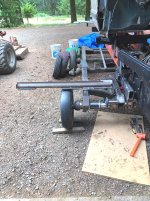
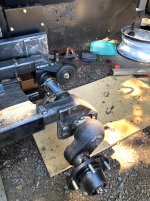
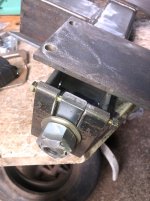
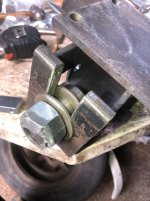
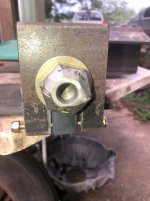
Got to looking at the short stub of axle that sticks out on the inside of the air bag arm.....This area is down in the battle zone...BIG TIME.

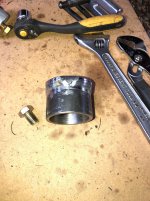
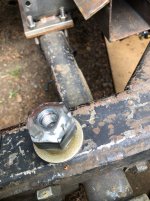
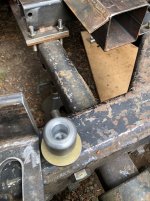
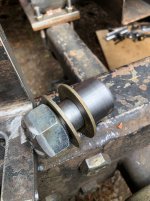
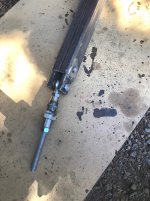
Decided to machine a little slip fit cover tube and weld a plate on one end and drill it to allow the center bolt in the axle to secure the cover.

The cover also pulls the air bag arm up tight against the 1/2" through bolt.....The shaft is now protected.....Grease it up really good before the cover is installed and removing the arm should be easy......

That bare shaft would get beat all to rat crap really quick.......Now is a great time to make it a better set up.....

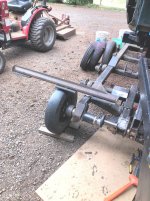
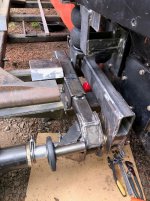
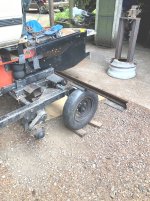
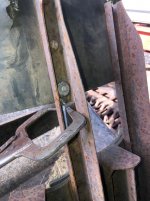
Some pics of the entire assembly from a few angles.

Grabbed a grouser and set it across the front tire to check the location of everything based on where the grouser will operate.

Looks great......Plenty of room.....
 

Attachments

  • UPPER STOP16.jpg
    UPPER STOP16.jpg
    365.5 KB · Views: 63
  • UPPER STOP15.jpg
    UPPER STOP15.jpg
    400.2 KB · Views: 63
  • UPPER STOP14.jpg
    UPPER STOP14.jpg
    427.5 KB · Views: 58
  • UPPER STOP13.jpg
    UPPER STOP13.jpg
    418.4 KB · Views: 62
  • UPPER STOP12.jpg
    UPPER STOP12.jpg
    326.8 KB · Views: 64
  • UPPER STOP12.jpg
    UPPER STOP12.jpg
    326.8 KB · Views: 64
  • UPPER STOP11.jpg
    UPPER STOP11.jpg
    360.2 KB · Views: 57
  • UPPER STOP19.jpg
    UPPER STOP19.jpg
    314.2 KB · Views: 62
  • UPPER STOP18.jpg
    UPPER STOP18.jpg
    419 KB · Views: 66
  • UPPER STOP17.jpg
    UPPER STOP17.jpg
    383.4 KB · Views: 63
MORE PICCY'S

The last piccy.....The heavy angle for the inner track adjuster assembly......Very similar to the item on the bag perch adjuster

The actual adjuster nut assembly will be made off the same print....The little bracket is a bit huskier though due to the loading....
 

Attachments

  • UPPER STOP21.jpg
    UPPER STOP21.jpg
    406.8 KB · Views: 59
  • UPPER STOP20.jpg
    UPPER STOP20.jpg
    301.7 KB · Views: 59
  • UPPER STOP25.jpg
    UPPER STOP25.jpg
    352.7 KB · Views: 63
  • UPPER STOP 29.jpg
    UPPER STOP 29.jpg
    459.4 KB · Views: 60
  • UPPER STOP28.jpg
    UPPER STOP28.jpg
    395.8 KB · Views: 61
  • UPPER STOP27.jpg
    UPPER STOP27.jpg
    493.8 KB · Views: 69
  • UPPER STOP26.jpg
    UPPER STOP26.jpg
    498.6 KB · Views: 64
  • UPPER STOP31.jpg
    UPPER STOP31.jpg
    386.4 KB · Views: 55
  • UPPER STOP30.jpg
    UPPER STOP30.jpg
    409 KB · Views: 67
Getting on with this bad boy.
Ordered two Heim joints this morning for the inner track adjusters.
Then machined up the adjuster nut assemblies.
Made the weld on bracket.

This is somewhat similar to the first design....but simpler to replace if need be.
It will be a couple days for the Heim joints to get here.

The bracket has a 1/4" hole for a through bolt to cage the adjuster nut......
Once the assembly is together and the actual vertical location is attained.....a little tube can be machined to slip over the 1/4" bolt in the bracket to hold the nut assembly (May not need any)
 

Attachments

  • UPDATED TRACK ADJUSTER8.jpg
    UPDATED TRACK ADJUSTER8.jpg
    396 KB · Views: 63
  • UPDATED TRACK ADJUSTER7.jpg
    UPDATED TRACK ADJUSTER7.jpg
    226 KB · Views: 62
  • UPDATED TRACK ADJUSTER6.jpg
    UPDATED TRACK ADJUSTER6.jpg
    315.7 KB · Views: 63
  • UPDATED TRACK ADJUSTER5.jpg
    UPDATED TRACK ADJUSTER5.jpg
    347.4 KB · Views: 71
  • UPDATED TRACK ADJUSTER4.jpg
    UPDATED TRACK ADJUSTER4.jpg
    279.4 KB · Views: 58
  • UPDATED TRACK ADJUSTER3.jpg
    UPDATED TRACK ADJUSTER3.jpg
    368.6 KB · Views: 65
  • UPDATED TRACK ADJUSTER2.jpg
    UPDATED TRACK ADJUSTER2.jpg
    396.3 KB · Views: 71
  • UPDATED TRACK ADJUSTER1.jpg
    UPDATED TRACK ADJUSTER1.jpg
    374.5 KB · Views: 66
More good things

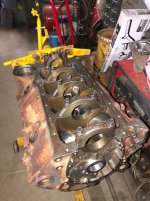
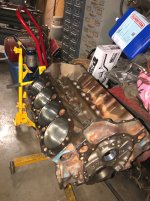
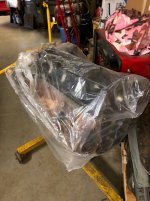
The 406 engine block was ready to pick up.....
Got the block all home and in the shop......

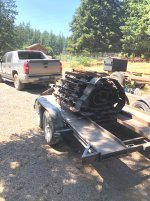
Got a call yesterday afternoon to get a pair of tracks for the Cat.
Bit of a road trip today to run and get them.
We had made a trade deal last fall for my 2100 Cab.....but the snows closed us out before we could get in and get the tracks.
This will get the next chapter of the FrankenCat much closer.....

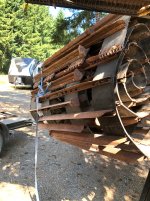
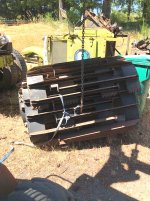
Two standard 2100 tracks......Fresh belts and narrow the tracks to 44" each.....

Likely the track project will be into next year.....

But having them to work with is a key piece of this puzzle.

Few pics of the 406 block fresh from the shop.
 

Attachments

  • 406.3.jpg
    406.3.jpg
    345.7 KB · Views: 62
  • 406.2.jpg
    406.2.jpg
    367 KB · Views: 66
  • 406.1.jpg
    406.1.jpg
    283.6 KB · Views: 60
A great day....ALMOST..

Headed out to get the tracks....
We arrived at a around noon and after some glad handing and swapping BS stories we got after loading up the tracks.....well almost tracks....

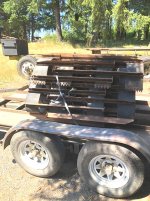
We sat the first one on the trailer and it settled down.....dropped the second one on and the trailer was on it's haunches begging for mercy......

Not enough clearance on the tires to the fenders..... (Light duty car hauler)

Not gonna happen. no damned way.....not safe either.....
A quick trip for a couple miles....no worries..in a heart beat.....but not the distance and at speed we were talking....

Heading back in the morning to pickup up the second track.

Used the Avy to haul the trailer.....Old green Burb has a dead AC.....Not gonna sweat all the way up and back.

The Avy has the 5.3 LS engine......piss poor excuse for a power plant me thinks.........Fine for a house car.....but not for any serious GRUNT work........

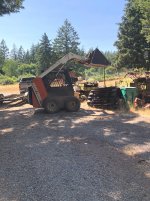
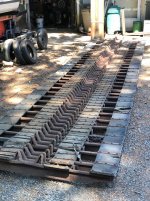
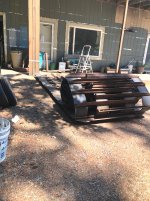
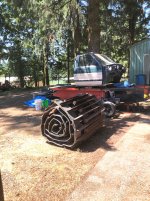
All home fine....Track unloaded with the Skid steer.....Stood it on tip toes unloading that monster though.....
 

Attachments

  • MT HOOD TRACKS5.jpg
    MT HOOD TRACKS5.jpg
    456.8 KB · Views: 74
  • MT HOOD TRACKS4.jpg
    MT HOOD TRACKS4.jpg
    461.5 KB · Views: 70
  • MT HOOD TRACKS3.jpg
    MT HOOD TRACKS3.jpg
    458.5 KB · Views: 74
  • MT HOOD TRACKS2.jpg
    MT HOOD TRACKS2.jpg
    492.3 KB · Views: 66
  • MT HOOD TRACKS1.jpg
    MT HOOD TRACKS1.jpg
    507 KB · Views: 75
Just got back with track number 2......Yesssssssssssssssssssssss.....

Just need to get it unloaded......

And the adventure continues.....
 
Today has been a "GATHERING SESSION"

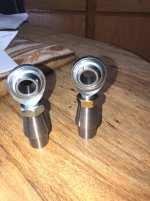
Picked up two Heim joints that showed up at the post office this morning.

These are weld in units that come with the joint and the bung.

These bad boys get welded into a steel sleeve.......The other end of the sleeve is tapped for 5/8-11 coarse thread......

The Heim joint goes into the inner end of the inner track adjuster slide and the 5/8" threaded rod goes into the adjuster nut on the angle bracket shown in post #993

Stopped at the parts house and picked up a 11/16 box end wrench to CUT UP and make a tool to get the grouser bolts/nuts off.

I fooled with a few bolts this morning......

Crammed a wrench in the J cleat and got my breaker bar and snapped the bolts right off.

Picked up a piece of heavy wall tube to make a "bolt on" cheater bar.....

This will give me a stable breaker bar with lots of extra ooooomph....
Soaking the nuts with Skunk piss is a waste of time and $$$$$

Just break the bolts off and move on

I am going to cut the belts at about 3 or 4 grouser apart and then grab the grousers in the vice and break off the bolts.

Nuff said......
The belts are trash anyway......

Just want the grousers and tire guides.......
 

Attachments

  • INNER TRACK ADJUSTER HEIM JOINTS.jpg
    INNER TRACK ADJUSTER HEIM JOINTS.jpg
    436.4 KB · Views: 74
Grabbed one of the tracks this morning and dragged it over by the cat (TOOLS) Went after it with the SAWZALL.

Cut the belts in about 2 foot sections.....Easy to hang that size chunks on the tractor bucket and go after breaking off the bolts and getting the parts all segregated into buckets of GOOD STUFF/ USABLE STUFF/ JUNK STUFF

Gotta head to town in a few minutes to get some steel bar to finish up the inner track adjusters.

I will get some pics of the carnage posted later.

'
 
  • Like
Reactions: PJL
OK

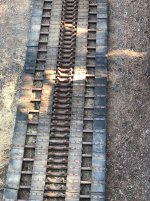
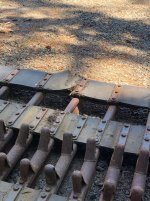
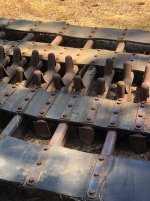
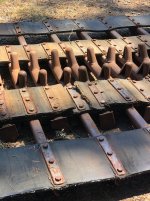
Hear are the pics of this nasty old 2100 track.....

It has several "patches" on all but one belt.
A few broken tire guides and one broken grouser.

The back plates are great.....maybe one or two have some damage.....no biggy

This track has the lacing cleat missing....But I have one from my original track.......

I have not looked at the other track too much yet...I did notice that it has a second hinge set and a short section looks to have been replaced.

Now with the pieces small enough to handle by myself......I will get after separating the parts.

The belting on these tracks was USED UP.....

I am still very pleased with the parts.....

Todays task is to get the new axle assembly back apart and the inner adjuster out and then finish the area where the heim joint mounts in the rear...

Some machining, welding and such....not a big job.
I decided to make a slight change order on the inner belt safety slide.....I scored a piece of 1" thick UHMW 12-1/2" X 23" the other day.. Just need to saw the pieces to bolt onto the inner adjuster assembly and get them drilled and also drill the holes in the mounting plate.

Once these few things are done the RH axle assembly will be done.....The one last tear down and get some paint on the parts....

Reassemble with the silicone lube on the bushings and IT WILL BE DONE....
 

Attachments

  • Track tear down7.jpg
    Track tear down7.jpg
    475.7 KB · Views: 57
  • Track tear down6.jpg
    Track tear down6.jpg
    452.4 KB · Views: 62
  • Track tear down5.jpg
    Track tear down5.jpg
    450.2 KB · Views: 53
  • Track tear down4.jpg
    Track tear down4.jpg
    361.8 KB · Views: 63
  • Track tear down3.jpg
    Track tear down3.jpg
    385.7 KB · Views: 60
  • Track tear down2.jpg
    Track tear down2.jpg
    458.1 KB · Views: 56
  • Track tear down 1.jpg
    Track tear down 1.jpg
    637.2 KB · Views: 65
Wrapping up the RH axle assembly.

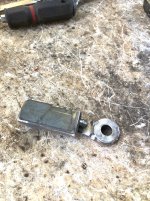
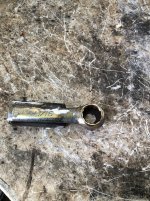
Machined a little adapter to allow the 5/8" fine thread heim joint weld bung to fit in one end and the 5/8 coarse adjuster thread rod to into the other end.

This will make life easy if any of the parts need replacing later on down the line.

Why is it that as soon as you get ready to weld with the mig welder......half a second after you pull the trigger the wind blows and make a mess of the weld ( Blows the gas shield away)

Anyway.
Was able to weld the 1/2" X 2" Flat bar into the adjuster tube ...had to plug weld the bars through the side of the tube to get a good weld.

The heim joint fits in nicely and has a slight bit of play sideways.

Once this thing goes back together for the last time....will use blue thread locker on both the heim joint and the coarse thread rod.

Started fooling with the grousers.

Gotta know it...First bolt did not break....came loose and needed the big impact to make it easy......

Going to build a modified wrench that will fit in the J grouser and lock into the inside so the impact does not shake it loose.

Damned wrench flew out twice and got me.....NO DOING THIS AGAIN......

Going to cut the box wrench off short....then bend the shank straight......then weld on a block of steel that will allow a pair of vice tongs to clamp it into the grouser.....

If it takes a bit to perfect it.....FINE....WELL WORTH A BIT OF FOOLING....WE HAVE A BUTTLOAD OF BOLTS THAT GOTTA COME OUT......
 

Attachments

  • REAL CLOSE5.jpg
    REAL CLOSE5.jpg
    345.1 KB · Views: 54
  • REAL CLOSE4.jpg
    REAL CLOSE4.jpg
    349.3 KB · Views: 61
  • REAL CLOSE3.jpg
    REAL CLOSE3.jpg
    442.5 KB · Views: 56
  • REAL CLOSE2.jpg
    REAL CLOSE2.jpg
    365.9 KB · Views: 69
  • REAL CLOSE1.JPG
    REAL CLOSE1.JPG
    408.4 KB · Views: 60
Decided to fool a bit more with the SPECIAL WRENCH for the grousers......

Grabbed the new 11/16" box wrench I got and stuck it in the vice.....Heated the blade up just outside the box end.....brought it up to a dull red and straightened the blade out (Took the angle out of the wrench)

Cut the blade off at about 4" from the box end......

NOW...

Grabbed a chunk of 1/2" x 1" flat bar 3" long and with the wrench in the "J" on a nut.....laid the flat bar on the wrench blade and will weld it in place (Tomorrows project)

Another issue is....WHEN THE NUT COMES LOOSE....The nut will slip up out of the wrench and this rounds off the nut as it slips...

Scared up an SAE grade 8 washer that fit the 7/16" bolts.......Lay it on the wrench centered on the bolt.....Clamp the washer with Vise tongs....tack weld to wrench box end..

I will finish the wrench GIZMO in the morning and get pictures.....

If this works like I think it will.....LIFE WILL BE MUCH EASIER IN THE TRACK BIZZ....

Simply toss the wrench in the J and clamp it with the vise tongs.....Hit the nut with the 3/4" impact.....ZOOOOOOOP GOOD TO GO..

IF THE IMPACT WILL NOT BUDGE THE SUCKER.....THE BREAKER BAR WITH THE 3 FOOT EXTENSION WILL GITTERDONE...


If this little creature works I will get some good hi res pics up.....

Easy and cheap to build.......


One thing is for sure.....When the tracks go back together.....there will be never seaze on the threads....
 
Got after things early this morning.

The 11/16" box wrench special is a real winner.

Slides into the J and sits down on the lock nut very well...

Clamp into the grouser and hit the nut with the 3/4" impact wrench......THE 1/2" IMPACT WAS A WASTE OF TIME AND EFFORT.

The big boy spins the bolts right out.

Then came the next batch of grousers and some putz has used 7/16 nylock nuts which are smaller (5/8") and some had already been worried a bit......

Gonna see about getting a couple 5/8" 6 point box wrenches to chop up and make tooling.

Every place there is a splice in the track there are the odd nuts........

Anyway.......this style of tool works sweet.

Got a nice chunk of the 4 ply belting off one of the tracks.....Going to trot that chunk of belting over town to the industrial conveyor belt supply house and see what they have.

The stuff is 1/2" 4 ply.

We're gonna need 12" wide belts to make this come together......287-1/2" long....

Starting to get excited...AGAIN.....
 

Attachments

  • Tooling for track work6.jpg
    Tooling for track work6.jpg
    477.9 KB · Views: 61
  • Tooling for track work5.jpg
    Tooling for track work5.jpg
    531.3 KB · Views: 55
  • Tooling for track work4.jpg
    Tooling for track work4.jpg
    270.8 KB · Views: 60
  • Tooling for track work3.jpg
    Tooling for track work3.jpg
    317.7 KB · Views: 75
  • Tooling for track work2.jpg
    Tooling for track work2.jpg
    335.1 KB · Views: 64
  • Tooling for track work1.jpg
    Tooling for track work1.jpg
    369.4 KB · Views: 65
Spent some time on the phone checking out new belting for the tracks.

The material that is coming off the old tracks is a 4 ply belting....about 1/2" thick.
The top and bottom rubber covers are about 1/8" thick.

What I found is a 4/440 belt with 1/4" top cover and 1/16" bottom cover.

This material will be as good if not better than what was on there.......

12" belts.....287-1/2" long.......

Should have price quotes tomorrow......
 
  • Like
Reactions: PJL
Out thrashing on the track "Chunks"

Got a "Disassembly line" going now

Using the bucket on "Widdle Red Tractor" hook a tire guide over the edge of the bucket....fasten it with a ratchet strap..

Off to the rodeo.
Will have pics later......
Bucket make a great tool bench....sort of
Has variable height control too :clap: :lmao:
 
GOT PLENTY DIRTY TODAY.

Sorted through the sections that have patches as these have all the bastard nuts....AND OTHER CRAP TO DEAL WITH.
The 11/16" 6 point box wrenches are the CATSASS.....Better than the custom tool I made......

Easier to get down in the "J"
Had a few of the smaller 7/16" nylock nuts that had to be cut off.....Other folks had managed to mangle them so they were worthless.....and impossible to use tools on.

I am trying to save all the backing plates......so far so good......
They will all need a few licks with a 5 pounder to lay flat again.

The new belts will be 12 inches wide ....so we will cut off a section of one of the extra plates and weld to the stock plates to add the 4th hole needed with the 12" belts

So far a few broken tire guides, and a few grousers that are too far tweaked to use easily.

I think somebody was using these tracks for logging....judging by the carnage.......

But for the most part.....we have parts to work with.

Plus all the tire guides off the original "Track" we will have plenty to work with PLUS EXTRAS.

Little Red tractor gets to help too......

I will not lie to anyone who is thinking about doing a set of tracks.....THESE ARE JUST PLAIN WORK.

A 6 point end wrench, a 5/8" impact socket and a 3/4 impact gun.....these bad boys will come apart....or the bolts will break.....

Careful handling and most of the damage to the HOOOOOMAN PARTS can be avoided....

So far nothing worse than dirty paws...... :thumbup:
 

Attachments

  • Track tear down13.jpg
    Track tear down13.jpg
    196.9 KB · Views: 75
  • Track tear down12.jpg
    Track tear down12.jpg
    262.2 KB · Views: 62
  • Track tear down11.jpg
    Track tear down11.jpg
    415.8 KB · Views: 61
  • Track tear down9.jpg
    Track tear down9.jpg
    425.7 KB · Views: 61
  • Track tear down8.jpg
    Track tear down8.jpg
    437.2 KB · Views: 62
  • Track tear down 10.jpg
    Track tear down 10.jpg
    624.1 KB · Views: 61
After getting into ripping off the old belting I see that the belts are various materials.(Thickness and ply count)

The outer belts are 3 ply with 1/4" rubber top cover and 1/16" bottom cover
The inner belts are 4 ply with 1/8" rubber covers on both sides...

Several patches are 4 ply with 1/4" top cover and 1/16" bottom cover

The other track appears to be all 3 ply......I have not gotten really serious on the other track, and will not until the first one is completely disassembled and the junk rubber in the trash.

I still need to finish the Front axles....but just needed a break from them....and to be able to see what we actually got with these tracks.

Would be sweet to sand blast all the hardware......But I do not have access to a blaster that can get it done.

A wire wheel on the grinder to knock off the worst and shoot them with some Rustoleum and call it a day..

Interestingly....The hardware is an assortment of various stuff.
Two different (Slightly) grousers....Same length but a little different.
A couple variations of tire guides (I do not see any 3700 type guides in the bunch which are much heavier)
There are 3 different types of backing plates....Some narrower, some wider and heavier.

But for sure the bulk of the parts are quite usable.

I am sorting out the tire guides into 3 catagories
Good to go (Just clean and paint)
Need a little crack welded on an upright ( So far a few have shown a crack on one or both outer uprights)
Absolute trash (Not even worth fooling with....missing uprights....or bolt holes broken out badly or that part missing)

Sorting the grousers too
Good to go
May need a slight tweak to straighten
Seriously Fubar'd (Broken in two or seriously bent)

I do not want to be dealing with bent/misaligned grousers during the reassemble process....

The hinges/lacers are the heavy hinge type on the one track....The track I am working on now is missing all of the hinges..
It appears they got torn out as all the bolt holes are ripped through and the lacing cleat is missing... (Only 71 grousers on the track)

The second track has an extra set of hinges (Likely a new piece was added) so this gives us enough of the heavy hinges to do two complete tracks.

I have enough all new Flexco 550 hinge to do the entire set of tracks....but I really like the heavy hinges.

Going to a two 12" belt layout the hinges and the back plates will need to be adjusted...I can splice on a piece of back plate to get 4 holes and the extra hinges (Original 4 belt system) can be cut to yield the width needed......

The other option is to use the Flexco 550 all the way. WE SHALL SEE AS WE GET CLOSER TO ASSEMBLING THE NEW SETUP...
Some time ago I made two jigs for drilling the extra bolt holes in the grousers to convert them to the NON OFFSET configuration...

Once the grousers are all off and sorted out......These bad boys can be drilled once summer is over and the weather closes in.

The drilling process will be time consuming.......
I am likely going to use a carbide drill to do the job......Cobalt is OK.....But carbide will last far longer.

Now.....

Drilling the holes in the new belts will get it's own modified drill press to do the deed.

Some months ago I picked up a small bench to drill press off Craig's list.

I need a machine with a throat that will allow the full 12" belt plus a couple inches to lay on the table and be drilled (4 holes each row and 7 holes for the lacers.

Decided to disassemble the drill press and cut the column off at the ideal height for the table.....Then fabricate an offset throat that will fasten under the table and then give the room needed and then add the top part of the column back on.

A funny looking little machine......Then add some hold down shoes to keep the belt from jumping.

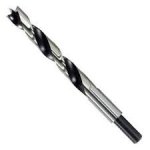
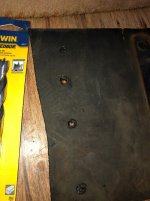
Already have the hole location fixture material (12" wide aluminum sheet) Will drill the pilot holes in the belts 1/8" diameter.....then finish with a 7/16" Brad point drill

This type drill bit is designed for cutting wood and other soft materials....The outer cutting edges are sharp and actually cut the material and do not rip like a standard twist drill....The center point is slightly longer so it engages the pilot hole first.

I have used these to drill odd materials like Dilecto.....Which is a phenolic and is a bitch to drill with regular drill bits.

Flexco makes a great rotary punch that works with an electric drill....sadly..wrong size....

Back years ago I called these "Spur bits" and ground up many by hand during my time in the mill industry

They make a nice clean cut as the outer points are sharp with knife like edges......
Leaves a clean hole without the tool grabbing and tearing at the part.....
 

Attachments

  • download.jpg
    download.jpg
    3.5 KB · Views: 57
You really don't need the flex hinge joints to assemble the tracks. You can leave the belting long and lap them using the grouser holes and bolts. Its a strong splice just a little harder to assemble and disassemble.
 
I really am not thrilled with the lap connection since I have the choice of either the heavy hinges or the Flexco...one or the other will be chosen

Removing 2 pins and being able to drop the track is far easier .... less tools required too.

Guess I’m just old school
 
Spent a fair bit of time today stripping the hardware off the old belts...
Had one bolt that had been molested previously and it got cut off with a cutoff wheel slid in between the belt and the grouser.

A bit smoky (Stinks a bunch) but gets the beast off.
A few others refused to come off..Rattled them just a bit more and they snap off...

A slow process....but we are moving ahead.

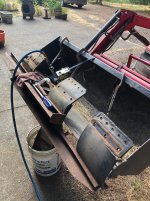
I stopped using the tractor bucket....to cumbersome to deal with more than one grouser at a time.

Grabbed the Sawzall and cut the rubber belts to give me one grouser at a time...toss it in the vise and just go after it.

This is an easy way to get these old parts stripped down.....

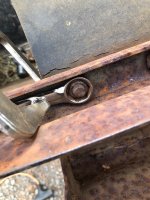
The 11/16" 6 point box wrench is a great investment.......The wrench slips easily into the J and grab it with the vise tong to secure it.....

Pretty much gonna gitterdone......

The key is the 6 point wrench.......Holding it tight on the nut is a plus and allows the big impact to do it's job quickly.
Even if the threads are rusted nasty and stuck....The 3/4" impact will break the 7/16 bolts really quick.......

No need to fight these bad boys.....Gear up and hit them hard.......

So.....once we see whats good and whats not we can clean the stuff up and then get the proper number of grousers ready to assemble with the new 12" belts......

So far there are a few end caps (Anti side slip device) that are damaged and will need some help.....but not a big deal...

Tomorrow will be another session thrashing on this pile of parts......
 
  • Like
Reactions: PJL
Sunday was a day of reasonable progress.

Straightened up the Chit hole work area and finally getting this demolition down to a decent routine....Fast....NOT EVEN....But things are working well.

Cutting the belts off now into single grouser pieces.....Then toss the grouser in the vise and go at it....

Careful procedure is the key to getting decent results.
Making sure the wrenches are seated well on the nuts and clamped down......

Starting to see far more good grousers than junk ones......I think today we will go out and count the left overs that came with the Cat and see just how many RH and LH parts we have to fill in the bad ones...

Several of the tire guides are cracked.....Tossing them in a separate pile to be dealt with later if need be.

We have close to a full set of good guides from the original track.....so we should be good to go....
I wish there was away to make this go much faster.....NOT GONNA HAPPEN.....

But so far KNUCKLES ARE ALL IN GOOD SHAPE (Knock on wood)

Once this track is apart and we see what we have....then back to work on the front axle......

The RH side in so very close to complete now........

Just a couple little things to finish and then tear it down and paint the parts and Reassemble ......ABOUT DAMNED TIME.....

Best part is that the major fabrication on the LH side is done.....and the engineering from the RH side makes finishing the LH side pretty easy...just cut the materials and make the remaining parts......

After the front axles.....then the cab comes back off and the diffy can go back in ....at least temporarily and the drive shaft can be finished up....the center bearing and its mounting built and installed.......

After this.....the engine and tranny comes out and the mounts can be finish welded (Currently just tack welded)
Then the 406 engine gets assembled and the TH350 tranny can come apart and get freshened up.......

Trying to get as much work done while we have good weather......Then after the weather goes sour along about late September/October we can work on the engine and tranny.

Ah yessss...Fun fun fun
 
We went out and dug out the remaining grousers from the original track that came with my 2100.

We have 25 RH and 25 LH grousers .....Hopefully these will be sufficient to make up for any of the dead ones from the recent acquisition.....

I am not really hopeful that any of the broken grousers can be welded up successfully....at least and get any real life from them....
Most of the bad ones are bent or twisted enough to make using them a poor idea....

A couple MAY BE ABLE TO BE STRAIGHTENED......Only if absolutely necessary....

Cooler weather forecast for tomorrow....hopefully much more conducive to ripping the bolts and belts off the grousers.....
 
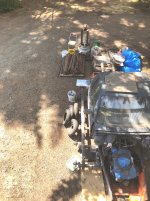
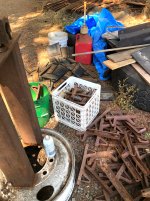
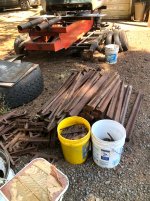
The track is getting shorter and the piles of parts are getting larger.
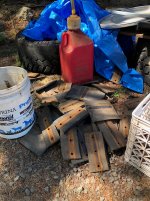
Piles of cut off rubber pieces, bucket with lots of bolts and nuts.

Pallet with good RH and LH grousers.....
A pile of junk grousers that is at about 10 so far (Some each of RH and LH)
A bucket of backing plates....Most need a few whacks to straighten them out......but they are all in fine shape.

The tire guides are a different story.

This track has a mixture of the early style and second style tire guides on it..

All the second style guides are in good shape.....Not the case with the early ones....nearly all the early style have the outer upright cracked at the weld....most have been re-welded....and cracked again a few of the early guides are missing chunks.....

Out of curiosity and worry I went over and looked at the other track....seems that all the guides are the later design..And the track is overall in better shape....

Be nice to have the 3700 tire guides....Beggars can't be picky...eh ???? :lmao:

Trying to get as many grousers stripped per day as I can......Old bones just keep plugging away it it.....

Cut off about 5-6 grousers.
Get them in the vise..Align all the bolt heads so the 5 point box wrench will slip on the nuts.
Clamp the wrench in place and knock the bolt out...move on.
Takes about 15 minutes or so to strip a grouser (Unless there are bolts/nuts that have been mutilated) Then things get ugly...

Inspect the grouser and tire guide and then put the pieces in the proper pile......

Filled the garbage can up with the belt chunks...nuts and old bolts.
Think I need a couple more pallets.
Goal is to strip both tracks into their usable parts.....

Such fun this is.......Arrrrrgh
 

Attachments

  • Track tear down19.jpg
    Track tear down19.jpg
    437.1 KB · Views: 58
  • Track tear down18.jpg
    Track tear down18.jpg
    423.6 KB · Views: 56
  • Track tear down16.jpg
    Track tear down16.jpg
    493.6 KB · Views: 59
  • Track tear down15.jpg
    Track tear down15.jpg
    582.9 KB · Views: 57
  • Track tear down14.jpg
    Track tear down14.jpg
    521 KB · Views: 64
  • Track tear down17.jpg
    Track tear down17.jpg
    1,004.7 KB · Views: 59
  • Like
Reactions: PJL
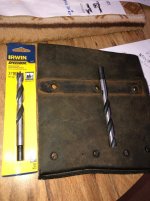
The Brad point drills came in today.

I just had to try one......
Grabbed a chunk of the old belt and drilled some holes to check out how well these drills work.
They are a tad different than what I used to grind up years ago for drilling phenolic board..

The holes are nice and snug on the bolts too.....

Did not grab or do anything ugly....just drills a nice 7/16" hole
Punched holes are a tad prettier.....but these bad boys will do a right fine job on the new belts.

One could make a tool with a 7/16" shank and a wooden handle....Heat it up RED and stuff it through the holes to seal the belting.

I think this is rather a waste of time....butttttttttttttttttttttt......

My belt jig will have 1/8" holes to mark/pilot the holes in the belts...The brad point drill will finish the task quite nicely.

The jig is about 4 feet long with the holes marked on 4" centers.....This job will be time consuming....but what isn't on a cat.
 

Attachments

  • Belt drill2.jpg
    Belt drill2.jpg
    292.8 KB · Views: 61
  • Belt drill1.jpg
    Belt drill1.jpg
    324.2 KB · Views: 58
Last edited:
A little bit done today....More grousers disassembled....

We decided to go out and relax a bit and hit a few garage sales.
Score a really nice aluminum Chevy bell housing.

I have been half way looking for a bell housing to make a test stand for the 406 cat engine to be able to test run it out of the cat.
$20 for that bad boy.....
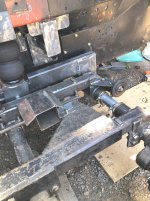
A little fab work and that mighty mouse will have a place to roar from.

I really wanted to run the engine....break in the cam and be sure the little critter does not have any oil leaks and such before cramming it down into the belly of the 2100.....

Never know whatcha gonna find.....
 
  • Like
Reactions: PJL
Still slogging through getting the first (New to us) track apart......
Down to about 10 grousers left to unbolt the chunks of belt and the tire guides.
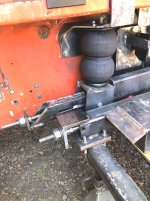
There were only 71 grousers on the track when we got it.....So far there are 8 left hand and 7 right hand grousers that are junk.
Mostly they are bent up.....one broken in two and a couple with bad cracks.
Since we have 25 each RH & LH good ones from the original track we are in very good shape as far as having enough parts to work with.

This track has a mixture of 1st and 2nd gen tire guides.......Almost all of the 1st gen guides are cracked on the outer upright where it is welded to the base........FOR NOW ...the plan is to toss all these gen 1 guides in a barrel and store then as "Possible repair and use if need be"

There are many of the 2nd gen guides and pretty much all of these are good to go.....

Best part is that with all the guides left from the original track plus what we now have there should be no issues getting things together....With extras left as spares.

The second track looks to be in far better shape... a section has been replaced and a second hinge assembly added......

From what I can see the tire guides on track 2 are all 2nd gen type (I have not unrolled the track as yet)

The biggest issue so far has been working with the patched areas of track 1.....Whoever did the work used standard Nyloc nuts (5/8" wrench size on the 7/16" bolts ) instead of the top lock type that are 11/16" size wrench.

There have been a few of the smaller nuts that were rounded over and required some extra time to cut off.....

We have a 6 gallon bucket of backing plates, that aside from needing a couple thumps with a 5 pounder on the anvil to flatten them are in great shape.

I had it in my head that working for a bit on this one track would be a bit of relief from the front axle build.....OMG.....Getting this track apart has been no relief.....just plain "DAMNED HARD WORK" Butttttttttttttttttttttttttt......all part of the job......


As soon as the track is apart......Back to the front axles.

I want both axle assemblies completed, painted, parts lubricated and assembled before the summer is over.

I would still love to score another GEN 1 S10 cab to use on the rear of the cat......They seem to be tough to find.....Every time I post a want ad.....all the calls I get are for extended cabs....TOOOOOOOOOOOOOOO LONG...

And the SAGA continues....
 
Cool this morning....Got after things at 6 am.....
Had about 15 grousers left.

Finished cutting the belts and that left 10 on the ground....

I wanted to get TRACK ONE completely apart.

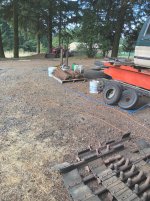
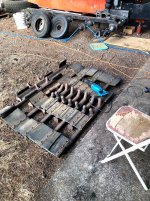
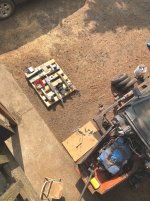
Done deal....Some pics.
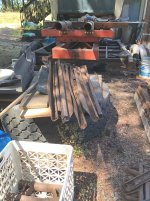
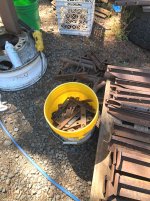
The junkers under the tree....Bent, cracked and otherwise no good.
The last few left on the ground.
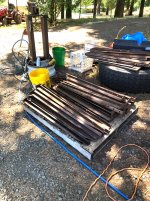
Buckets of back plates, good tire guides in the square crate, not so good ones on the dirt in a pile.

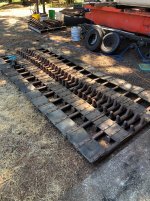
Pallet full of the good grousers...
Still need to straighten the end caps (Slide stops) on some and weld a few caps up....

The parts on the pallet are straight and free of cracks.

A top side down view......

Feels good to have these suckers all in pieces now......

I hope track two is easier.......I think the numbers of junk grousers are far less....
 

Attachments

  • Track one apart7.jpg
    Track one apart7.jpg
    596.7 KB · Views: 60
  • Track one apart6.jpg
    Track one apart6.jpg
    504.8 KB · Views: 69
  • Track one apart5.jpg
    Track one apart5.jpg
    471.6 KB · Views: 61
  • Track one apart4.jpg
    Track one apart4.jpg
    495.6 KB · Views: 63
  • Track one apart3.jpg
    Track one apart3.jpg
    683.5 KB · Views: 61
  • Track one apart2.jpg
    Track one apart2.jpg
    520 KB · Views: 61
  • Track one apart1.jpg
    Track one apart1.jpg
    579.1 KB · Views: 60
Back to work on the RH Front axle.
Had a few little things to do.....and then get the entire assembly off the cat and then wash the parts to get all the crud off and then paint the parts.

The anti spatter spray used when welding leaves a nasty film....gotta wash the parts in a cleaner....

Had to weld up the inner track adjuster nut bracket on the rear of the adjuster.

A little piece goes in and keeps the adjuster nut centered....and a 1/4" bolt goes through to hold it....

While the parts are off the machine, aside from painting I will make sure we have all the parts to finish building the LH side.

Some pics...

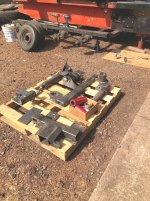
All the pieces on the pallet
 

Attachments

  • Front RH final work8.jpg
    Front RH final work8.jpg
    501.2 KB · Views: 64
  • Front RH final work 7.jpg
    Front RH final work 7.jpg
    543.2 KB · Views: 55
  • Front RH final work6.jpg
    Front RH final work6.jpg
    276.6 KB · Views: 62
  • Front RH final work5.jpg
    Front RH final work5.jpg
    283 KB · Views: 58
  • Front RH final work4.jpg
    Front RH final work4.jpg
    262.2 KB · Views: 58
  • Front RH final work3.jpg
    Front RH final work3.jpg
    332.2 KB · Views: 60
  • Front RH final work2.jpg
    Front RH final work2.jpg
    314.5 KB · Views: 57
  • Front RH final work1.jpg
    Front RH final work1.jpg
    306.4 KB · Views: 63
Hot weather is still dogging my progress (I do not do well in the heat.....worse after my strokes back in 2012)

Today the plan is to get after cleaning and painting the parts.

I have one hole to drill on the inner slider bracket (Where the lower bump stop inner bolt needs to be)

I dragged out the LH axle yesterday to measure the shaft length from inside the spindle casting to the end of the shaft...

I wanted to see how it compared to the RH side tht is wrapping up now.....

Exactly identical at 26-3/16" THIS IS A GREAT THING.....

To be honest I had cut the shafts the same, but did not really pay close attention to the distance from the inside of the casting to the inner bearing shoulder on the spindle...... It's been months since I was working on the LH side.

Making up the rules as we go can lead to things getting sideways if one is not careful.

Most all of the parts are identical.....but there will no doubt be a tiny bit of "Fudge factor" here and there.......BUT IT IS LOOKING GOOD.

Once the assembly is back on the cat I need to fab up a little fixture to fasten to the lug nut studs (With 2 at the top) and that registers off the adjuster slider.

This will allow me to use it on the LH side to set the location of the the spindle with the assembly at its BOTTOM point with the suspension on the bottom bumper.

Working on the ground the only real locators are the frame itself....Frame is pretty level using the angle meter and a level....but I want to make things as close to the same as can be done... PLUS OR MINUS 1/32" Good enough for the crowd I run with....

Seeing the parts all painted and back on the cat is going to feel really good....

The past few days of beating on that one track was exhausting.....BUTTTTTTTTTTTTTTTTTT....No busted knuckles and no bandaid's needed..... :clap:

Last fall as the weather closed in and the rains came.....I began to give a lot of thought to EXACTLY WHAT we were going to do for tracks....
The steel prices have gone stupid crazy $$$$$$$$$$$$$$$$$$$$$$$$$$$ and this would have made fabricating grousers from scratch a very spendy endevour.

Having the two recently acquired 2100 tracks HERE ON SITE is such a great thing....At least we know where the parts are coming from....... The trade deal for my original cab came full circle and both parties came away happy..

I ended up with some good axle spindle castings with good spindles.....and the two tracks.

The other fella got the complete cab and the C6 tranny and the factory fuel tank that had been in my cat.
The cab had all the blade controls intact as well as the complete dash and the steering controls.....

I don't think this could have ended better if we wanted it to.....

Plus I don't have the old cab sitting in my yard.....
 
  • Like
Reactions: PJL
Got out early this morning and started washing up the new axle assembly parts.
Laid things out on a clean pallet and gave them some black paint.

Cleaned off the front frame and the number 2 axle and got the inner adjuster assembly sitting back on the cat.....

I need some 1/2" SAE washers for the U BOLTS and some nylocks nuts too. ....the ACE hardware is closed today....arrrrrrrrrgh.

I have been using standard nuts for the build up and not wasting the Nylocks with a lot of on and off during the build....

The pile of parts getting some much needed paint.....

This is a rattle can job....The Ace rust stop paint has held up well on several things my son in law has done....decided it will be fine for the cat.

Pretty well have the paint scheme figured out.....FrankenCat is going to be Florescent Green and Flat Black Camo......This is gonna be a GAWDAWFUL color.....but quite suited to the Rat Rod snow cat theme.....

Another little change is in the works too....OH NO...NOT ANOTHER CHANGE ORDER....Yeah buddy.

Decided I did not like the exhaust going out the rear.....just going to be in the way of access to the diffy and other stuff in the area.

Going to make a hard turn to the sides out of the Super 10 mufflers ....go up on an angle, then out the side of the tub and into a pair of 5" flat black stacks with "Bull Horn" tips on top.....

This will eliminate the mess in the tub....plus it should help eliminate any worries about CO getting into the back with a canopy on it....

Should also enhance the BADAZZ look and further the Rat Rod theme....

The 406 thundering out of the 5" stacks should sound awesome too........Well maybe.... :lmao:
 

Attachments

  • Front RH final work9.jpg
    Front RH final work9.jpg
    527 KB · Views: 56
  • Like
Reactions: PJL
Got the parts out of the pile of goodies and assembled the track adjuster grease cylinder for the RH side.
I had machined a new cylinder for that side a while back....The original was so badly pitted it was junk.

Machined the weld off the back head and added a new DOM tube section.

Fitted the new seals and greased things up well.....The piston and rod were still in fine shape.....

The grease hose that extends rearward to the little block that the Zerk threads into was in good shape.

Assembled the piston/rod into the cylinder....Good to go.

The cylinder is ready to fit onto the slider assembly and get stuffed back down the frame rail....

Picked up a couple new 3/4" bolts with lock nuts to go through the back head of the adjuster cylinder......

The old onces were pretty nasty looking.....Mostly the threads were munged up.....

New will be better.

Picked up some "Super lube" silicone grease to lube the Axle shafts, Red urethane bushings and other parts of the new assembly.

The silicone grease is advertised to stick to everything, be water proof and last a long time.

The big red bushings will be happy with the super slickum.....

Still need to take the air bag lower perch back off the arm and paint those parts....plus the upper and lower bag mounts need paint.

Weather started looking ugly earlier so I picked up the tools and covered up the remaining parts that are unpainted.

I really don't want stuff getting rusty at this juncture....

Really close to stuffing this bad boy back together for the final time.....

I am negotiating on some large bearing aluminum Cat wheels for the front and rear locations.....So for now I may just toss on some standard hubs so I can get tires on the front axles for the time being.....

I have the two aluminum wheels my cat came with....all the others were stamped steel tube type .

Two other alloy wheels I scared up...one is standard bearing and one is the large bearing.

Be nice to have the four end ones with the large bearings....

The middle axles are all going to get my custom steel wheels ......

Finding these wheels at decent prices is tough.....
 
  • Like
Reactions: PJL
Top