• Please be sure to read the rules and adhere to them. Some banned members have complained that they are not spammers. But they spammed us. Some even tried to redirect our members to other forums. Duh. Be smart. Read the rules and adhere to them and we will all get along just fine. Cheers. :beer: Link to the rules: https://www.forumsforums.com/threads/forum-rules-info.2974/

602 Restore

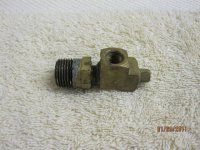
Getting close to being ready to put the cab back on the frame. Couple pictures of some miscellaneous items...First, the slave steering cylinder had a brass "T" fitting which I have replaced with a steel fitting made for use with hydraulics.
grousers 002.jpg

grousers 003.jpg

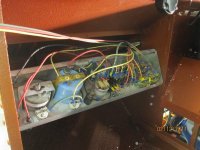
I have the basic wiring inside the cab nearly complete

grousers 004.jpg

The "Kid" has been doing a little work fabricating some new powder paddle grousers. He painted them up with POR15.

grousers 005.jpg
 
Somehow I missed some of your recent posts... what a beautiful job on the paint. The details are great as usual and it seems your son is learning how to do excellent work as well. Those grousers are very cool! Mainer could be right... you may not want to drive her - she's hot! :clap:
 
I was finally able to get the cab back on the frame. Man this was a tough job getting all eight 1/2" bolts to line up and have the cab sit correctly on the new polyurethane body isolators. Of course the cab is way heavier than you think and I spent alot of time wondering if the ropes holding it up were about to go:smileywac! Now I can get the full wiring harness put together:hammer:
001.jpg

002.jpg

004.jpg

005.jpg

The SISTERS:clap:

006.jpg
 
Sweet...and those wheels have some real bling to them with that paint! I'm sure body as well but just doesn't show up as much with straight lines using camera. Very nice!
 
THE SISTERS are very HOT! Can't wait to see pics of them out together on a night on the ...mountain! The job you're doing just continues to amaze - great work! Keep the pictures coming... :clap:
 
I reread this entire thread for the 50th time again this morning dlmorindds & cant find where you mentioned what you used for the coating inside the cab or the frame of the body itself . :unsure:

Whatever it is it looks bullet proof , the black looks like it could be Por15 but I cant make out whats used on the inside unless its the same coating with another color over it . Any hints ? :biggrin:


Once again a great restoration . :clap:

Cowby...pretty much the whole cat has either been sand blasted or soda blasted. A couple aluminum body panels have been replace. The interior was treated with bed lineer using the exterior body color. Also, the tunnel area both inside and out has black bed liner. On alot of the tranny parts and brake/clutch parts I have been using POR15. That material is probably the easiest to use and gives a good tough finish!
 
Cowby...pretty much the whole cat has either been sand blasted or soda blasted. A couple aluminum body panels have been replace. The interior was treated with bed lineer using the exterior body color. Also, the tunnel area both inside and out has black bed liner. On alot of the tranny parts and brake/clutch parts I have been using POR15. That material is probably the easiest to use and gives a good tough finish!


Thanks for the info dlmorindds, I thought maybe it was bedliner but hadn't heard it mentioned . Looking forward to more progress . :biggrin:
 
Beauuuutiful job on the paint. From the photos it looks flawless.

I'm thinkin' Mainer may be right. It'll be too pretty to use!

You and Weatherby are an inspiration.
 
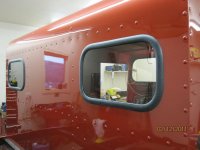
Just got the new glass in on the cab. I thought they did a great job on the window gasket material. The glass man is still working on the slider windows on the doors. He is having problems with the gasket pucking in the radius areas. The gasket material seemed very thick to me...I will post some pictures of this as soon as I can get to the glass shop.

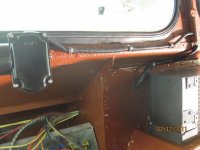
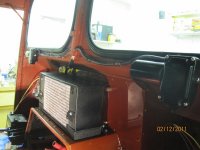
I am just finishing up running the wiring for the cat. Most of the instrument panel is now wired in. All the interior wiring is complete and have the heater in place:wink:

wiring 001.jpg

wiring 002.jpg

wiring 003.jpg

wiring 004.jpg

wiring 005.jpg

wiring 006.jpg
 
I've never seen glass installed like that with the filler strip to the inside. Was that the way is was originally done or did you request it done that way for a reason?
 
A lot of the older Thiokols as well as others had the glass sealed on the inside for a "emergency exit". If you were sumerged in deep snow or water, an could not exit the doors. Just remove the seal strip kick the glass out and exit , hard to do from the outside if trapped on th inside.(ARCTIC TRAINING) Most of the newer equipment has top escape hatches for this purpose as an option, if you think you may encounter this type of situation. On any window installation we do using the bead lock we still install the seal strip on the inside just in case., but prefer to use the one piece window rubber that is self-locking into itself and makes glass removal easy from either side. PS Very nice restoration and consider it to one of the top ones on this form. Bill
 
I replaced all the seals on a Spryte I use to have and the sliders on the doors were a major pain. I never could get them to completely lay flat in the corners. They were also very tight and hard to open or close.
 
A lot of the older Thiokols as well as others had the glass sealed on the inside for a "emergency exit". If you were sumerged in deep snow or water, an could not exit the doors. Just remove the seal strip kick the glass out and exit , hard to do from the outside if trapped on th inside.(ARCTIC TRAINING) Most of the newer equipment has top escape hatches for this purpose as an option, if you think you may encounter this type of situation. On any window installation we do using the bead lock we still install the seal strip on the inside just in case., but prefer to use the one piece window rubber that is self-locking into itself and makes glass removal easy from either side. PS Very nice restoration and consider it to one of the top ones on this form. Bill

Bill...Great information on the windows...Thanks
 
Your glass guy did a great job on those slider windows, they look good. I know from past experience that is no easy job, I bet he doesn't want to do those again anytime soon:biggrin:
Your doing a A+ job Dan.... keep the pic coming:thumb:
 
Took a break from wiring and replaced the doors on the cat. Used a silicone weather stripping on the doors. Driving the hinge pin back in place on the doors was quite an effort. Included a couple close-up pictures of the sider windows and gasket work.

doors 001.jpg

doors 003.jpg

doors 004.jpg

doors 005.jpg

doors 002.jpg
 
Last edited:
very nice work...... Dan, should fit in nicely with the rest of mine. just in case mainer has been talking around. Ill call dibs now. :wink:
 
Top