• Please be sure to read the rules and adhere to them. Some banned members have complained that they are not spammers. But they spammed us. Some even tried to redirect our members to other forums. Duh. Be smart. Read the rules and adhere to them and we will all get along just fine. Cheers. :beer: Link to the rules: https://www.forumsforums.com/threads/forum-rules-info.2974/

602 Restore

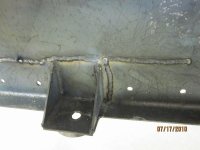
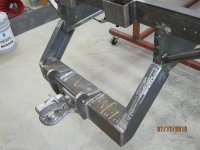
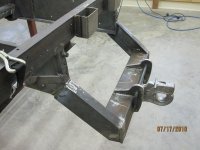
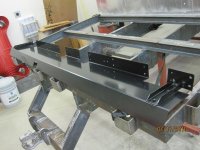
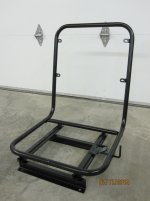
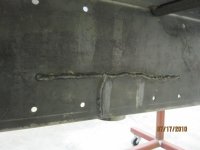
Been dinkin' around on the cat lately...Welded up a significant crack over the third from front body support. Will be welding a plate on the inside over the new weld to add extra reinforcement. Got the new hitched welded on. Also have a picture of the powder fender and a seat frame. I had both of these powder coated.
Summer 2010 Snow Cat 011.jpg

Summer 2010 Snow Cat 013.jpg

Summer 2010 Snow Cat 014.jpg

Summer 2010 Snow Cat 015.jpg

Summer 2010 Snow Cat 016.jpg

Summer 2010 Snow Cat 017.jpg
 
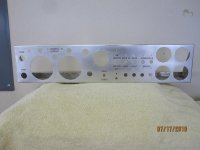
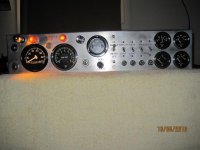
I have been working getting the instrument panel back into shape. Took alot of elbow grease to get all the scratches out of the aluminum. Used weatherby's approach to get the letters looking good. Will be starting to rewire soon:hammer:
Summer 2010 Snow Cat 020.jpg
 
You are doing a great Job! If anything, this is a compliment to weatherby's restore! By using his standards, you are doing a great job on your machine and also appreciationg his restore. Great Job!:thumb:
 
Hey Bulldog and weatherby----THANKS...I appreciate your comments, input and compliments. Yes, all of weatherby's hard work and great effort in documenting the 601 restore has been a tremendous help and resource. I had nothing to do with that hitch...I was just the "Hey Boy" as the kid did all the fabrication and placement :brows:
 
Almost a shame to cover up all that hard work with paint. Looks great. Paint should hold well on a well prepped surface like that.
 
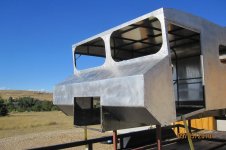
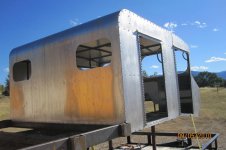
Dlmorindds.......That new skin looks fantastic along with your riveting,GREAT job:thumb: Looks like, after you cut your holes for the wiper motors, fuel filler neck, overhead spotlight, headlights, and reflectors...you'll be about ready for primer.

I just thought of something:idea:.......you could always buff that aluminum skin to a mirror-like shine like some of those restored Air Stream trailers. Buffing compound is way cheaper than paint AND it could be good punishment...er..er..I mean EXERCISE.......for the boys:whistling:

Your workmanship looks A+.....but I do have one complaint ....your a little slow with the pics:wink:
 
Hey Weatherby...kind of like the "art deco" look...maybe get an old airstream trailer on tracks to pull behind the 602...great industrial appeal:brows:

Thanks for reminding me of all the holes I still have to drill...ya forgot the big ol' hole for the check'n the radiator:hammer:
 
Hey Weatherby...kind of like the "art deco" look...maybe get an old airstream trailer on tracks to pull behind the 602...great industrial appeal:brows:

Thanks for reminding me of all the holes I still have to drill...ya forgot the big ol' hole for the check'n the radiator:hammer:

Yep...I did, and also the mirrors:smile: how is the re-wire going on the instrument panel?....good I hope......I might have some closeup pics. of the back of my panel if you run into problems:thumb:
 
Yep...I did, and also the mirrors:smile: how is the re-wire going on the instrument panel?....good I hope......I might have some closeup pics. of the back of my panel if you run into problems:thumb:

Thanks for reminding me about the mirrors and also the rear flashes:whistling:

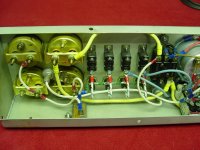
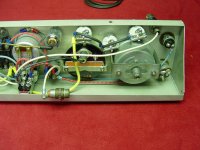
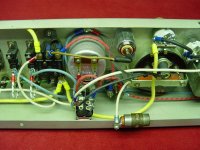
If you have a few more pictures of your instrument panel that would be great. Trying to get that headlight switch figured out. At some point the 602 alternator was changed and the voltage regulator was moved to the engine bay. Some of the wiring is a bit confusing since things were added and deleted along the way. I did decide on upgrading that alternator to a modern 70A single wire model with a built in voltage regulator...takes about 4 wire out of the wiring harness.

So I needed to rebuild the one steering slave on the other 602 so I thought what the heck should do both and the masters too...Well Napa the Crapa says it can't get the master cylinder rebuild kits anymore UP#387...had just bought two about three months ago...what the heck:doh:
 
just let me know if & when you need help figuring out the wiring.

Those master cylinders are still pretty common, that style was used for years & years and the rebuild kits are readily available here in Mich. It's a good idea to "hone" the cylinder bore of the master cylinder before you install the new seals & piston.
 
Let me know if you need other views.
 

Attachments

  • 003 (6).jpg
    003 (6).jpg
    81.9 KB · Views: 682
  • 005 (4).jpg
    005 (4).jpg
    88.5 KB · Views: 691
  • 004 (3).jpg
    004 (3).jpg
    83 KB · Views: 682
Wow I have done some nice looking auto wiring before but that looks great. Even looks like you have the cig lighter hooked up.
 
Hey Weatherby...kind of like the "art deco" look...maybe get an old airstream trailer on tracks to pull behind the 602...great industrial appeal:brows:

Your craftsmanship here is highly impressive. You do the old airstreams
much justice. The cab is very similar in appearance and just as nice.
I think someone even dedicated a thread to your handiwork:
http://forum.wbcci.org/frame-bumper-hitch/1531-artistry-torch-rivets.html

Hope Im not violating any rules, just thought this level of craft deserved
a pat on the back. :thumb:
 
Clecos are 3/16". Relatively cheap. Just google clecos--can get alot of this stuff off ebay too. Forgot to take a picture of the bucking bar.
This is a great project and perfect workmanship! Love to follow the progress :w00t2:

I do a lot of similar stuff with trucks, as for some reason I've chosen trucks to restore which have lots of rivets (I really love to drill hunders of rivets out :glare:). I also like Clecos as they are priceless help, but I really hate those Cleco pliers. They are made in Taiwan and complete crap! Couple of years ago I bought several boxes of Cleco's from USA, paid a huge shipping cost (they are heavy) which was more than the price of the actual Cleco's. But why do they ruin the great product with such a cheap useless tool? I'd wish to see something that is proudly Made in USA, I would gladly pay higher price to get a quality tool (and rather support US than Asian production). I'm not sure if your pliers are any better, I guess I have to start looking eBay auctions selling older US made pliers...
Don't forget to keep us updated with plenty of photos! Thanks!
 
Hey Sisu and Supersix...Thanks for your comments and compliments. Yes, an old airstream would be cool. Love all the aluminum work on those puppies Never been around a really old one, but from the pictures on the Air Stream Forum you can tell there is some major fabricator handi-work. Never knew anything about solid drive or blind rivets until I got the snow cat bug...but I do get great satisfaction out of bucking a nice straight line. It leaves a sense of permanence. And yes those f#$%&@ cleco clamps are a pain in the arss!!:hammer:
 
Last edited:
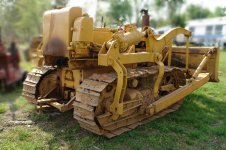
Alright, so a little show and tell?
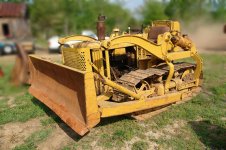
Doesnt really compare to these snow cats but......

Ive got [2] of these little jewels. These photos are of
the smaller TD9. Also have a monster TD18 nicknamed
"Captain Crunch" :brows:
 

Attachments

  • TD9frontfade.jpg
    TD9frontfade.jpg
    121.2 KB · Views: 562
  • TD9rearfade.jpg
    TD9rearfade.jpg
    108.5 KB · Views: 563
It might not work well in 40 inches of snow, but I bet it would push a bunch of dirt! :biggrin: I've never seen a hydraulic cylinder as big as the one in your picture...that should do some serious lifting and lowering.
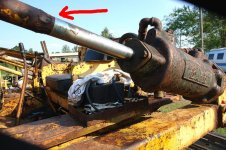
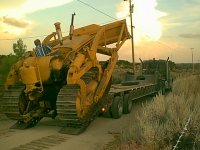
 
LOL. This is the cylinder on the other machine....[now rebuilt]
 

Attachments

  • cylinder2.jpg
    cylinder2.jpg
    132.4 KB · Views: 822
  • td188.jpg
    td188.jpg
    160.1 KB · Views: 823
Dlmorindds.......You did a perfect job:thumb: It's nice to see another 6 series being brought back to better than new condition. I think it would be safe to say, your dash and the dash in Mainer's 601 are the only two 6 series dash panels restored to that degree of originality in existence to date.
 
Thanks weatherby...I was really disappointed in the lighting of the gauges and the speedometer...not very bright:sad:

You'll be surprised, I know they don't appear very bright, but, when in use, in a dark cab at night, they are plenty bright enough, the gauges will be lit up just fine.:smile:
 
Excellent job. It looks so easy in pictures, but when you try to do it, that's where you find out that it does take skill to do something "right" like that. Congrats on the work, tried twice before getting it right myself. You seem to have gotten it right the first time. :-)
 
Excellent job. It looks so easy in pictures, but when you try to do it, that's where you find out that it does take skill to do something "right" like that. Congrats on the work, tried twice before getting it right myself. You seem to have gotten it right the first time. :-)

Hey benz9...believe me, it wasn't without some newly invented cuss words, a few sparks and a lot of looking at weatherb's photos to get the panel figured out. I am not an electrical guy so this was new territory. Thank goodness for the Fluke Meter! Really like the fabric covered wire. Great colors and good heat resistance. Had a problem with the master switch...took it apart...the little tiny spring on the middle terminals went----BLING---and I could hear it fly across my shop. To make a long story short...an hour later I started to sweep the floor in desperation...can you believe it...I found that little sucker and replaced it back into the switch with nice and clean contacts...everything is working GREAT:clap:
 
this rig is looking good now i prefer to use an arctic grade wire i buy from polar wire products in anchorage it's flexable to - 50 and comes pre tinned wich makes soldering easy.
 
Top