• Please be sure to read the rules and adhere to them. Some banned members have complained that they are not spammers. But they spammed us. Some even tried to redirect our members to other forums. Duh. Be smart. Read the rules and adhere to them and we will all get along just fine. Cheers. :beer: Link to the rules: https://www.forumsforums.com/threads/forum-rules-info.2974/

602 Restore

If the tank is as good as it appears to be structurally, a good radiator shop can make it good as new.
Senders and gauges are matched units to a degree. Measure the resistance of the sender through its sweep. Does it appear to work O.K.? (1/2 position equals 1/2 on gauge, etc..)? if so you have a baseline for a replacement sender. If not, Napa sells VDO gauges and universal adjustable senders you can substitute. If you must use the original gauge, use a variable resistor to determine what sender values you need and go from there. Hope this helps.
 
Whatever tank you decide to use, a Stewart Warner sending unit WILL work with a Stewart Warner fuel gauge, and Stewart Warner senders are readily available. The sending unit you have is a Stewart Warner.


If you're not sure of the fuel tanks impedance, determine it's' resistance by following this method:

Disconnect the fuel tank sender from the gauge.

Connect an ohmmeter across the fuel tank sender. Connect the meters positive lead on the fuel tank sender's output and the connect the ground lead to the fuel tank sender's flange.

Manipulate the position of the float arm with a piece of wire or some other device so that you can position the float arm in the full and empty locations.

The range for Stewart Warner fuel senders are: Empty - 220 to 260 ohms; 1/2 tank - 80 to 120 ohms; full tank - 20 to 50 ohms. This is normally noted as 240 ohms at empty and 33 ohms at full.

GM fuel tank sender will read in the opposite direction. At empty, it will read zero ohms and at full it will read 90 ohms.

Ford/Chrysler fuel tank sender will read zero ohms at empty and 73 ohms at full.
 
Hey Bulldog and Weatherby--thanks for your input and information. My sending unit is not as good as the picture shows it. Lots of corrosion. I will run the resistance check on it to see its functionality but will most likely replace it. At this point I am planning on a salvage of the tank the cat came with.
 
Had my head shop dude rebuild the hitch on the cat--no not really just kidding:yum::yum:. My third born rebuilt the hitch for his high school welding class--I thought it turned out better than original:hammer::clap:

phpgzsKkEPM.jpg

phpuVWZn2PM.jpg

phpcWRtOoPM.jpg
 
DLM...Nice performance from the offspring! Strong seed grows well. ;)
Have the boy earn his keep... I'll take 6 at going shop rate.
 
I have been working on trying to get a replacement for worn out grousers. Gone through a couple iterations with a fabricator. Here is the final draft and what I am going with---okay give me hell:hammer:
phpDHeoj4PM.jpg

phpR8SFfAPM.jpg
 
Those pics. look fantastic, great job your doing:thumb:

The new grouser looks real good, but boy, that's a lot of labor to hand make one of those, does he have a idea what the cost would be to manufacture one, ten, twenty, or all one hundred & sixty:whistling:
 
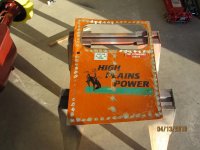
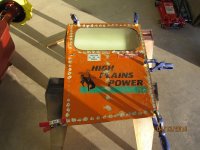
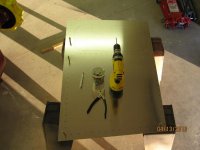
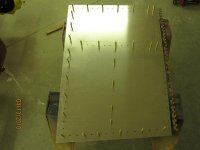
Started working on some of the reskinning. Using original spec .050" aluminum. The driver's side door ready for the rivet. Using two different sizes of blind drive rivets along with a solid drive rivet. Great fun:clap:
door 001.jpg

door 002.jpg

door 003.jpg

door 004.jpg

door 005.jpg

door 006.jpg
 
Dlmorindds,

Can you take a picture of all of your riveting equipment? What model pneumatic rivet gun are you using? I have to make up the rear section panels / frame for my 4T10.

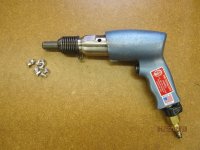
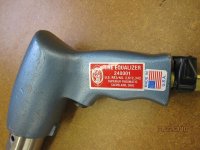
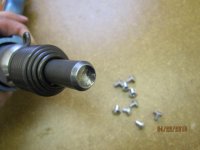
Snowcat--here are some pictures of the riveting setup. You can get the air hammer nearly anywhere. Got mine from McMaster Carr. The key is the rivet set. Need to make sure the diameter of the set is compatible with the diameter of the rivet head or else you mar the rivet head. I think my set come from Hanson Rivet. Clecos are 3/16". Relatively cheap. Just google clecos--can get alot of this stuff off ebay too. Forgot to take a picture of the bucking bar. I got mine from McMaster Carr also. The riveting process is easy and greatly simplfiied with two sets of hands. Use blind drive rivets for areas where you are not able to buck a solid rivet--they work great! :brows:
Rivets 003.jpg

Rivets 004.jpg

Rivets 005.jpg

Rivets 006.jpg

Rivets 007.jpg
 
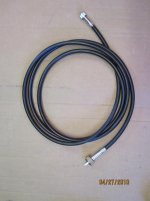
I thought I would post this just in case anyone was interested. My original speedometer cable was functional but showed alot of "wear and tear" to the protective casing. I considered just removing the casing but ended up finding a shop that fab'd me a new cable with new ends for a very reasonable fee. Should be a "no worries" cable now...:clap:

door 001_001.jpg

door 002_001.jpg

door 003_001.jpg
 
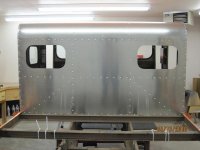
Finish up with the reskinning of the back of the cab and the driver's side door. Had to find a fabrication shop with a roller wide enough to allow for placing a slight curvature to the skin to make the transition from the top of the cab to the back. Got the windows cut in.
Skin 001.jpg

Skin 002.jpg

Skin 003.jpg

Skin 004.jpg

Skin 006.jpg
 
Your doing one heck of a nice job, your riveting looks very good and that rear snow fender looks excellent:thumb:

Thanks weatherby---as I remember it you are the one that convinced me to pull the old skin off and get rid of the third rear window and get that cat back to original---I am glad I listened to you advice. Thanks again for all your help in finding parts for this crazy project:clap:
 
nice work if i didn't know better i would swear you were an aircraft sheet metal worker the project looks very nice.
 
nice work if i didn't know better i would swear you were an aircraft sheet metal worker the project looks very nice.

Don---Thanks for your compliment. What I do for a living is the furthest thing from restoring a vintage snow cat:w00t2:
 
Top