-
Please be sure to read the rules and adhere to them. Some banned members have complained that they are not spammers. But they spammed us. Some even tried to redirect our members to other forums. Duh. Be smart. Read the rules and adhere to them and we will all get along just fine. Cheers. :beer: Link to the rules: https://www.forumsforums.com/threads/forum-rules-info.2974/
You are using an out of date browser. It may not display this or other websites correctly.
You should upgrade or use an alternative browser.
You should upgrade or use an alternative browser.
1973 Tucker Sno Cat 1443 New to Me
- Thread starter Track Addict
- Start date
Tucker Someday
Member
Must have been blowing a gale up there. Had football playoffs in Plymouth and it was a steady 25mph, snow squalls and gusts to 40+ straight across the field. Completely killed our passing game.
Davenet, I’m sure it was still as good as the Patriots passing game yesterday! Ouch.
Sent from my iPhone using Tapatalk
Track Addict
Bronze Member
Was nice until noon then wind and sno sideways.
Track Addict
Bronze Member
Track Addict
Bronze Member
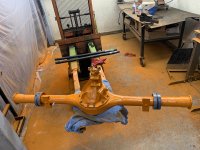
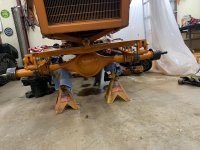
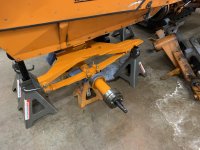
Tucker is back on its own weight. Nothing broke so that’s good.
New bearings pressed. New axle seals and races installed.
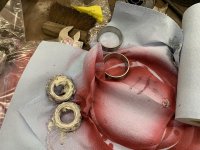
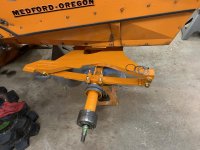
Shimmed the axle endplay. On the pontoon cats the manual talks about adding shims between the retainer to adjust endplay. These old ones I see
have the opposite problem of the races sit recessed from the retainer needing shimming added due to lots of endplay. Probably wear somehwere.
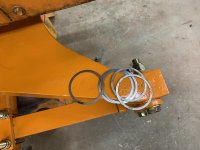
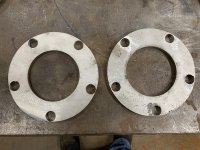
Tucker sympathizer made these up years ago which are the size of the outer race on the thick side. Does just the trick. You will see some ones I use for the carrier coming up as well.
Almost done with this project.
Saw Tucker Claus dropped some 442 parts off at the workshop.....
As and aside from this build we celebrated 730 days the without a Tucker incident at our annual event Friendsgiving event.
Another sympathizer who has been featured in these build threads over the years honored Tucker and proved there is no hill too steep. Only one miner injury skin abrasion due to a loose track pin on the subject cat!
Attachments
-
 4415FB2B-E619-4E57-9C3D-012CD16F2EFC.jpg108.2 KB · Views: 375
 -
 F326AF82-7ED5-4803-8F3D-26779710C49B.jpg97.4 KB · Views: 362
 -
 EDDD2798-63AE-4696-BE7F-8A6F6E46232F.jpg96 KB · Views: 371
 -
 F727A065-1F12-455F-BFC3-42196EFA5335.jpg71.4 KB · Views: 365
 -
 279DD536-DCB4-433B-8A33-1CF16119CAA5.jpg115.7 KB · Views: 374
Track Addict
Bronze Member
Happy Thanksgiving!
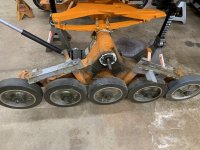
Got a little time with Tucker before dinner.
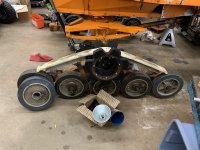
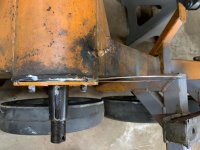
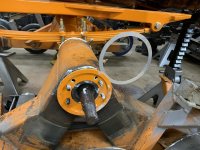
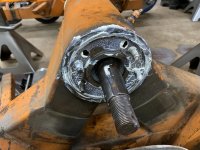
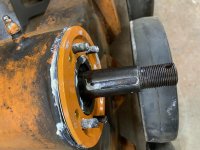
Carriers all on. Pictures are the shims I use in this area. Where the carrier meets the journal and the end cap is a overlooked wear surface. To grease this the tracks should come off and the sprocket. Needle grease or loosen the retainer. Not sure how often but keep this area in mind.
Attachments
-
 2B6A8DD7-E193-486F-9A45-865E24505FAA.jpg118.2 KB · Views: 331
 -
 617B4CD1-F5AE-419C-938B-46BF1CB518A0.jpg91.4 KB · Views: 314
 -
 7C60EB9C-5D44-4FEB-8768-B3D5546F7A2A.jpg114 KB · Views: 321
 -
 E01CD19E-AB31-490C-B366-2A3A3570EA3A.jpg103.5 KB · Views: 331
 -
 D1FE08AD-6F76-42C1-966B-571542F8670E.jpg94.4 KB · Views: 335
 -
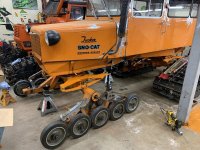 333BD34A-D687-4470-B93A-9BA610D0F3E4.jpg137.3 KB · Views: 331
Track Addict
Bronze Member
Track Addict
Bronze Member
Track Addict
Bronze Member
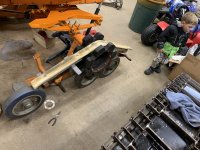
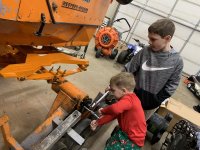
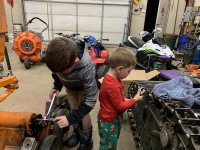
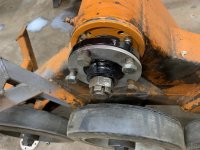
Hubs and nuts torqued. Stainless cotter pins. Made up some new spacers.
The clearance without them isn’t enough for my liking. Added same ones on the back worked great. If or when bearing tape starts to wear should buy more time before carrier hits sporocket.
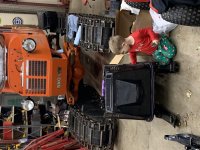
Boys asssisted for awhile. Going to need some new Tucker projects soon with all the extra hands.
The clearance without them isn’t enough for my liking. Added same ones on the back worked great. If or when bearing tape starts to wear should buy more time before carrier hits sporocket.
Boys asssisted for awhile. Going to need some new Tucker projects soon with all the extra hands.
Attachments
-
 8D6560A2-7369-4AA1-8949-7D6F86AAB014.jpg124 KB · Views: 244
 -
 FFD5212E-9933-4F6C-B706-4E437B890958.jpg133.3 KB · Views: 240
 -
 D806E152-F24B-4A7C-96AC-35624B621A92.jpg93.3 KB · Views: 245
 -
 82EEE514-1249-41D8-BD20-A8B3944BA6CD.jpg134.1 KB · Views: 243
 -
 D31379C1-D1D3-4DF5-867E-B4072F666F43.jpg122.5 KB · Views: 240
Track Addict
Bronze Member
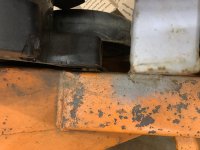
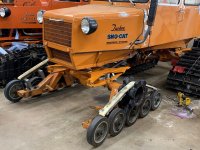
New grade 8 sprocket bolts and lock washers installed with sprockets and spacers. As you can see with the spacers there’s not a lot or room for carrier wear until they hit.
Filled the differential and installed the hyfax.
Tracks could go back on quick but looks like I have some time. Going to swap out some rk wheel and the extra ice breaker on the passenger side.
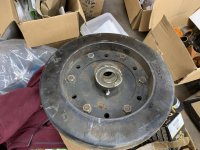
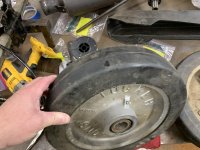
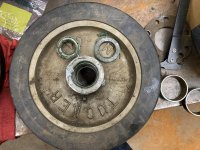
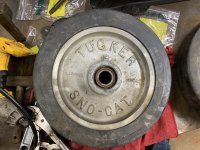
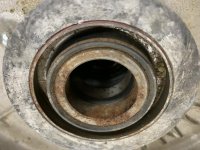
Found a NOS wheel in the stash along with a good used. Going to put new bearings and seals in. Interesting setup on then NOS seal and spacer. None of the other ones look like this on the cat.
Attachments
-
 8F587011-11DB-4A54-B0B7-4C348696FE8C.jpg94.2 KB · Views: 689
 -
 A2D8B6C4-02F5-48CC-B909-3C310788CC78.jpg84.8 KB · Views: 657
 -
 1E7AC098-083A-4489-B78D-91AF1C7970A9.jpg123.2 KB · Views: 1,300
 -
 CF0825A5-45FE-4B58-ACB9-ABC6B16D7F79.jpg91.6 KB · Views: 678
 -
 AB48ECA2-F259-4424-B68A-3FADB5084310.jpg134 KB · Views: 649
 -
 6FC7AC8B-8A7D-4618-998A-86256C47E164.jpg131.1 KB · Views: 673
 -
 627EB350-7CDA-417E-8330-28CB4B1996EA.jpg100.3 KB · Views: 665
 -
 DA9D4C05-167F-4AAD-B605-9950527FF9F1.jpg129.8 KB · Views: 668
 -
 24C2568F-7A07-46D9-B206-6462A9476705.jpg91.7 KB · Views: 677
Track Addict
Bronze Member
So these could be under those flat washers. I haven't pulled a wheel off the carrier yet.
Track Addict
Bronze Member
Pulled off the extra ice breaker and the RK wheel. Front will now be back to matching.
The wheels all have spacers and varying seal configuration. Going to replace some bearings seals reversed and the Tucker washers which keep the snow and debris out.
The wheels all have spacers and varying seal configuration. Going to replace some bearings seals reversed and the Tucker washers which keep the snow and debris out.
Attachments
Track Addict
Bronze Member
Pulled the bearings and seals from the NOS wheel. Although never used it was never grease and has some rust.
New bearings and seals on the way.
Seal National 471429
Bearing Timken LM67048
Other wheel had
Seal Chicago Rawhide 1612
Bearing SKF LM67048/Q
The national seal has a better lip than the C/R.
The seals do install backwards.
New bearings and seals on the way.
Seal National 471429
Bearing Timken LM67048
Other wheel had
Seal Chicago Rawhide 1612
Bearing SKF LM67048/Q
The national seal has a better lip than the C/R.
The seals do install backwards.
bobby wilkes
New member
What were the part numbers for the inner and outter bearings and races and seals?? I have a tucker 1644 would be nice to know the numbers thanks keep up the great work with nice pictures
Track Addict
Bronze Member
Races are in good shape so did not pull look.
I’ll see if I can figure out.
I’ll see if I can figure out.
bobby wilkes
New member
thank you
Track Addict
Bronze Member
Only squared up the front and rear tables tonight on this one. Couldn’t cross any of those part numbers easily. Jean at Track Inc East had the parts and numbers quickly for me thanks!
Fired it off tonight purrs. Needs an exhaust manifold.
Fired it off tonight purrs. Needs an exhaust manifold.
Track Addict
Bronze Member
Napa BR6 bearing and race for idler wheels
Chicago Rawhide 16128 seals
Two per
Chicago Rawhide 16128 seals
Two per
Not to hijack the thread, but I'll throw out a couple of thoughts:
When it comes time to replace wheel seals many people go to their local auto parts store or bearing supply company and get seals there. Those seals, made by companies such as CR (Chicago Rawhide, now owned by SKF) and National are usually a double-lip design.
One can also buy seals from Tucker and they're different. Tucker uses a triple-lip design, and the seals themselves use a special rubber compound designed for low temperature applications. They used to be very reasonably priced. I bought a bunch about eight years ago at $2.75 each. Now they're $4.45 per...a 62% increase. Ouch!
I've seen the backwards seal installation technique recommended before, but I think folks are overlooking something in blaming the wheel seals for grease contamination issues.
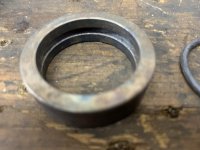
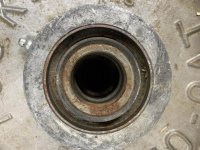
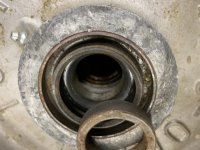
If you think about the Tucker idler wheel setup (damper wheels, if you have those, are similar), you have a spindle, whose outside diameter is substantially less than the wheel seals inside diameter. Tucker uses short machined steel sleeves called "ring seals". The wheel seal rides on the the OD of the ring seal. Look at the inside of the ring seals pictured in this thread. Here's a pic so you don't have to scroll backwards.

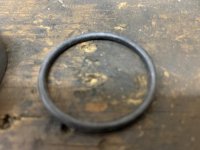
The inside is just machined steel, and it's designed to slide over the spindle. There is no sealing capability whatsoever between the inside of the ring seal and the spindle, and water, or other contaminants, can fairly easily get in and raise havoc with the bearings. Tucker (correctly) recognized this and came out with a revised ring seal design that incorporates a groove on the ring seal ID for an O-ring. That O-ring makes a seal with the spindle. I don't know when they introduced the redesign, but I suspect many Tucker owners are replacing wheel seals when they aren't the problem at all. If your machine has the original style ring seal design I'd consider machining the groove and adding an O-ring to your existing ring seals, or possibly purchasing new ones from Tucker. Here's a pic of the second generation ring seal.
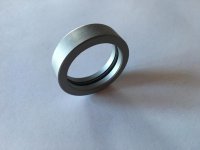
When it comes time to replace wheel seals many people go to their local auto parts store or bearing supply company and get seals there. Those seals, made by companies such as CR (Chicago Rawhide, now owned by SKF) and National are usually a double-lip design.
One can also buy seals from Tucker and they're different. Tucker uses a triple-lip design, and the seals themselves use a special rubber compound designed for low temperature applications. They used to be very reasonably priced. I bought a bunch about eight years ago at $2.75 each. Now they're $4.45 per...a 62% increase. Ouch!
I've seen the backwards seal installation technique recommended before, but I think folks are overlooking something in blaming the wheel seals for grease contamination issues.
If you think about the Tucker idler wheel setup (damper wheels, if you have those, are similar), you have a spindle, whose outside diameter is substantially less than the wheel seals inside diameter. Tucker uses short machined steel sleeves called "ring seals". The wheel seal rides on the the OD of the ring seal. Look at the inside of the ring seals pictured in this thread. Here's a pic so you don't have to scroll backwards.

The inside is just machined steel, and it's designed to slide over the spindle. There is no sealing capability whatsoever between the inside of the ring seal and the spindle, and water, or other contaminants, can fairly easily get in and raise havoc with the bearings. Tucker (correctly) recognized this and came out with a revised ring seal design that incorporates a groove on the ring seal ID for an O-ring. That O-ring makes a seal with the spindle. I don't know when they introduced the redesign, but I suspect many Tucker owners are replacing wheel seals when they aren't the problem at all. If your machine has the original style ring seal design I'd consider machining the groove and adding an O-ring to your existing ring seals, or possibly purchasing new ones from Tucker. Here's a pic of the second generation ring seal.

Track Addict
Bronze Member
Great info and tip. For new spacers for these wheels on the way!
The NOS seal is definitely a triple seal much better design than the replacement one on other wheel.
That part number is what Tucker uses today according to Track Inc east.
The NOS seal is definitely a triple seal much better design than the replacement one on other wheel.
That part number is what Tucker uses today according to Track Inc east.
Track Addict
Bronze Member
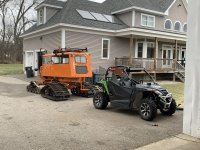
they are known as over passesInteresting discovery next door.
This use to live at a local tubing hill which I heard closed.
We do have hills in Haverhill so maybe?
Track Addict
Bronze Member
Track Addict
Bronze Member
Got the spacers. They are just under 10$ per. You need 40 or more depending on the machine.
The most cost effective way is turn a groove in existing using this as a guide and buy some orings if so inclined. Great info from Blackfoot and makes perfect sense.
Evolution must have been seals in backward water intrusion. Then the washers over the seal still water intrusion. Then this which is the fix.
That being said seals in either way. Reverse would have bought just a little more time before the water hit the bearing. Reverse requires a little less grease for the first fill. If you have the washers I think this is preferred method. Also depending on your seal and lip orientation on the replacement you may want to put one way or another.
Attachments
Track Addict
Bronze Member
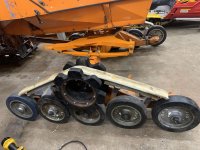
Front is all back to matching. Driver side icebreaker was on backwards.
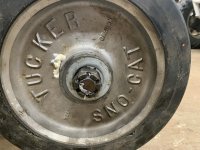
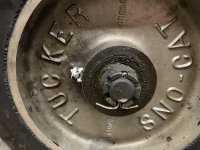
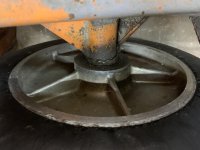
Pics show wheels with seals in correct and reversed with the washers. Washers must help keep the seals from blowing out when greasing.
Pics show wheels with seals in correct and reversed with the washers. Washers must help keep the seals from blowing out when greasing.
Attachments
-
 C93D039B-146E-4555-BA19-E95587361237.jpg112.5 KB · Views: 416
 -
 61F514FE-FA62-409D-B1BC-77685194657F.jpg104.6 KB · Views: 387
 -
 424C229D-516E-4F0B-AB66-13031C630275.jpg95.9 KB · Views: 377
 -
 071FF9EA-9819-4328-B8B3-17661923D019.jpg69.6 KB · Views: 572
 -
 1B856782-012F-41DE-A9CF-28181AB66C6F.jpg76.6 KB · Views: 400
Track Addict
Bronze Member
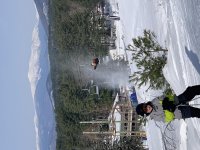
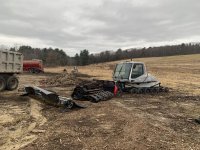
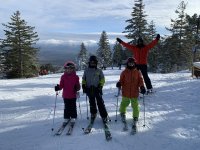
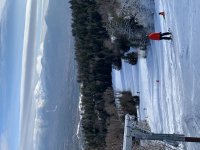
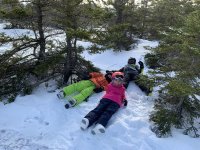
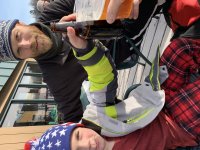
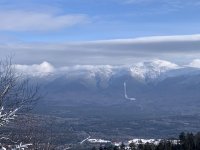
Back from a little family vacation down south and was happy to cap it off back in the north! Changes in latitude, changes in attitude? Should be increase in altitude improves attitude!
Plan is to get the tracks back on this week. After that just need to remember where I put the sno?
My buddy on the red is 6’10” or so then add skis and boots.
Happy New Year!
Plan is to get the tracks back on this week. After that just need to remember where I put the sno?
My buddy on the red is 6’10” or so then add skis and boots.
Happy New Year!
Attachments
-
 70E7C384-2C04-4BC2-86A4-25AC1A6AE5FF.jpg121.9 KB · Views: 345
 -
 1D194261-A4D1-45F8-BC1F-2E2197E80D9B.jpg143.7 KB · Views: 333
 -
 33A0CF66-F645-4D7F-83E9-31E5C9F6CF65.jpg124.5 KB · Views: 333
 -
 33B0B111-D93D-4BD0-AD80-C3D70B3744B6.jpg186.7 KB · Views: 335
 -
 BCA98227-E9AF-48BC-B7F6-FBB91DD88808.jpg121 KB · Views: 339
 -
 8C42105C-A7D8-4625-91AF-604890288174.jpg79.3 KB · Views: 352
Hi All,
First time on this forum and new to the snowcat world Hoping for some advice. I own a 1999 VMC RT01. Has a Volkswagen diesel motor and a hydro-static transmission. It has just over 500 hours on it and appears to have been well cared for. Runs fine going down the trail but when I get into deep snow or even a slight grade it pulls the motor down or kills it. I'm not sure if it should spin the track or not but it won't even pull itself up on a tilt deck trailer very well. Hydraulic oil is up and filters have been changed. Also having problems breaking the grousers. They split on the 90 degree bend of the cleat. I have tried welding a wide bead on the bend and had limited success but still having problems. I know a guy in Salt Lake City who builds new grousers that are much stronger than the originals but I was hoping to avoid that cost. I would appreciate any advice I could get from those who are familiar with this machine. Thanks in advance.
First time on this forum and new to the snowcat world Hoping for some advice. I own a 1999 VMC RT01. Has a Volkswagen diesel motor and a hydro-static transmission. It has just over 500 hours on it and appears to have been well cared for. Runs fine going down the trail but when I get into deep snow or even a slight grade it pulls the motor down or kills it. I'm not sure if it should spin the track or not but it won't even pull itself up on a tilt deck trailer very well. Hydraulic oil is up and filters have been changed. Also having problems breaking the grousers. They split on the 90 degree bend of the cleat. I have tried welding a wide bead on the bend and had limited success but still having problems. I know a guy in Salt Lake City who builds new grousers that are much stronger than the originals but I was hoping to avoid that cost. I would appreciate any advice I could get from those who are familiar with this machine. Thanks in advance.

