• Please be sure to read the rules and adhere to them. Some banned members have complained that they are not spammers. But they spammed us. Some even tried to redirect our members to other forums. Duh. Be smart. Read the rules and adhere to them and we will all get along just fine. Cheers. :beer: Link to the rules: https://www.forumsforums.com/threads/forum-rules-info.2974/

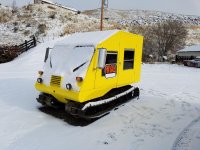
The continuing saga of Niksons 1402 IMP sn 129

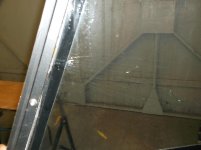
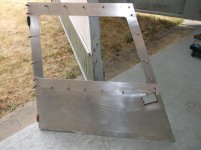
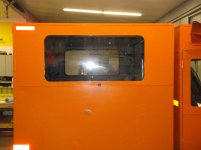
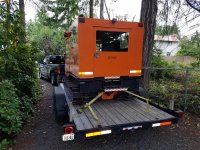
I brought the cat home to Silverdale on 5 July for summer maintenance and inspection. Somewhere between Ellensburg and home the passenger door came open and being a suicide door slammed into the side of the rear cab. I had installed rubber bumpers on both sides, after having had the same problem two years ago when the door opened on the freeway and broke the tempered safety glass in the rear cab side window. But it hit the bumper so hard it flexed the door and broke the safety plate glass. :sad: It's always something.

Everything else looked good on inspection. No safety or reliability issues. Just cosmetics and corrosion control.

The new glass is on order. I decided to rebuild both doors since I have to tear one apart anyway. I will try to figure out why the latch won't hold it closed. I had also been thinking about putting bigger windows in the side of the rear cab for better passenger visibility. So I ordered two of those while at the glass place. What started as a small repair job is now a major project. I'll cover that in the next post.

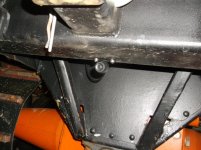
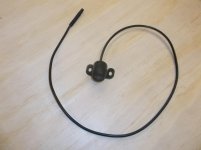
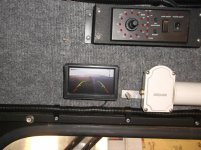
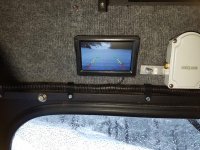
While I had it apart I installed the back up camera I bought last winter. it was pretty easy. I got a wired unit that just has a camera about the size of a walnut, and a 4.3 inch monitor. The cable length is about 16 feet total. it has a 4 pin micro plug on each end and a ground and hot lead. I wired it to the instrument circuit so it is on all the time.

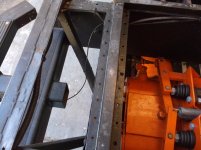
The camera is mounted on the bottom of the hitch cross member. the wire runs up the left side of the tunnel, under the dash board, up the left side of the windshield to the space above the windshield centered on the drivers side. I don't know how, but the wire was not an inch too short or an inch too long. It was just right.:biggrin: Goldilocks!
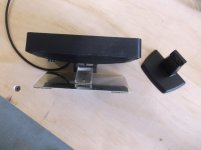
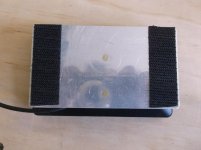
I made my own mount for the screen. The supplied arm is fairly long and had a small base. I wanted to mount the screen close to the head liner over the windshield with Velcro that will stick to the interior carpet soundproofing/insulation. That way I don't have to drill any holes.
There are distance bars on the screen. The red bars start at about 2 feet from the back bumper.
I kind of had to put the camera on the back of the chassis because the rear cab is removable. A cat with a permanent rear cab would be able to put the camera higher. I think the low mounting will be ok. It is fairly well protected. I'll find out this winter.
 

Attachments

  • DSCF1511.jpg
    DSCF1511.jpg
    130.5 KB · Views: 490
  • DSCF1510.jpg
    DSCF1510.jpg
    50.8 KB · Views: 493
  • DSCF1520.jpg
    DSCF1520.jpg
    106.6 KB · Views: 492
  • DSCF1521.jpg
    DSCF1521.jpg
    180.5 KB · Views: 498
  • DSCF1526.jpg
    DSCF1526.jpg
    53.1 KB · Views: 485
  • DSCF1525.jpg
    DSCF1525.jpg
    77.1 KB · Views: 478
  • DSCF1527.jpg
    DSCF1527.jpg
    146.4 KB · Views: 487
On the trip to bring the cat back to the shop the passenger side door came open and broke the window in the door. This is the second time this has happened. The first time it broke the window in the rear cab. Before I trailer it again I am going to make some positive clamps to prevent this from happening. I don't know why the door latch won't hold. All of the Thiokol cats have suicide doors which can really fly open at 70 miles an hour.

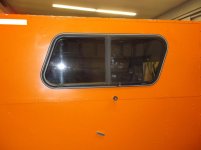
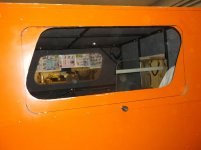
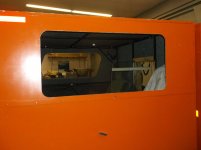
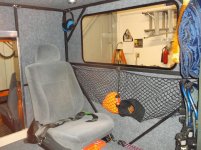
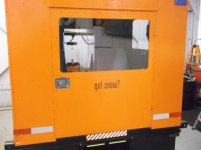
Since I had to drive all the way up to the glass shop I decided to get some bigger windows for the sides of the rear cab as well. The small camper type windows were difficult for the rear passengers to see out of. The new ones are 4" lower, 1 inch higher and rectangular. (The frame on the old windows made the glass part smaller than the cutout they went into.) The new ones are about as big as the framing will allow. All of the windows in this cat are glued in with Dow windshield sealant except the windshield which is in a grommet.
 

Attachments

  • DSCF1506.jpg
    DSCF1506.jpg
    62.3 KB · Views: 415
  • DSCF1533.jpg
    DSCF1533.jpg
    107 KB · Views: 423
  • DSCF1534.jpg
    DSCF1534.jpg
    51.7 KB · Views: 418
  • DSCF1539.jpg
    DSCF1539.jpg
    66.1 KB · Views: 417
  • DSCF1540.jpg
    DSCF1540.jpg
    54.3 KB · Views: 415
  • DSCF1545.jpg
    DSCF1545.jpg
    58.9 KB · Views: 414
  • DSCF1549.jpg
    DSCF1549.jpg
    147.7 KB · Views: 417
  • DSCF1543.jpg
    DSCF1543.jpg
    64.1 KB · Views: 418
when I bought a bombi in idaho bill put a bungee between both inner door handles. on the snow trac I put one on the hood .
your improvements are looking good. what latches are you planning to use?
jim
 
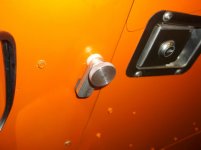
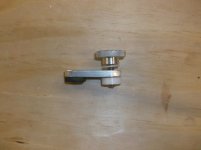
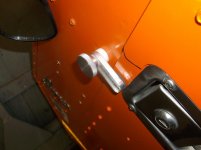
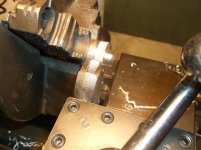
Hi Jim. This was my solution. I made these this morning.
 

Attachments

  • DSCF1553.jpg
    DSCF1553.jpg
    42.8 KB · Views: 399
  • DSCF1555.jpg
    DSCF1555.jpg
    47.7 KB · Views: 403
  • DSCF1552.jpg
    DSCF1552.jpg
    54.9 KB · Views: 401
  • DSCF1551.jpg
    DSCF1551.jpg
    97.7 KB · Views: 402
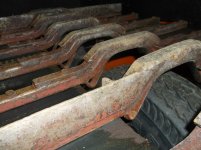
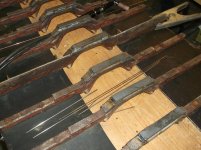
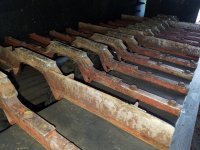
The drop center grousers on my 1402 were pretty worn out when I got it. They had been repaired at one time with 1/4 X 3/4 flat bar when the original wear plate had been worn to the point of being gone and the wear was going into the 3/4 square tubing. The repair is now worn out. The grouser at the tire guide should be 1- 3/16 inch thick. Some of mine are down to less than 7/8". I cut up about 40" of 1/4 X 3/4 and 3/16 X 3/4 flat bar and welded it to the bottoms to get the thickness back to spec. It's slow going. I don't have a water cooled tig torch so I have to stop and let things cool down. I rarely have welding jobs this big. Plus who knows what kind of rod the repair was done with. On some grousers mild steel rod pops and pockets like crazy. Stainless rod seems to work the best. One track is done.
It would be nice to get all new grousers, but the cost for 110 of them would be half the value of the cat.
 

Attachments

  • DSCF1557.jpg
    DSCF1557.jpg
    118.2 KB · Views: 393
  • DSCF1556.jpg
    DSCF1556.jpg
    133.2 KB · Views: 391
Hard surfacing is in the plan, but I am getting really tired of welding. Been going at it for 2 days now. Hope to finish tomorrow. Its hot in my hangar!
I don't think these grousers ever had hard surfacing. I want to put it on in such a way that it will bite into ice. We get a lot of ice under the snow on our hills from springs that continue to run in the winter.
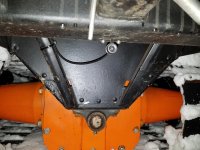
 
The cat is back home in its box with new wear pads on the grousers.

Now we just have to wait for winter.
 

Attachments

  • 20170720_080129.jpg
    20170720_080129.jpg
    118.4 KB · Views: 348
  • 20170720_080150.jpg
    20170720_080150.jpg
    185.2 KB · Views: 347
  • 20170703_094117.jpg
    20170703_094117.jpg
    152.2 KB · Views: 344
Last edited:
Great job on the tracks,and the larger window is going to be a great benefit for your rear passengers. Windows can NEVER be too large in a snowcat!
 
I don't know yet. I haven't had it out of the container since July. We probably won't get any snow until late November. I will post an evaluation after some real world experience. Check back later.
 
We had snow flurries all day yesterday and a few today. There are still white patches on the ground. This is the earliest I have seen it snow in the 15 years we have had our cabin. Hoping for a good snow year. :biggrin:
 
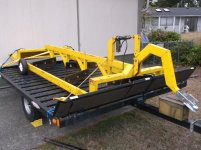
I picked up this groomer Sunday at the Puyallup snowmobile show for $600. It is 4 feet wide and about 12 feet long counting the tongue. It has 4 blades, a packing slide in back and a power jackscrew lift. It looks like a mogul master copy. The previous owner towed it with a utility snowmobile so I should be able to drag it with my little ol' 30 hp cat. A 6 foot wide drag would have been nice but this is the first one I have seen locally that was reasonably priced. I have to rig a temporary control cable setup for this winter, then if it works out I'll do something more permanent when I bring the cat home to the shop in the summer.
Our roads to our cabin get really lumpy by mid winter. Its a rough ride even in the cat. hopefully this will help.
Does anyone have experience with this type of trail groomer?
 

Attachments

  • DSCF1606.jpg
    DSCF1606.jpg
    129.8 KB · Views: 583
The wheels are just for moving it on dry ground. They come off and are stored on the front cross member. You can see the holes in the top.
Will a groomer like this do the job in one pass or do you have to go over the rough parts several times?
 
Only issue you will have is the double pass to make it wide enough for your cat. I had a drag about a foot narrower than the tucker and the edges were a challenge.

Key is grooming it from the start and keeping it smooth. You will want to pack it down then groom it. If you are the only one on the trail will stay flat. If there is traffic will get lumpy. Depending on how big the bumps get and how frozen they are will determine the quality trail grooming. That and snow fall. Tough to keep lots of powder groomed.
 
It would have been nice to have found a 6 foot groomer but this is the first one I have seen locally for sale. We have to make 2 passes anyway since it will be a round trip to the starting point. About a mile of our road gets packed and rough with whoop-di-doos from snowmobiles going back and forth. I only get over there about 4 days a month in the winter so it may be a challenge.
 
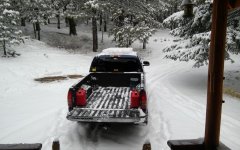
We had about 7-8 inches of snow on Nov 6th at the cabin. We have never had more than a trace of snow this early in the 15 years we have been here. I even took a snowmobile out for a ride. Looks like we will be using the cat for our next trip the day after Thanksgiving. :winterrul
 

Attachments

  • 1106170819_HDR.jpg
    1106170819_HDR.jpg
    110.5 KB · Views: 518
It would have been nice to have found a 6 foot groomer but this is the first one I have seen locally for sale. We have to make 2 passes anyway since it will be a round trip to the starting point. About a mile of our road gets packed and rough with whoop-di-doos from snowmobiles going back and forth. I only get over there about 4 days a month in the winter so it may be a challenge.

NO challenge, all those hours in the sand box as a kid prepared you for this task.:w00t2:

It is hard to give straight forward advice on beating up snow flakes. the moisture content and freeze thaw cycles make One answer impractical.

the drag you purchased will have no problem shearing off the offending snow and churning it up (friction in the working snow warms it a bit) then buttering it out the back. go in the full moon and you can see it shine and steam if it is cold enough.
as mr addict points out, Edges are a bit of a bitch on the butt as you will rock back and forth cleaning them up..... Oh wait you have the other orange machine.... the one that has all its wheels working together to ease the ride :brows:
When I pull a 10 foot drag behind a 13'6" 2100, I just put the hitch offset to the inside. Put one track off the trail in the fluff. lower the knifes to kiss off the tops on the way in. 6-9mph is Ideal.
same on the way out.
If your machine has enough grunt, Grab a cog, and go right up the middle and the way back to the coffee cup. (beverage of choice)

All you can do is hope the sleds stay off, or behave with the right thumb, until it has a chance to freeze
random thoughts below.
  • I feel grooming adds a whole new dimension to the fun of owning a over the snow machine.
  • Don't ever confuse packing with grooming.
  • early in the year pack down a base.
  • Grooming comes later after you have some stiff snow to work with.
  • Snow mobiles do an excellent job knocking the air out of snow.
  • snow mobiles like/love groomers
    • Gooming snow will stress test your exhaust system and the paint that inadvertently got on it, don't worry about it, thats why the doors have hinges......
have a great snow season
 
Thanks for the great advice. Our roads get well packed by snowmobiles, but then we get the odd idiot who tries to drive his truck up the road and tears it all up. We usually don't get too mogully til late January although if there is wind we get some drifting in certain spots. There is really only about a mile of road that gets rough but parts of it are real steep. My cat is only 30 hp so low gear and 5-6 mph will be it.
I didn't think about offsetting the hitch. Mine is dead center. So I will have a foot of track either side of the groomer. Is that something I should modify next season?
When making a u turn, do I just raise the front of the groomer and turn like normal? My cat is only 10 feet long.
What about backing one of these things up if you are in a tight spot?
I've already had offers from sledders to buy my gas. So they should be happy. :smile:
 
Don't sweat the offset, it is just a looks thing. a smooth flat ribbon is something to lust over. the grouser marks outside of the pan actually help get snow built up as the blowing snow will drift, if it bugs you just get some cheap comb from fall line and put little wings on to smooth out the grouser marks.
before a turn you will want to run your actuator up and pan out the snow, (empty the drag) lower it a bit when you back up to keep it from digging in, it looks to be built well and should slide backwards. Like backing a school bus up to turn around, backing a drag around to a jack knife is easier than the foot ball field it seems like it takes to pull it around. a properly placed stump of post will help facilitate a tight turn,
you will get into all kinds of frustrating spots, best advice I got to avoid neck strain is.....

Just Go.

I have gone miles out of the way to a good spot to turn around rather than making a j turn then spending 12 minutes trying to clean up the mess a tight turn creates.

BTW. I will take a stout 30 HP WI, over a crappy running V8 that idles weak anyday.
 
How's your rear view camera holding up? Any issues with vibrations and cold?

The back up camera seems to work great. It didn't have any snow on it after a 2.5 mile trip. It works as a rearview mirror also. There is a good view to the rear while traveling. The reference marks provide anout 5 feet of distance to the end of the green when backing. Definitely worth the 16 bucks I paid for it.
 

Attachments

  • 20171227_165856.jpg
    20171227_165856.jpg
    115.6 KB · Views: 380
  • 20171227_145848.jpg
    20171227_145848.jpg
    152.3 KB · Views: 387
I saw this little 1402 on highway 10 a few miles west of Ellensburg Wa. $7995. I put more pictures on the for sale section as well as the phone number.
 

Attachments

  • 20171227_122318_001.jpg
    20171227_122318_001.jpg
    123.8 KB · Views: 387
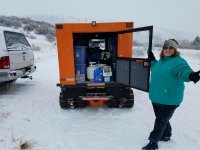
We had another successful trip to the cabin. There was a big New Years party and fireworks on our mountain so we had a lot of gear. 7 Rubbermaid totes, 6 duffle bags, 2 ice chests, propane, oil, gas, water, pop, air compressor and tools. The usual. I bet my wife it wouldn't all fit and we would have to use the cargo sled. She won.
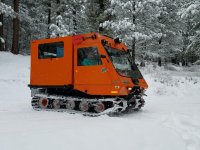
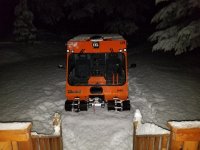
There was about 5 inches of snow when we got there on Wednesday the 27th. Thursday was nice then it rained all night and Friday, turning the snow to slop. Then the temperature dropped to 16F and everything froze solid. The road down was literally a sheet of ice. We made it down on the 2nd ok, but the cat could be competitive in Olympic Ice Dancing.
Typical Washington winter.
 

Attachments

  • 20171227_142628_001_resized.jpg
    20171227_142628_001_resized.jpg
    91.7 KB · Views: 338
  • 20171227_150217_resized.jpg
    20171227_150217_resized.jpg
    146.4 KB · Views: 342
  • 20171228_191413_resized.jpg
    20171228_191413_resized.jpg
    88.1 KB · Views: 338
We went to the cabin last weekend (19-22 Jan). I wasn't able to post due to a data base error on the forum when I tried to log in. Looks like it is fixed now.
There had been about 10 inches of snow on Thursday but when we arrived on Friday it was 38 deg and the snow had shrunk to 5". Pretty mushy and wet. A lot of the road was bare gravel but there was still a lot of ice on the shaded areas of the road. Naturally those areas are the steepest sections. It was pretty hairy coming down on Monday to go home. I tried to keep one track off to the edge of the road so it would be in undisturbed snow, but on our steepest part, downhill, with the right track on the outside of a gentle turn, and the left track on ice, with the left brake on full, I could not turn left around the corner. The left track was just skating. It eventually started to hold and we made it around. I was reluctant to stay on the inside (left) of the turn as that is a steep slope into a canyon.
I would have thought the drop center grousers would have done better on ice because the ground pressure would be higher on a solid surface. I need something on the grousers to bite into the ice that won't tear up other surfaces. Any ideas?

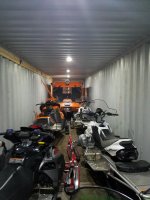
I picked up a very nice 20' storage container last week for the cat. My buddy who let me keep it in his 40 footer just bought a new Ranger 4 seat UTV with tracks. There is room in his for both, but it will be more convenient to have my own. I got it for $1000 but still have to have it moved over to Ellensburg in the spring.
We put vents in the door and a turbine vent on the roof of the opposite end on his to pull the moisture from melted snow out. I'll do the same on mine.
 
Would spotting with a carbide nuggets like they do horse shoes work? tradenames such as borium, drill tek, carbraze...

??

CT
 
Top