-
Please be sure to read the rules and adhere to them. Some banned members have complained that they are not spammers. But they spammed us. Some even tried to redirect our members to other forums. Duh. Be smart. Read the rules and adhere to them and we will all get along just fine. Cheers. :beer: Link to the rules: https://www.forumsforums.com/threads/forum-rules-info.2974/
You are using an out of date browser. It may not display this or other websites correctly.
You should upgrade or use an alternative browser.
You should upgrade or use an alternative browser.
Picked up another project
- Thread starter m1west
- Start date
This morning I had an extra 1/2 hour so i pulled the oil pickup tube and started loosening rod bolts. Im going to loosen them all, then snug them, then start changing the bearings one at a time torquing them as I go. The Oil pan and pick up tube will not be reused. The new rear sump pan and pick up I bought for it will be used to clear the front axle.
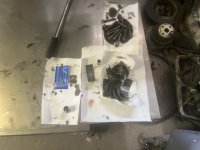
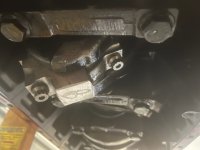
It was 85 today, after lunch I swapped out the rod bearings and put in the new ARP bolts.
It was a little bit of a PITA because its tight in there and has angled rod cap plus I'm laying on my back.
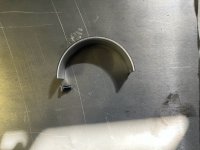
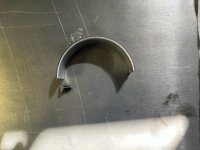
All of the old bearings still looked good and really could have run them as is, but for a few bucks they are new with good bolts.
I just did the rods, I snugged the bolts and will torque the rods and mains at the same time. It started getting a little hot out there so I will do the mains tomorrow. Altogether it took a couple hours
This afternoon had a little time so I broke loose all the main bolts and pulled off the rear main. Bearing looks good. Tomorrow I will start rolling them in right after I make a tool that will be inserted into the oil feed hole in the crank, then when the crank is rotated will roll the bearing out. It will make it from a bolt that with a wrap of electrical tape will fit snugly in the oil feed hole, then grind the head down a little thinner than the bearing. Its so tight in there, there is no way to do the upper bearing by hand. Using a screwdriver to start it out is a good way to slip and mar the crank journal, also the thrust bearing would be impossible to rotate out by hand. We will see how it goes, I'm sure there will be some swearing and skinned knuckles before its done.
So this morning after chores, I went after rolling the main bearings. Took about 3 hours. Only had to use the roll tool twice, the rest rolled out by spinning the crank while putting pressure on it with my hand. They all looked good and could have been run as is. Only a pain because of laying on my back and there isn't much room in there. Next I will torque all the rods and mains and change the rear crank seal in the housing and put it back on. Then it will be time to move on to the fuel system.
Just ordered ARP main studs, On the net there is a lot of conflicting info for the torque spec on the main bolts, some say to step up to 66# then turns 90 degrees, others stepped up tp 130#. While trying to figure that out, one thing I kept hearing is its not recommend to reuse the factory bolts after they been torqued before. So for $239.00 I now have main studs coming to go with the rod bolts and head studs. now everything is ARP and if I decide 600hp isn't enough I can turn it up more.
Today it was drizzling so I took advantage and finished the bottom end, swapped out the main bolts for arp studs, then torqued the mains 3 step to 125# and the rods 3 step tp 95#. Now I'm off my back for a while until the oil pick up and pan go on. Still have to do the rear main seal then start pulling the old fuel system.
Looking at my last post, it’s been more than a year since I got slammed with work then summer came and it was too hot in the garage then finished the COOT project then almost finished with the RaidTrac project, both of those sat around 4 years. Now that the RaidTrac is outta the garage, today I started the big clean up and organization of the garage. This project is now back on the radar, although I may put the other Cummins 12 valve with an Allison in my hauler first, most likely I’ll kinda work on them both at the same time. I’ll start a thread on that project to.
Today I removed the old main seal from the housing, installed the new seal, put the housing back on the engine and torqued to 84 inch pounds. That concludes the bottom end except for the new pick up tube and rear sump oil pan, those can’t be installed until I do the pump swap and put the front cover back on.
First pull the vp44 pump
Remove the rockers and push rods then tie the lifters up off the cam lobes, electrical tie wraps work goof for that then pull the cam.
Remove the old front cover and install the p pump cover
Put the cam back
Install the p pump with the timing at 21 degrees btdc , this modification is worth a good amount of power on its own. If you advance to far it will be hard to start in the cold. While the push rods are out and the rockers are off, install the new 4000 rpm valve springs and head studs. Just ordered the injection pump gear puller, thought I already had one but did not. So now we wait a week for it to show up.
Pulled the lift pump, filters and lines, plus the injector lines
Then the front gear cover and rolled the engine to TDC.
Had to stop there until I get a new piece of clean plastic to bag it with to keep the dust out, next the valve cover comes off and we start swapping parts.
Then the front gear cover and rolled the engine to TDC.
Had to stop there until I get a new piece of clean plastic to bag it with to keep the dust out, next the valve cover comes off and we start swapping parts.
Today I had time to change all the valve springs,it was a bit of a learning curve with the spring compressor, and i got better as I went. One big thing you can not forget is to bring the piston to the top of each cylinder as you go or the valves will end up in the bore when the retainer locks pop. I left #1 springs off for now, tomorrow I will rig up a dial indicator on one of the valves, lower the piston about .100 and set my degree wheel to 0 then roll the crank so the piston goes over TDC then down until it reads .100 again. Take the total degrees moved and divide in half and move the degree wheel 0 TDC to that number and roll the crank to 0 again. That is true TDC. Then I can pull the cam swap front housing to accept the p pump and put the cam back. To do that I first have to pull the lifter cover and tie all the lifters up off the lobes with zip ties.
Today I found true TDC and set the degree wheel, then scribed the rear crank flange to the rear seal housing so it can’t be lost. Finished the valve springs, now I can rev to the moon.
Pulled the injection pump and a vacuum pump from the gear housing.
Removed the lifter galley cover to get at the lifters, and ordered a billet one so it doesn’t flex and leak
Pulled the injection pump and a vacuum pump from the gear housing.
Removed the lifter galley cover to get at the lifters, and ordered a billet one so it doesn’t flex and leak
J5 Bombardier
Well-known member
Never liked the wooden dowels we used to hold up the 8.3 lifters ,when the ISL Cummins came along with the roller lifters the tool improved , good thing cause we had lots of lifter failure and cracked front covers .Tomorrow, I will tie all the lifters up
Pull the cam
Swap the front cover to a p pump cover
Put the cam back in
Anyone need a good VE injection pump with the gear, lines an brace?
I’ve seen that trick, I think the tie wrap method is a little more positive.Never liked the wooden dowels we used to hold up the 8.3 lifters ,when the ISL Cummins came along with the roller lifters the tool improved , good thing cause we had lots of lifter failure and cracked front covers .


