• Please be sure to read the rules and adhere to them. Some banned members have complained that they are not spammers. But they spammed us. Some even tried to redirect our members to other forums. Duh. Be smart. Read the rules and adhere to them and we will all get along just fine. Cheers. :beer: Link to the rules: https://www.forumsforums.com/threads/forum-rules-info.2974/

Bombardier SW48 Restoration 2016

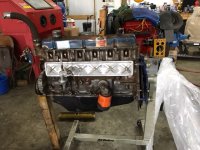
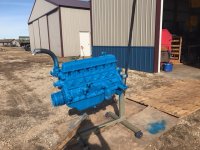
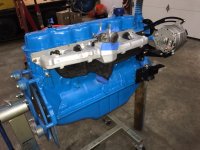
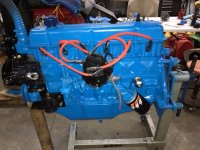
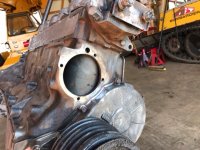
Thanks gents. I refurbished the engine (mostly cosmetic, ran perfect except for worn out water pump, replaced gaskets and seals); these Ford industrial engines are tanks.....they sure made them to last!

cItWjYVej5.jpeg


Ybx03Kwa1M.jpeg


2eKD3v2Ly=.jpeg


xaYb4(3GYb.jpeg


1wutC&ld1l.jpeg


WZk6p=w)Hu.jpeg


A lot of elbow grease and Ospho (convert the residual rust the wire wheel couldn’t get off)....and that sweet baby blue Ford paint.
 
Last edited:
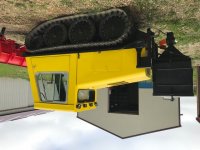
took the liberty to make them right side up.
 

Attachments

  • 1.jpeg
    1.jpeg
    143.1 KB · Views: 682
  • 2.jpeg
    2.jpeg
    148.7 KB · Views: 725
  • 4.jpeg
    4.jpeg
    159.3 KB · Views: 733
  • 5.jpeg
    5.jpeg
    136.8 KB · Views: 687
  • 6.jpeg
    6.jpeg
    154.5 KB · Views: 686
  • 3.jpeg
    3.jpeg
    161.5 KB · Views: 742
Thank you! I’m on an IPad, can’t tell if they view upside down for others (my 12 year old son is my tech consultant)
 
Finished the diamond plate today ......cut two slots for the Control handles using the CNC mill, bolted the plates down....good to go! Was able to hook up the fuel line from the pump to the carburetor....now to start on the wiring. Having fun!

LMk411ZK)Q.jpeg


lJ9CoebviF.jpeg


cBI!(Wd(CU.jpeg


o~DVIIT!OZ.jpeg
 
Oops....what’s this muffler doing over here? Forgot to put muffler back on when installing engine (was waiting on flange studs). Lifted engine off rear mounts, quick fix. Having fun!

fXQol~QpoV.jpeg
 
Got the transmission shifter put together, gas and parking brake pedals hooked up (almost forgot the little spring on the brake pedal), ready for wiring! Getting there .....having fun!

S=NC!JWn6o.jpeg


la&gq)mC8I.jpeg
 
The engine is running! After I installed the new HEI distributor, found TDC on #1, backed it off 10 degrees.....no fire! Realized I had the wires two cylinders off (before the rotor).....moved them all clockwise 2 positions....fired right up! Set the spark gap, fuel/air mixture......runs like a top!

Got one of the tracks on (minus the drive gear).....used muscles I didn’t know I had. One more to go, should be ready for a test drive!

Having fun!

q&ozzVrbMI.jpeg


dR3_DuvjF5.jpeg


96oMVbpPD=.jpeg
 
It runs! Got the tracks on, tightened them up, fired up the engine.....drove the machine up to the house. A couple more items (finish wiring the cab, install, mount plow and hook up hydraulics)....and she’s ready for next year! So....what to work on next....

Xk5ZDTHyeP.jpeg


How about a Bombi? Found this beaut at an auction in Indiana (was owned by the IN DNR)....really good shape. It needs some TLC, but on a cursory run.....great little machine.

k80kAwqLAf.jpeg


2dWkT_!LSM.jpeg
 
Sweeet.

Well if the original casting is broken then building one from a steel fabrication and machining it certainly might make the long term durability much better.

I would not attempt welding it.. the durability of a welded casting is sketchy at best.

Doable...yes.. long term..not so good.. and that part is a mission critical item and likely tough to get to.

Plus when it breaks it will not be in a great place...like a warm summer afternoon in the shop.

Castings have their place, but after looking at where the ear was bolted to and then broken I would consider it a plus to get a good steel unit in there.

Just sayin...

Having machine tools makes these big projects far more fun.

I don't have a CNC but do have a 9 x 42 Bridgeport with a DRO on the both axis of the table.
 
Diagnosis, you are completely cat addicted. There is no known cure. Enjoy.

Haha.....I truly love working on these. Resurrecting (or improving) what others look at as worn out or from a bygone era is my passion.

My first big project was a 1974 Galion 150 crane. It took 3 1/2 years, a ton of time and $$$, but it was a journey worth taking (still figuring out what I’ll use it for).


g_GOVdRjnv.jpeg


I recently considered this as my next project, but with parts rarer than hens teeth and a width larger than what’s legal for transporting (and the lack of an ability to transport it)....its something I’ll likely take a pass on.

!CNwM~kciW.jpeg


Having fun!
 
Sweeet.

Well if the original casting is broken then building one from a steel fabrication and machining it certainly might make the long term durability much better.

I would not attempt welding it.. the durability of a welded casting is sketchy at best.

Doable...yes.. long term..not so good.. and that part is a mission critical item and likely tough to get to.

Plus when it breaks it will not be in a great place...like a warm summer afternoon in the shop.

Castings have their place, but after looking at where the ear was bolted to and

then broken I would consider it a plus to get a good steel unit in there.

Just sayin...

Having machine tools makes these big projects far more fun.

I don't have a CNC but do have a 9 x 42 Bridgeport with a DRO on the both axis of the table.

When I dig into the Bombi (likely in the fall), I’ll circle back on this. Thank you for the heads up. And a Bridgeport is good as any CNC...just takes a little longer (some of the smartest people I ever met/worked with were Tool & Die makers......whom I learned machining from.....on a J mill and Leblond lathe).
 
Me too.

I started out in a machine shop that operated solely on WWII vintage machines.

The co eventually got some 1960's vintage stuff and then about a year before I left and started my trucking company they invested in a couple fairly new (Then late 80's) DRO equipped Bridgeports.

Learning to do machining the old school way teaches skills that are all but lost today.

Today's big shops generally have setup people and then operators or part changers to sit and watch the machine.

I have only been around a CNC a tiny bit.

My dad was a tool and die man as was grandpa.

Dad was the night maintenance lead for Continental can company in Portland, Ore when I was growing up and I learned soooooooooooooo much machine shop tech stuff from him.


AS you have the original cast part it will be easy to measure the critical dims and then fab up a suitable replacement with some extra material in the places that's needed

I was thinking about the FOOT that has the crack.

Making the pad longer and adding a nice set of gussets to strengthen the area.

If possible can you post a piccy of the complete adapter ???? or whatever Bombardier calls it and I will take a good look at it and maybe I can offer some ideas as to what might work well.

JUST AN OFFER :smile:

I was looking at the Diffy pics and the info on the bands.

I am using a Weasel rear axle in my van cat and there is little doubt that the bands will need to be relined.

I will give Steve at Mn Outdoor a call Monday and open a conversation on the subject.

There is a good likelihood that he can help me out.


Your project is looking great...

Always nice to see a piece of equipment put back in top shape.

I love the pix and the more detailed the comments the better. :smile::smile::smile::smile:
 
Got a good deal done this weekend.....cab is wired and on the machine! I went with LED lights front and rear.....might add some Whelen Hazard LED’s for “effect”. Having fun!

9QR5B=okMu.jpeg


DAGUZdY1Vb.jpeg


F_wgN4zpG4.jpeg


wLQMc9bv6b.jpeg


JSDWz7z!S1.jpeg


DM7zvAjIjW.jpeg
 
What’s a good hydraulic fluid to use for the plow hydraulics? The manual is calling for Dexron, so assuming a modern synthetic ATF ok?

Thank you

Bob
 
Thank you!

The recommendation on the Amsoil Poweshift SAE 50 is working great in the differential!

Bob
 
She’s almost done! Had to do some work on the plow before mounting to the machine:

Noticed a rusted out tube that holds the cutting edge on....so used a 1/4” x 3” length to make the tube whole again. Also added skis for our gravel driveway (considering the SW48 could probably plow a corn field in a pinch) courtesy of a friend in Canada (who is selling his early model SW48...
https://www.kijiji.ca/v-heavy-equip...ow/1354083915?enableSearchNavigationFlag=true)

I weld like a 6 year old with crayons, but came out ok

wtkKIHouIS.jpeg


WuHF~r5Trq.jpeg


E=GQ2~TW2Q.jpeg


The bushings on the plow were completely worn out, used a hydraulic press, saw saw....and two engine hoists to make it all work (had to think about this before attempting to get the old bushings out, new ones in)...

nyPaLVzl&T.jpeg


Cok&i!!eo7.jpeg


80N&c9t!Ex.jpeg


Having fun!
 
Project complete! I’ll add some Bombardier Logo’s, but she’s ready for SNOW! Had a ton of fun on this beauty....well designed machine.

bQV!MQorZm.jpeg


Xxc8iH4una.jpeg


Z9T5IEu~eA.jpeg


D4HfthvwXv.jpeg
 
Very nice Bobcatbob, she turned out great ! Had to stop looking at your last pics , my neck was cramping up ! Looking forward to your next project.
J5 Bombardier:hammer:
 
Darn IPhone pictures! Thank you Nikos.

Yes, the Bombardier Bombi is next! I’ve been following the modifications on the “Blue Bombi” ....that sweet cab with the additional axle...neat project. Thanks J5.
 
Finally got around to painting the Bombardier Logo’s.

I had a heck of a time trying to paint the cavities on this (drink to much coffee to free hand it). I fired up the CNC and cut a mask out of hvac sheet metal.....worked like a charm!

OAG8esr&PO.jpeg


fGqNzvQh4v.jpeg


d3HjMj_Uzz.jpeg


Having fun!

Bob
 
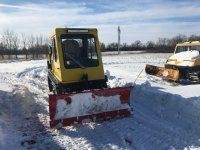
Two years ago I started restoring the SW48.....and this past weekend I took her out ....and had a Blast! It was -2 F when I started her up, warmed up for about 5 minutes....then plowed to my hearts delight!

dd=4FHMu9l.jpeg


eqU0fzH5Qv.jpeg


I even plowed around the perimeter of the farm field after doing the 3/4 mile long gravel driveway! The machine is a beast.

Having fun!

Bob
 
Top