• Please be sure to read the rules and adhere to them. Some banned members have complained that they are not spammers. But they spammed us. Some even tried to redirect our members to other forums. Duh. Be smart. Read the rules and adhere to them and we will all get along just fine. Cheers. :beer: Link to the rules: https://www.forumsforums.com/threads/forum-rules-info.2974/

Bombardier SW48 Restoration 2016

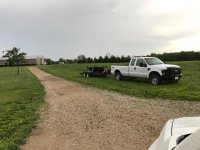
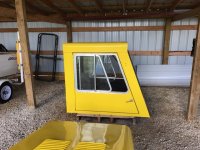
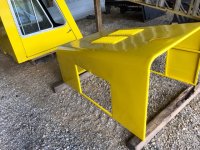
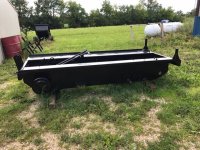
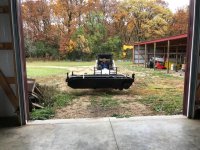
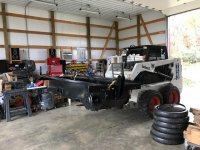
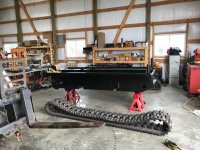
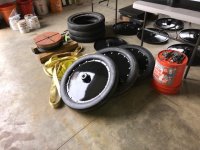
Been a few months since posting (son's baseball season ended in June), was able to knock out (pun intended) some work on the Bombardier!

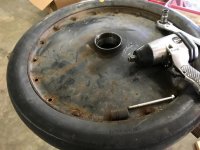
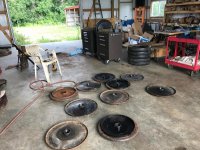
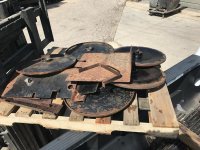
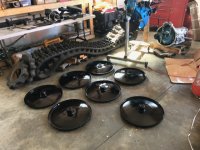
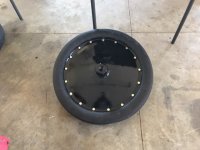
Cab and Engine cover being sandblasted and painted, frame just brought in a few days ago (will replace differential steering bands and seals once finished). The tires all need to be replaced, so separated rims to sandblast and install new races. I'll post more pics soon, but having fun with this project! I've been collecting replacement parts over the past few months, surprised to find OEM is still available. Having fun!

SW%2048-6.jpg


SW%2048-1.jpg


SW%2048-3.jpg


SW%2048-5.jpg
 
Bobcatbob

Been a few months since posting (son's baseball season ended in June), was able to knock out (pun intended) some work on the Bombardier!

Cab and Engine cover being sandblasted and painted, frame just brought in a few days ago (will replace differential steering bands and seals once finished). The tires all need to be replaced, so separated rims to sandblast and install new races. I'll post more pics soon, but having fun with this project! I've been collecting replacement parts over the past few months, surprised to find OEM is still available. Having fun!


Thats better
Nikos
 

Attachments

  • SW 48-6.jpg
    SW 48-6.jpg
    129.4 KB · Views: 585
  • SW 48-1.jpg
    SW 48-1.jpg
    101.3 KB · Views: 634
  • SW 48-3.jpg
    SW 48-3.jpg
    151 KB · Views: 592
  • SW 48-5.jpg
    SW 48-5.jpg
    154.1 KB · Views: 568
Thank you Nikos. I've emailed Doc (moderator) to see if he can delete the prior oversized images.

Bob
 
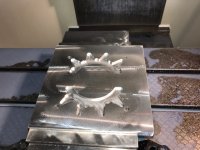
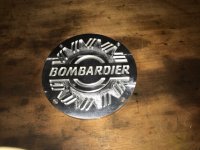
Parts back from sandblast and paint! Also did a little work on my CNC mill to add some flair when done: Bombardier Logo's. Not sure if I'll anodize them or paint....but will mount these on the cab. Having fun!


image2.JPG


image1.JPG


image5.JPG


image3.JPG


image4.JPG
 
Thank you J5

I have more pictures of recent work to upload, though want to resize to avoid the MEGA pictures displaying.
 
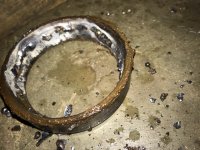
Rims sandblasted, primed and painted! Replaced all the race's in both the hubs and pivot arms.....and they were rusted in! The 20 ton press worked well on getting out the hub races, though the pivot arms were a little harder. I applied a weld bead on them....came out with a few hits using a slide hammer. To install the races.....I used cans of "dust off" air cleaner to freeze them (to around -10 to -25 F) ....worked really well! I assembled two tires (that was a trick to press the rims into the wheel, used 6 long 3/8 bolts).....having fun!

IMG_1022.JPG


IMG_1023.JPG


IMG_1034.JPG


IMG_1013.JPG


IMG_1009.JPG


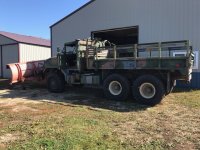
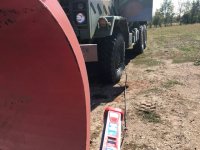
I threw the next two in to see if I'm the only scaredy cat when inflating tires to 70 Psi. The truck is an M925 with an 11 foot gledhill plow....the SW48 will be for "light" snow...lol!


IMG_1030.JPG


IMG_1033.JPG
 
Last edited:
Bobcatbob

Parts back from sandblast and paint! Also did a little work on my CNC mill to add some flair when done: Bombardier Logo's. Not sure if I'll anodize them or paint....but will mount these on the cab. Having fun!
 

Attachments

  • image2.JPG
    image2.JPG
    134.6 KB · Views: 534
  • image1.JPG
    image1.JPG
    166.1 KB · Views: 499
  • image5.JPG
    image5.JPG
    179.7 KB · Views: 551
  • image3.JPG
    image3.JPG
    106.8 KB · Views: 504
  • image4.JPG
    image4.JPG
    123.2 KB · Views: 494
Bobcatbob

Rims sandblasted, primed and painted! Replaced all the race's in both the hubs and pivot arms.....and they were rusted in! The 20 ton press worked well on getting out the hub races, though the pivot arms were a little harder. I applied a weld bead on them....came out with a few hits using a slide hammer. To install the races.....I used cans of "dust off" air cleaner to freeze them (to around -10 to -25 F) ....worked really well! I assembled two tires (that was a trick to press the rims into the wheel, used 6 long 3/8 bolts).....having fun!


I threw the next two in to see if I'm the only scaredy cat when inflating tires to 70 Psi. The truck is an M925 with an 11 foot gledhill plow....the SW48 will be for "light" snow...lol!
 

Attachments

  • IMG_1022.JPG
    IMG_1022.JPG
    128.8 KB · Views: 506
  • IMG_1023.JPG
    IMG_1023.JPG
    92.2 KB · Views: 537
  • IMG_1034.JPG
    IMG_1034.JPG
    131.6 KB · Views: 512
  • IMG_1013.JPG
    IMG_1013.JPG
    110.9 KB · Views: 506
  • IMG_1009.JPG
    IMG_1009.JPG
    140.5 KB · Views: 498
  • IMG_1030.JPG
    IMG_1030.JPG
    140.7 KB · Views: 501
  • IMG_1033.JPG
    IMG_1033.JPG
    125.6 KB · Views: 505
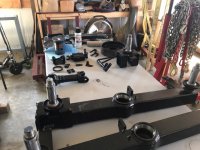
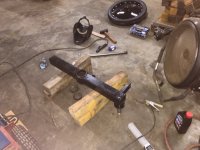
Got a little done today.....with some help. We brought the refurbished frame inside to start "winter work". Having fun!

1_image1.JPG


1_image2.JPG


1_image3.JPG


1_image4.JPG
 
Bobcatbob

Got a little done today.....with some help. We brought the refurbished frame inside to start "winter work". Having fun!

...with a little help.
 

Attachments

  • 1_image1.JPG
    1_image1.JPG
    85.5 KB · Views: 640
  • 1_image2.JPG
    1_image2.JPG
    66.8 KB · Views: 656
  • 1_image3.JPG
    1_image3.JPG
    69.9 KB · Views: 632
  • 1_image4.JPG
    1_image4.JPG
    57.9 KB · Views: 630
Hey Nikos, I think a practical joker might have flipped your monitor upside down!

Great job resizing and correcting orientation all of the other times though!!
 
Hey Nikos, I think a practical joker might have flipped your monitor upside down!

Great job resizing and correcting orientation all of the other times though!!

There is no app for that (Practical Joker photos - sending pictures from iPhone etc )
But there is an app to resize and correcting orientation all the photos, including the ones of the Practical Joker.

Nikos
 

Attachments

  • B8crmN3CUAAa2RO.jpg
    B8crmN3CUAAa2RO.jpg
    65.3 KB · Views: 606
Thank you! I'm constantly going to my IPad consultant for help (my 12 year old, takes payment in sour cherry balls).

Got this done today.....corrected the axle positions, mounted the right rear pivot arm, got 5 of the 6 wheels assembled (what a trick those are to put back together!). Having fun!

Thanks Nikos

4_image1.JPG


4_image2.JPG


4_image3.JPG
 
Drivers side suspension and tires are on! I used a come-along to stretch the spring, install the chain into the pivot arm....worked like a charm. The rear spindle was a bit chewed up (likely from the spindle support not being solid due to the sliding structure for track tensioning).....but a little sanding, elbow grease...got the bearing's on. Found putting the rear bearing on, then press fitting the grease seal on (with lip facing out) saved the risk of the seal not setting correctly. Having fun!

IMG_1111.JPG


IMG_1105.JPG


IMG_1107.JPG


IMG_1109.JPG
 
great to see another over-the-snow machine getting a full rebuild, thank you for posting the photos, and sure encourage others to do so. Nice work...
 
Got the passenger side tires on today, opened up the differential.....might have a problem. I ended up bending the bands to get them out. I bent them back .....hope this isn’t an issue when installing (sending them to MN Outdoors for resurfacing). Is there an easier/correct way to install these without pulling the differential?

Thank you

TIygD7hD.jpeg


Igs0FR0Y.jpeg


nPKjdDUi.jpeg


uXDgFqG0.jpeg
 
Very nice work . I usually pull the diff and check the side bearings when I do bands now, for piece of mind . After the cost of relining , would hate to bend one installing. Those are very nice solid tires , new rubber ?
J5 Bombardier
 
Very nice work . I usually pull the diff and check the side bearings when I do bands now, for piece of mind . After the cost of relining , would hate to bend one installing. Those are very nice solid tires , new rubber ?
J5 Bombardier

Hi J5

I refurbished the wheels to get them as close to OEM as I could (new rubber). The mistake I made was not getting everything from MN Outdoors (I’m buying everything from them now, Steve is great to work with, incredibly knowledgeable).

Do you know of a way to get the differential bands on without bending them?
They were a bear to get off.....didn’t see a way without bending them.

Thank you
 
Engine and tranny are back together! I’m hoping to get them installed over the Thanksgiving weekend. Having fun!

BmfXVeEx.jpeg
 
Engine is installed! It was a little tricky getting the engine hoist positioned under the frame with the wheels mounted and up on jack stands......though with a set of drift pins and a port-a-power...it lined up perfectly (once in a while it goes as planned). Having fun!
erVEdm6c.jpeg

7HAZTNln.jpeg


REFDCeXN.jpeg
 
A side view with machine off jack stands.....and the drive shaft with new u-joints (am I the only one who has difficulty with the spring clips?).

p3JH3F5C.jpeg


9xqo7a0K.jpeg
 
Nice work, those spring clips are a pain but far better than the GM U-Joints that are glued in. Those have to be heated with a torch.
 
Looking good ! As for the joints, makes you wonder if they have a little to much offshore content these days, remember the days when the clips were always colored black . Back then it was usually the yoke that was the problem , not sure these days.
J5 Bombardier:hammer:
 
Looking good ! As for the joints, makes you wonder if they have a little to much offshore content these days, remember the days when the clips were always colored black . Back then it was usually the yoke that was the problem , not sure these days.
J5 Bombardier:hammer:

Thanks J5 & PJL

I couldn’t believe it when on the side of the Spicer box it stated something to the extent of “some components from China”....never seen that stated in that fashion. It was a surprise. What’s next, Timken going offshore?

I recently tooled up my CNC mill and luckily I was able to find the CAT40 tool holders and carbide end mills “made in America”. When I went to buy a 0-1 Mic and a set of Calipers.....Starett, Brown & Sharp....made in China! Took the safe route and bought made in Japan (Mitutoya).
 
New differential brake bands are in! Phew.....that was a trick getting those in and secured to the Control arms. Steve at MN Outdoors took absolutely fantastic care of me on resurfacing the bands (had them back to me in a week!) and a few pointers on an easier install (take the differential cross bar out). Having fun!

PIhPPwM0.jpeg


oV7Ezlu7.jpeg


02wuRSKU.jpeg


ePmZn2mt.jpeg


UJBNzZFI.jpeg
 
Got the hydraulic valves back in (had them rebuilt do to leaks), front hoses, parking brake.....and added a “no rust differential” upgrade for the breather tube (big can of desiccant....we’ll see how long it lasts). Still working out how to mount it.

Finally, Merry Christmas from my family to yours!

rffuD8fF.jpeg


kIcljCsE.jpeg


l1XqBD7X.jpeg
 
Got some play time in this past weekend! Fabricated a radiator mount and transmission cooler brackets ....installed the seat/shifter base along with shifter and transmission cable. Used a B&M cable on this....fabricobbled a linkage from the cable to the C6 transmission (thank you McMaster Carr!). Having fun!


S~XDA6u9Dq.jpeg


(r5gJRFM13.jpeg


L2k1Vp86C8.jpeg


LdYod&cjLN.jpeg


voU8_CGNwG.jpeg
 
Top