-
Please be sure to read the rules and adhere to them. Some banned members have complained that they are not spammers. But they spammed us. Some even tried to redirect our members to other forums. Duh. Be smart. Read the rules and adhere to them and we will all get along just fine. Cheers. :beer: Link to the rules: https://www.forumsforums.com/threads/forum-rules-info.2974/
You are using an out of date browser. It may not display this or other websites correctly.
You should upgrade or use an alternative browser.
You should upgrade or use an alternative browser.
542 Cab Forward Restoration
- Thread starter GMoose
- Start date
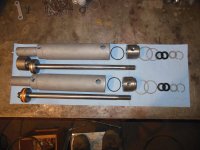
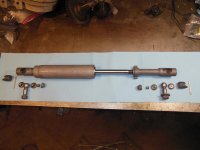
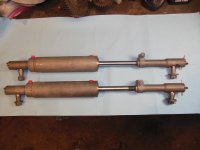
Here is the technical information I found for these rams and ball joints in case anyone else can use it.
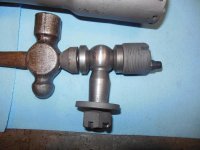
Rams are Garrison 37281. Here is also the assembly figure and the assembly instructions. I mainly wanted the assembly instructions so I could determine how tight the plug on the end is to be tightened, which compresses the spring. The spring has a very high spring constant (2333 lb/in - Lee spring part number LHP 125H 01S is what I used) and can only compress about 3/32" before the mating components go metal to metal. The only instructions are "tighten plug until ball moves freely and without any bind", that is kind of arbitrary, but I will probably split the difference and compress the spring about half of the 3/32", ensuring the joint still moves freely without bind.
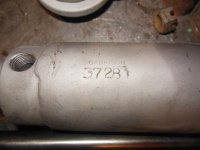

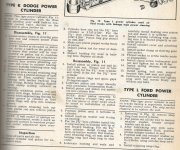
Rams are Garrison 37281. Here is also the assembly figure and the assembly instructions. I mainly wanted the assembly instructions so I could determine how tight the plug on the end is to be tightened, which compresses the spring. The spring has a very high spring constant (2333 lb/in - Lee spring part number LHP 125H 01S is what I used) and can only compress about 3/32" before the mating components go metal to metal. The only instructions are "tighten plug until ball moves freely and without any bind", that is kind of arbitrary, but I will probably split the difference and compress the spring about half of the 3/32", ensuring the joint still moves freely without bind.


How does grease get to the ball 'cup' on the spring side?
Excellent question, I had the exact same thought. I even considered installing a grease zerk on the back side of each ball joint carrier so grease could be injected on the opposite side of the original zerk. This would have also required drilling a hole in the cone shaped insert which the spring sits in. I was not sure that even with these additions that grease would get to the bearing surface, it could just squeeze around the edge and out the opening. After finding the Dodge manual which has this steering ram assembly (see post a few back), and after seeing that the condition of the poorly maintained ball joint was still in very good condition, I decided to reassemble back the way it came originally. When I install the unit I will grease all sides very well. Probably something that should be taken apart routinely, inspected and regreased anyway (assuming I am not to lazy). Inspection is probably in order since two of the three springs (one was missing) were broken in half.
olympicorange
Active member
Excellent question, I had the exact same thought. I even considered installing a grease zerk on the back side of each ball joint carrier so grease could be injected on the opposite side of the original zerk. This would have also required drilling a hole in the cone shaped insert which the spring sits in. I was not sure that even with these additions that grease would get to the bearing surface, it could just squeeze around the edge and out the opening. After finding the Dodge manual which has this steering ram assembly (see post a few back), and after seeing that the condition of the poorly maintained ball joint was still in very good condition, I decided to reassemble back the way it came originally. When I install the unit I will grease all sides very well. Probably something that should be taken apart routinely, inspected and regreased anyway (assuming I am not to lazy). Inspection is probably in order since two of the three springs (one was missing) were broken in half.
….. the ''ball seats'' have a lubrication hole in the center of each one , so range of motion, ''squeezes '' grease thru , just give it a couple pumps after each run.... the springs break from adjustment pre-loads torqued too high , and not backed off to spec.,.. usually in an attempt to take up ''steering slop'',...
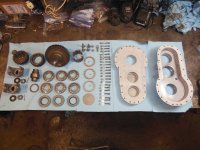
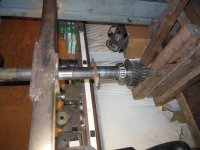
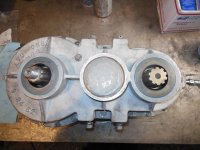
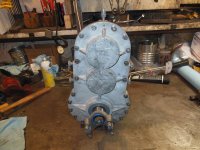
Back to the transfer case. A couple pages back are some photos of it disassembled, removal of the races, and some damage identification where the center gear rubbed.
After removing the races from the other side, where the adjustment nuts are, more damage was found where the center bearing race resides.
At sometime the center bearing race adjusting nut must have backed off and slop had occurred. The loose bearing wore the aluminum case half so someone had used a punch to extrude some material so the race would be held. The adjusting nut also had some damage on the face which interfaces with the backside of the race.
You can see the damage in these photos:
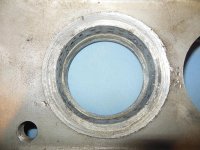
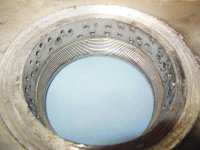
The nut on the left is the damaged one, you have to look real close to see it. The worst is from 12 to 3 o-clock position.

After removing the races from the other side, where the adjustment nuts are, more damage was found where the center bearing race resides.
At sometime the center bearing race adjusting nut must have backed off and slop had occurred. The loose bearing wore the aluminum case half so someone had used a punch to extrude some material so the race would be held. The adjusting nut also had some damage on the face which interfaces with the backside of the race.
You can see the damage in these photos:


The nut on the left is the damaged one, you have to look real close to see it. The worst is from 12 to 3 o-clock position.

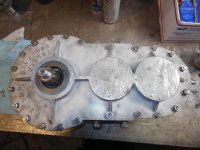
My machinist friend, who is extreamly talented, took both halves of the case, set up on the half which had no damage so the exact center of the center bearing could be determined. Using this setup, he then set up on the bad half of the case and bored out the damaged area. He then made a flanged insert out of carbon steel which was slightly larger than the bore. He then pressed the new flanged insert into the aluminum case. This turned out extremely well in my opinion.
He then partially threaded the adjustment nut into the threads of the case and refaced the face of the nut so it would be perpendicular to the threads/bore of the case.

Center nut is the repaired one, there is still a slight "witness" mark, but that will not affect the function, there is more than enough flat surface to interface with the bearing race. We did not want to remove anymore material than necessary.
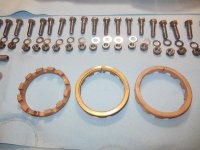
He then partially threaded the adjustment nut into the threads of the case and refaced the face of the nut so it would be perpendicular to the threads/bore of the case.

Center nut is the repaired one, there is still a slight "witness" mark, but that will not affect the function, there is more than enough flat surface to interface with the bearing race. We did not want to remove anymore material than necessary.

Prior to assembly I gathered the following information, from bearing manuals, other individuals, Tucker factory, and Youtube video (Tucker X-case assembly for a 2000XL). Posted it here just in case someday someone wants it. This is the information I used, I am not saying it is what anyone else would use, but it is what I used, and feel confident it will be sufficient.
View attachment Transfer Case Details.pdf
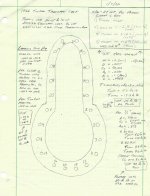
View attachment Transfer Case Details.pdf

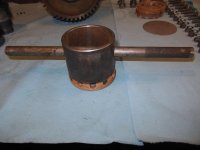
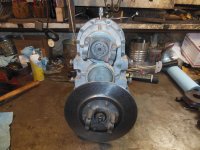
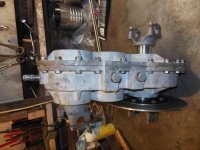
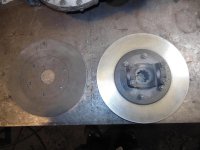
On the front output shaft yoke the brake disk was dished, must have gotten hot at one time. We flattened it out, but I decided it would probably just dish again, so we made a new brake disk that is thicker in the mid section to help prevent the dishing. Here it is attached to the yoke, the old dish is next to it. Note that they are the same diameter, the image just makes it look like the original one is smaller.


Awesome workmanship, and very nicely presented as well!
Thank You!!!
Thank You!!!
Impressive to say the least.
I have started to work on the 542CF again, I need to catch this thread up as to the work I now have completed. But for now I am getting prepared to rebuild the engine. All the machining has been completed and now I am rounding up the remaining parts for rebuild. Now if any of you have never tried to get parts for a Jeep OHC Tornado 230 straight 6 engine you know the challenge I have been working. But, I have found just about everything I needed and stole the rest from the spare engine that came with the cat when I purchased it.
So now the purpose of this post, I am short one key component, a fuel pump. The engine did not have a mechanical fuel pump, but it had been replaced with a plate covering the attachment hole and replaced with an electric pump. I know it is crazy to go back to the mechanical pump, but that is what I am doing so I can try to get the cat back to original. They no longer make or sell this fuel pump, and I have looked far and wide trying to find one (new or used). I do have one that came on the spare engine, but it is a fuel pump/vacumm pump combo which is not what I want. I have found a company that rebuilds these fuel pumps but I need to provide the pump to be rebuilt. I have a couple feelers out looking for one but nothing yet. So I ask any of you that may have a junk yard around that may have an old Willys or Jeep OHC 6-230 Tornado (1962 through 1965) that may still have the correct fuel pump on it I would appreciate the info.
The part number is 930144.
This is the one I need:

This is the one I have:

So now the purpose of this post, I am short one key component, a fuel pump. The engine did not have a mechanical fuel pump, but it had been replaced with a plate covering the attachment hole and replaced with an electric pump. I know it is crazy to go back to the mechanical pump, but that is what I am doing so I can try to get the cat back to original. They no longer make or sell this fuel pump, and I have looked far and wide trying to find one (new or used). I do have one that came on the spare engine, but it is a fuel pump/vacumm pump combo which is not what I want. I have found a company that rebuilds these fuel pumps but I need to provide the pump to be rebuilt. I have a couple feelers out looking for one but nothing yet. So I ask any of you that may have a junk yard around that may have an old Willys or Jeep OHC 6-230 Tornado (1962 through 1965) that may still have the correct fuel pump on it I would appreciate the info.
The part number is 930144.
This is the one I need:
This is the one I have:
G Moose,
During part of my time in the USAF I was stationed in Southern Arizona. Being from Northern New England I was amazed at the number of rust free vehicles, and when I went to salvage yards things didn't really deteriorate (other than from sun exposure). There were a number of places that specialized in old(er) vehicles, some of which were brand-specific.
I don't know if you've looked at any of these, but this is where I would start:
Virtual Jeep Club
Joe,West,jeep,forum,arizona,offroad,offroading,4-wheeling,azvjc,virtual jeep club,CJ,TJ,WJ,ZJ,Willys,Cherokee,wrangler,rock crawling,Virtual Jeep Club, Jeep,jeep.com,jeep wrangler,electronic throttle control,
www.virtualjeepclub.com
Thank you, I will take a look. Have a couple other promising leads I am working also. By the end of the day (month(s)) I will have a fuel pump.G Moose,
During part of my time in the USAF I was stationed in Southern Arizona. Being from Northern New England I was amazed at the number of rust free vehicles, and when I went to salvage yards things didn't really deteriorate (other than from sun exposure). There were a number of places that specialized in old(er) vehicles, some of which were brand-specific.
I don't know if you've looked at any of these, but this is where I would start:
Virtual Jeep Club
Joe,West,jeep,forum,arizona,offroad,offroading,4-wheeling,azvjc,virtual jeep club,CJ,TJ,WJ,ZJ,Willys,Cherokee,wrangler,rock crawling,Virtual Jeep Club, Jeep,jeep.com,jeep wrangler,electronic throttle control,www.virtualjeepclub.com
vintagebike
Well-known member
Try Jwjeep.com in Antelope, Ca. I have been buying new and used Jeep parts from their wrecking yard for many years.
Thank you to everyone that has helped with the fuel pump issue. I owe Cidertom a great big thank you, he found a person with an OEM pump that was new in box, I immediately purchased it, we will see what shows up in a few days. I will still use some of these great contacts/resources others sent so I can find a second one. I think it would be good to have another one on hand, just in case.
But the story doesn't end there. So I found a 230 Tornado engine that was mostly disassembled in South Carolina. The photos of the engine showed that it still had the fuel pump on it and it was the one without the vacumm, just want I needed. So knowing that I can have the pump rebuilt I thought I would ask the owner if they would be interested in selling the pump only from the engine. Well hell ya they say. Here is the good part, the engine is basically a basket of parts, they wanted $500 for the entire thing. So the price for the pump only was $400 (20% off from the original price of the entire engine they said), and I have to decide by 4:50am on 12/1 or the offer expires. Well I don't want a fuel pump that bad, that then needs a $225 rebuild. So I passed.
I also found a complete engine and transmission assembly out of an M715 still all attached just down the road a couple hours from me, but it had the wrong fuel pump.
Snowy Rivers
Well-known member
Helluva nice job doing the Rebuild on the CF Tucker.....
Long ways to go still, but we are getting there. To many irons in the fire for a quick job.Helluva nice job doing the Rebuild on the CF Tucker.....
I need to get this thread caught up, and now that I am coasting into retirement working only part time with two weeks to go I have been getting quite a bit done on the 542CF. The last few weeks I have been taking my retired machinist friend parts to remake, repair, modify, etc., he is liking the "pension" as I call it, I am providing him. My goal is to have it done so I can take it to a Jamboree in 2022. I will start posting the work that has been completed but not yet included here. I also am in need of some Tucker specific parts, so I am going to be reaching out to you Tucker fans in hope that help is there. I am not looking for freebees, I am more than willing to pay a fair price plus shipping, as others I have gotten parts from on this forum can attest to. So hang on, lets get this project going again, I am sure many of you want to drive this machine in 2022.
Drive line help needed. I cannot find a dust cap for my front drive line, it has 24 splines and is 1-1/8 inch in diameter. The rear is 32 splines and has a diameter of 1-1/4, but I have this dust cap. Is anyone out there a driveline expert or in the know? So what I am looking for is one front 1-1/8 inch 24 spline dust cap, a felt seal for it and also a felt seal for the 32 spline 1-1/4 inch diameter.

Okay, here is a tough one, I am looking for one aluminum outer pontoon bearing plate AND hub cap. What I am looking for is what I believe is the older style (top in photo), WITHOUT the grease zerk OR screw attached hub cap (press fit). I know the newer one with the grease zerk and screw attached hub cap is better, but I am trying to get this machine back to original. What I have is three of the original plates and caps (top photo) and one that is newer (bottom photo). I would be willing to trade my newer one for a usable older one or outright purchase it from you. Anyone out there have such a component they are willing to sell or trade.

Is this what you are looking to trade for...I will trade, your flange, cap and 5 lbs of Idaho's best baking potatoes

got the dust cap also
got the dust cap also
Last edited:
That is worth at least 10 lbs of Famous Idaho Spuds. I will bring the spuds to Sun Valley.Is this what you are looking to trade for...I will trade, your flange, cap and 5 lbs of Idaho's best baking potatoes
View attachment 134861
got the dust cap also

