-
Please be sure to read the rules and adhere to them. Some banned members have complained that they are not spammers. But they spammed us. Some even tried to redirect our members to other forums. Duh. Be smart. Read the rules and adhere to them and we will all get along just fine. Cheers. :beer: Link to the rules: https://www.forumsforums.com/threads/forum-rules-info.2974/
You are using an out of date browser. It may not display this or other websites correctly.
You should upgrade or use an alternative browser.
You should upgrade or use an alternative browser.
SW 48 D Resto
- Thread starter J5 Bombardier
- Start date
J5 Bombardier
Well-known member
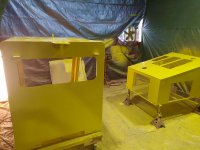
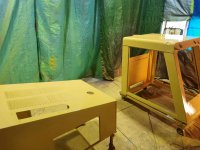
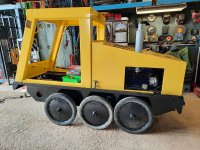
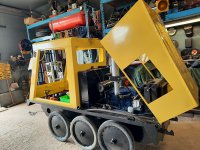
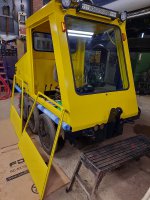
Put the hood on for probably the last time , the cab will come off once more for the trans install. Either way the project is going on the backburner until the cold hits, to much to do outside.
J5 Bombardier
J5 Bombardier
Attachments
J5 Bombardier
Well-known member
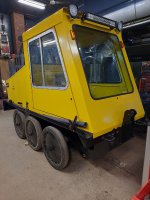
It's been a while , but now that the snow is being washed away , looks like some garage time is in order. Finished the hood , front and rear glass installed , now have to clean the door windows and hang the doors . Guess it will be trans and diff time after that . Still on the lookout for the complete wiper system and speedo for this SW48DA.
J5 Bombardier
J5 Bombardier
Attachments
J5 Bombardier
Well-known member
J5 Bombardier
Well-known member
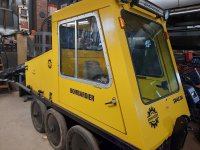
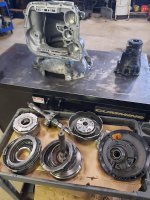
Minus 20 F, its a garage day . Door rubbers and latches are done, and finished the decals this am. Got to start washing tranny parts , rear clutch is toast , the rest looks pretty good ...so far.
J5 Bombardier
J5 Bombardier
Attachments
J5 Bombardier
Well-known member
Finished cleaning the diff housing yesterday ,this morning took a donor diff and sacrificed the side bearings in order to get the drums off. Have to turn them and dig up a set of bands, got to go look for the drive shaft flange that goes on the pinion. It's special for the brake drum ,it seems loose parts can move around in the course of a 10 year span..... FFS !
J5 Bombardier
J5 Bombardier
Attachments
J5 Bombardier
Well-known member
Finished putting most of the diff together this am ,still have to clean up the yoke and install the pinion seal. I'll have to dope out the brake band mount on the diff housing as some of those parts were lying in the hull when I bought the machine and some are missing .
J5 Bombardier
J5 Bombardier
Attachments
J5 Bombardier
Well-known member
Finished the parking brake install on the diff today. The band mount had been shortened for some unknown reason so some bar stock was milled down and welded on the remaining stub on the diff housing. Had to dig up some springs and make a 7/16 J bolt ,and the rest of the hardware was in need of a sandblast.
Next up transmission assemble , weather permitting.
J5 Bombardier
Next up transmission assemble , weather permitting.
J5 Bombardier
Attachments
J5 Bombardier
Well-known member
Hi Bob
727 Chrysler is in this one, I have a new kit for it , that's next on the SW48 list . Just have to finish cutting wood and make it through maple syrup season first.
J5 Bombardier
.
727 Chrysler is in this one, I have a new kit for it , that's next on the SW48 list . Just have to finish cutting wood and make it through maple syrup season first.
J5 Bombardier
.
J5 Bombardier
Well-known member
J5 Bombardier
Well-known member
One 3/8 bolt had been changed before , the other was a sawsall and then hydraulic press job. I believe the Technical term was "Build your own bomb" but it came out and no Chicklets got knocked out by flying parts, it was a win. LolLooks great! I was never able to get the pivot pins out……rusted in solid! How you got them out….and upgraded to 7/16”…..awesome!
Bob
Snowy Rivers
Well-known member
These Jigsaw puzzles are certainly fun eh ??
Some of the stuff ya come across sure makes ya wonder what others were thinking .....
Project is looking great
Some of the stuff ya come across sure makes ya wonder what others were thinking .....
Project is looking great
J5 Bombardier
Well-known member
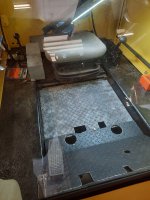
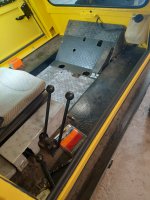
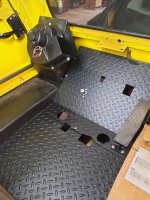
Finished fabbing up the floor, will need to fit the stick holes ,once the diff is in. Pretty much used the parts book and some rusted out panels to make copies....got to love salty boots.
J5 Bombardier
J5 Bombardier
Attachments
J5 Bombardier
Well-known member
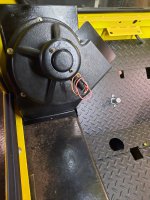
Repaired the heater box , had to replace the bottom panels on 3 sides and a bit of spit shine on the motor assembly. The core was flushed and pressure tested ,all good. Put the floor back in for now, had to store the panels somewhere . So now its time to start on the trans .
Still on the look out for a complete wiper assembly and a speedo.
J5 Bombardier
Still on the look out for a complete wiper assembly and a speedo.
J5 Bombardier
Attachments
Snowy Rivers
Well-known member
Looking very much "Top shelf"
Gotta love the stinking salt.......Arrrrrgh
Gotta love the stinking salt.......Arrrrrgh
J5 Bombardier
Well-known member
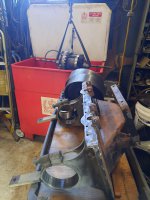
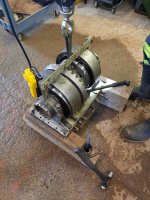
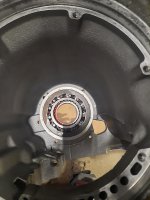
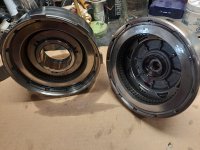
Cleaned up the 727 case today and installed the overrunning clutch. New seals and discs/plates installed in the front and rear clutches. Lucky to have a manual , cause the memory is a little fuzzy from the tear down 4 months ago.
J5 Bombardier
J5 Bombardier
Attachments
J5 Bombardier
Well-known member
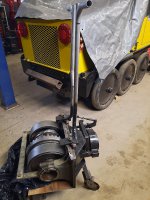
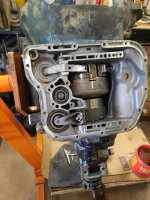
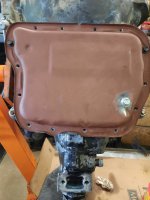
Trans is mostly together , waiting on a new accumulator piston and output seal . Valve body is on the bench and I welded in a drain plug to be able to change the oil after some run time. Flushing the torque but I'm sure there will be some crud left over in it.
J5 Bombardier
J5 Bombardier
Attachments
Snowy Rivers
Well-known member
Looks great....
Drain plugs and such went away many loooooong years ago.
We used to warm the rigs up ....Drain the convertors out and then the pan....Wash things out and check for metal and clutch....band materials.....Install a fresh filter and refill with Red juice......
The TF is a pretty good box.....the one thing that is a must is a stage one shift kit.
The 727 from the factory always had way too much shift overlap and slip between the gears.....When I was in the mopar shop...seemed like we always had a big OLD LAND BARGE IN THE SHOP FOR TRANNY REWORKS.....
When the Transgo shift kits hit the market.....the failures went waaaaaaaay down....
Between fixing cross leaks, poor shift timing and a handful of other issue.... the kits made a real reliable gearbox out of these buggers....
Been many years since I been in one.....Pretty easy to work on though.......
Good coolers are always a good deal too....
Did you replace the front pump bushing and seal.....Or all the bushings and thrust washers ????
J5 Bombardier
Well-known member
Pump bushing/seal were done (frigging salt) ,rest of the bushings were good. Trans looks like a low hr rebuild , but they smoked 1st /rev clutches. Got my end play and clutch clearances so we'll see how it and the Perkins get along . Ya , I'm up for removing the foot square hull cover beneath the trans, but don't want to get into pan removal ,so it's plug time .
J5 Bombardier
J5 Bombardier
Last edited:
Snowy Rivers
Well-known member
Did you install a shift kit ????
A transgo "Dash 1" will really buy some much needed reliability
Be very careful to set up the Throttle pressure correctly...(Rod that connected from the carburetor to the tranny on a gasser...or injector pump linkage )
This is the only control there is for line pressure under load.
Once you get a reasonable adjustment.....Get a pressure gauge on the tranny and see whats up while things are operating
Improper throttle pressure (TOO LOW) WILL WIPE OUT CLUTCHES AND BANDS REAL QUICK
Mechanically controlled throttle pressure can be a bit dicey to get set correctly when swapping to an engine that was not originally married to the tranny.....
The linkage on the LH side of the Tranny........The one arm is the range selector and the other "Moves relatively free) is the Throttle pressure control...
IIRC at low throttle with control all the way forward pressure should be 65psi and with the lever all the way to the rear the pressure is around 90psi
Under load things change a bunch...
Shifting the tranny with the throttle pressure too low will waste things really quick.
Setting the TP high all the time is also not a good plan.
What sort of arrangement was/is on the TP linkage
The linkage is NOT just a "Kick down" IT IS THE DIFFERENCE BETWEEN LIFE AND A QUICK DEATH
Was this tranny an original install in the cat ????
J5 Bombardier
Well-known member
This SW48 DA was probably like them all, a
municipal machine , they came with C6 Ford (gas) or 727 trans/ Perkins. Now I'm not of a big fan of automatics in a working machine , but I guess nobody had to be able to drive standard like the old models . So were keeping this one original , just as it came , except I won't be plowing sidewalks . Kickdown /Tp on this one is locked on the side of the case, the same as shown in the manual ,nothing connected to the fuel pump. Shift kit not right now , want to see this unit moving under it's own power and go from there as it was a dead duck when I bought it, as it had no diff installed and a no start ( bad ground). There will be lots to check when she runs and a gauge on the TP to see what Bombardier was doing, but ...were not there yet.
J5 Bombardier
Last edited:
Snowy Rivers
Well-known member
Sounds good
The Automatic tends to be much easier on "Parts" than a stick shift......The convertor is great for multiplying torque and softening the connection between the foot of the operator and the ground.......The ability to change gear ratios on the fly without loss of forward momentum is a plus.
You might think about going with a manual valve body......SELECT SHIFT.
This is whats on my head for my 2100...Where you put it is where it stays.....Start in whatever gear you select and do just what you ask it to....
It would seem that the TP was likely set to a happy medium and they called it good.....
Since it was a factory lash up ....At least somebody knew what they were doing.
I have seen various "Buggies" put together (Franken rigs) without any real knowledge of what was "GOOD..BAD..UGLY"
This is where things tend to get Hinky.....
Sounds like Y'all got it covered pretty well....
"Sits anxiously waiting for the next chapter"

Last edited:
J5 Bombardier
Well-known member
Snowy Rivers
Well-known member
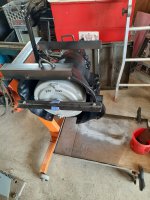
I like the tranny lift......Great setup
One my 2100 the entire power pack comes out in one chunk.
No way to get at the converter to flex plate bolts down on the closed bottom tub....
Ah yess....adapt and make stuff work
One my 2100 the entire power pack comes out in one chunk.
No way to get at the converter to flex plate bolts down on the closed bottom tub....
Ah yess....adapt and make stuff work
J5 Bombardier
Well-known member
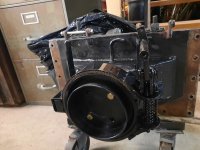
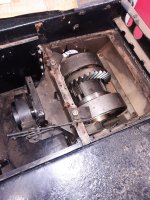
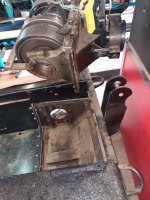
Going to start juggling 2 projects , this being one of them , need to see it out the door this winter . So rounded up the diff and installed it just now , it's fun trying to find the loose parts......
J5 Bombardier
J5 Bombardier

