-
Please be sure to read the rules and adhere to them. Some banned members have complained that they are not spammers. But they spammed us. Some even tried to redirect our members to other forums. Duh. Be smart. Read the rules and adhere to them and we will all get along just fine. Cheers. :beer: Link to the rules: https://www.forumsforums.com/threads/forum-rules-info.2974/
You are using an out of date browser. It may not display this or other websites correctly.
You should upgrade or use an alternative browser.
You should upgrade or use an alternative browser.
Squerly and friends build a house...
- Thread starter squerly
- Start date
squerly
Supported Ben Carson
The fan will be located in the attic and will pull air through the pipe, vs pushing it from the bottom. A variable speed switch (dial) will allow me to regulate the amount of "pull" applied so we don't pull the air faster than it can be cooled on its trip through the pipe.Squerly - interesting setup. A couple questions.
Will there be an inline blower or will flow be controlled by the ceiling fan(s)?
When the pipe goes above grade, are you going to use insulated flex piping (so the air stays cool)?
As for the pipe being above ground, I hope that to be negligible as we plan to re-enter the building at floor level and then continue the journey up through the wall (on the inside). But any time the pipe is above ground we will make sure it is well insulated.

I guess it should be noted that I have no solid statistics showing that this setup will actually work. It works on paper but aside from that it's all speculative. Hell, it may turn out to be a major waste of money. But if it does work, it should all but eliminate my cooling bills and that would be well worth the effort. Firing it up for the first time will be a real 0-hero moment, or visa-versa...

Kane
New member
The theory is certainly convincing and you'll take advantage of some mighty cool air. But based upon the relatively small volume of air, it'll be moving at relatively high speed. So expect a 'whistling' somewhere in the system during high season. Or not.The fan will be located in the attic and will pull air through the pipe, vs pushing it from the bottom. A variable speed switch (dial) will allow me to regulate the amount of "pull" applied so we don't pull the air faster than it can be cooled on its trip through the pipe.
As for the pipe being above ground, I hope that to be negligible as we plan to re-enter the building at floor level and then continue the journey up through the wall (on the inside). But any time the pipe is above ground we will make sure it is well insulated.
I guess it should be noted that I have no solid statistics showing that this setup will actually work. It works on paper but aside from that it's all speculative. Hell, it may turn out to be a major waste of money. But if it does work, it should all but eliminate my cooling bills and that would be well worth the effort. Firing it up for the first time will be a real 0-hero moment, or visa-versa...
Very kool, squerly. You must be having a ball (insert 'Envy' emoticon).
.
squerly
Supported Ben Carson
I agree Kane. Wish I had gone with the larger volume pipe now that I'm thinking about it. But on a project like this one you have to draw the (budget) line somewhere. All the equipment, labor and materials can get out of hand in a hurry. And building on the side of a mountain (and this far away) means you can double the price of building right from the start. Then throw in the whims/ideas/wants/desires of a squerly wildman and the bottom line becomes challenging for the faint of heart.The theory is certainly convincing and you'll take advantage of some mighty cool air. But based upon the relatively small volume of air, it'll be moving at relatively high speed. So expect a 'whistling' somewhere in the system during high season.

Oh, and my wife mentioned something about a stove, refrigerator and dishwasher! I mean, WTF???
I'm actually thinking there's plenty of air. I'm no thermal engineer but sitting here pondering a garden hose for comparison. Lay out a 1/2" garden hose in the sun and set it to some value of GPM's and measure the temp on the far end. Let's say it's 20 degrees warmer. Now, using the same length and GPM flow, use a 2" hose. I'm "thinking" it may not gain the same warmth.
If you want more circulation from the basement (and assuming forced air heating system), just run the fan on the furnace air handler. Our newer furnace has a low speed for the fan. We use that fan 24/7/365 to equalize the temp/humidity from the lower levels to the upper levels of the house.
Which brings me to another question. When running through this duct, you're going to have high pressure upstairs, low pressure in the basement. Do you have returns or an open doorway/hallway to the lower level?
It is an ingenious sysem. My concerns are the plastic pipe. That High density pipe does not transfer heat very well.
Secondly, the air flow is the reverse of efficient transfer. The pipe should start at the top of the ground and go down for best results.
That said, the length of the pipe should be sufficient to make an effective exchanger. And the smaller diameter may be a benefit if air flow rates are low.
End of the day, the system will certainly "balance" the temps between the upper floors and the basement. It will also dehumidify your summer air because of the condensation flow. All with low energy useage.
squerly
Supported Ben Carson
Yes BC, there is a stairwell that will allow the cool air from upstairs to "fall" back down where it will again be picked up by the intake. Repeat as necessary.Which brings me to another question. When running through this duct, you're going to have high pressure upstairs, low pressure in the basement. Do you have returns or an open doorway/hallway to the lower level?
Yep, the original plan called for using the fan on the air handler but I wanted something that I could run off my solar system and the air handler was not efficient enough. The fan of choice uses 177.6 watts (full on) and I can generate that with very little effort (should we loose grid power).If you want more circulation from the basement (and assuming forced air heating system), just run the fan on the furnace air handler. Our newer furnace has a low speed for the fan. We use that fan 24/7/365 to equalize the temp/humidity from the lower levels to the upper levels of the house.
Yeah, that bothered me for awhile too Franc. But I've come to the conclusion that the insulating factor of the pipe is about -0- so it should do no more than to hold the dirt from falling into the cylindrical tube-hole through the dirt. And if there were nothing but a virtual hold in the dirt, any air flowing through it should rapidly become the same temp as its surroundings.It is an ingenious sysem. My concerns are the plastic pipe. That High density pipe does not transfer heat very well.
But I guess we won't know for sure until that big day when I flip the switch...

Last edited:
I used Schd 40 pipe, 6.0" & 12.0" in my last powder plant for all air handling.. Including HVAC. Primarily because of it's thermal insulating properties.
No condesaction occurs as would happen with metal pipes. Important in a plant producing instant coffee, chocolate milk and Kool-aid drink mixes. But PVC is the best solution for your application because it will not rust or corrode.
Are you going to put a filter on the make up air intake?
No condesaction occurs as would happen with metal pipes. Important in a plant producing instant coffee, chocolate milk and Kool-aid drink mixes. But PVC is the best solution for your application because it will not rust or corrode.
Are you going to put a filter on the make up air intake?
squerly
Supported Ben Carson
How will humidity be controlled in the house?
Since the humidity, at least in Central NC, is 90%+, it seems to me that some type of humidity management system will be required otherwise you're adding so much humidity to the interior that it will feel damp.
Bob
Hi Bob, and thanks for following my thread. I'm just short of 4,000 foot elevation and we don’t get high humidity here until August, even then it’s not bad. So during those months we don’t have humidity we will open the windows downstairs and the cool temp will be stored in the cement/tile floors. (During the summer nights the temps consistently get down to the high 50’s / low 60’s.) We close the windows in the morning and it stays cool downstairs all day. In the afternoon when the upstairs needs a little help we will turn on the fan/pipe system and bring the cool air up to the top level.
Now… in the humid months we will keep the windows closed and run the air conditioner for a couple of hours, or until the humidity has been pulled from the house. Then when the fan/pipe system is turned on we are simply recirculating the dehumidified air throughout the house, cooling/re-cooling it as it moves through the underground pipes.
Squerly - In your drawing, you have a pipe to outside. Is that going to have a valve or cap or something to shut it down when you don't want to pull outside air? I'm assuming there will be at least some screening on the outside to keep the varmints out...
squerly
Supported Ben Carson
(That's a hell of a drawing, isn't it...Squerly - In your drawing, you have a pipe to outside. Is that going to have a valve or cap or something to shut it down when you don't want to pull outside air? I'm assuming there will be at least some screening on the outside to keep the varmints out...
 ) Yes, nothing elaborate, just a manual gate valve. I honestly don't know if it will be open much but it seemed like a good idea to add it just in case. Also, we will probably drill a small hole in the bottom of it to serve as a drain for the humidity that may/or may not build up in the pipe. (BTW, the pipes are all angled so that if you drop a golf ball in the top it will roll all the way through the pipe(s) and roll on out the end.)
Squerly, I think you plan for managing humidity will work.
I believe you are west of Asheville, but didn't realize you were at 4000 ft.
It'll be interesting following your utility usage once you occupy your new house.
I have all my utility bills since I completed my house in 1972. The data is in a spread sheet and it's interesting to look back over the years to see the changes when a more efficient heat pump was installed; or when we put in a wood stove; added more insulation in the attic; etc.
Bob
squerly
Supported Ben Carson
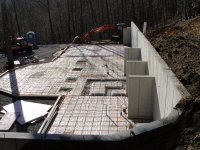
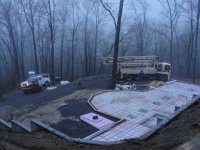
Shooting for Monday, weather is supposed to be favorable.Get it poured! Monday should be a good day for it.

Looking good!
Hope you were able to pump your cement. I really like your choice of an area to build. You are going to enjoy the solitude, and the beauty of the area for sure. The elevation is remarkable for a flatlander like me. I don't think of the appilattian range very much, and tend to forget about it. Don't make it that far East very often.
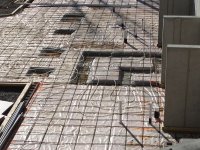
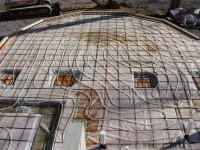
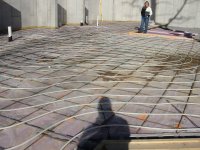
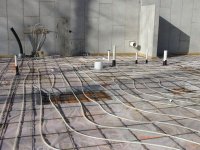
The floor heat is a great thing. In colder climates it has fast become the most popular way to heat. If I should biuld, it's the way I will go..
Regards, Kirk
squerly
Supported Ben Carson
Looking good!
I really like your choice of an area to build. You are going to enjoy the solitude, and the beauty of the area for sure. The elevation is remarkable for a flatlander like me. I don't think of the appilattian range very much, and tend to forget about it. Don't make it that far East very often.
The floor heat is a great thing. In colder climates it has fast become the most popular way to heat. If I should biuld, it's the way I will go..
Regards, Kirk
Thank you Kirk.
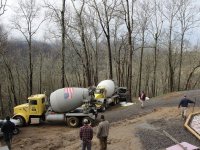
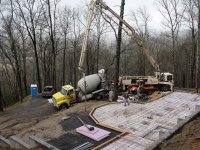
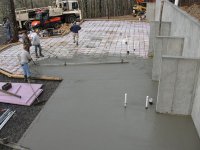
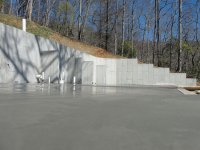
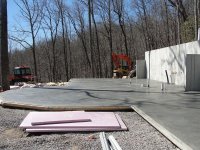
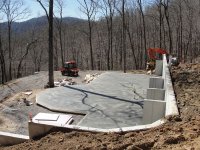
More cement pictures (Video Here!) and a shot of my back yard. It's pretty foggy here today but that's a mountain over there.

Attachments
squerly
Supported Ben Carson
It was part of the cement costs RDT, so I'm not sure how it breaks down. But I'll find out!Nice pumper truck, have had to use it twice so far and two more times to go. Around here it runs 5-600 each time depending on who you can get. How much down there?
Meanwhile,the finished product.
Attachments
squerly
Supported Ben Carson
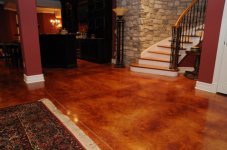
Well eventually it will be a stained, etched concrete interior, similar to the attached picture. But I don't know what the procedure is for doing that. It's one of the last things to happen but I don't know if a sealer is going to be applied earlier or not.Looking good! Now, are you going to hit that crete with a good sealer tomorrow?
When it comes to interior stuff, I'm just here for the ride...

Attachments
Well eventually it will be a stained, etched concrete interior, similar to the attached picture. But I don't know what the procedure is for doing that. It's one of the last things to happen but I don't know if a sealer is going to be applied earlier or not.
When it comes to interior stuff, I'm just here for the ride...
That is a beautiful technique. They usualy do not seal before it is stained.
I have seen guys make concrete look like wide plank hardwood flooring. With dowling and everything.
Well eventually it will be a stained, etched concrete interior, similar to the attached picture. But I don't know what the procedure is for doing that. It's one of the last things to happen but I don't know if a sealer is going to be applied earlier or not.
When it comes to interior stuff, I'm just here for the ride...
That's a beautiful floor. I could live with that!!!!
squerly
Supported Ben Carson
Yeah, pretty huh? Wait until my 2 GSD's come running through the house, mud and all...That's a beautiful floor. I could live with that!!!!
Is that finished concrete slick (to dogs) like a Pergo floor? I think it's a riot when the dog tries running on it and just sits there not moving much.Yeah, pretty huh? Wait until my 2 GSD's come running through the house, mud and all...And you know they will! I've seen em do it, doesn't bother them in the least.
squerly
Supported Ben Carson
My guess is yes, but I won't know for sure until it's in. Never had it before.Is that finished concrete slick (to dogs) like a Pergo floor? I think it's a riot when the dog tries running on it and just sits there not moving much.
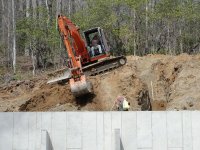
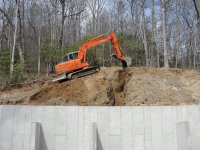
Today we dug out the trench for the water line down to the house.
Attachments
squerly
Supported Ben Carson
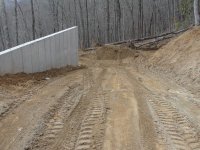
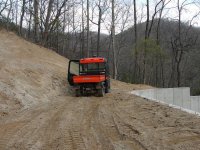
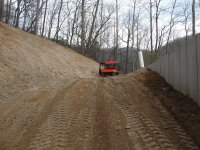
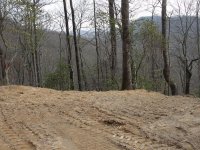
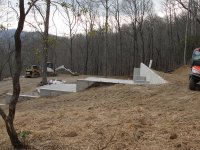
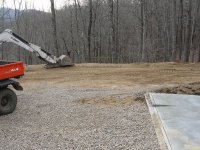
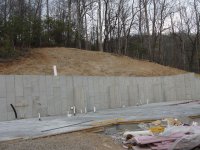
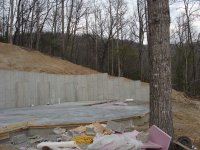
Backfill finished.
Attachments
-
 tn_final 002.JPG111.4 KB · Views: 67
 -
 tn_final 003.JPG131.3 KB · Views: 67
 -
 tn_final 005.JPG131.4 KB · Views: 67
 -
 tn_final 012.JPG151.2 KB · Views: 66
 -
 tn_final 022.JPG144.8 KB · Views: 67
 -
 tn_final 028.JPG139.2 KB · Views: 68
 -
 tn_final 035.JPG114.9 KB · Views: 65
 -
 tn_final 036.JPG121.9 KB · Views: 68

