• Please be sure to read the rules and adhere to them. Some banned members have complained that they are not spammers. But they spammed us. Some even tried to redirect our members to other forums. Duh. Be smart. Read the rules and adhere to them and we will all get along just fine. Cheers. :beer: Link to the rules: https://www.forumsforums.com/threads/forum-rules-info.2974/

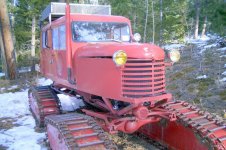
An Old Cats Tale.....

Mtn-Track,

I just noticed the seventh photo on your post of 11/16 (showing a fully assembled carrier).

It looks like you installed two brand new Tucker rubber idler wheels; one on each end of the carrier. The rear-most wheel position on all four carriers should have a "de-icer" wheel installed.

These differ from a regular rubber idler wheel in that the de-icer wheel's "rubber" is replaced with a harder compound. I'm sure Tucker has made them out of all kinds of different stuff, but I've seen some blue and some a reddish brown color (which I believe is urethane). Tucker also made some modular de-icer wheels which had two replaceable white plastic outer portions.

Unfortunately the de-icer wheels are considerably more expensive than the regular idler wheels.

Also, it looks like all the wheels are missing what Tucker calls "seal washer set/inner and outer". Those are relatively cheap, about two bucks a set, and basically protect the seals.

I respectfully suggest you talk with Jeff at Tucker or someone else more knowledgeable than me.

Very Pretty Cat!
 
Good eye, Blackfoot! Can't sneak anything past you........:tiphat:

There's a lot more to the story. Yes, I decided to go with the rubber wheels on both ends of the track frames. The ice-breaker wheels do come in a one-piece and a mudular version like you said. The latest version is made with a harder urethane material. I did talk to Jeff when I ordered the new wheels and decided to go with the rubber ones for a couple of reasons. The harder urethane is intended to break up ice but also has the tendency to chip. The consensus on how efective the urethane wheel was compared to the chipping resistence of the rubber wheel seems to be a toss-up. Jeff thinks the urethane will last longer, but when compared to the extra cost, it may not make much difference on a cat that won't be used as hard as a commercial groomer.

In the end, the rubber wheels that were on this cat had become hardened and were all chipping and the 12" rim with 1" rubber wheel let the track guides and ice grind on the rim. The newer 10" rim with the 2" rubber wheel alleviates some of that problem, so that was the big push for me to at least replace the end wheels.

I'm currently working on the tracks right now, but the jury is still out on the wheel seals before I put the tracks on. A problem that I encountered was that the new wheel hubs are different than the old one's I have. The distance between the bearings inside the hub, the ID of the seals, and the OD of the seal bushing is different than the old one's. The new C-R seals that Tucker sent with the new wheels popped out as soon as I tried to grease them. I reversed them and had the same problem. I tried to install thin washers on the spindles to hold the seals in but that didn't leave me with enough room to install the cotter pins in the spindle nuts. I ended up installing the 'reversed' Timken seals that I put in the old wheels, and re-used the smaller OD seal bushings.

I'm honestly not sure where to go from here. It's been suggested that I install the seals as you normally would but with a small hole drilled in them to relieve the grease pressure. The Tucker seal protectors won't work on the old wheels unless I leave out the cotter pins, re-machine my old hubs, or make longer spindles. The way the wheels are set-up right now is how it came from Tucker after the track conversion, with the exception of the new-style wheels, so it made it for years like this. I don't like it and still pondering........:unsure:
 
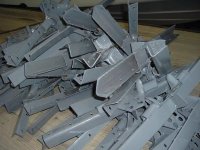
I'm still undecided about what to do with the wheel seals as a long term solution, but I did want to get the tracks on and test out the cat. I've been working on painting the grousers with POR-15 and it wasn't anywhere as easy as Wheatherby made it look!:ermm:

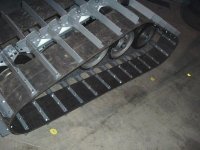
I managed to get two of them done with the new belting from Tucker and installed on the back of the cat. I have the rest of the grousers done and plan to get them bolted to the new belting over the next several days. Progress, albeit slow, but it's still progress.....:wink:

Sorry for some of the dark pic's. I tried to lighten them up as much as I could but it's not really as dark as it appears in my shop, just a cheap camera and flash.:hammer:
 

Attachments

  • 12-6-2010 001.jpg
    12-6-2010 001.jpg
    71.5 KB · Views: 992
  • 12-6-2010 002.jpg
    12-6-2010 002.jpg
    70.4 KB · Views: 989
  • 12-6-2010 003.jpg
    12-6-2010 003.jpg
    73.8 KB · Views: 996
AWESOME WORK! Those tracks are going to be soooooo nice... just as nice as the rest of the rig :clap:

Great job - can't wait to see it in the snow!
 
Thanks for the words of encouragement, gentlemen!

Kevin; Painting the grousers sucked! You didn't mention that part in your resotration. I learned the hard way not to lay the freshly POR-painted grousers down on anything that I didn't want to permantntly become part of the project.:ermm: I like the end results, even in gray!:brows:

Don; That rig with the hemi is probably the larger Tucker 743 around the same vintage as mine or a little later. My 'little' 443 just had the 251 in it so I'll just have to live without the hemi-option.:sad:
 
Oooooh yeah I forgot to mention........don't let the wet por15 touch ANYTHING that you DON'T want to become permanently attached to your part.:whistling:

I once set a part with wet por15 on some plywood to dry, and when I came back the next day to check it out, I had to use a hammer to knock it of the plywood and when it broke loose it took a piece of the plywood with it.:oops:

So don't feel bad, I also learned the hard way
 
Ooooops!:hammer:
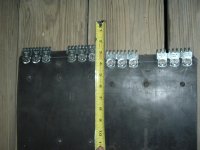
I had a little issue last week while assembling the last track. It was "operator error" on Tuckers end so they took care of it immediately and sent me a replacement. I'd have to say that I've really been impressed with their customer service!
 

Attachments

  • 12-8-2010 002.jpg
    12-8-2010 002.jpg
    53.1 KB · Views: 826
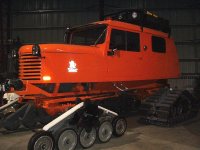
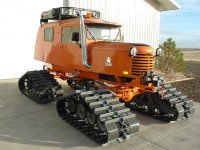
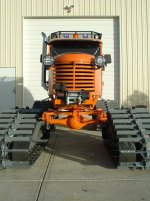
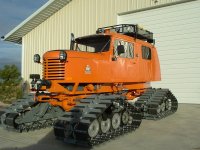
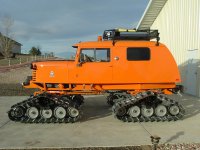
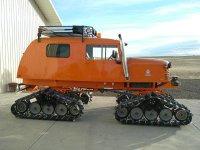
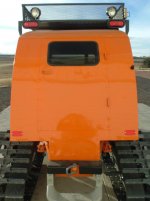
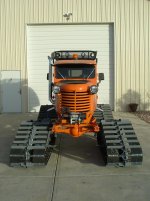
A few minor interior details to deal with yet, but after almost three years she's finally ready for snow trials.:w00t2:
 

Attachments

  • 12-12-2010 001.jpg
    12-12-2010 001.jpg
    86.7 KB · Views: 845
  • 12-12-2010 002.jpg
    12-12-2010 002.jpg
    140.2 KB · Views: 829
  • 12-12-2010 003.jpg
    12-12-2010 003.jpg
    86.3 KB · Views: 834
  • 12-12-2010 004.jpg
    12-12-2010 004.jpg
    75.6 KB · Views: 838
  • 12-12-2010 005.jpg
    12-12-2010 005.jpg
    70.7 KB · Views: 842
  • 12-12-2010 006.jpg
    12-12-2010 006.jpg
    80 KB · Views: 838
  • 12-12-2010 007.jpg
    12-12-2010 007.jpg
    126.7 KB · Views: 822
  • 443f.jpg
    443f.jpg
    100.6 KB · Views: 836
I like this particular body style due to the smooth curves. Kinda' the same way I like my women...:w00t2:

All the new sno-cats look like a giant industrail dog house to me, with the exception of the Prinoth's which look like a high-tech industrial dog house.:whistling:

Thanks for the complements!
 
Congratulations! That is a piece of SNOWCAT ART - I would be so nervous to drive it - but in snow it should look like that for many years... Beautiful!
:wow:

Now I need to figure out how to get up there when the snow finally comes and get a ride in it... :whistling:
 
Very nice! Don't get it out on any tight trails and scratch that pretty paint job up. It sure looks good with the new tracks and should serve you well.
 
That is an absolutely beautiful restoration. Love that body style. It's so great that you were willing to bring it back to its glory days.
 
Very, very nice job here....

I am sure it will be the "bell of the ball" when ever you take her out and encounter other snow cats.....

Hope you get all the snow you want to run in this year!

Best regards, Kirk
 
Wow - You really did a wonderful job! Congrats on having what appears to be the finest Tucker in Colorado - bring her up to the Vail Pass Winter Rec Area sometime, I'd love to see the cat in person.
 
Thanks guys! I should have the rear seats installed this weekend and finish some other small interior projects.

Then it's off to the SNOW for some testing/tuning!:brows:

BG: I may need to install a turbo just to get it off the trailer in VPWRA! Might have to give it a try though...:wink:
 
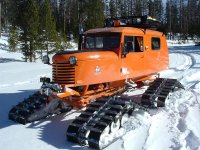
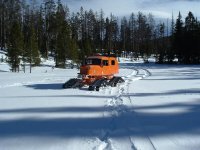
Snow trials were sucessful! Ran like a champ! Took the family out for some snowshoeing......

This was at 10,100' elevation. With four of us and lots of gear, she pulled an average of 8mph going in (cutting trail and mild climbing) and shifting between 2nd and 3rd gear. Heading back (on existing tracks, mild down hill) in 3rd averaged 15-18mph. Tried 4th but it didn't have the pull to keep it going at that altitude. Snow depth was just over 5' and made for a nice ride.

I think I need a turbo!:glare:
 

Attachments

  • 12-27-2010 002.jpg
    12-27-2010 002.jpg
    109.5 KB · Views: 953
  • 12-27-2010 005.jpg
    12-27-2010 005.jpg
    82.9 KB · Views: 936
Top