-
Please be sure to read the rules and adhere to them. Some banned members have complained that they are not spammers. But they spammed us. Some even tried to redirect our members to other forums. Duh. Be smart. Read the rules and adhere to them and we will all get along just fine. Cheers. :beer: Link to the rules: https://www.forumsforums.com/threads/forum-rules-info.2974/
You are using an out of date browser. It may not display this or other websites correctly.
You should upgrade or use an alternative browser.
You should upgrade or use an alternative browser.
An Old Cats Tale.....
- Thread starter Mtn-Track
- Start date
Very nice. I like to see someone who understands that doing a vehicle halfway is not an option. If you skimp on a over the snow vehicle and it breaks down, who's going to come and get you? A tow truck? No. And for all you 7th graders who put others down because they don't drive the same vehicle as your's- no you won't be coming to the rescue unless you happen to know us and live in the same area. I am unable do my body work and paint due to finances but my mechanics will be top notch. I really want to see more pictures of your progress. I will have more posted on my 1983 542A soon as I am getting close to having her snow worthy. I have the hydraulic pump and cylinder being redone as we speak and am rebuilding a more modern version of my 318 starter. A small amount of wiring, some seats for the flat bed and Christmas tree hunting we will go. Great job and keep posting.
Mtn-Track
Member
I appreciate the nice comments, even though I fully realize that I intentionally deviated from the originality of this cat. Some may not like that much, but believe me, I fought with that for a while too. In the end I didn't want to just have a cat that works, but wanted a reliable and comfortable working-cat. I spent enough time in this thing "as-is" to know I would never really be happy with owning it unless I made some changes.
OK, so I guess I'm not done beating myself up about the orignality, but I like what I'm ending up with here and certaily won't hesitate to head out into a blizzard with it.......... in style and comfort...........
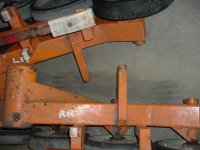
Muley...... I feel the same way, thus all the work I put into the '58 Tucker I had. Just because I got it to run didn't mean I was willing to sell it to someone unless I would be perfectly comfortable taking up in the mountains myself. It sure looked like hell, but it was at least mechanically sound. I understand your situation with body and paint work right now, but when I got mine back from being blasted I found some stress cracks around the front horrizontal fifth-wheel pivot. I welded them up right before it went to paint, but I never noticed them the whole time I worked on it! You might take a good look around that area on yours. Just a thought.
OK, so I guess I'm not done beating myself up about the orignality, but I like what I'm ending up with here and certaily won't hesitate to head out into a blizzard with it.......... in style and comfort...........

Muley...... I feel the same way, thus all the work I put into the '58 Tucker I had. Just because I got it to run didn't mean I was willing to sell it to someone unless I would be perfectly comfortable taking up in the mountains myself. It sure looked like hell, but it was at least mechanically sound. I understand your situation with body and paint work right now, but when I got mine back from being blasted I found some stress cracks around the front horrizontal fifth-wheel pivot. I welded them up right before it went to paint, but I never noticed them the whole time I worked on it! You might take a good look around that area on yours. Just a thought.
Last edited:
weatherby
Member
I appreciate the nice comments, even though I fully realize that I intentionally deviated from the originality of this cat.
I know how you feel, I myself for years contemplated if I should keep that Thiokol 601 original or modifie it, as it turned out, I kept it all original, however, there were so many times I would come across something that would be much better if I would have used today's methods, materials and or parts.
On my next restore I am most certain it will be a modified restore with today's up to date materials / parts, also with more comfort and luxury in mind.........You know, something like the wife & daughters wouldn't mind riding in, as opposed to a originally restored 1963 Thiokol 601
No offense Mainer...but I just couldn't get the the girls to like it
Mtn-Track
Member
May 2010....
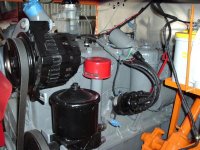
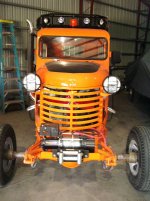
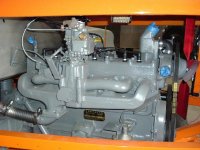
The firewall was a mess so I made a new one out of slightly thicker material and coated it with high-temp clear. I figured out how to snake the firewall back in with the engine and trans installed, so I finally got that done. Installed a new 160 amp low-rpm alternator and the Vickers hydraulic pump (now rebuilt) from the '58. I made all the electrical connections to the engine, instruments, and lighting.
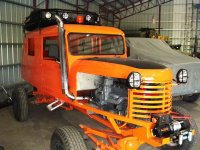
The original exhaust stack was a piece of pipe surrounded by asbestos, and no muffler. Laws since 1953 have apparently changed and it's now a requirement that all snow machines have a muffler 'in the woods', so why not do something different in the process?
How about a new 3" side-pipe for a Corvette Stingray!
With the exhaust installed I fired it up. I sounds great; not at all loud and has a nice deep tone to it. In fact it was quiet enough to realized that I needed to hot-set the valves. That wasn't fun, but necessary and it ran better after the adjustment. I did have the radiator and hoses installed before I ran it...........
Also rebuilt the wiper motors and installed them with new arms and blades. I re-cored the original heater on the passengers side and installed a new 3-speed motor and new defroster hoses. It was finally starting to look and feel like a sno-cat again.
The firewall was a mess so I made a new one out of slightly thicker material and coated it with high-temp clear. I figured out how to snake the firewall back in with the engine and trans installed, so I finally got that done. Installed a new 160 amp low-rpm alternator and the Vickers hydraulic pump (now rebuilt) from the '58. I made all the electrical connections to the engine, instruments, and lighting.
The original exhaust stack was a piece of pipe surrounded by asbestos, and no muffler. Laws since 1953 have apparently changed and it's now a requirement that all snow machines have a muffler 'in the woods', so why not do something different in the process?
How about a new 3" side-pipe for a Corvette Stingray!

With the exhaust installed I fired it up. I sounds great; not at all loud and has a nice deep tone to it. In fact it was quiet enough to realized that I needed to hot-set the valves. That wasn't fun, but necessary and it ran better after the adjustment. I did have the radiator and hoses installed before I ran it...........

Also rebuilt the wiper motors and installed them with new arms and blades. I re-cored the original heater on the passengers side and installed a new 3-speed motor and new defroster hoses. It was finally starting to look and feel like a sno-cat again.

Attachments
Last edited:
NorthernRedneck
Well-known member
Geez....You've sure come a long way on this cat. Looking great!
Mtn-Track
Member
That Chrysler engine was called the "Hurricane", the block was made of Chrome Molly and it was so hard you would wear the rings out and not have ring groves in the cylinder walls. If you rebuilt it, it should last another twenty to thirty years!
That's exactly what I found. I basically wore out a glaze buster on the cylinders just trying to remove some minor scuffs! The rings that were in it were originals and didn't look that bad, but I replaced them anyway since I had it torn down that far.
Mtn-Track
Member
August 2010:
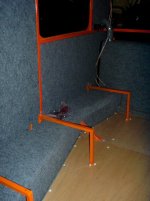
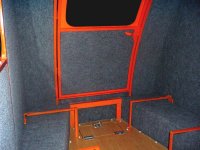
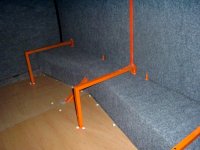
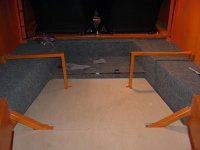
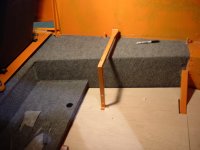
Doing the interior was just as bad as the body work. Nonetheless, a few trips to Home Depot for 1/2" rigid insulation board, some indoor/outdoor carpeting, and a bunch of cans of 3M 90# spray adhesive made it come together. I'm still working on the roof and trying to deal with compound curves and rigid foam board doesn't exactly speed things along.
The floor in the front was coated with Dupli-Color truck-bed liner, the same stuff someone on here used and recommended about a year ago (Thank's for the tip, it worked well!). The rear floor was 3/8" plywood and long since shot, so I bought some 5/8" marine plywood, cut it to fit, then coated it all with spar varnish. The original bench seat supports were welded to the sides of the cat and I had to cut them out to get the floor out. To avoid the same problem and having to weld anything after it was all painted, I installed the brackets with hinges on the wall before it went to get blasted.
The studs sticking up along the sides are seatbelt mounts I added while I was fixing the frame. The hatch in the floor is the access to the rear battery/tool box between the frame rails. All of the wood floor will eventyally be covered with a rubber truck-bed mat.
I did finally get all the windows back in. Had new ones made and installed them with new rubber. The rear one's are tinted but I stuck with clear in both doors. I had broken the original windshield when I tried to get it out (rubber was hard as a rock) and I put the new windshield in some time ago.
Attachments
Last edited:
Mtn-Track
Member
"First Class"
"cheap"
You don't often see them two words in the same sentence for a reason.

fogtender
Now a Published Author
You don't often see them two words in the same sentence for a reason.
Nor do you see "broke" and "Lotto winner"....LOL
Mtn-Track
Member
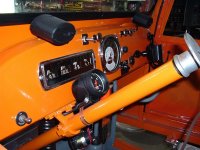
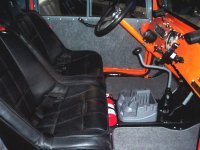
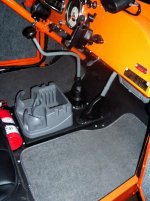
Since I had to destroy the original steering wheel to get it off the shaft, I cut out the hub and built a new steering wheel set-up (couldn’t find anything that fit the shaft and splines that wasn’t a huge vintage wheel). I also had installed the higher pressure/volume hydraulic steering system so the old 21" wheel was not necessary and I found a 16" Grant GT that I liked much better. While I was ‘slumming’ at that chain auto parts store I grabbed some front floor mats and the can’t-live-without beverage holder.
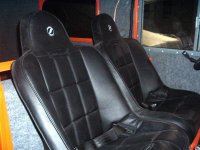
For the life of me I can’t remember the name of the material that they used to use as seat padding, but it looks like a combination of splinters and hay with a thin layer of rats-nest felt (ring any bells?). Not the most comfortable to sit on especially when it’s only about an inch thick. This is a very narrow cab and it took some time to find some comfortable suspension seats that would fit and replace the old bench. I finally came across a set of Corbeau’s for a Rhino (of all things) that were the right width, height, waterproof material, and comfortable. Either I was always too tall or the cat was too short, so during the rebuild I moved the fuel tank back 3" and made brackets to mount the new seats. I also reclined them to get more leg room so now it’s like sitting in a LazyBoy instead of grade school bleachers. The rear benches are currently in the upholstery shop being re-done with new foam and similar black vinyl.
Did lots of other odds-and-ends such as new sliding window rails and felts, door grab handles, door swing limiting straps, shift and brake lever boots, other small details, details, details.... and still plenty more left to do on the interior.

Attachments
Snowtrac Nome
member formerly known as dds
i like those seats i have to do something about my snow trac drivers seat and have the same problem every thing is to wide those might be the solution
fogtender
Now a Published Author
Since I had to destroy the original steering wheel to get it off the shaft, I cut out the hub and built a new steering wheel set-up (couldn’t find anything that fit the shaft and splines that wasn’t a huge vintage wheel). I also had installed the higher pressure/volume hydraulic steering system so the old 21" wheel was not necessary and I found a 16" Grant GT that I liked much better. While I was ‘slumming’ at that chain auto parts store I grabbed some front floor mats and the can’t-live-without beverage holder.
For the life of me I can’t remember the name of the material that they used to use as seat padding, but it looks like a combination of splinters and hay with a thin layer of rats-nest felt (ring any bells?). Not the most comfortable to sit on especially when it’s only about an inch thick. This is a very narrow cab and it took some time to find some comfortable suspension seats that would fit and replace the old bench. I finally came across a set of Corbeau’s for a Rhino (of all things) that were the right width, height, waterproof material, and comfortable. Either I was always too tall or the cat was too short, so during the rebuild I moved the fuel tank back 3" and made brackets to mount the new seats. I also reclined them to get more leg room so now it’s like sitting in a LazyBoy instead of grade school bleachers. The rear benches are currently in the upholstery shop being re-done with new foam and similar black vinyl.
Did lots of other odds-and-ends such as new sliding window rails and felts, door grab handles, door swing limiting straps, shift and brake lever boots, other small details, details, details.... and still plenty more left to do on the interior.
The Beverage holder is a nice touch, but if I tried to drink while driving my IMP out to the cabin on our trails, most of it would be up though my nose... Not the smoothest of rides...
 MTN-TRACK, You have done an excellent job restoring the old Tucker!! Keep up the awesome work. Cant wait to see some pics of her in the white stuff. Ito love all the upgrades from ''factory original'' Great Job!!! Wakeupcall
J5 Bombardier
Well-known member
Definitely a first class restoration ! I really like that interior, nice work.
J5 Bombardier
J5 Bombardier
Mtn-Track
Member
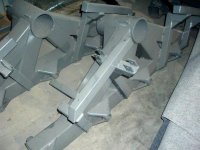
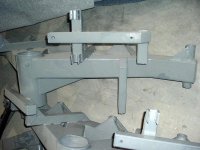
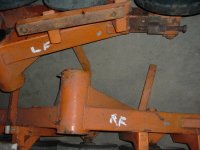
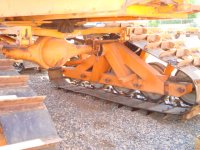
At the same time I had the cat blasted I had the track frames done. The frames themselves were in decent shape, but the hy-fax, seals, bearings, and some of the wheels left something to be desired. The sprockets were OK but had some wear and had not been reversed yet.
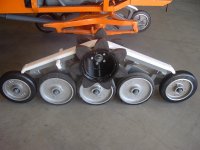
These frames were marked from Tucker as 1400's, but they have 5 wheels that should have made them 1500-series. Just another one of them things Tucker did as an experiment where they took 4-wheel frames and stuffed 5 wheels in them. Tucker said these were a hybrid that they did for a while and was used mostly on the steel-track to rubber-track conversions. There were apparently a few production models set up this way but most had the center wheel off-set from the sprocket. The close wheels had great track support but the 3/8” clearance between the wheels tends to grind up the rubber when ice or rocks get in between them. Oh well, at least I have the rubber track system now!
I cleaned up the frames and got them painted. One of the big problems with a Tucker is the wear on the sides of the narrow wheels, especially the end wheels. I could have spent some time trying to clean some of them up, but in the end I thought it better to just buy 8 new ones from Tucker. The newer one’s are a 10" wheel with 2" of rubber on them. This helps keep the track guides from eating up the sides of the aluminum rims. New one’s are expensive, but I thought it would be worth it in the long run to preserve the track guides. Something that added to the decision was that getting the old 12" rims re-tired would have cost almost as much as the new one's from Tucker. I bead blasted the remaining 12 wheels and clear-coated them.
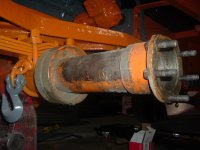
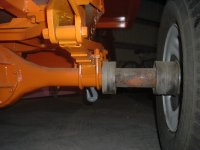
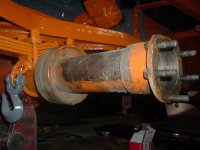
I had already gone through the differentials so pulling the axles again and replacing all the bearings and seals were in order. An interesting note on the seals is that Tucker used an inner seal to separate the oil from the axle bearings. The axle bearings are packed with grease and do not interact with the oil in the diff’s. First time I’d seen that on a Dodge 8.75” axle.
Something else I discovered is that the new wheels had a different hub, bearing spacing, seal, and seal collar. Fortunately the bearings and races were the same. I ended up having to use the same seal and seal collar as the old wheels and a shim washer on the spindle to keep all 5 wheels in the same line. I also reversed all the seals so they wouldn’t pop out when you grease the hubs. It eventually all worked out in the end.
These frames were marked from Tucker as 1400's, but they have 5 wheels that should have made them 1500-series. Just another one of them things Tucker did as an experiment where they took 4-wheel frames and stuffed 5 wheels in them. Tucker said these were a hybrid that they did for a while and was used mostly on the steel-track to rubber-track conversions. There were apparently a few production models set up this way but most had the center wheel off-set from the sprocket. The close wheels had great track support but the 3/8” clearance between the wheels tends to grind up the rubber when ice or rocks get in between them. Oh well, at least I have the rubber track system now!

I cleaned up the frames and got them painted. One of the big problems with a Tucker is the wear on the sides of the narrow wheels, especially the end wheels. I could have spent some time trying to clean some of them up, but in the end I thought it better to just buy 8 new ones from Tucker. The newer one’s are a 10" wheel with 2" of rubber on them. This helps keep the track guides from eating up the sides of the aluminum rims. New one’s are expensive, but I thought it would be worth it in the long run to preserve the track guides. Something that added to the decision was that getting the old 12" rims re-tired would have cost almost as much as the new one's from Tucker. I bead blasted the remaining 12 wheels and clear-coated them.
I had already gone through the differentials so pulling the axles again and replacing all the bearings and seals were in order. An interesting note on the seals is that Tucker used an inner seal to separate the oil from the axle bearings. The axle bearings are packed with grease and do not interact with the oil in the diff’s. First time I’d seen that on a Dodge 8.75” axle.

Something else I discovered is that the new wheels had a different hub, bearing spacing, seal, and seal collar. Fortunately the bearings and races were the same. I ended up having to use the same seal and seal collar as the old wheels and a shim washer on the spindle to keep all 5 wheels in the same line. I also reversed all the seals so they wouldn’t pop out when you grease the hubs. It eventually all worked out in the end.
Attachments
Mtn-Track
Member
Thank's guys. Unfortunately the cat is not ready to drive yet. I have the tracks all apart to replace the belts and decided to use POR-15 on the grousers. I just couldn't put the rusty-looking grousers back on the cat. The mountains have been blessed with lots of snow but we haven't had much along the northern front range, yet.
Last edited:
OMG. I don't even know what to say. (except like Fogtender said, I'd be afraid to scratch it on tight NE trails). Simply stunning. 

Can't wait to se the finished product. No, really. I can't believe I started at post one this morning and don't have conclusion! Get to work so we can see more!!


Can't wait to se the finished product. No, really. I can't believe I started at post one this morning and don't have conclusion! Get to work so we can see more!!

NorthernRedneck
Well-known member
Thank's guys. Unfortunately the cat is not ready to drive yet. I have the tracks all apart to replace the belts and decided to use POR-15 on the grousers. I just couldn't put the rusty-looking grousers back on the cat. The mountains have been blessed with lots of snow but we haven't had much along the northern front range, yet.
I have only one thing to say to that!
The best things in life are worth waiting for! Now get busy...we're all dying to see the finished product. Looks great!!!

Mtn-Track
Member
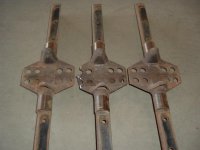
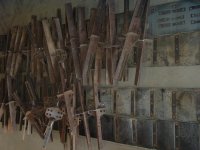
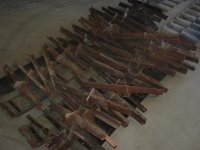
The belting on the tracks was original from the conversion that Tucker did on the '58. I might have been able to use them this season but I just didn't trust them. At least on the pontoon track set-up, if you throw a track you can usually still drive the cat. Not an option on the rubber track. I plan to keep some short sections of the old rubber belting and will get some longer grouser bolts to carry as patch material if I do break a track sometime.
Like Muley said in another post, if you own a Tucker you had better keep it out of the gravel. The ALL-rubber terra track may not be an issue, but the old steel tracks and the rubber tracks with steel grousers don't take to rocks very well. The clearance between the grouser pads is about a 1/8" and getting a rock between them will break the end off. I have several I found like this.
New belting is ready to install, so just cleaning up the grousers for the POR-15 treatment before I put them back together. Getting closer...
Like Muley said in another post, if you own a Tucker you had better keep it out of the gravel. The ALL-rubber terra track may not be an issue, but the old steel tracks and the rubber tracks with steel grousers don't take to rocks very well. The clearance between the grouser pads is about a 1/8" and getting a rock between them will break the end off. I have several I found like this.

New belting is ready to install, so just cleaning up the grousers for the POR-15 treatment before I put them back together. Getting closer...

Attachments
fogtender
Now a Published Author
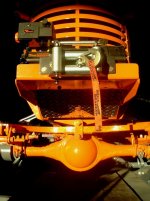
Cool, I like this photo, looks like the prelude to a good movie...
Um, dumb question though, are those hooks welded to the tubes? I am not an expert on the subject (but play one in real life), but anytime I have seen welds on a tempered tube like that, and when it takes a major stress like that such as the tracks extending out past the springs, the tube broke/cracked. Is that something that has been on the unit since the Guberment had it?
Course, that may be so old that it is built like a brick $hithouse and not be an issue....
Mtn-Track
Member
The hooks are actually welded to the leaf-spring perches. They were on there when I got the '58 and I think they were used for tie-down's, not towing/pulling. I decided to leave them on, but not sure if I'll use them or not.

