• Please be sure to read the rules and adhere to them. Some banned members have complained that they are not spammers. But they spammed us. Some even tried to redirect our members to other forums. Duh. Be smart. Read the rules and adhere to them and we will all get along just fine. Cheers. :beer: Link to the rules: https://www.forumsforums.com/threads/forum-rules-info.2974/

442 Refurbishment Project

That's awesome! And it explains why I only have a three speed!!!:yum::yum: I've never heard of a 3 spd in that year Tucker and was afraid someone had blown it out at some point and swapped it. A little grinding & it's fixed!:yum:

I never noticed anything out of the norm on my frame (other than a ton of patches). And my cab seems okay as well. I wonder if it's the one Mark still has that rolled?
 
it is soo cool how we are able to compile history on these old cats here on this site wished I could get some history on my Thiokol 2100 as the diesel models were so rare and the turbo diesels were un heard of here in the us im betting my engine was changed at some point as it is a 363 not a 380 as Thiokol advertised it
 
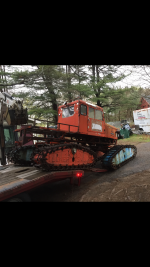
The last of the kitty litter has found a new home. Friend sent me this pic today. His boss's friend bought it. I believe it is staying local. He has his work cut out for him.

Tried to keep the family together but we were too far apart! Only took him 5 years to get the money for it.
 

Attachments

  • IMG_6718.PNG
    IMG_6718.PNG
    1.2 MB · Views: 556
I'm guessing it was quite the job just getting it up to that trailer from down by the barn . . . I thought I heard a massive squeaking, squealing sound the other afternoon! :doh:
 
interesting, when unloading a non running tucker, it seems that a excavator is the only tool you will need, yup addict, he has his work cut out for him and lots of it, does look like it has 31 grousers per pontoon, he is ahead of the game there...
 
I can't believe the tracks are on it at all. I figured that when he tried to move that one it would be so bound up it would just snap the connecting links off of it.
 
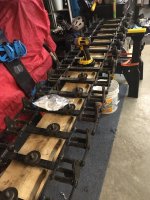
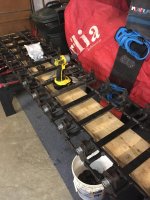
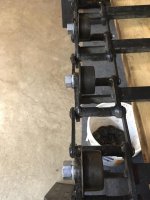
Well, I was having issues keeping the bearing stud spinning in the grouser holes of the track I’m working on now (finally ). There is barely any ‘perch’ left on this ice track. For the first two tracks I was able to use a deformed nut to hold them (to alleviate the chances of them loosening up as some had in the past). With the current one, it spins the stud as soon as the deformed part seats, sometimes sooner. So, I ordered up 200 zinc coated standard nuts & lock washers (no one stocks the 9/16” fine thread?). Using the lock washers to make sure they stay put. Also bought a corresponding die so I can clean up the stud threads prior to installing so there is no resistance before the nut bottoms out.

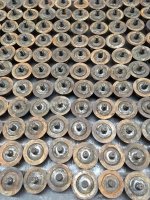
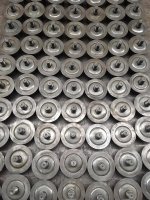
Thank the sweet baby Buddha it's working great. I was REALLY dreading the idea of having to tack weld and file all of those holes . . . also crazy how some rollers are almost factory new, others are pizza cutters. So zig-zagging them down the line.
 

Attachments

  • IMG_1427.jpg
    IMG_1427.jpg
    196.9 KB · Views: 467
  • IMG_1428.jpg
    IMG_1428.jpg
    184.4 KB · Views: 467
  • IMG_1429.jpg
    IMG_1429.jpg
    112.9 KB · Views: 472
  • IMG_1430.JPG
    IMG_1430.JPG
    469.7 KB · Views: 476
  • IMG_1431.jpg
    IMG_1431.jpg
    198.6 KB · Views: 471
Glad to see you fixing your cat tracks. The factory used the thinner star locks, both external and internal tooth. Using the thick lock washers will help to protect the grease fittings which can get dinged up during trailer loading and unloading. I see nothing wrong with doing it that way as long as you have adequate thread in the nut. Locking nuts do not work for the reasons you state. Chasing the threads good idea too.
 
I used the stars for the first tracks and wasn't worried because I was also using the deformed nut. But have to say I wasn't too confident of them holding a standard nut on their own. These lock washers have a pretty aggressive cut so I think they will hold well. The nut is grabbing 98% of the thread and as you stated, the grease fitting is just a touch below or even with the flat surface of the nut so should offer good protection, as well as staying in place.
 
Great to see forward motion on the field here. I instead of zig zag spacing wouldn't it be better to put them across and space those grouses with the better rollers equal through the track?

The thinking is instead of allowing the track to slide side to side following that zig zag it may run more true and straight?

Also did you have to straighten any slightly bent roller flanges on the grousers?/
 
I'm having to straighten / square almost every grouser flange.:hammer::hammer::hammer:

Really unknown on the zig-zag pattern vs. the good grouser/weak grouser pattern? I guess I was thinking more of even wear in-line when I started and didn't really consider the possible lateral forces by going zig-zag?:ermm: I'm guessing that my kids would be the ones worrying about it many years in the future with the way our winters keep going! Just going to grease the crap out of them & run it!:biggrin:
 
Just sticking them in a vise and bending back, then using a square to make sure I'm close.
 
I also used the vise to bend them back but used a long bolt with a nut on both sides of the flange, bolt pointing in. When you use this method with the bolt through the flange it magnified the about it was bent and made it easier for me to gauge how much to bend it back. Basically I would bend it until the bolt was parallel with the connecting tube (triangle or round center tube). I also kept taking a measurement from one bearing flange to the other making sure it was close to my "good" grousers.
 
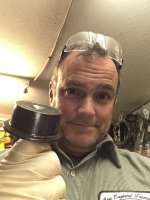
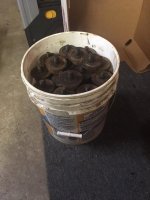
4 Gallon Bucket of Love

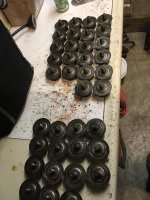
Presidents Day = Vacation Day = Roller Refurbishment Day. I finally got a free day to myself and put it into the Tucker. Got to get this thing in motion since it won't be as much fun to enjoy from the other side of the dirt! :smile:

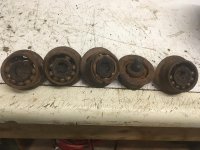
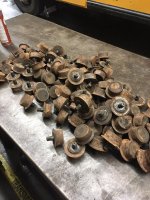
I have to say the rollers on the first two tracks were fairly well greased. These two not so much. Previous owner must have started greasing at the front each time, and by the time the rear two pontoons came around he just said screw it. So, I ended up with 10 destroyed ones (like the five below). Luckily the ones I got from Muley180 are keeping me in business.
 

Attachments

  • IMG_3297.jpg
    IMG_3297.jpg
    146.6 KB · Views: 283
  • IMG_3296.jpg
    IMG_3296.jpg
    104.1 KB · Views: 290
  • IMG_3298.jpg
    IMG_3298.jpg
    211.4 KB · Views: 287
  • IMG_3299.jpg
    IMG_3299.jpg
    304.8 KB · Views: 294
  • IMG_3305.jpg
    IMG_3305.jpg
    254.1 KB · Views: 286
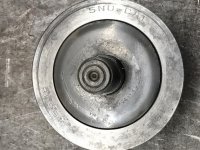
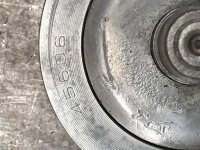
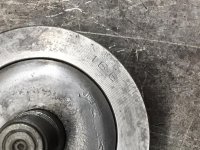
Out of all of the rollers I've cleaned, this is the only one I have seen that had this stamped into the shell flange.
 

Attachments

  • IMG_3304.jpg
    IMG_3304.jpg
    112.8 KB · Views: 298
  • IMG_3303.jpg
    IMG_3303.jpg
    121 KB · Views: 288
  • IMG_3302.jpg
    IMG_3302.jpg
    121.8 KB · Views: 283
  • IMG_3301.jpg
    IMG_3301.jpg
    104.4 KB · Views: 279
Great to see progress. Wire wheel?

Let me know if you need some lubriplate. I have the east coast connection from friend sympathetic to Tuckers.
 
6 hours on the wheel yesterday. It's unbelievable how dry some of these rollers were. As in dust coming out when they were spun on the wheel.
 
Making a 443 from a 442 project(AKA The Decade Project!)

Biannual update & review . . . :smile:. Tinkering . . .

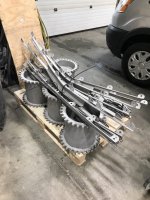
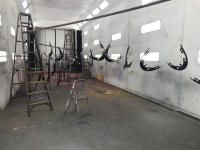
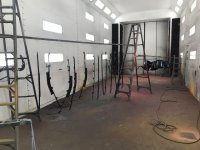
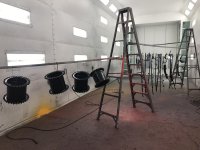
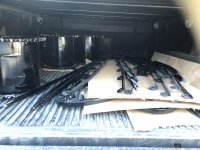
Guides, rails & sprockets sand blasted & epoxy coated:
 

Attachments

  • IMG_0200.jpg
    IMG_0200.jpg
    201.6 KB · Views: 348
  • IMG_0224.jpg
    IMG_0224.jpg
    76.4 KB · Views: 333
  • IMG_0225.jpg
    IMG_0225.jpg
    81.4 KB · Views: 339
  • IMG_0226.jpg
    IMG_0226.jpg
    86.1 KB · Views: 343
  • IMG_0236.jpg
    IMG_0236.jpg
    102.5 KB · Views: 335
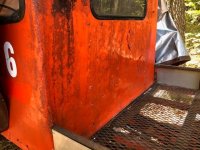
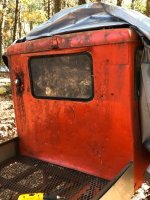
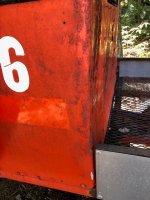
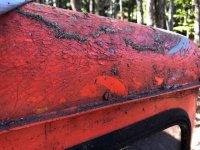
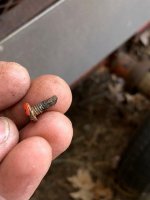
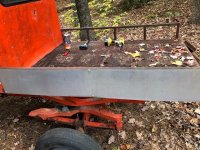
Unscrewing and un-riveting every panel. Everything is free (other than one roof screw)and can be peeled off in 10 minutes when ready.
 

Attachments

  • 1012191.jpg
    1012191.jpg
    107 KB · Views: 334
  • 1012192.jpg
    1012192.jpg
    130.2 KB · Views: 332
  • 1012194.jpg
    1012194.jpg
    111 KB · Views: 330
  • 1012195.jpg
    1012195.jpg
    115.5 KB · Views: 319
  • 1012196.jpg
    1012196.jpg
    67 KB · Views: 326
  • 1012197.jpg
    1012197.jpg
    141.8 KB · Views: 329
I was originally going to do that, but now planning on a west coast open air concept . . . Easier, more storage for hauls into camp, and buddies that don't care about the cozy amenities as long as there are cold beverages.
 
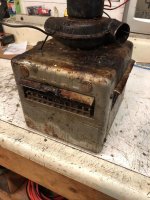
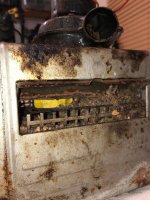
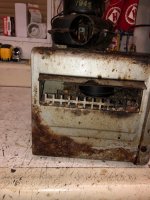
Going to try to fit some heater box repairs in-between pontoon work. :hammer:
 

Attachments

  • 10201912.jpg
    10201912.jpg
    208.2 KB · Views: 286
  • 10201915.jpg
    10201915.jpg
    217.3 KB · Views: 266
  • 10201914.jpg
    10201914.jpg
    243.8 KB · Views: 288
Top