• Please be sure to read the rules and adhere to them. Some banned members have complained that they are not spammers. But they spammed us. Some even tried to redirect our members to other forums. Duh. Be smart. Read the rules and adhere to them and we will all get along just fine. Cheers. :beer: Link to the rules: https://www.forumsforums.com/threads/forum-rules-info.2974/

1977 Tucker 542A Restoration Project

Got the track rollers all wire wheeled, prepped, and painted today. Tomorrow after the paint dries I will flip them upside down, drilling holes in the plywood so that they will be upside down!

We ordered all stainless hardware, which should be in by the end of the week. Also ordered stainless hardware for all the nuts on the pontoon from the bolt ring to the rails, should be shiny!

While the rollers dried, I moved on to sanding and polishing the tucker outer bearing assemblies. For being cast, they sure cleaned up nice. Since I had the polisher out, I also gave the custom stainless exhaust a quick polish. The 440 will likely color the piping quickly, but at least it will look good on its maiden voyage.
https://www.forumsforums.com/attachments/img_0327-jpeg.172628/
 

Attachments

I know the drill on the "Trash fixes on everything"

I have a Thiokol 2100 "Franken Cat"
The Chassis is a 1972 Thiokol 2100 packmaster (Groomer)

Decided to add bits and pieces of a 1993 S-10 pickup (Front cab) and the rear portion of a 1991 S-10 Blazer (From B pillar back) to add the needed creature comforts and common easy to get parts.....

"Franken Cat"

Power is a 406 Cube Chevy small block.......Another franken job 1980 sb 400....+030 overbore ....1998 L31 Vortec heads

After market high capacity oil pan.....And on and on.....A roll yer own

The drive is the common OC-12 rear diffy
Tranny is a TH350

All the wiring is GM Stock S10 .....(Easy to make it all work)

Interior is modified little...Added bucket seats ...Cable shifter and electric joy sticks the control oil pressure flow to the valves for the steering bands (400 psi) Steering column is locked in place...All other column multi purpose switches function as factory
You can read the long and convoluted history of this Kitty in my thread

After reading through your thread, I can see you too are familiar with opening up a can of worms! Very cool and unique build, with a lot of thought put into making it a reliable machine. Creature comforts go a long way, and you've got plenty of them with that S-10 cab. It's cool seeing other people tackle big builds like this!

Also, looks like you spent some time as a professional truck driver. Not sure if you've seen our milk tankers running around your side of the town, but we pick up a lot of milk near there! Blue Pete's and Stainless Milk Tankers
 
Our winter operations kept us busy the last few weeks, which meant the Tucker took a backseat until things settled down.

Timing somewhat worked out as Larue Brothers had plenty of prep and paint work to be done on the pontoons and cat itself.

This week we picked up our freshly painted pontoons and rails, as well as our stainless hardware and began reassembly. Below are some pics of the paint we chose. Original Tucker base coat with a House of Kolor pearl top coat. Pictures don’t do this justice - it looks absolutely amazing when the sun hits it.

Bummer that we weren’t able to make the Jamboree, but looks like there was a great turnout!


IMG_1831.jpeg
 

Attachments

Here are some pics of the cat itself, we decided to go with a black front end similar to our 442A except full gloss instead of flat black.

We were also asked to enter into the 68th Anniversary Portland Roadster Show on March 15th-17th! View attachment 173712
All the holes are for the side panels correct? These really aren't "required". On my rig, the whole reason the frame has damage, is because water got into the frame via those holes. Did you guys have weep holes drilled to allow water that enters, to exit?

Love this build/restore! Thank you for sharing!
Yes, they are indeed. We toyed with the idea of removing them and the panels all together, but decided to keep them. Drilled them out and re-threaded to accept a stainless button head bolt.

Someone thought ahead (shockingly) and drilled weep holes in this machine already. Might have been factory, might have been Aspen Ski Corp? Either way this machine hasn’t suffered and rot and is solid!

How bad was the damage on your rig? Do you have pics? On our 442a, the frame was so rotted it was beyond saving. Our new one is below:


View attachment IMG_0271.jpeg
 
Yes, they are indeed. We toyed with the idea of removing them and the panels all together, but decided to keep them. Drilled them out and re-threaded to accept a stainless button head bolt.

Someone thought ahead (shockingly) and drilled weep holes in this machine already. Might have been factory, might have been Aspen Ski Corp? Either way this machine hasn’t suffered and rot and is solid!

How bad was the damage on your rig? Do you have pics? On our 442a, the frame was so rotted it was beyond saving. Our new one is below:


View attachment 173806
Here are a few. They were all bulged and split. I also found a few of the diagonals that were bulged and split.

I think I’m going to weld all the holes shut, remove the skirts and drill weep holes.
 

Attachments

  • IMG_0723.png
    IMG_0723.png
    12.1 MB · Views: 51
  • IMG_0722.png
    IMG_0722.png
    9.5 MB · Views: 54
View attachment 172439

To give credit where it’s due - it was Clyde’s suggestion down at the factory to make these out of plate. While discussing what our options were for rebuilding the old ones he said that solid plate would be the way to go. Thanks Clyde!

Do you happen to have the DXF/CAD file for the sprockets? I'm in the middle of debating on refurbishing or rebuilding mine, would love to fiddle around with the template you have :) Your paint job looks killer btw!

Thanks!
 
What color orange are you guys using?

The original Tomahawk Orange as a base coat, then House of Kolors Pearlescent Tri-Coat clear. I can grab some pictures of the paint codes tomorrow and post them.

The original orange was just too flat for us, and we wanted something a little flashy after putting all this work into it!
 
Do you happen to have the DXF/CAD file for the sprockets? I'm in the middle of debating on refurbishing or rebuilding mine, would love to fiddle around with the template you have :) Your paint job looks killer btw!

Thanks!
I can certainly get it! Do not have it with me at home but will send it to you
 

Attachments

The only thing I worry about with these sprockets is excessive wear from them not being hardened. But maybe it won’t make that big of a difference with the minimal amount of use it will receive each year?
Appreciate you grabbing the files! Again not certain if I will use them, or just rebuild my old sprockets. The tubes on mine are really in bad shape, the gears are pretty good, minus the fact someone welded extensions onto the teeth, which should have ruined the heat tempering. For what it's worth my teeth look really good considering they ran for at least 20-30 years without tempering.

Little too late for you now, but you could have taken your teeth rounds to a local blacksmith/shop and had them heat tempered. A person would then need to be careful welding them to the tubes to make sure they didn't get too hot to ruin that temper, but would be manageable.

All and all I wouldn't stress too much over hardness. A softer sprocket will have the benefit of educing less wear on the rollers on the track, which one could argue would be more painful and tedious to replace than the sprockets. So maybe it's better to have a softer sprocket? :LOL: Also wear on a sprocket won't increase the distance between the faces of the teeth, so this even wear shouldn't compound any issues on the tracks, it wouldn't be a problem so long as the teeth aren't slipping on the tracks, but you would need a lot of wear to get to that point I would think.

I actually thought about having some sprockets cut then heat treating them myself, but I found out almost any steel you get locally will be a low carbon construction grade, which simply can't be oil quenched to temper, it needs to be baked in a furnace with carbon so it can absorb it, before treating. Basically a very tedious process and you need a big oven to carbon bake the parts, so best left up to a shop with all the experience/tools to do it.

Pontoons are looking mint!
 
That is interesting. My Tucker also has the 6 bolt axle and the hub looks the same as well. The hub lock washer is also the same. This is the first Tucker I have seen with a 6 bolt axle.

IMG_5108.jpeg
IMG_5111.jpeg


However the diff doesn’t look the same as the Dana 60 on my Tucker. I installed an Eaton electric locker in the front diff.

IMG_5041.jpeg
IMG_5043.jpeg


IMG_2558.jpeg
IMG_2561.jpeg
 
  • Like
Reactions: PJL
wonderful post with great photos, thank you

and

new frame, prefect pontoons, etc etc etc, and amazing stardust orange show cat paint, wow wow wow,

again what a beautiful show cat, hope you win a few of trophies at the portland roadster show, you are most deserving, and building a new frame is well beyond the norm
 
Last edited:
Hello all!

Boy have we been busy.. haven’t had much time to post updates. We were however able to finish up the Tucker the day before show entry. Definitely cut it close, but was well worth the push to get everything finished up and see the final product. Normal work operations have been hectic.

Built some rolling dolly’s in order to move the cat around, which we didn’t even end up needing for the show. There is a pic with them attached below. We just unloaded in the building onto some plywood sheets (they didn’t want the tracks or the dolly’s on the cement..)

We placed second in our category, not bad! Lots of cool rigs at the show and they did a great job hosting.

Updates since last post:

Interior carpet installed, sound dampening installed, seats and upholstery installed. Added some seat heaters in the front two seats, although I expect we probably won’t ever use them. Had a bunch of 1” sheet aluminum cut, and bent in the press brake to make all new carpet trim cover pieces. Polished them up to a mirror finish to match everything else.

Removed gauges from dash, sanded and painted gloss black. Reinstalled gauges and even got the low oil pressure light/circuit working again. Noticed horn didn’t work, come to find out no horn was installed. Bought a compact “hella” horn and installed and wired up.

Added 3/4” led lights (amber sides, red rear) all the way around the cat. Wired up to their own circuit. Installed the Vision X headlights, and wired up the halos on their own circuit as well. Added two glass watermelon led lights mounted directly under the cab floor near the steps on both sides (we are a trucking company, couldn’t resist throwing some of these on). Added amber ID lights to the custom visor as well.

Removed paint from all the grease zerks on the cat, and gave everything a healthy dose of grease. Greased all rollers as well. Set track tension - still unsure about what this should actually be, but we are at about 1” of slack when lifting up on the track at its loosest point. We are only halfway tensioned on the sliders for each adjuster on the pontoon so plenty of room to increase if needed. Maybe someone on here can advise what best tension is.

Had some door decals made up, and had all pontoons clear-bra’d. That PPF is some thick stuff and should minimize damage to the pontoons.


View attachment IMG_0644.jpeg

View attachment IMG_0675.jpeg

View attachment IMG_0730.jpegView attachment IMG_0731.jpegView attachment IMG_0622.jpeg
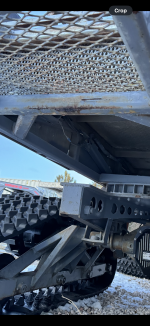
 
That is interesting. My Tucker also has the 6 bolt axle and the hub looks the same as well. The hub lock washer is also the same. This is the first Tucker I have seen with a 6 bolt axle.

View attachment 174630View attachment 174631

However the diff doesn’t look the same as the Dana 60 on my Tucker. I installed an Eaton electric locker in the front diff.

View attachment 174632View attachment 174633

View attachment 174634View attachment 174635

Interesting - looks like you did some digging too when trying to identify the hubs. It took us awhile to finally figure out what an 8 lug hub with a 6 bolt axle came out of with these dimensions. Our build sheet shows a RA17 axle. I can’t imagine there are many of these left out there.

Our other cat - the 1977 1642 also uses these hubs. I didn’t think anything of it because they were in great shape and didn’t need to be replaced.

I am curious how many machines were built with these international parts??

How does the locker work for you? We definitely want to do this on our 1642. Pretty neat set up you have there!
 
It appears Tucker was making belted and pontoon SnoCats at the same time and mixing parts.

View attachment 174636View attachment 174637
Indeed they were! We’ve got two machines that are a year apart. One is belted, one has pontoons. Both purchased by the same company.

Our pontoon cat received axles that were meant to be under a belted cat - hence the long journals on our front that we ended up cutting down. Build no two the same!

Beautiful build you have there by the way!


View attachment IMG_0203.jpeg
 
Top