• Please be sure to read the rules and adhere to them. Some banned members have complained that they are not spammers. But they spammed us. Some even tried to redirect our members to other forums. Duh. Be smart. Read the rules and adhere to them and we will all get along just fine. Cheers. :beer: Link to the rules: https://www.forumsforums.com/threads/forum-rules-info.2974/

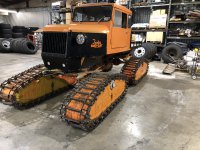
1977 Tucker 542A Restoration Project

Hello all!

New member, but not new to the world of Tucker! Figured this would be a great place to document our third cat project - a 1977 Tucker 542A. We purchased this a couple weeks ago from Colorado. Originally an Aspen Ski Corporation cat (same as our 1642)

After doing some digging here on the forum, I noticed this cat has had a couple owners, and that there have been some previous modifications and partial repairs done to it. I can’t remember the exact thread that detailed all the work that was done to it before it was sold back in 2019, but maybe one of you guys can link it here.

Looks like it was given a rewire and repower to a 440 and 727 transmission in 2019. The most recent owner (owned a fabrication shop) removed the bed and extended the cab, added a removable winch, and a couple other odds and ends. He did an amazing job to say the least!

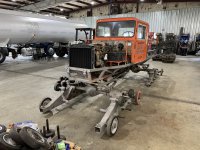
Now that the cat is in our possession, we decided to completely tear everything from the frame down apart and inspect, repair, and replace as necessary. It’s a good thing we did as we found problems that would have left us stranded on the mountain. Being a pontoon cat we know the importance of these components either makes or breaks you!

I will slowly start to attach all the pictures we’ve taken of the problems found so far, as well as our repairs, restorations, and final product!


Hope to see you all at the Jamboree in January!
 
IMG_1223.jpeg
 

Attachments

  • IMG_0088.jpeg
    IMG_0088.jpeg
    6.7 MB · Views: 75
  • image0.jpeg
    image0.jpeg
    967.5 KB · Views: 106
  • image1.jpeg
    image1.jpeg
    853 KB · Views: 107
  • IMG_0064.jpeg
    IMG_0064.jpeg
    6.2 MB · Views: 70
Starting with the dismantling of the pontoons!

Tracks are in great shape. Almost all grousers are straight, and any repair welds that have been done are holding up. We’ve had to touch up a few with some nickel rod, but for the most part in good shape.

Rollers were mainly original style with the greaseable bearings, had roughly 20 of some newer non-greaseable rollers installed. Will need to replace a total of 35 rollers due to bearin failure/uneven wear. All cotter pins have been replaced (that was fun) as there was no rhyme or reason as to what they used for cotter pins. Some had nails, some had too thin of cotter pins, some had no cotter pins, you get the idea.

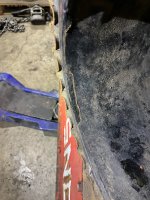
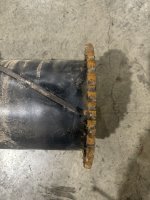
Drive sprockets are toast. You can see in the pictures that they have all “torn” at some point and been repaired. None of the welds held up, and the center piece that bolts to the hub is barely hanging in there on some of them. Teeth in the sprockets are worn down pretty significantly, one sprocket had ran out of adjustment for quite some time and is warped, which in turn wore the rollers on the grousers extremely uneven.

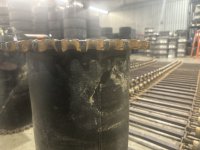
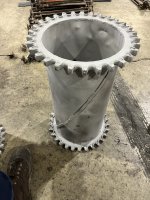
Having new sprockets machined from 1/2” steel, and new drums rolled out of 12 GA steel. New inner mounts for the hub machined from a single piece rather than two chamfered pieces. I have attached a picture of a test sprocket we had cut to make sure everything was going to line up before they ran production.

A lot of the sprocket rollers were worn, so we cut some new ones and hardened them (cherry red then into an oil bath, and repeat) and then installed. Now that all worn items have been replaced, we are ready for paint and reassembly of the tracks.

Check out the attached pictures!
 

Attachments

  • IMG_0086.jpeg
    IMG_0086.jpeg
    1.7 MB · Views: 96
  • IMG_0118.jpeg
    IMG_0118.jpeg
    3.9 MB · Views: 66
  • IMG_0362.jpeg
    IMG_0362.jpeg
    2.3 MB · Views: 101
  • IMG_0119.jpeg
    IMG_0119.jpeg
    6.2 MB · Views: 55
  • IMG_0082.jpeg
    IMG_0082.jpeg
    2 MB · Views: 103
  • IMG_0094.jpeg
    IMG_0094.jpeg
    7 MB · Views: 57
  • IMG_0096.jpeg
    IMG_0096.jpeg
    8.5 MB · Views: 56
  • IMG_0386.jpeg
    IMG_0386.jpeg
    2.1 MB · Views: 99
  • IMG_0363.jpeg
    IMG_0363.jpeg
    2.6 MB · Views: 111
  • IMG_0118.jpeg
    IMG_0118.jpeg
    3.9 MB · Views: 69
Save the sprocket cut info . . . I'm sure there will be inquiring minds as time moves along. That sprocket must have been making a hell of a noise for a long time to get rolled in like that.
 
Save the sprocket cut info . . . I'm sure there will be inquiring minds as time moves along. That sprocket must have been making a hell of a noise for a long time to get rolled in like that.
Agreed! You would have thought that whoever used this cat when things became misaligned would have paid attention to that noise… it very clearly ran for quite some time. Here is a picture of the wear it put into the inside roller rail.

IMG_0367.jpeg


IMG_0368.jpeg
 
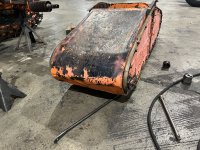
Our pontoons were in rough shape. Looks like all 4 had tracks that were de-railed at some point, and a lot of rust issues. Lots of welding, grinding, and cutting out rust.

Have any of you seen brazing on pontoons? It seems whoever owned this cat at one point preferred to braze for repairs. They also left the top portion of the inner bolt ring on all 4 pontoons cut like in the picture below. I am not sure if they did this to prevent them from continually cracking out, but we welded them up nicely.

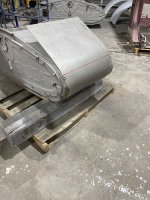
Began re-skinning the pontoons with some mild sheet metal. I am assuming all the dents are from track related issues in the past and not rocks, branches, etc since this was hardened material originally and would take a lot of force to dent.

View attachment IMG_0097.jpeg

View attachment IMG_0100.jpeg


IMG_2773.jpeg

IMG_1537.jpeg
IMG_2769.jpeg
IMG_0379.jpeg
 

Attachments

  • IMG_0361.jpeg
    IMG_0361.jpeg
    4.6 MB · Views: 68
  • IMG_1537.jpeg
    IMG_1537.jpeg
    2.3 MB · Views: 70
Worked some more on the pontoons today, the two on the right side were rusted where the lip meets the bottom skid on each side. Cut out the remaining bits of material and welded in some 1/2” flat bar, as well as welded up all the cracks. Ground everything down to a smooth finish and re-installed the roller track.

These pontoons definitely have seen some use (was a groomer), but we didn’t know that they were in this bad of shape.

View attachment IMG_0182.jpeg
 
Began re-skinning the pontoons with some mild sheet metal. I am assuming all the dents are from track related issues in the past and not rocks, branches, etc. since this was hardened material originally and would take a lot of force to dent.


View attachment 171701


My original steels were dented just as badly as yours. Sticks and rocks will do that getting pulled over the nose. In the picture above, that seam on the left (and any others) needs to be sealed / welded. I've never seen a drain channel stuck in and not 'finished'(?). With it like this, every time it rains or snow melts, water is filling the inside of the pontoon. Some may evaporate back out during the summer, but most is rotting holes out the lower side rails. The more airtight the better.

Also, the sprocket was obviously riding against the side. I hadn't noticed it before, but is the lower part of that wear bearing really as rolled / worn as the picture implies? (That was a fine looking 'repair' job when it was replaced last time . . .:rolleyes: )
Thanks for the info DAVENET! We will definitely try and get these as airtight as possible. I can see just how much damage that sitting water will do now that we have really dug into these - you would have thought Tucker would have coated the inside of these during mfg. to slow that process down. Wear bearing is in good shape - the crusty grease makes it look worse than it is. It appears that these were already replaced on all 4 pontoons at some point in its lifetime. Journals on the axles are also in good shape minus some cracking.

I worked on the two driver side pontoons today, and noticed they both had a piece of 1” flat bar secured to the side just above the rail pieces with self tappers. This was not blatantly obvious before sandblasting. Some of these self tappers weren’t even tight, and they had used “seam sealer” around all the edges.

I decided to take that piece off and of course found a rotted mess, and someone’s previous attempt at repairing it. Cut the bad material out, welded in some new flat bar (and filled their self-tapping holes) and blended down to be smooth. Should be much stronger now.

It’s truly amazing the kind of repairs you see on these cats! Is this typical for the side to rot out this high? Or is it due to cracking and stress from the larger 500 series pontoon? The two passenger side pontoons were cracked out just above each of the lower rail mounts. Seems like this is a pretty big stress point. Hopefully we never have to touch these again once we are finished!


View attachment IMG_0196.jpeg

View attachment IMG_0199.jpeg

View attachment IMG_0194.jpeg
View attachment IMG_0195.jpeg

View attachment IMG_0190.jpeg
My original steels were dented just as badly as yours. Sticks and rocks will do that getting pulled over the nose. In the picture above, that seam on the left (and any others) needs to be sealed / welded. I've never seen a drain channel stuck in and not 'finished'(?). With it like this, every time it rains or snow melts, water is filling the inside of the pontoon. Some may evaporate back out during the summer, but most is rotting holes out the lower side rails. The more airtight the better.

Also, the sprocket was obviously riding against the side. I hadn't noticed it before, but is the lower part of that wear bearing really as rolled / worn as the picture implies? (That was a fine looking 'repair' job when it was replaced last time . . .:rolleyes: )
 
While I worked on the pontoons, my brother began getting the hitch plate and rear cab supports fabbed and welded into place. We went with 1/2” plate for the receiver to mount to. Will be much stronger than the original (wouldn’t trust that old mount to pull on much of anything).

Since this was originally a 542, we figured added support in the back frame area with all the extra weight of passengers would be a good idea. The only mount that was in place had already cracked out where the support wings ended.View attachment IMG_0193.jpeg

View attachment IMG_0192.jpeg
 
My guess on why the rot is so high: the bottom sides already had major rot that wasn't addressed in a timely fashion. Even though the rails were effectively rotted off, the tracks (and machine weight) were holding everything in place. When they finally decided to fix it they spliced in the replacement metal with studs. Instead of welding it in, they added that screw on 'trim cover' strip to hide the seam. It wasn't sealed well and continued to hold moisture which allowed the problem to continue.
 
Pontoons are nearly completed, and were sent off for bodywork and paint.

In the meantime, we continued work on cleaning up the frame, welding up cracks, and adding reinforcements.

We also cut off the old rotted exhaust and started fabricating our own out of 2” stainless. Ordered some mufflers offline and sourced the rest of the stainless piping from our shop inventory here at work (same stainless piping that is used for the CIP systems to clean out our milk tankers). The old exhaust was rotted and cracked out, and there were no flex joints which probably contributed to the cracking and leaks.

Just waiting on our stainless hangers to be able to mount the muffler and piping to the cab.

New drivelines showed up, as well as 4 new yokes and respective seals. Old yokes were paper thin near the strap bolt holes, and drivelines had been repaired at one point. Definitely a bomb waiting to go off in the snow

Also installed new front springs thanks to Clyde down at the factory. Ours were completely flat and front yoke nearly hitting oil pan! Interesting fact - these are the same springs used on the new Terra’s! Much better ride height now.

View attachment IMG_0215.jpeg

View attachment IMG_0216.jpeg
View attachment IMG_0219.jpeg
View attachment IMG_0217.jpeg

View attachment IMG_0220.jpeg

View attachment IMG_0222.jpeg

View attachment IMG_0206.jpeg

View attachment IMG_0223.jpeg
 
Began work on the axles and spindles. Removed both differential covers and inspected gear sets and oil, both look great. I believe they have been changed within the last couple of years.

Spindles on rear axle were replaced at some point, you can see the cut point and where they re-welded the new ones on. Those are in great shape.

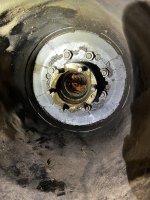
Spindles on front axle were toast, so we cut them off and I was able to source some good used ones locally. The front two hubs were also toast, looks like the nuts backed off both spindles at some point during usage and the bearings wore the spindles down to nothing, and the nuts bouncing around in the hub took out the races, inner hub, and sealing surface.

Whoever repaired this was well aware of the damage that occurred, and welded the nut to the spindle since there were no threads left. They also brazed the wheel seal area (very poor job) and pinged the spindles so that the bearings would stay put.

Overall very glad we pulled these off and repaired the correct way - we were likely only a few hours of use away from a complete breakdown.
IMG_0370.jpeg


IMG_0375.jpeg


IMG_0080.jpeg


IMG_0370.jpeg
IMG_0375.jpeg
IMG_0080.jpeg
 
View attachment IMG_0204.jpeg

View attachment IMG_0207.jpeg

View attachment IMG_0250.jpeg

View attachment IMG_0252.jpeg

New spindles were sourced from 70’s 3/4 ton international harvester axles front Woody’s 4x4 in Vancouver, WA. Great guys to deal with! They also have me the hubs and all hardware that went with. These were very hard for me to find - almost nothing exists online and most bone yards don’t have stuff that dates back this far. We are lucky that we were able to find them!

Made a sleeve, had the inside machined out to be a near perfect fit, measured everything and burned them in!

Since the front axle had a journal meant for a rubber track carrier, I cut it back in order to give us access to weld the new spindle on. Cut out a new ring to stiffen up the outside back up.
 
Hey neighbor....Almost anyway....I am over near Newberg

The Cat is looking great....
It never ceases to amaze me how things can get beat so bad and nobody seems to notice that something sounds like a rock crusher ..

Gonna be a sweet ride for sure.......

Great pictures.....
 
Hey neighbor....Almost anyway....I am over near Newberg

The Cat is looking great....
It never ceases to amaze me how things can get beat so bad and nobody seems to notice that something sounds like a rock crusher ..

Gonna be a sweet ride for sure.......

Great pictures.....
Howdy neighbor! Newberg is close to us for sure. Very few people around here with cats, so glad to hear you too caught the bug.

This one was rough for sure, and the repairs that were made were even rougher. I get a bush fix here and there to get the cat home, but everything we touched on this was that way.

Will you be attending the jamboree in January? What kind of cat do you run? Would like to see pics
 
After a couple days of intense work to make our sandblasting appointment today, we made it! Everything from cab down will be blasted.

Will pick it up tomorrow for body prep (remove the old camo wrap) body work, and paint.

The last few days have been busy but we were able to replace all hydraulic lines, all fuel lines, all coolant lines, fluid flush on all gear boxes, oil changed, aluminum holes on body welded up, visor attached and brackets fabbed up, front winch mount fabbed, and wiring cleaned up.

View attachment IMG_0268.jpeg

View attachment IMG_0266.jpeg
View attachment IMG_0267.jpeg
 
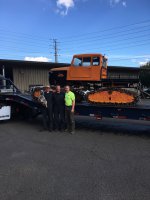
Picked our cat up from precision sandblasting (we use them for all of our equipment at work) and hauled it up to Larue Brothers Painting in Vancouver, WA. We’ve been working with Larue brothers for over 15 years and they throw down some of the best body and paint work you’ll ever see!

We had everything from the cab down blasted, and they did an amazing job!

View attachment IMG_0279.jpeg
 

Attachments

  • Like
Reactions: PJL
While we were out, we decided to check on our 1970 442A frame that is being reproduced.

Our original had rotted out all down the side rails, and was cracked in nearly every point where the two frames were connected with the bracing that holds them together. There was no saving the frame unfortunately.

Usually this is something we would do in house, but due to time constraints we outsourced to Versa-Tech in Portland, OR. As the frame sits now it only took them 3 days to reproduce. Versa-Tech also has the drawings for 400 series pontoon skins (except for the stamped “Tucker sno - cat” piece) and all plow steel rails and adjuster caps if anyone is interested. We had this done a couple years ago.


View attachment IMG_0269.jpeg
View attachment IMG_0271.jpeg
 
Howdy neighbor! Newberg is close to us for sure. Very few people around here with cats, so glad to hear you too caught the bug.

This one was rough for sure, and the repairs that were made were even rougher. I get a bush fix here and there to get the cat home, but everything we touched on this was that way.

Will you be attending the jamboree in January? What kind of cat do you run? Would like to see pics
I know the drill on the "Trash fixes on everything"

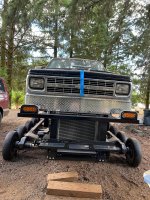
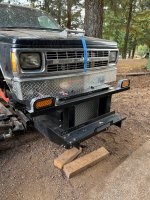
I have a Thiokol 2100 "Franken Cat"
The Chassis is a 1972 Thiokol 2100 packmaster (Groomer)

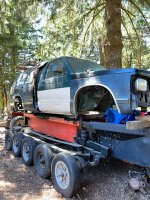
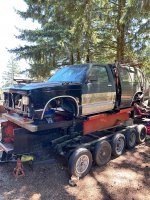
Decided to add bits and pieces of a 1993 S-10 pickup (Front cab) and the rear portion of a 1991 S-10 Blazer (From B pillar back) to add the needed creature comforts and common easy to get parts.....

"Franken Cat"

Power is a 406 Cube Chevy small block.......Another franken job 1980 sb 400....+030 overbore ....1998 L31 Vortec heads

After market high capacity oil pan.....And on and on.....A roll yer own

The drive is the common OC-12 rear diffy
Tranny is a TH350

All the wiring is GM Stock S10 .....(Easy to make it all work)

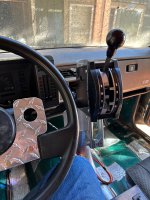
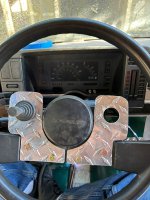
Interior is modified little...Added bucket seats ...Cable shifter and electric joy sticks the control oil pressure flow to the valves for the steering bands (400 psi) Steering column is locked in place...All other column multi purpose switches function as factory
You can read the long and convoluted history of this Kitty in my thread
 

Attachments

  • IMG_6633.jpg
    IMG_6633.jpg
    919 KB · Views: 65
  • IMG_6631.jpg
    IMG_6631.jpg
    885.7 KB · Views: 62
  • IMG_6428.jpg
    IMG_6428.jpg
    746.9 KB · Views: 55
  • IMG_6426.jpg
    IMG_6426.jpg
    926.8 KB · Views: 63
  • IMG_6407.jpg
    IMG_6407.jpg
    573.1 KB · Views: 63
  • IMG_6406.jpg
    IMG_6406.jpg
    574.5 KB · Views: 58
Not a whole lot we are able to do now that the cat is in for body prep and paint. Today, we chose to tackle the sprockets.

Our old sprockets were severely warped (all 4) and the teeth were pretty worn down. It seems that only one side of the sprocket wore on all of them too, I would have thought someone would have moved them to opposite sides in order to decrease wear.

We had ours cut from 1/2” plate, and then drums rolled to match the original oddball diameter. What’s really cool is the inside hub; the old one is two chamfered pieces welded together with a gap on the inside. The ones we had machined are all one billet piece, and just barely fit inside the drum. Very nice tolerances from the machine shop. Should prevent all the cracking around the mounting holes that our old ones had.

IMG_0299.jpeg


After an hour of alignment and measurements we finally welded everything up. All sprockets are now within 1/16” of each other. Should last much longer, although they aren’t hardened. I am hoping they wear ok, do you guys have any thoughts on this?

View attachment IMG_0291.jpeg

IMG_0293.jpeg
 
Top