• Please be sure to read the rules and adhere to them. Some banned members have complained that they are not spammers. But they spammed us. Some even tried to redirect our members to other forums. Duh. Be smart. Read the rules and adhere to them and we will all get along just fine. Cheers. :beer: Link to the rules: https://www.forumsforums.com/threads/forum-rules-info.2974/

1953 Tucker Sno Cat 443 Mt Washington WMTW Channel 8 Restoration

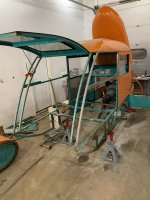
The original roof frame hoop was welded in before the roof skin was installed.

The donor and OE roof will be installed on top of a painted frame. Added some tabs that will be riveted in upon install but they also keep the hoop from expanding pushing the roof line out instead of up.

Welded up the crack in the steering booster linkage. Repair is to weld the crack but also adde material on each side then blend. This is a weak spot in the early steering geometry.

IMG_5075.jpeg
IMG_5077.jpeg
IMG_5076.jpeg
IMG_5078.jpeg
IMG_5079.jpeg
IMG_5080.jpeg
 
The donor and OE roof needed a little more fitment. The frame dimensions are a bit off between the two plus some tweaking over the years. The rain gutter needs to come down a bit and/or the upper frame needs to go up.

Cut a relief in the vertical frame close to the upper frame and refit all the panels. Used some straps to suck it all in and install the body pins.

Very pleased with the blend. Final install will rivet the two pieces together to the hoop tightening up the roof seam.

Just need to weld back in the vertical frame pieces and body blend is complete.
IMG_5083.jpeg
IMG_5093.jpeg
IMG_5094.jpeg
IMG_5095.jpeg
IMG_5088.jpeg
IMG_5090.jpeg
IMG_5089.jpeg
IMG_5087.jpeg
 
The donor body was orange originally before being yellow. You can see some remnants behind the tool box, shovel, and axe holder. Most of the paint flaked but these orange and yellow patches are adhered well for whatever reason.

I have been trying to figure out how to blend the donor body into the project for it is some of the history and story. Yellow doesn’t do it.

Options at hand are to strip or paint like new absent finding a skilled patina artist. Test stripped a spot and was underwhelmed. Painting shiny new isn’t the right finish either.

Tested my skills at a solution and think we have a winner!
IMG_5182.jpeg
IMG_5184.jpeg
IMG_5185.jpeg
IMG_5186.jpeg
P
 
Last edited:
I envy you…… trying to decide what to do with this situation. It’s gonna be tough as hell.
It looks good though.
 
Shifting the focus on Marty for winter. Now that the body is fit properly I can worry about the finish later so stripped it down and stowed the skin.

The passenger side of the upper OE frame still needs to be the bottom tube replaced.

Last task before disassembly was to confirm the steering box mount location. I tacked the bracket up based on measurements but did not factor in Tucker tolerance.

My tacks broke off moving it around the shop so i added the front dash clip and steering mount to figure out proper aligment. Here the OE bracket has a custom alignment bend and orientation to clear the battery box and make the wheel fit with the door closed.

Crude engineering awesomeness! Early tilt steering…..
IMG_5313.jpeg
IMG_5316.jpeg
IMG_5314.jpeg
IMG_5315.jpeg
 
Last edited:
The firewall has excessive holes and was going to replace but convinced the new aluminum and paint won’t flow which is accurate. Will clean up and reinstall. Many heaters and shogun slug is party of Marty’s life story.

What’s interesting is the engine side has no traces of paint but the passenger side is painted.
IMG_5320.jpeg
IMG_5321.jpeg
IMG_5322.jpeg
IMG_5323.jpeg
IMG_5324.jpeg
 
Last edited:
At this point multiple part finishing will occur as I finish the frame work.

Removed the steering piston, pivot, tie rods, transfer case.

Prepping to remove the transmission while it’s in the frame. Looks to have enough clearance. Looking forward to getting the engine and trans on a stand to work on.
IMG_5325.jpeg
IMG_5326.jpeg
IMG_5327.jpeg
IMG_5329.jpeg
IMG_5330.jpeg
IMG_5331.jpeg
IMG_5332.jpeg
IMG_5333.jpeg
IMG_5335.jpeg
IMG_5334.jpeg
 
Different type of riding shotgun than Marty experienced. My ASSumption is this bullet hole is from its junkyard servitude. Leaving this lifemark as party of the hiStory line.

Glad the experts gave me little nudge on the finish direction. Pleased with the outcome and we will make the rear body match upon final installation.

Primer is rare on Tucker Sno Cats overall but some model years had it. This 53 and the donor body 57 have some but not everywhere. Whatever color finish was over it is long gone if it was finished at all.

Was able to reuse the OE hardware for the most part. In true build no two the same Tucker Tolerance fashion, we have 21 matching flat head #8 screws, a fraction of them with lock washers, and a mix of #8 nuts with two different socket sizes.
IMG_5339.jpeg
IMG_5338.jpeg
IMG_5336.jpeg
IMG_5337.jpeg
IMG_5342.jpeg
IMG_5343.jpeg
IMG_5344.jpeg
IMG_5340.jpeg
IMG_5341.jpeg
 
Last edited:
Real Estate adventures have stalled our Tucker project but with a new heated garage maybe next year. Going in a full resto-mod direction on ours but I can see your passion for a period correct restoration. 👍
 

Attachments

  • IMG_8590.jpeg
    IMG_8590.jpeg
    1.2 MB · Views: 18
  • IMG_0391.jpeg
    IMG_0391.jpeg
    335.6 KB · Views: 18
  • IMG_8487.jpeg
    IMG_8487.jpeg
    1.8 MB · Views: 18
Learning to preserve smarter not harder after over a decade of restoration, modification, and preservation this adage holds true like Tucker tolerance:

Projects can all be good, fast, and cheap, but you can only have two of those option at any one time.

Good cheap stand, not going to be fast
Cheap fast stand, not going to be good
Fast good stand, not going to be cheap

Also pay me now or pay me later applies along with time is your friend.

Spoiler Alert: Reason people have multiple sno(w)cats is to increase the smiles to miles ratio because they are all work!
 
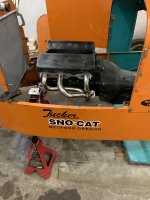
Removed the manifold bolts with this helpful tool.

Stripped down the water pump and thermostat neck and found no thermostat!

Cleaned up and degreased engine. Going to keep this patina vs painting.

Oil pan had been off, resealed poorly, and patched with JB weld type material so this will be replaced.

IMG_5636.jpeg
IMG_5638.jpeg
IMG_5639.jpeg

IMG_5640.jpeg
IMG_5641.jpeg
IMG_5642.jpeg
IMG_5643.jpeg
IMG_5644.jpeg
 
Removed the crank pulley uneventful.

Typical pulley wear from the seal. Speed sleeve and new seal will return to spec.

This is a 1” wide timing change with stiffener found on the industrial model no signs of wear.

Need to figure out what the chain slack tolerance spec is. Has about .380 or so now but looks great otherwise.
IMG_5760.jpeg
IMG_5761.jpeg
IMG_5763.jpeg
IMG_5764.jpeg
IMG_5765.jpeg
 
Top