• Please be sure to read the rules and adhere to them. Some banned members have complained that they are not spammers. But they spammed us. Some even tried to redirect our members to other forums. Duh. Be smart. Read the rules and adhere to them and we will all get along just fine. Cheers. :beer: Link to the rules: https://www.forumsforums.com/threads/forum-rules-info.2974/

Skidozer step 2

there are some cab pictures of the cab removal in this thread
http://www.forumsforums.com/3_9/showthread.php?t=32840&highlight=skidozer+step+1
once the doors were removed it didnt weigh very much i would guess maybe 300 pounds with glass in it, it picked up easier that when i put my snowmobiles on the storage deck with the hoist and they are around 500 lbs.
as far as removal hoses made a mess, wires were a rats nest so I just cut them, a few bolts to remove and off it came.
 
well. i would line up 4 and take the doors off first. the issue will be that you have to get high enough to clear the brake controls---Probably at lease 6 feet off the ground. If you took out the front windows then i would look at pivoting it on the front edge and have it land on some saw horses with plywood, get the fat out of the way and then pivot it back onto the ground. If i remember right you said yo live in Washington, If you are within driving distance to Graham you can come over and take a look, my cab is on the ground on roller wheels in the shop.
 
I may take you up on that. My cat is missing all sorts of stuff. It would be nice to see one up close that has all the parts.
 
Nathan,
I just sold Boggie a few extra wheels from a SV200, which might be a match. You might try him. You might also do well to pick up another machine for parts.
 
Thanks Undy, I got a quote from them today but it was way to high for my blood. I will ping him and see if he has used stuff.
 
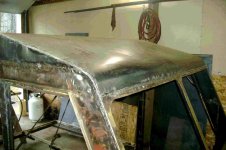
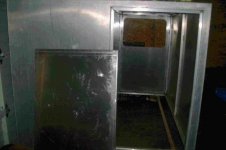
Made some more progress, I got the sheet metal on the roof, a couple of rippes but it is solid. Also working on the door the the aluminum cab extension. had that bend up at a local fab shop, it is turning out nice.
 

Attachments

  • angelique 031.jpg
    angelique 031.jpg
    66.5 KB · Views: 664
  • angelique 029.jpg
    angelique 029.jpg
    40.2 KB · Views: 660
Good looking work on your Ski Dozer rebuild, I'm also working on the same machine, redoing the track belting now. I noticed you have the grousers facing in the opposite direction from mine. Do you know if yours are correct? I have'nt got a service manual so no factory info. Do you know of somewhere a person can get a manual .?
Thanks
Bill

Bill, the tall leg of the cleat should be in the back it is easier on the sprockets
 
Thanks Boggie, i'll reinstall that way, not sure who worked on it last. Have tracks off and am going to do the rear hub seals, sure would be nice to see an exploded view of that!! any ideas?
Thks Bill :unsure:
 
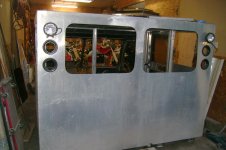
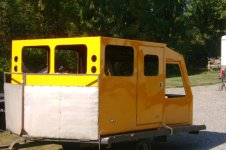
Made some progress this winter. Did the body work on the cab roof and fabricated up a body splice to bond the aluminum rear cab to the steel front cab. Cut all of the window openings ( I am using RV windows) so I had to make installation trim rings to squeeze the window to the aluminum skin. the two in the rear will be emergency escape windows and the three on the side slide open. No rivets on the rear aluminum cab because it has a 1/8th inch skin welded to a frame of aluminum tubing. It came with the cat when I purchased it. I also made the covers for the tunnel that will now be under the rear cab and fabricated the exhaust. roughed in the wiring and did the gauge cluster. I used 10 lb gas shocks for the door openers so the don't fly open. Re-routed the hydraulic hoses so I can remove the entire engine cover without breaking a line loose. Next I have to figure out the gas tank location and where to put the filler cap then I should be ready to seal the cab together and paint it yellow.
 

Attachments

  • Snowcat 004.jpg
    Snowcat 004.jpg
    53.6 KB · Views: 761
  • Snowcat 005.jpg
    Snowcat 005.jpg
    58 KB · Views: 753
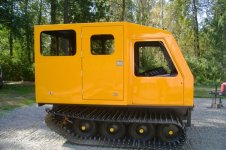
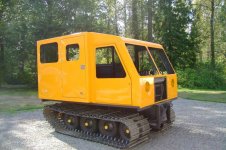
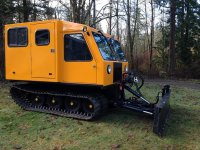
finally finished the bodywork and got it painted then lifted it up and on the running gear
 

Attachments

  • Snowcat 040.jpg
    Snowcat 040.jpg
    78.7 KB · Views: 703
  • Snowcat 002.jpg
    Snowcat 002.jpg
    67.8 KB · Views: 684
  • Snowcat 044.jpg
    Snowcat 044.jpg
    114.3 KB · Views: 698
  • Snowcat 045.jpg
    Snowcat 045.jpg
    120.6 KB · Views: 700
  • Snowcat 046.jpg
    Snowcat 046.jpg
    130.6 KB · Views: 676
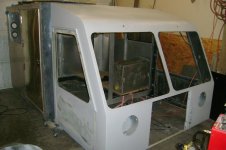
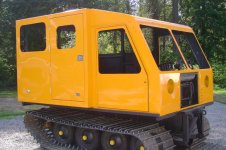
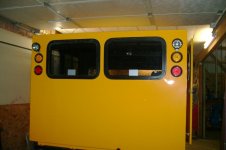
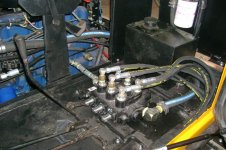
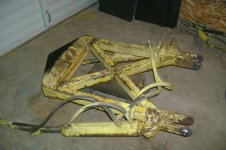
No snow in the northwest so I have made a little progress. Windows are in the back of the cab. I used RV type windows, the rear two are emergency exit type and the side ones open. lights are in as well as the gas tank and hydraulic reservoir and hoses. been working on the blade. Cut out and replaced all the pivot bushings with new bushing stock and welded up the cracks. It was bent pretty bad straightened it out pretty close and made a new cutting edge. Hope to paint the rest of the blade soon.
 

Attachments

  • cab back.jpg
    cab back.jpg
    52.4 KB · Views: 559
  • hyd.jpg
    hyd.jpg
    111.6 KB · Views: 558
  • bladeframe.jpg
    bladeframe.jpg
    78.7 KB · Views: 563
  • blade2.jpg
    blade2.jpg
    89 KB · Views: 551
No, could be 4" or 4.50" or even something different there is no pattern to some of those depends on what someone has done for tracks and sprockets
 
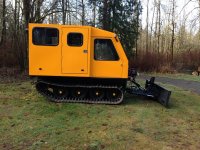
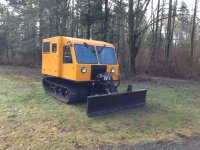
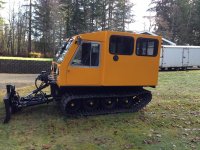
Getting pretty close to finished. Installed the windows and the pantograph wipers. New installed the blade and new hoses. Fabbed up a mount in the front for a removable winch and put some seats in the back.
 

Attachments

  • snowcat1.JPG
    snowcat1.JPG
    297.5 KB · Views: 334
  • snowcat2.JPG
    snowcat2.JPG
    263.6 KB · Views: 323
  • snowcat3.JPG
    snowcat3.JPG
    280.1 KB · Views: 331
  • snowcat8.JPG
    snowcat8.JPG
    297.6 KB · Views: 321
You have to feel a lot of satisfaction in your results. Huge transformation, you have showed a lot of stick to it. It hard to start a project and see it all the way through!!! Whats next???
 
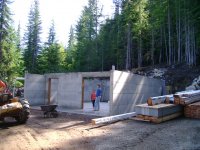
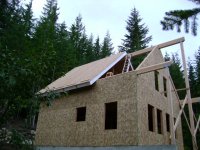
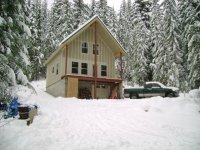
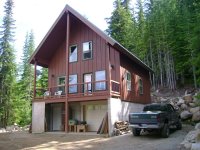
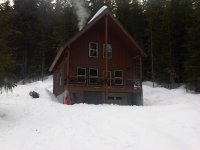
Thanks Tatman, Normally I am not this slow with things ---think I will take a little time off. It definitely has been a project---looking back I started it 6 years ago Jan 2010. During the same time we also built a cabin on Snoqualmie Pass. Started it in August 2009 got the final in 2012 and over the last 3 years we have been finishing up trim work and such. This summer we will put some carpet in and finish up the bedrooms and it will be done also. The cabin is off the grid so it is snowmobile or snow cat access only in the winter.
I picked up the snow cat thinking it would be a quick project to bring people into the cabin with, there ended up being so much wrong it was a total rebuild to ensure it is safe and reliable. During the same timespan I also had to deal with Kidney cancer ( they removed my left kidney) and a 4 way bypass ( side effect of Chemo when I was a kid). Setting my priorities was very important--the cabin and the snow cat were two projects that I didn't want to leave unfinished. It is good that they are finally both almost done. We are finally getting some decent snow this year in the north west and I have been riding the snowmobile a fair amount this year. The Forum has been a great source of information over the past 6 years as well as a great motivator. Seeing some of the other peoples successes and challenges has kept my project moving forward. When I decide to take on a new project I have been looking into some of the Pro touring cars. The new LS motor looks kinda cool and it would be good to put one in an early 70's Camaro or maybe a 67 Nova with some good suspension and fat tires.
 

Attachments

  • cabin1.jpg
    cabin1.jpg
    129.3 KB · Views: 283
  • cabin2.jpg
    cabin2.jpg
    129.9 KB · Views: 277
  • cabin3.jpg
    cabin3.jpg
    129.7 KB · Views: 274
  • cabin4.jpg
    cabin4.jpg
    153.7 KB · Views: 278
  • cabin 5.jpg
    cabin 5.jpg
    63.1 KB · Views: 279
Nice! EPS panels! Are they in the walls too? I'm guessing 'yes', based on the size of OSB panels in the walls.

I've built a few, and they are amazing homes. Good choice for off-grid climate control.
 
looks just like my bombie set up. I just bought a new pinion ring gear set up. Price was good 245 bucks taxes and shipping. did not have a puller for the bearings so removed the cage and used a zipcut wheel to cut the bearing off. B very carefull not to touch the shafting but came off easy.Done it many times on mercruser drives. But please tell me the timing of sun gears??? put it back together everything turns fine so timing??? tell more or not aplyed to bombies Thanks Hammy :ermm: PS How do i post pics have many but i am a dummy with computers. My skills are forumsforums and poker stars
Where did u get ur parts from is there a manual out there I can down load
 
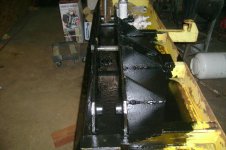
Finished cleaning up the frame and got it back in side. Removed the cover to check the brakes and found a bad Pinion gear. Removed the carrier and pinion today. Still need to disassemble the bearings for the drive sprockets and wheels. Not a lot of rust but obviously there was water inside of the housing area---Oil was real milky. It really surprised me how bad the pinion looked compared to the Ring.
Dave.
What kind of rear end is that I have a 252 ski dozer just wondering if that’s like mine
 
Top