• Please be sure to read the rules and adhere to them. Some banned members have complained that they are not spammers. But they spammed us. Some even tried to redirect our members to other forums. Duh. Be smart. Read the rules and adhere to them and we will all get along just fine. Cheers. :beer: Link to the rules: https://www.forumsforums.com/threads/forum-rules-info.2974/

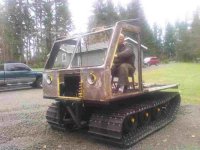
Skidozer step 2

dep6113

Member
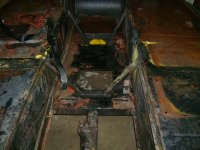
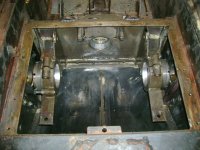
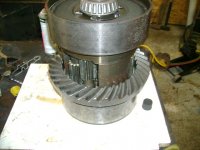
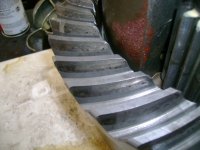
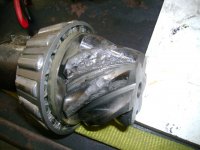
Finished cleaning up the frame and got it back in side. Removed the cover to check the brakes and found a bad Pinion gear. Removed the carrier and pinion today. Still need to disassemble the bearings for the drive sprockets and wheels. Not a lot of rust but obviously there was water inside of the housing area---Oil was real milky. It really surprised me how bad the pinion looked compared to the Ring.
Dave.
 

Attachments

  • snowcat 010.jpg
    snowcat 010.jpg
    132.1 KB · Views: 2,235
  • snowcat 011.jpg
    snowcat 011.jpg
    132.4 KB · Views: 2,184
  • snowcat 012.jpg
    snowcat 012.jpg
    132.3 KB · Views: 2,218
  • snowcat 013.jpg
    snowcat 013.jpg
    131.2 KB · Views: 2,187
  • snowcat 014.jpg
    snowcat 014.jpg
    133.2 KB · Views: 2,180
  • snowcat 009.jpg
    snowcat 009.jpg
    124.9 KB · Views: 2,196
That damage to your pinion looks typical of what we see when someone has water in the bottom and it sits outside and it freezes solid then they try to move the machine. instant damage :doh:
 
dep,

When you repair the rear, get a matched ring and pinon. Then you will only have to do this once. Read up on the centersection before you take it apart, and be sure you understand how to time the gears when re assembling. Witness marks are your friend, make lots, as you must make sure it goes back together just the way it came apart....Been there, done that...:whistling:

Also in case you didn't know, the inner bearing race on the outside of the brake drums have to be removed. With out the very special puller used to remove them, you might as well order a set with your ring and pinion set, as we ruined them trying to get them off:hammer: They are heat shrunk onto the shaft. Warm your new set in oil, and they almost fall on.

Regards, Kirk
 
It's Bombardier,

I don't think Oliver/Clark had any thing to do with these, unless they work simularly to this. It is 4 planetary gear sets sandwitched, with the sun gear in the out board planetarty sets hubbed to the brake drums for steering. The center two planetary sets share the shafts the planet gears are on. Not a shaft exactly as the gears are machined into it. Both of the inner two sets require being timed to the middle or sun gear. Not a torsen for sure. As far as I know bombardier built this set up themselves. It works well for what it was designed for.

Regards, Kirk
 
looks just like my bombie set up. I just bought a new pinion ring gear set up. Price was good 245 bucks taxes and shipping. did not have a puller for the bearings so removed the cage and used a zipcut wheel to cut the bearing off. B very carefull not to touch the shafting but came off easy.Done it many times on mercruser drives. But please tell me the timing of sun gears??? put it back together everything turns fine so timing??? tell more or not aplyed to bombies Thanks Hammy :ermm: PS How do i post pics have many but i am a dummy with computers. My skills are forumsforums and poker stars
 
Well the manual says to time them and it has been awhile since i have been inside of gearboxes this deep but from what i remember since you have gears with odd numbered teeth that are located on splines there is a potential to get them out of sink and then they try to bind up and exert pressure and crack things.

another way to state it---

when you have a group of gears working in a restrained environment (the differential carrier) the ratios have to be in sink or one tries to spin faster than another and when the force exceeds the material strength---Bang.
I plan on marking it very well.
Dave
 
The timing marks are on the end of the gear teeth, made by a center punch. Once you find them, it's pretty easy to get it together. Just make sure the shafts/gears go back exactly into the same places, and the thrust washers have to have the bevelled side towards the gears, or binding will result form them. I think we printed our "maunual" fom this web site...And with some help from boogie. By all means get a copy of this before you reassemble it. Then you will be doing this just once.....:wink:

From what I have seen Bombardier made several different version/sizes of this same set up. The Bombi pics I have seen are very simular to the 252 diff. I worked over. Quite a clever design really.

Good luck gentlemen,

Regards, Kirk
 
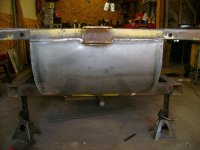
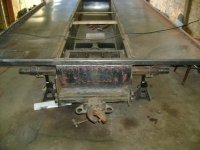
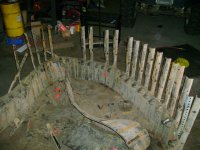
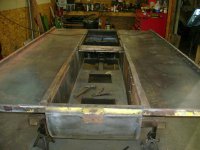
Its been a long summer with to many projects but i am gack onto the snowcat, ordered lots of parts from boggie, the C4 is rebuild, got 8 new tires and foam filled them, have all the bearings for the carrier, drive sprockets and boggie wheels. cut out the rusted or damaged metal, replaced the main cross tube across the rear, bent up a curved piece or 14 gauge for the front of the tub and made two new side board sections for the tub. they are fit and ready to weld in. before i do that i will assemble the differential, put on the drive sprockets and the new flexitors and suspension arms before i weld the sidepanels in.
 

Attachments

  • snowcat 003.jpg
    snowcat 003.jpg
    61.3 KB · Views: 1,837
  • snowcat 004.jpg
    snowcat 004.jpg
    56.7 KB · Views: 1,826
  • snowcat 005.jpg
    snowcat 005.jpg
    60.8 KB · Views: 1,826
Also, I forgot to find out what angle to install the arms on the flexitors for the sv200 with 4 boggie wheels , any body have it handy?
 
Also, I forgot to find out what angle to install the arms on the flexitors for the sv200 with 4 boggie wheels , any body have it handy?


skidozer SV200 starting at the front 22degrees arm towards back, 2nd, 15 degrees arm towards back,3rd, 15 degrees arm forward, back 15 degrees arm forward.

keep up the good work.
 
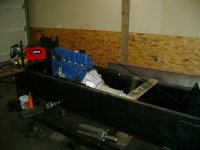
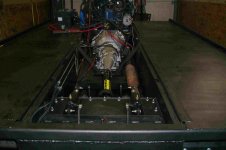
put the engine/transmission in the frame new rings bearings converter and rebuilt transmission. and then dismantled the tracks
 

Attachments

  • snowcat 003.jpg
    snowcat 003.jpg
    132.7 KB · Views: 1,657
  • snowcat 004.jpg
    snowcat 004.jpg
    132.5 KB · Views: 1,659
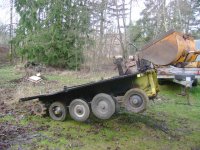
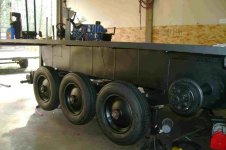
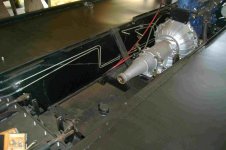
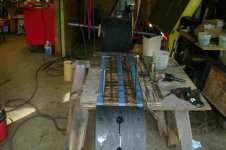
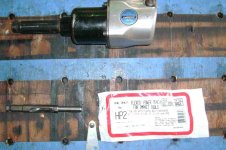
Finally making some progress. Welded on the new sideboards and painted them. Bolted on the suspension and mounted 6 wheels. Made new tranny cooler lines and brake lines and had some hoses made for each end of the brake lines. Then I made a drill template to drill up the 700 or so holes in the track belts. Picked the rolls up with the hoist so they would roll out into the drill template. I used a Flexco power punch and a 1/2 inch impact gun. the tool worked very well. Each cycle would drill 11 sets of holes. Probably spent as much time making the drill jig as i did drilling all of the holes.
 

Attachments

  • snowcat 005.jpg
    snowcat 005.jpg
    56.1 KB · Views: 1,542
  • snowcat 006.jpg
    snowcat 006.jpg
    56.2 KB · Views: 1,556
  • snowcat 001.jpg
    snowcat 001.jpg
    60.3 KB · Views: 1,531
  • snowcat 002.jpg
    snowcat 002.jpg
    72.5 KB · Views: 1,513
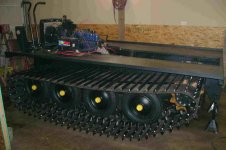
Well step 2 is finally complete Mounted up two electric cooling fans and a shrowd, added some tranny fluid and primed the motor then fired it up. Then installed the new tracks. Now i have to clean up the shop and get ready to stretch the cab--step 3
 

Attachments

  • snowcat 4.jpg
    snowcat 4.jpg
    57 KB · Views: 1,424
  • snowcat3.jpg
    snowcat3.jpg
    50.1 KB · Views: 1,382
It was a common problem on all of the bombardier products until the 252 and 302 that the differential built into the frame instead of an indepentant housing for it allowed the covers to loosen and moisture to enter into the housing and freeze overnite causing ring gears to freeze and blowing the pinion gear. It was not until bombardier went to mont ste Anne with 4 engineers and tore apart an oc 12 and saw the proper way to build it that they modified their construction and eliminated the problem.
Ray Green
 
I agree about the water problem. I thought I'd avoided moisture in the differential, but this winter I discovered a solid chunk of ice back there. I was lucky I didn't force it to "go" (auto transmission saved me?).

dep6113: I plan to stretch (add to) my two-man cab in order to provide room for search and rescue victims if the need arises. What material(s) do you plan to use? (Square tubing frame with aluminum skin?)
 
When Mr. Bombardier ""Borrowed"" the internals of the American made Ford T 16 carrier ,maybe he should have used the whole axle assembly. You heat that diff oil up during operation,where you can't hold you hand on the bottom housing,then park the machine overnight,that box is a big condensation trap. My 2 J5's always sleep in a heated garage,so I've never seen water in the oil, my neighbor's machines stay outside and he has condensation problems,plus any of these machines with the engine over the diff will suck in snow which ends up pooling on top of the cover.
Oliver ,cletrac, Ford t16 ,case,sherman tank all share this diff design,it would be nice to know who first came up with the idea J5 Bombardier
 
Hi Snowbird,
not 100 percent sure yet, Probably go with square steel tubing for a frame and then possibly 18 gauge steel for the shell, I need to figure out the diifference in weight between the materials and also cost and such. the machine came with an aluminum box somebody fabbed up---it is 6 foot by 7 foot so it hangs over the frame boards in all directions ---looks kinda funny as is and not sure about cutting it down.
 
The nodwells and formost also used the t-16 in the units up to 8000 lb capacity. The difference was a seperate differential housing not as part of the frame. Any twisting of the frame loosens the cover allowing water to enter add the heating and cooling vacum effect only makes it worse.The m 24 in the bigger units was also a seperat housing and did not have this problem. When they reversed engineered off of one of the 2100 oc 12 at mont ste anne when they were designing the 252 and the 302 this problem was cured. Ray Green
 
If anyone is looking for the t 16s . Southeast equipment used to sell the surplus units at a cheap price. This is where most of the mfg. Were buying them.
Ray Green
 
dep6113: I'm probably heading in the opposite direction on size. My search and rescue director asked my to make the "cabin" big enough to hold what's called a Stoke's basket (sort of a sophisticated stretcher), so I'll need to make one dimension at least 7 feet (if not a little more.) He said there might not only be injury, but frostbite could also prevent a victim from being to walk.
 
Making a little progress, the snowcat came an aluminum box for the back that was 6 foot by 7 foot, not sure why they fabbed it up at that size (the cab on the ski dozer is 74 inches wide) but they did a very nice job so i decided to use it. I had to shorted the steel cab and also change the hight and angle of the roof to match to it. I put the framework on the chasis today to do a fit check before i weld on the new skin and then join to the aluminum box. it fit nice.
 

Attachments

  • snowcat 111.jpg
    snowcat 111.jpg
    72.1 KB · Views: 909
only a little progress, I have been working too much. have the sheet metal on the cab and the doors stripped. Working on a light bar and then it will be surface prep and bondo.
 
Top