• Please be sure to read the rules and adhere to them. Some banned members have complained that they are not spammers. But they spammed us. Some even tried to redirect our members to other forums. Duh. Be smart. Read the rules and adhere to them and we will all get along just fine. Cheers. :beer: Link to the rules: https://www.forumsforums.com/threads/forum-rules-info.2974/

Pulling trans and Variators

Snowcat Operations

Active member
SUPER Site Supporter
Before I get ahead of my self. LYNDON has written an article on how to remove the variator (and much more than that!) Here is a link to that article. PLEASE read this before working on the Variator. This article will make life very easy for the long life of your Snow Trac.


http://www.forumsforums.com/3_9/showthread.php?t=4113


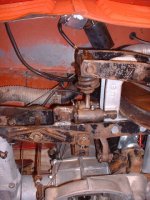
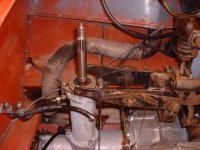
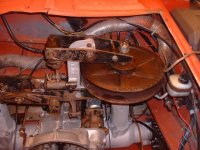
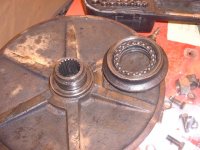
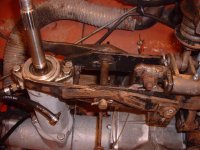
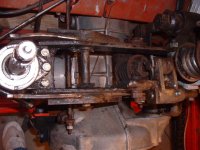
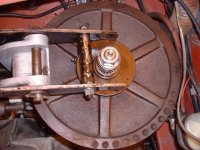
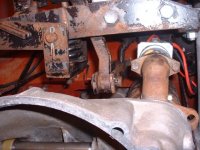
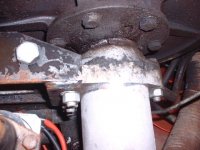
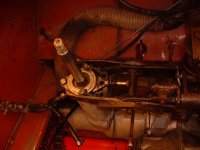
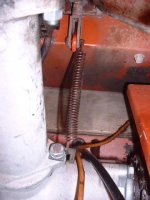
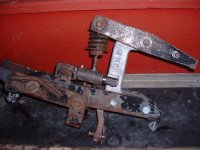
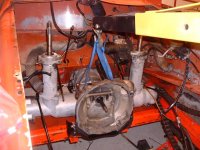
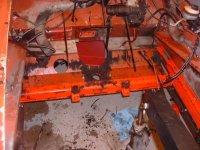
Today I started to pull my transmission and Variators. You first need to remove the upper part of the Variator. This took me about 2-1/2 hours my first time around. I have since learned the quicker way to do it. Regardless it is still a job and is a greasy mess if you have properly greased everything during your dailey maintenance. I found one worn part which was put in wrong sometime in the past. I ordered the new part today and should get it in about two weeks. (ST 14 A) That was the only thing I found to be wrong with the variators. Actually its the only REAL problem I have found on this Snow Master. That amazes me since this vehicle is 30 years old. I have taken a series of pictures that are really for me to look at when everything goes back together. I have reassembled the upper variator so nothing except the disks are apart. Reassembly should be pretty staright forward. I should have the trans and the rest of the variators pulled by the end of today.
 

Attachments

  • b.jpg
    b.jpg
    58.1 KB · Views: 892
  • c.jpg
    c.jpg
    75.1 KB · Views: 892
  • a.jpg
    a.jpg
    78.9 KB · Views: 908
Last edited:
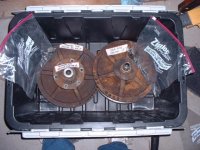
Well I didnt quite pull out the trans today. Got side tracked pressure washing my upper Variator and the discs. On each side one of the discs has a huge cavity that will be full of grease. Even at 2650 psi that Amsoil grease didnt want to blow out! I spent two hours cleaning all the components. I then used my compressor to blow dry them out (really gets the moisture out of all the nooks and crannies). The bearings are in great shape but I will be ordering new ones anyway. It wouldnt make sense not to since I have everything apart. Next I will be bead blasting all the surfaces and then have everything powder coated. Should stay pretty and protected for a long time that way. I also put all the nuts and bolts in the parts washer and cleaned them up real nice. Rinsed them off and sprayed them down with Amsoil MP metal protectant. MP is 1000 times better than WD40. Everything is tagged and bagged. I also assembled the components as good as I can without them being on the Snowcat. I will pull the trans out in the morning.
 

Attachments

  • n.jpg
    n.jpg
    77.8 KB · Views: 838
  • o.jpg
    o.jpg
    66.1 KB · Views: 833
Last edited:
Well its all out. Removed the trans and variators as one unit less the upper half. Pulled the steering colum too. Everything has been pressure washed and cleaned. Will crate the trans/vari and have them shipped off to Washington to half a looksy inside. Everything seems very good and I had no trouble with either units but I want them gone over anyway and all the bearings replaced regardless. This will be a better than new Snow Master when I am done. I will post pictures tonight. The kids want to go to the lake. BYE.
 
Well I am glad it went well for you . So is the body ready for me ??? The way you have pulled it down is the only way I like to repaint . It just looks so much more professional when everything is removed before painting . I do believe you just may end up with the best looking Snow Master around , before we are done .
Damn good job ,Mike !!!

To bad it ain't a Kristi . Now there would be some real class .
 
BigAl, Thanks! Some swett, blood and a little bit of cussing and she came out ok. I did have some help with my son. He was great. I pressure washed it real good too so the trans mechanic wont have to deal with all the grease. It sure will be nice putting everything back together. All clean and no grease! I am however having a problem pulling the front sprockets and brake assemblies. Lyndon said they may be a bit rusted in the splines. I have been pre-soaking so hopefully they will come out Monday or Tuesday. Next is the entire brake system and anything else in the engine compartment. I will most likely wait on the wire harness until I pull the cab apart at your place. The entire machine will be washed Tuesday (after brakes drums and sprockets are pulled) then the stripper comes out to do her work. I will strip it down inside and out to bare metal (except dash). Still alot to do but not nearly as much as I had before. I will post the pictures in the morning.
 
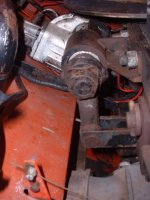
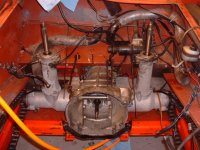
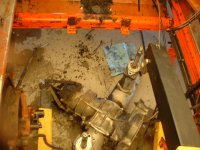
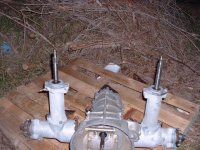
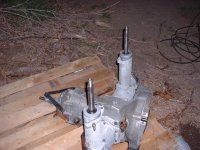
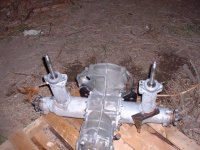
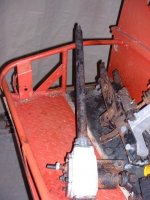
JUst got back from the lake and the movie CARS (GREAT MOVIE FOR YOUNG AND OLD) OK so here are some pictures. The Trans and Vari on the pallet were taken in the dark so forgive my crappy photography. The last picture is of the steering box and shaft. They were also pressure washed.
 

Attachments

  • r.jpg
    r.jpg
    71.5 KB · Views: 804
  • p.jpg
    p.jpg
    82.4 KB · Views: 806
  • q.jpg
    q.jpg
    82.6 KB · Views: 818
Last edited:
Monday morning will see first off all of the hand tools washed off and put away. Then the gargae will need some serious degreasing! Then pressure washed. After that I will begin on the brakes. See you later.

It took about 1-1/2 days of work to remove all of the items pictured above. That includes removing and then cleaning. Small parts were cleaned in my parts washer. Then everything was tagged and bagged then put away in a storage case. The larger items were all pressure washed. The project is really moving now. I have a few UPGRADES that should surprise most people. I am looking forward to recording the rebuild in detail as well. I will have a much better camera by then.
 
Well after a 7 month stent away from home I am finaly back! I will be shipping my transaxle to be rebuilt here in a week or so. It doesnt need it but I will do it anyway since I have her out. Sorry for such the delay but work called and I had to go. Now I am home and hope I can get some weeks outside to work on the Snow Master. I will be takeing the body to my good friends house to have her painted by a real proffesional. BigAl. Oh by the way BigAl can you uh paint my Snow Master? I have also ordered my neew bearings for the variators today. I am just waiting for confirmation. Once I get those and a few other new parts I will be ready to reassemble everything as soon as I get her painted. The Tracks as BigAl knows are probrably the biggest pain in the arse to rebuild. I will most likely have the new belting cut and drilled by someone else. The grousers will get bead blasted and repainted (not that the paint will last long). Should be fun.
 
At any stage if someone needs to know where I got certain parts or the rubber belting or whatever please feel free to ask. I will also post in a seperate thread where everything was farmed out to like the Transaxle rebuild ect ect.
 
ST16B and the bearing holder

I know this is an old thread, but this seemed like a good place to ask the question because mike posted a great photo of what I THINK the thing should look like.

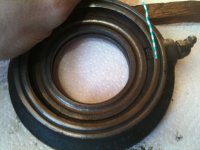
The top of the drivers-side ST16B chive has been worn by the bearing holder due to bearing failure....I assume. Here is a photo of the grooves worn into the casting on the chive first:
 

Attachments

  • ST16b.JPG
    ST16b.JPG
    157.2 KB · Views: 574
ST16B and the bearing holder

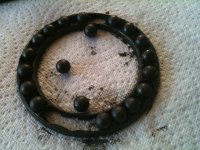
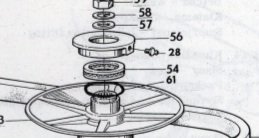
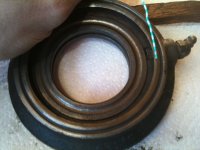
I ran in to several question about what is REALLY supposed to be there and what was "improvised" at some point. Starting with the fact that there seem to be more pieces to my bearing holder assembly than what I see in the 1976 manual for it (more on this below). My bearing holder is marked ST14a which is shown in some manuals, but the 1976 manual shows ST7792. The bearing itself does not seem right, it only has 1 "tray" that holds the bearing and not two trays/retainers to hold everything together. I can't find a good pic of what the bearing is supposed to look like... the first pic is what came out of mine. The second pic is a snap-shot from the manual with shows the bearing holder, the bearing itself, and some sort of seal.
 

Attachments

  • worn bearing holder.JPG
    worn bearing holder.JPG
    147.1 KB · Views: 558
  • pic from manual.jpg
    pic from manual.jpg
    20.2 KB · Views: 554
Last edited:
ST16B and the bearing holder

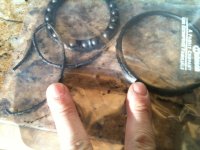
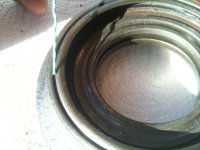
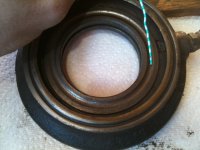
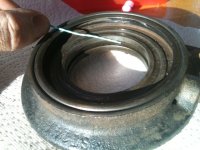
The bearing holder (ST14a) seems to be made of more than one part though I haven attempted to pull it apart. The "other parts" might be what the whole bearing assembly is supposed to be, not sure. The first pic is of the rubber seal and spring that were pulled from what looks like a separate pressed-in seal housing (last picture). Note, there is rubber (paper clip is pointing at it in middle picture) between what I am calling the seal housing and the actual cast bearing holder ST14a.
 

Attachments

  • spring-seal.JPG
    spring-seal.JPG
    119.8 KB · Views: 557
  • seal housing.JPG
    seal housing.JPG
    100.5 KB · Views: 547
  • rubber.JPG
    rubber.JPG
    101.8 KB · Views: 557
ST16B and the bearing holder

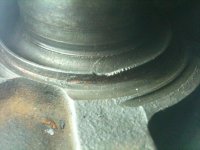
Also wondering if the part of the bearing holder st14a that the bearings actually roll on is removable, first pic is of the part that looks like it might be removable and the second pic is of a "groove" that looks like it really wants an o-ring or something but none was present.
 

Attachments

  • is this removable.JPG
    is this removable.JPG
    110.8 KB · Views: 540
  • mystery notch.JPG
    mystery notch.JPG
    132.9 KB · Views: 560
Last edited:
ST16B and the bearing holder

Finally, here is the top of the bearing holder where you can see the groove worn into the top by the two link-arms that press on the bearing holder. I'm sure this was caused by the fact that the bearing holder rotates with the chive (instead of remaining relatively stationary) and the groove was worn in over time. I will probably need to fix this too, would welcome advice on:
1) don't fix it
2) weld it up and grind it level again
3) use a "large washer" over the top to get a flat surface again.
 

Attachments

  • top of bearing holder.JPG
    top of bearing holder.JPG
    118.3 KB · Views: 532
Last edited:
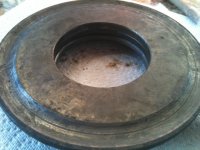
I am hoping that someone with some experience on dealing with the bearings can tell me how to put it back together with the right stuff. Hopefully all the photos above (and descriptions beginning in post #16) give you an idea of what is there now. My back-up plan is to go to a bearing house and ask them to do their best. Ideas? Thanks in advance.

Again, here is the compare and contrast: (please start with post #16 for full set of pics)
 

Attachments

  • pic from manual.jpg
    pic from manual.jpg
    20.2 KB · Views: 458
  • spring-seal.JPG
    spring-seal.JPG
    119.8 KB · Views: 451
Last edited:
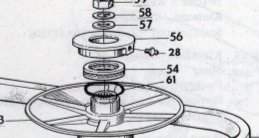
The worn bearing holder could be welded back up by some one who knows how to weld cast. I am thinking it should be heated in a furnace and welded up at dull red. Then, placed in a bucket of lime to hold the heat in, so it cools slow. Why? because cast piece tend to warp badly when welded unless normalized by furnace heat, and the slow cool down. Might hunt up a spare in case....

There is a removable upper and lower race in the thrust bearing in the parts pic. Never had the one in the bearing holder out, but the bottom one should be on the sheeve. The seal is a simple o ring I think.

Good luck,

Kirk
 
Last edited:
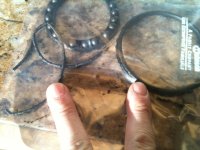
After re reading your post I am tempted to go out and pull my right hand variator to see what was there....I just did this to change belts.

The thrust bearing was never one piece as the book shows It is three pieces that are just stacked on top of one another. The races are removable from both the sheeve and the bearing holder. You will need to do this.

Don't remember the details of the seal other than is is not much of one, but it just sort of holds the greese in. Use too much and it gets on the walls of the engine bay and other places as well....:whistling:

Kirk
 
I've assembled and rebuilt about 20 Variators, and NONE of them had a seal in the pressure bearing like those pictured above. I actually re-assembled a variator 2 weekends ago for a man in Washington. We had 2 to work with which was helpfull. It took about 4 hours, plus alot of cleaning and greesing of the pins and bushings. I don't recal there being seals shown in any of my service manuals. ??? This would have to be either one of the ver last machines and they made a modification that doesn't show up on earlier models, or some individuals own modifications.

I don't know if anyone mentioned it, but the top half and the bottom half of the bearings are slightly different, by only a millimeter or so. One will be a sloppy fit where it rests on the pulley. Both halves fit in the cup that has the greese Zerk on it, but only one likes to ride on the Chive.

When tearing down a variator it is important to take out and free up every one of the stepped washers and all the associated shafts. I recomment a plumbers tubing brush, cheap and redily available, for the insides of all the 1/2 holes, and steel wool or Scotchbrite for the shafts. There are I believe 10 of the special stepped washers.

When reassembling, I use a flux paste brush , and dab water repellant, blue, boat wheel bearing greese on every shaft and the insides of the special stepped washers. Once the variator is reassembled it's pretty hard to get lube in these points. Many of the variators I've rebuilt had multiple frozen points on them and it was almost always the washers.

Maybe I rebuilt more like 30 Variators, can't remember, all I know is that I don't have to look at the manual anymore. They are pretty simple, perfect for a 'simpleton' like me.
 
Kirk / Lyndon, thanks for posts. A couple of additional comments. I have not removed the passenger-side sheaves yet so not sure what the assembly looks like on that side, but as for the drivers-side sheave and bearing holder (all the pics)....

1) the lower race that is on the sheave-side appears to be CAST into the sheave. I tried to clean the mating surfaces to find a line of separation and their does not appear to be one. I also used channel locks to see if I could turn the race and break it free of the sheave...no luck, think they are the same cast.

2) I imagine I can remove the race that is in the bearing holder... it looks to be pressed in.

3) The cage (called it tray earlier) on the bearings I took out does not serve to hold the bearing together. It has either been worn down and missing lots of metal, or it is designed to only let the balls rest in it until you gently place the whole thing into the race.

4) I am attaching the picture again of the mysterious seal-housing part of the bearing holder...the paper clip is pointing at it. It housed the rubber seal and the spring. It (part i'm pointing at) appears to have rubber between it and the ST14a bearing holder casting. Hmmm.

the BIG QUESTION I have is where I get the stuff to put the whole thing back together.
 

Attachments

  • seal housing.JPG
    seal housing.JPG
    100.5 KB · Views: 433
THE bearing race IS normaly removable and would be significantly harder that the material the chive is cast of.

I don't know if you reviewed this thread:
http://www.forumsforums.com/3_9/showthread.php?t=4113
It goes into some detail about things one must and musn't do with Variators.

As before, Ive never seen one like this with a seal in it. A seal would only be of much use on the upper bearing as it gets snow and rain from the intake cowling. The lower one rarely if ever gets dirt, and due to the construction of having the 2 pulley halves above it, no snow or rain.

The Bearing itself comes NEW in 3 pieces: Top half, the balls and their retaining cage, and the bottom half. They are inexpensive and redily avalable from bearing supply houses.

Don't Over-greese the Variator. Excess greese will sling off the assembly and can end up on the chive halves, once it gets into the belt you really need a new belt. Cive surfaces and the belt need to stay oil and greese free.
 
I am hoping that someone with some experience on dealing with the bearings can tell me how to put it back together with the right stuff. Hopefully all the photos above (and descriptions beginning in post #16) give you an idea of what is there now. My back-up plan is to go to a bearing house and ask them to do their best. Ideas? Thanks in advance.

Again, here is the compare and contrast: (please start with post #16 for full set of pics)
i think i have a spare bering that is servicable i will look today it will save you some monking around and get you back on the road we used to be able to order those berings through alaska bering but i can't remember if it was the bering only or bering and housing
 
Bearing race on variator sheave assembly

I will get a photo showing the lower race that looks like it is attached to the sheave in the same casting. If I can't get the lower race off the sheave then I will need to try to get bearings w/ cage that will fit.

dds, thanks, let me see where i get with the race issue first.
 
thrust bearing

Lyndon, here is the narrative you are referring to in the link you provided above:

Re:Thrust bearings
Most of the snow track OEM bearings and seals are SKF part numbers and are actual SKF parts. The number series has been changed in some cases, but can still be cross referenced by a baering supplier. The Thrust bearing that pushes the pulley halves closed is readily available and I use a Check republic copy from ZKL, it's a 51110A. This bearing appears to the naked eye to be the same on both sides, but actually one side is slightly smaller than the other. One side fits snugly on the Chive, over a collar. The other side pops in the cap and the race goes in between. The 'cap' is ST14A, the Bearing Bracket and the 2 parallel arms press against it. The top one has a zerk fitting, the lower one, on the other side of the variator has a hose barb, short hose and the Grease Zerk fitting that bolts on a bracket on the side of the engine compartment. The lower one rarely if ever goes bad, where as the upper one gets wet and will likely have to be replaced so you only have to buy one when you do a rebuild.


Here is a picture of mine
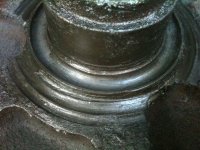
...the lower bearing race looks to be part of the sheave /chive casting. I cleaned and scraped looking for separation between the two but couldn't find it. Also, when I put a wrench on the race the outer edge EASILY chipped off revealing raw metal which looked cast.
 

Attachments

  • closeup of lower race.jpg
    closeup of lower race.jpg
    53 KB · Views: 396
i can look at one of mine i was thinking mine was seprate but i know that mine was missing one when i got it so i had to steel parts off the old one but the missing race was on the bottom chive
 
Top