• Please be sure to read the rules and adhere to them. Some banned members have complained that they are not spammers. But they spammed us. Some even tried to redirect our members to other forums. Duh. Be smart. Read the rules and adhere to them and we will all get along just fine. Cheers. :beer: Link to the rules: https://www.forumsforums.com/threads/forum-rules-info.2974/

Astro van cat conversion

Yes it is....

The Spryte and Imps used a manual lever type operating the master cylinders.
The 2100 was a power steering.
The steering "Actuators" were just a valve with a pressure relief that fed 400 PSI to the slaves on the OC-12
The 2100 cats had at a minimum 57" tracks and there were wider ones as well...up to 65" wide.

Shoving a blade, pulling a drag and hauling the big tracks was tough on the bands in the 2100..

When I ran a 2100 grooming for one season at the snow park....The 2100's were always getting bands replaced....
Two sets per season was not out of the question.

I am narrowing my tracks up to 43" ( One grouser width and not off set to 57")
No blade or other crap hanging on the back....

Still the power steering is a PITA.
The actuators were made by Mico (BRAKE LOCK FOLKS) and are no longer serviced.
The soft seals are still available, but the springs and the specs were long ago discontinued....Nothing available.

A pair of 4/2 way hydraulic valves can be used in place of the original actuators......Parker is the best choice for a quality part..
I was quoted $1000 each plus freight and 36 week lead time...Need a spare ??? same deal.
Waaaaaaaaaaaaaaaay too much $$$ to sink into only such a small part of the equation .....

Going to go with air over oil set up with two easy to get 1-1/2" master cylinders and run them with two air brake chambers and plumb these to the original OC-12 slaves....

Very easy to do, easy to get the parts.....and the stuff is cheap too......All major auto parts stores can get these....Or order them online
For about half (or less) the cost of one of the hydraulic valves I can completely do the steering system with parts that are readily available....

This set up will deliver a good reliable 400 psi oil pressure to the slaves.
Slipping the bands kills them quickly......

Thiokol, DMC, LMC went away from the OC-12 on the big cats and went to the Hydrostatic set up.....Far more reliable, but very spendy when they do go away... When the hydro pumps and drive motors go away.....$$$$$$$$$$$$$$$$$$$$$$$$$$$$$$$$$$$$$$$$$$$$$$$$$$$$$$$$$$$$$$$$...OMG
I have rebuilt the swash pumps and motors in a couple skid steers......Not hard....just $$$$$$$$$$$$$$$$$$$ is all.

The OC-12 can be reliable....Just has some areas that need some loving...

The thrust washers between the drums and the main case need to be replaced with REAL thrust washers and not thin shims.
The same for the inner thrust washers in the compensating case.

The washers between the outer pinion gears were soft steel.

The spot faced my case and added hardened washers.....

The crap washers wear out, shed pieces and then the junk goes through the R&P AND THEN BEARING....BOOM...A BEARING goes away (Explodes) and the things look like what the Cootenay Cruiser posted recently on his 2100C

These boxes are metal chewing monsters and unless care is taken to eliminate the root source of all the crap....They will fail.
Magnetic drain plugs in the main and drop boxes.....Change the oil regularly....if metal shows up....Box needs to come apart and the source found and fixed.....

The planetary gears, the drums and the R&P are good stuff....Just the overlooked stuff that wears can kill these..
My thread shows the machine work I did to fix the diffy.

Will it solve all the issues...????????????????????/ I hope it does.....The bands, if let go can wear to the point that they start chewing the drums up......Metal junk will ruin the box and if a large chunk hits a bearing BANG....BALL BEARINGS CAN GO THROUGH THE DROP GEARS AND THE R&P

Massive carnage ......

GOOD TUCKER DOES NOT HAVE THESE ISSUE....BUT HAVE OTHER PROBLEMS....

Toys are expensive.....run them hard...more expensive....then the :shitHitFan:
 
Indeed.

The engineering is the time consuming part.
Sorting out all the math to come up with the right size mater cylinders to work with the Slaves on the OC-12
To get the needed amount of fluid displacement in one push on the master cylinder that can....(1) totally fill the slave on the OC-12 without multiple pumps.
(2) Getting the needed pressure at the 0C-12 SLAVES (400 PSI NOMINAL) with the ability to vary it up or down.

The OC-12 SLAVES are 2-1/4" diameter with a 3/4" total travel from collapsed to fully extended to the snap ring.
ABOUT 2.98 CU IN VOLUME

To get a master cylinder that can deliver the needed juice put the choices in a narrow area of available cylinders
The M661 Dorman has a 1-1/2" bore and a 2-1/2" stroke (A touch over 4 cu in) Plenty to spare
A type 20 air brake chamber has a max travel of 2-1/4" and at 35 psi it will give us the 400 psi at the slaves

At 2 inches of travel yields 3.5 cu in of fluid

So we have plenty of room to spare and when the bands are adjusted where they should be the travel will be much less.

Finding a compatible cylinder THAT IS READILY AVAILABLE took a bit of snooping.
Readily available with repair parts too.
AND THEN TO BE AFFORDABLE.....

My fave shopping spot EBAY. $59 each with free shipping....
Got a pair coming..... :clap:

Al the air parts are HD truck stuff and readily available.....
 
Last edited:
Yes it is....

The Spryte and Imps used a manual lever type operating the master cylinders.
The 2100 was a power steering.
The steering "Actuators" were just a valve with a pressure relief that fed 400 PSI to the slaves on the OC-12
The 2100 cats had at a minimum 57" tracks and there were wider ones as well...up to 65" wide.

Shoving a blade, pulling a drag and hauling the big tracks was tough on the bands in the 2100..

When I ran a 2100 grooming for one season at the snow park....The 2100's were always getting bands replaced....
Two sets per season was not out of the question.

I am narrowing my tracks up to 43" ( One grouser width and not off set to 57")
No blade or other crap hanging on the back....

Still the power steering is a PITA.
The actuators were made by Mico (BRAKE LOCK FOLKS) and are no longer serviced.
The soft seals are still available, but the springs and the specs were long ago discontinued....Nothing available.

A pair of 4/2 way hydraulic valves can be used in place of the original actuators......Parker is the best choice for a quality part..
I was quoted $1000 each plus freight and 36 week lead time...Need a spare ??? same deal.
Waaaaaaaaaaaaaaaay too much $$$ to sink into only such a small part of the equation .....

Going to go with air over oil set up with two easy to get 1-1/2" master cylinders and run them with two air brake chambers and plumb these to the original OC-12 slaves....

Very easy to do, easy to get the parts.....and the stuff is cheap too......All major auto parts stores can get these....Or order them online
For about half (or less) the cost of one of the hydraulic valves I can completely do the steering system with parts that are readily available....

This set up will deliver a good reliable 400 psi oil pressure to the slaves.
Slipping the bands kills them quickly......

Thiokol, DMC, LMC went away from the OC-12 on the big cats and went to the Hydrostatic set up.....Far more reliable, but very spendy when they do go away... When the hydro pumps and drive motors go away.....$$$$$$$$$$$$$$$$$$$$$$$$$$$$$$$$$$$$$$$$$$$$$$$$$$$$$$$$$$$$$$$$...OMG
I have rebuilt the swash pumps and motors in a couple skid steers......Not hard....just $$$$$$$$$$$$$$$$$$$ is all.

The OC-12 can be reliable....Just has some areas that need some loving...

The thrust washers between the drums and the main case need to be replaced with REAL thrust washers and not thin shims.
The same for the inner thrust washers in the compensating case.

The washers between the outer pinion gears were soft steel.

The spot faced my case and added hardened washers.....

The crap washers wear out, shed pieces and then the junk goes through the R&P AND THEN BEARING....BOOM...A BEARING goes away (Explodes) and the things look like what the Cootenay Cruiser posted recently on his 2100C

These boxes are metal chewing monsters and unless care is taken to eliminate the root source of all the crap....They will fail.
Magnetic drain plugs in the main and drop boxes.....Change the oil regularly....if metal shows up....Box needs to come apart and the source found and fixed.....

The planetary gears, the drums and the R&P are good stuff....Just the overlooked stuff that wears can kill these..
My thread shows the machine work I did to fix the diffy.

Will it solve all the issues...????????????????????/ I hope it does.....The bands, if let go can wear to the point that they start chewing the drums up......Metal junk will ruin the box and if a large chunk hits a bearing BANG....BALL BEARINGS CAN GO THROUGH THE DROP GEARS AND THE R&P

Massive carnage ......

GOOD TUCKER DOES NOT HAVE THESE ISSUE....BUT HAVE OTHER PROBLEMS....

Toys are expensive.....run them hard...more expensive....then the :shitHitFan:
When you get it going is when the real costs will begin. Couple gallons to the mile at $12.00 is going to be painful. Makes snow shoes seem inviting.
 
You got that right....
8000 pound barge with a 406 inch V8 growling away....

Yeah...no coast on that beast..
I am too old to consider the snow shoe thing..
 
Doing some research on the conversion of the Sanden AC compressor to air pump duty.

The unit we have is a 9.4 Cu in compressor and will easily supply the amount of air needed,

The one area of concern has been lubricating the Pump.

The JEEP crowd use these compressors for "Onboard air" and they seem to work well.....But in my application lubricating the swash plate, torrington bearing and the pistons and other goodies in the center of the pump is of great concern....
Mission critical....
I do believe we will add a VIAIR electric as a "Get home unit" just in case.....A lot lower CFM but it will give steering.

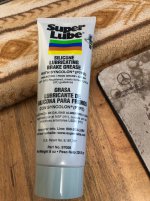
Reading a lot of info on greases brought me to "SUPER LUBE"
I bought a few tubes of the Silicone brake part lube to handle the Urethane bushings in the new front axle set up.

So I called up the mfg and spoke with their tech guru's

The lube I have will tolerate very high temps without degradation and will also function in low temps too (Cold weather start up)
The silicone will not hurt the air brake valves and other components in the system.

Sooooo....A bit of luck in finding a lube that should keep the little air pump quite happy....

Another plus....The stuff is not off the charts $$$$$$$...

Any of Y'all who are into off road Jeepers and have your own onboard air.....Might keep this stuff in mind
Very wide temperature range......
 

Attachments

  • IMG_5260.jpg
    IMG_5260.jpg
    323.8 KB · Views: 69
Headed out yesterday and picked up 3 HD air tanks that came off a semi truck...
These bad boys came with the brackets....all the fittings...check valves and drain cocks too.

These type of tanks are not all that prevalent on places like Craig's list and such...
Did score these on Craig's list.....About 30 miles away.

These will give us a good supply of air for the cat...
I had been looking for tanks, but when I decided to give the hydraulics a go....I backed off.
Now that hydraulics have proven to be waaaaaay to expensive to consider....plus the crazy lead time......

Decided to flip through Craig's list.....and there these were....
3 tanks...$100.
The truck wreckers get far more than this for one tank....at least here they do...

Slowly...the materials for this segment are coming into place.

The exact mounting points will need to wait until the Blazer body is on the 2100 chassis.

The square tubes that mount the Body to the 2100 look like a great place to hang the tanks.....but will wait until the Blazer is on the Cat chassis to get excited.... The mounting tube that is there now for the single cab can stay as is.....the center and rear mounts will have to be fabricated....The rear mount as it is now will likely need to be modified.....the standard cab is a lot different........But the tube and the brackets that bolt it to the 2100 tub are good to go....

No doubt that the tanks will fit well.....Just need to make certain that they don't end up some place that makes getting to other stuff difficult

With the exhaust in the belly of the beast....the heat rising up will keep the tanks warmed up some.

The details on the entire air system are still in flux.

The air dryer needs to be mounted in a place that the spin on desiccant filter can be accessed easily...
And be such that it will not get packed with snow.....

So at this date we have the following.
Sanden 4440 compressor....Fits the GM serpentine drive. (At 2500 Engine RPM will deliver about 13 CFM)
The air control valves....( Controls that are in the cab now ....Trailer valves TCS-9000)
(3) air tanks with several fittings.
(2) Master cylinders to operate the slaves on the OC-12 (M661) (Shipped yesterday)

Parts that are spec'd out and are standard stuff that can be picked up as we need them... Most are Bendix parts
(2) Type 20 brake chambers (To operate the master cylinders)
(1) Air dryer unit (AD-SP)
(2) Relay vales(R6)
(2) Quick release valves (QR1)
(1) Compressor governor (Standard (D2) Will operate the air dryer and pressure switch to turn compressor clutch on/off
( ?) Hose and DOT Nylon air lines to connect the system
(?) Check valves and fittings ...Parts with the tanks may be usable.
(?) Other goodies
This system will allow graduated control of the bands for braking too.......The plan for outboard disc brakes at the drive sprockets is still very much on the table......Having a usable FOOT brake that can stop the cat is a good thing......

The Discs, calipers and brackets are on the shelf and ready to go...
This can wait until the machine is operational or close to it.....
Adding the brake fluid lines in the tub while the body is off will be a good idea...

The exact location of the master cylinders to operate the Steering bands is still a bit of a guess.

Mounting a bracket behind the rear seat in the cargo area is definitely on the top of the list....Simply because the hydraulic lines to the OC-12 slave cylinders will be short lengths...Also the air chambers will be in a clean and warm place so they are not hindered by snow/ice....
Did some sketches on a few ideas of a bracket to mount the (Hydro boost air over oil setup) We shall see...

AS SOON as the weather improves the Blazer body needs to be readied to go on the cat...

Overall the plans are pretty much on track.....Some details have changed slightly....some ideas have improved......
At this point the general direction is looking good again.

One big thing....WE have not spent $$$$$$$$$$$$$ on too many wasted ideas....Yes...A few little experiments proved to be non starters......But few so far.

Spending lots of time doing real time engineering (Imagineering) and searching out (Sourcing parts) has taken many many hours.....But this is what is needed to make things work.....
McGyver projects are fun....BUT real engineering is a must if the end result is to be worthy of much.

Thiokol operated on a very low budget plan.....As much off the shelf parts as possible and some of the factory ideas were rather sketchy......AT BEST...
When DeLorean got involved things got even more weird... The Big D viewed the Cat bizz as a cash cow and put very little into the operation...

When viewing the old cats like the THIOKOL, DMC. LMC and comparing them to machines like the Pisten Bully and other modern machines....Light years apart in technology and realization of the product... OMG.....
 
Last edited:
  • Like
Reactions: PJL
A bit of a break in the weather today...

Just itching to get after the Cat after a long winter sojourn .....

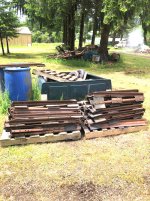
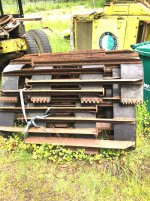
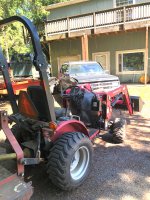
Grabbed the tractor and loaded up all the grousers from last summers disassemble of one of the two tracks I got from a fella near Mt Hood.

I was intent on getting the grousers off the belts...(Belts junk)
There were some grousers that were bent, broken or otherwise unusable....These went in the scrap...

The Cat came with one track that I disassembled the summer before.....I traded a few grousers from that one to another fella for some tire guides.....

So today's exercise was to get the lot of these bad boys segregated into RH and LH orientation....
Takes 36 of each (Actually 36 RH and 35 LH with the last LH being a lacing cleat ...Different bolt pattern) 72 grousers per track.
The pile was behind the Cat...in the way...I need to roll the Cat backwards and clean up the needles, cones and other crap from the winter storms.
Grass and weeds have grown up as well.

So got the loose grousers all on separate pallets with RH and left hands on their own pallet.

Looks like we are at 50 or so plus or minus of each that are good shape...
I still had a few that I tossed aside for now as they were a bit tweaked..

The other track is still rolled up....But from what I can see it has a lot of 3700 grousers and the tire guides appear to all be Gen 2 type....

The next plan is to get the little Blazer apart and the body cleaned up and ready to sit on the Cat chassis.....

Fun stuff.....
 

Attachments

  • IMG_5261.jpg
    IMG_5261.jpg
    505.7 KB · Views: 72
  • IMG_5262.jpg
    IMG_5262.jpg
    510.2 KB · Views: 75
  • Like
Reactions: PJL
Checking the tracking numbers on some goodies.
The master cylinders are in transit,,,should be here tomorrow.

Ordered the Type 20 brake chambers this morning.....Normally these are $35-$50 each..
Found some from a NOS freight seller for $9 each.....Sweet deal...complete....

These are coming out of Fresno Cali.....Will be a quick hop up here..
Depending on the weather....Maybe I can get things cleaned up around the cat tomorrow.....

Winter around here made a bit of a mess for me to clean up...Cat belly is full of needles, cones, small limbs and other debris

Ah well...such is life..
 
Brake chambers and the master cylinders are here now.
The brake chambers have a stroke of 2-1/4"
I could not get any good reliable stroke numbers on the master cylinder (M661)
One reference mentioned a volume of the cylinder per stroke.

I did the math on things based on the volume.....A close number put the stroke at 1-3/4" (After manually checking the master cylinder....Numbers are not real accurate)
The Slave cylinders on the OC-12 are 2.98 Cu in at maximum (Piston at the snap ring)
The ACTUAL stroke by hand is in the 1- 5/8" range on the master cylinder
Shooting at 1-1/2" stroke will give us a touch over 5/8" travel on the slaves

This will work.... If the bands are kept adjusted ...life should be good...
We can get a good usable response at the Slaves cylinders......with the parts we have....and they are readily available...

I can start designing the mounting bracket that the master cylinders and air chambers bolt to now.

I had hoped for a tad more stroke on the master cylinders....But the numbers we have will get us very close to a full stroke on the Slaves without having to "pump" the master cylinders...

The main parts are now in my hands to work with......

We'll see what shakes out.....

Once the bracket is fabricated and the components mounted....The rest of this system are just simple turning wrenches and mounting hoses and such.

Once these parts are together it will be an easy little task to "Bench test" the assembly to see exactly what sort of actual pressures we get at the outlet of the master cylinders The goal is 400 psi.

The Thiokol manual says to "Tune" the pressure at the slave cylinders to 400psi for best overall steering results...

Tweaking the air pressure to the brake chambers will allow things to be dialed in easily
 
Summer is here....The torrents of cold rain we had through April, May and up until last Saturday are gone..
Was finally time to service the AC in the house....All good to go..

Now it's time to get to work on the Cat again.
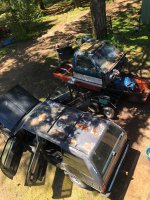
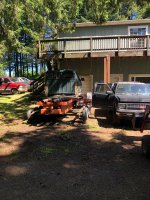
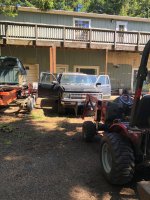
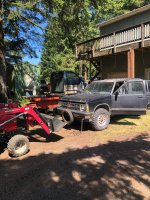
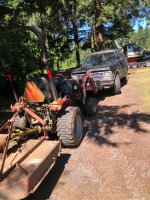
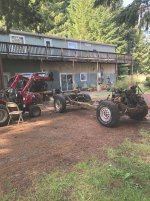
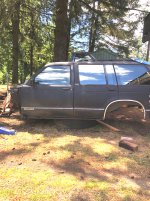
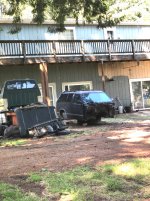
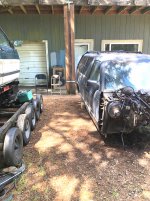
We moved the S10 Blazer over alongside the Cat...(Yesterday the cat got pulled out of it's hole and the area cleaned of all the winter debris)

The Blazer body is an absolutely perfect size for the cat......
As can be seen in the pictures .....the body will be easily fit onto the 2100 chassis.
The mounts I built to hold the single cab (Front cab mount on the cab) will work with the Blazer fine......How will the rest fit ??

HELL IF I KNOW.....But very likely some similar cross members will to what I
 
Just time and disassemble things and get the various fasteners all in little containers for reuse later.

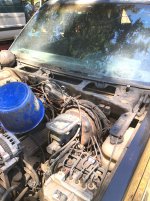
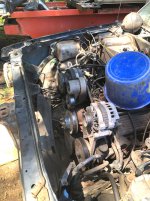
A lot of crap under the hood that must come off before I can get at the fenders and such.

All the wiring is plug and play.......Using the 1998 Serpentine set up on the 1980 engine and then adapting the 1998 alternator to the 1991 wiring harness.....Somebody already been there....Adapters available.....

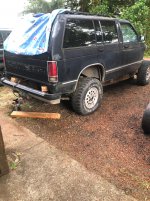
Body is pretty good...A tad dirty.......Needs all new door seals as they are shot....Easy to get these online...standard stuff..
Front carpet is crap....rear seating and cargo area is good...just toss in fresh carpet up front....

At least it is not Moldy as hell......Headliner is nice all the way......

Door panels are pretty good...

Has power windows too......Power mirrors.....

I picked up a pair of late Dodge 2500 electric mirrors for cheap at a garage sale.....
These look like they were pulled in favor of a set of the BIG tow mirrors.....

The plan is a tube steel support up and across the top of the body to mount LED LIGHTS, HAZZARD LED FLASHING LIGHT BAR.....The truck mirrors can mount on the uprights and the original mirror control wiring can be rerouted to the new larger mirrors....

Everything is available to get stuff doing whats needed
 

Attachments

  • IMG_5271.jpg
    IMG_5271.jpg
    911.3 KB · Views: 77
  • IMG_5270.jpg
    IMG_5270.jpg
    867.8 KB · Views: 81
  • IMG_5269.jpg
    IMG_5269.jpg
    934.8 KB · Views: 77
  • IMG_5268.jpg
    IMG_5268.jpg
    1 MB · Views: 78
  • IMG_5267.jpg
    IMG_5267.jpg
    878.3 KB · Views: 76
  • IMG_5266.jpg
    IMG_5266.jpg
    1 MB · Views: 79
  • IMG_5265.jpg
    IMG_5265.jpg
    715.7 KB · Views: 83
  • IMG_5264.jpg
    IMG_5264.jpg
    438.8 KB · Views: 83
  • Like
Reactions: PJL
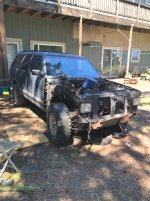
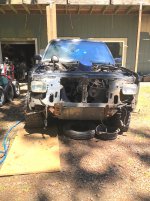
The long awaited disassembly of the "NEW CAT BODY" HAS BEGUN IN ERNEST.....
Started off this morning at the front bumper....Then the fun began.....

Bumper needed to come off before I could get at the bottom grille screws.....
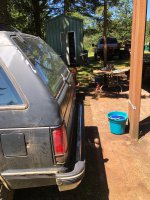
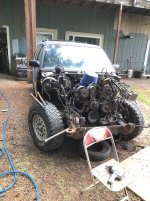
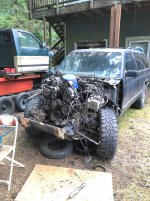
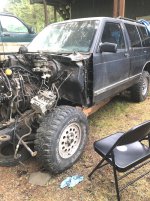
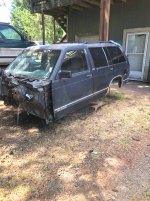
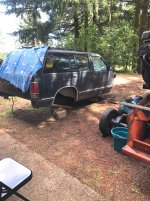
This rig had been used as a Dingy......Herky azz brackets welded to the front of the frame and clean notches cut in the air dam.
Some clown had double nutted the bumper bolts and used red loctite....OMG.
The tow bar likely was shoved into the bumper....as there were dents in the bumper the same on both sides.....

Decided after twisting the carriage bolt square holes round on two bolts fighting with them.....Just to hell with the bumper....Took the disc grinder to the bolt heads....5 minutes later that mess is off on the ground.....

We do not need that bumper for the cat anyway.....

Grill all out and quite usable......
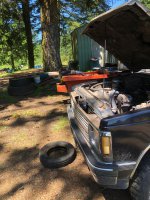
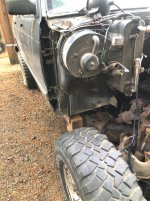
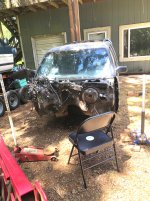
Core support is nice and straight......Got the radiator out, fan off the engine......
A good squirt of Skunk pizz on the core support mounting bolts ....This stuff is in good order....but a bit of lube will help...

Already a few perks....After lifting the radiator out a good peek down into the front cover pan under the area revealed a handful of tools...A couple wrenches, a 6" long 3/8 extension, a 2" long extension and a13mm socket.....

Nothing fancy....but these will go in the tool box.....

Fenders look great.....Core support is great.....no signs the rig was ever wrecked.......

The slow dissection continues.....Weather is pretty warm...About 90F out there this afternoon.....
After all the crap is off the inner fenders then they can come out....Then the fenders come off.....

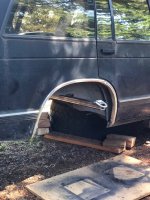
Before calling it quits for the day....Took a look at the area of the rear wheel house opening just behind the rear doors.

A nice fabricated bracket that can bolt through the Flange where the trim screws on will be a sweet place to get hold of the body to lift it off...AND TO PUT IT ON AND OFF THE CAT.....A permanent thing me thinks.

The lift rig I built to handle the standard cab will probably be usable....With some tweaking maybe......

I am not sure what this body weighs...

The Curb weight spec says 3427.

The majority of the weight is the frame, engine, tranny, T case and diffy's...

My skid steer is rated at 1300 pound capacity in the bucket......

I have an extended lift rig the sits in the bucket to allow reaching in over the road wheels and frame on the cat.....

As long as the Skid steer can handle the load....Good to go..

The single cab was a piece of cake....

The 57" tracks are close to the limit.....Skid steer gets a tad light on the rear packing those monsters around

And so the progress continues.......

I will get a few pics tomorrow......

The real fun will be sweating bullets getting the body mount bolts out......This old of a rig....lets hope the bolts are not rusted badly....

The single cab is the same age....it came apart easily

Time to call it a day.....
 
Got after things today pretty good.

Slow tedious slog getting stuff apart.

Parts all look great....
Just a lot of crap to get out of the way.....

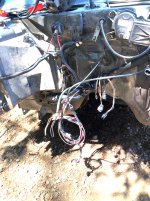
The extra wiring that was added in its previous lifetime of "Dingy Duty" is snaked around and not very neatly done.....

This stuff needs to be traced back to where it was connected to the rig and cut loose.....

I want to keep all the ABS SYSTEM AND MASTER CYLINDER AND LINES ALL INTACT.....Whoever buys the rolling chassis will most likely want it......A 47-53 five window pickup body would be cool on this chassis.

Anyway....nuff of that....

Once both fenders are off and the core support I can finish getting the wiring off the engine that we need.

I want to keep all the important stuff...
Alternator....Starter solenoid...Ignition coil + lead...Temp gauge wire...oil pressure gauge wire....

A lot of stuff that will need to be wrapped up and abandoned in place....

This was a TBI truck......I do not want that convoluted mess to deal with....
The 406 SBC is getting a Large Cap HEI ignition and a 650 CFM Quadrajet 4 bbl carb (Already have these goodies)

The dash gauges will all be plug and play....We simply use the sending units that fit the S10....

The only slight skew is the alternator......I am using the stock alternator that came with the 1998 Vortec 350 I got the heads and the serp drive off of...There is an adapter cable that will get the 1991 wiring to talk to the 1998 alternator....

The alternator is on the opposite side of the engine than the 1991 was.....Just have to reroute the wires......

The AC Compressor mounts on the drivers side serp bracket and gets a few mods to convert it to pumping air only to run the steering equipment......

Once the last of the wiring is all tended to....Then comes the body mount bolts.

So far things do not look all that rusty....Being a NW truck....no nasty salt to deal with...

A few nasty bolts to deal with on the RH fender....The speed nuts that slip into the sheet metal had broken and were spinning.

This took a bit of finesse to get them loose....Without damaging the tin.

Easy to slip in new speed nuts...I think we have some off the single cab that can be used.....

A few pics.
I waited to see if some of the extra baggage would rot off while I sat there looking at it.
Nope...it did not.....Gotta get it off one piece at a time.

Snooping for a NON AC heater box to replace that huge evaporator box.....This cleans things up a bunch....We do not need the AC box
I found one...just gotta get it coming......

Sorting out the vacuum hoses....OMG.....THE 4X4 uses vacuum to engage the front axle....YUCK.....PITA when they do not work
We just need the vacuum canister (Ball) the check valve and hose that feeds the heater controls.....

Looks at present that a long rod and a cool adjustable tranny lever kit will get the stock column shifter connected to the TH350 GEAR BOX......Much less spendy than a complete cable shifter......

Be far more fun when the last of the tin is off the front end and I can get to the stuff I need to....
All for now.......I am really pleased that all the wires are pretty much in good condition.....PLUG AND PLAY

The sending units for the 4.3 V6 will all work just fine with the 400 SBC

I have a complete FACTORY GM electrical manual for the 1991 S10 RIGS.....This really makes things way easier to sort out too.

The rig has tilt column.....This will allow the steering lever assembly to mount right to the steering shaft.....Then located things level and anchor the shaft solid..... Being able to tilt the controls up and down should be sweet....

All the controls such as the Wipers, turn signals and such will all work just as they did from Ma General...

Ignition switch will be left stock (Likely stick in a fresh switch and a new lock tumbler to make sure its top notch)

The fuel gauge senders are easy to duplicate in various types of tanks.....Stock gauge will go to work....Should be zero need to touch the dash.....May remove the ABS light and the SES light so they will not be annoying.....

Pretty simple Re-purposing of parts...

The PO said the power windows work.....We shall see... They will or they will get fixed....
 

Attachments

  • IMG_5276.jpg
    IMG_5276.jpg
    436.5 KB · Views: 71
  • IMG_5275.jpg
    IMG_5275.jpg
    409.6 KB · Views: 71
  • IMG_5274.jpg
    IMG_5274.jpg
    384.8 KB · Views: 68
  • IMG_5273.jpg
    IMG_5273.jpg
    423.8 KB · Views: 71
Doing some snooping online for "Universal column shifter kits"
Found the perfect solution to getting the column shifter connected to the TH 350.
Comes with a splined part that fastens to the shifter shaft on the tranny....Has a long stamped steel splined arm that allows adjustment to "The sweet spot"

The only thing....IT WILL NEED TO BE LENGTHENED
Looks like cutting the rod and adding a tube that can slide over the rod ....Add set screws to the tube to rod connection to allow for preliminary set up...Then once things are happy and the rod end heim joint can deal with and minor adjustments...WELD THE TUBE TO THE ROD....

A very neat clean set up to allow the factory column shifter in the S10 cab to function as it did originally.....

Quick and easy....

I was looking at the pictures of the exhaust system I built and installed.....I will be honest here....I really had not thought a lot about the shifter....other than we would likely use a cable type floor unit.

This plan is far easier to install and will keep the Hump area free of clutter.

The 4x4 shifter that is there now will go with the chassis to it's new home.....Cover the hole in the floor and toss in a full rubber floor mat.....

Case closed.....

Currently the single cab on the cat has the shifter hole open.

And so the modification plans continue to unfold on the family model cat.......:thumbup:
 
Weather was wonderful today....about 65 F all day....Cloudy on and off....Perfect working weather.

Finished getting the Core support removed and the LH fender (Inner and outer) off the unit.

Started sorting out the wiring and other crap more.

Decided to go after the body mount bolts....JUST BECAUSE....If they are gonna be a fight....Might as well get it on.....

The core support mount bolts came right off......

Moved aft to the A piillar location...The RH one came right off...On back to the B pillar location.....Rattled it hard with the 1/2" impact...NO JOY.
OK....Went and grabbed the 3/4" gun....Yeah buddy...Gonna come loose or break off trying.....Came right off..

To the rear.....The RH REAR was a tussle.....Just a bit tight getting the big tool into the area.....BRRRRRAAP...Off it came...
On to the LH REAR....Came right loose.....B pillar ...same same....A pillar area...right off.

All the bolts/mounts are off...... ******The bolts have a blue loctite compound on the threads....this keeps the bolts from backing out...also keeps water out of the threads too) Once the body is off I think a tap run through the threads is in order....just because...

Back up front sorting out wiring and plugs.....

Getting that mess sorted out and stuff loose so the chassis can be rolled out.

There is a valance by the rear bumper that seems to come off with a couple bolts.

Hoping the bumper can stay in place.....

I don't need it and do not want to fight it off....The rig has a trailer hitch....Just a bitch getting rusty bolts off in that area.

All went well, accept a bit of "Frame rash" during a close encounter.....

I will heal though :lmao:
Tomorrow is a busy day and likely nothing gonna happen on this project.

Still have a bit more wire sorting and such.....Then the master cylinder has to come off.

The fuel filler unit has to get disconnected.

Not sure yet if the rear light wires are in the body or in the frame......

Gonna remove the lights and have a peek at the wire location......
If they are in the body...they stay there....if they are in the frame....Gonna have to get them pulled loose from the light assemblies and out of the body...Then worry about things once the body is off....

I am getting excited to see the body off the frame......Gonna be sweet to get that body up on the cat.........

A bit of Rigging needed so we can grab the body.
I made a pair of lift bars that bolt to the A pillar area where the front fenders bolt on (Good stout place....did this for the single cab) .....The next thing is to be able to grab the body back in the rear wheel house area....The opening right by the rear doors looks like a good spot to think about...../Sturdy spot that can hold the weight and not be damaged during the lifts....I want to make a permanent lifting lug that can fasten on each side of the body for removals should they be needed for future repairs....
 

Attachments

  • IMG_5281.jpg
    IMG_5281.jpg
    479.2 KB · Views: 66
  • IMG_5280.jpg
    IMG_5280.jpg
    1.1 MB · Views: 69
  • IMG_5278.jpg
    IMG_5278.jpg
    430.6 KB · Views: 69
  • IMG_5277.jpg
    IMG_5277.jpg
    461.7 KB · Views: 70
Things have slowed up a bit....Getting through all the wiring takes time and patience....

I have a factory GM wiring book for the Blazer....This makes life very good.....I am not a fan of the way GM does their wiring books....but with patience you can sort things out....
Really sweet being able to identify wire colors and where they all go.....

The engine sits very tight in the S10 chassis....So I decided to unplug the main harness at the firewall/cowl bulkhead plug....
This will allow the body to come off easily...Then all the needed wiring can be sorted out and new wrinkle loom placed over the wires that will be used for the Cat application....

A lot of wiring that are simply not needed.....
Cruise control....Nope
All the TBI controls...Nope


Still need to get the starter solenoid wire fished out from under the engine....
Several of the needed wires will require some added length.
There are myriad ground wires that fasten to the cowl, inner fenders and core support....
The plan is to add a common GROUND BUSBAR...in the engine bay and then ground it to the engine and the cab....

All the various ground wires can be routed to the common ground buss IN AN ACCESSIBLE SPOT.....

I found a NON AC heater box to replace the big evaporator box....These were only used on the minimally outfitted trucks.(Work trucks and low budget models)
Scored one on ebay.....

Then came the tranny lift rod....OMG..... there are in a tight spot....the engine bay is so snug on these rigs....the rod is tough to get at.....But we have the entire assembly ....The body mounting as high as it does on the cat gives plenty of room to jiggle things around and make the connection to the tranny all spiffy...

May be able to use the entire setup and just lengthen the main rod....Won't know until the body is on the 2100 and things can be looked over well....
The 700R4 tranny in the Blazer has a slightly different shift pattern....P-R-N are the same...the The OD-D-2-1.....
I have swapped a TH350 in place of the 700R a few times.....the shifters work fine....

I have thought few times about using the 700R....The OVERDRIVE WOULD BE SWEET....Sadly these boxes are just crap.
The converter is small, the entire innards are very light duty....

The TH350 is pretty tough little box....I plan on doing the tranny as a select shift....MANUAL control......
This just eliminates all the fooling about trying to get things to shift where you want it to....
Many times starting in #2 hole will be fine....The super low butt gears will make this an interesting Giddyup Go....

Having the nice column shifter will be sweet.......

Not much more at this point.....
Just keep on picking the little rig apart.....
 
  • Like
Reactions: PJL
Great weather..
Got after things....BIG TIME
Getting a hand down in behind the engine to get bell housing bolts off...Damned tough.....Needed to get one wire retainer bracket off..

Everything is pretty well loose now.
The bulk of the wiring for the rear is inside under the carpet....The connections for the fuel pump and gauge sender are just behind the bumper...Sweeeeeeet...

One wire loom still connected up front and it heads to the tranny and Tcase....(Speedo and Torque converter clutch)
We don't need these...so will likely snip the bundle where I can get at it at the rear of the engine harness then tape up the ends .....

Body all jacket up and blocked....
Steering shaft unhooked from the steering box.....

Fuel filler tube out of the way.
Found two more body mounts just ahead of the rear wheels.....They came off easy too....

The next plan is is build a lifting rig for the rear of the body....

So as it stands....We are almost ready for " Lift off "

Got a shipped notice on the NON AC heater box I scared up..
These are popular with V8 conversions.....

Fairly tough to find too....

I just hope the Skid steer can lift this bad boy....

I really do not know what the body alone weighs. The curb weight is listed as 3427 lbs....This is complete with guts feathers and all.
Without the frame, axles, Tcase, Tranny, engine, drive shafts, tires/wheels.....Front clip is off too
This thing should not be all that heavy......

THE FAMILY MODEL YA KNOW.... :thumbup:

This little package is gonna make a sweet crew compartment for this kitty.....

Thing needs a good mucking out though....

Once the body is off and the chassis is out of my hair.....I will probably yank the seats and then pull out the carpet....

Gonna see if it can be cleaned and saved.....I really don't want to pour $$$ into new carpet....But....I like the idea of having the sound deadening on the floor.

More as it happens.....
 

Attachments

  • IMG_5294.jpg
    IMG_5294.jpg
    500 KB · Views: 72
  • IMG_5295.jpg
    IMG_5295.jpg
    281.4 KB · Views: 67
  • IMG_5297.jpg
    IMG_5297.jpg
    453.7 KB · Views: 74
  • IMG_5298.jpg
    IMG_5298.jpg
    492.2 KB · Views: 75
  • IMG_5296.jpg
    IMG_5296.jpg
    421 KB · Views: 68
Finishing up getting the last of the goodies cut loose on the Blazer yesterday.
Sitting in the rig fooling about and noticed that the dash display is just a DARK AREA....NO GAUGES.

OH CHIT....This beast has one of the Digital dash displays with Speedo, Tachometer, oil pressure, engine temp, voltage meter, fuel gauge....

OMG..

I had not looked sat the dash before...The rig fit the need and the body was decent.

I started thinking about options.....New gauges from one of several vendors are $$$$$$$$$$$$$ these days.

Then in my snooping I came across a sweet deal on an S10 site dealing with V8 conversions.

An outfit called DAKOTA DIGITAL

The sell a cool little magic box SGI-100BT.....This little gizmo will change the signal so the tachometer in the rig will read correctly.....Also will allow the digital speedometer to work and read actual speed.

I will need a little pulse generator that screws onto the OLD STYLE speedo drive on the TH350
Dakota Digital has the magic box for that too.

All in all......A simple way to get all the gauges working correctly with minimal bother.....

The speedo correction requires a little VOODOO math to get the numbers close and then fine tune things with an app on my iphone....

I have had a couple GM rigs with the digital dash before.....When they are working they look sweet.

I had one that had a couple pixels gone in one of the displays....but still worked great....

All the factory GM sensors for the original 4.3 engine will screw right into the 406 V8 and work JUST LIKE DOWN TOWN... :thumbup:
This makes life very easy.......

We'll have a few wires that feed annoying things such as
Check engine, ABS and a couple others that will need to be cut loose to remove the annoyance..

Being able to have the factory tach and speedo working will be sweet.....

Raining now.....An inside and think day...
 
I bought one of their units over 10 years ago, have had no problems. Tapped the bell housing on my Isuzu diesel that went into my yellow Muskeg , paired the sender/ box with an after market tac .
J5 Bombardier
 
These guys seem to know their Chit....

Getting the speedo to read right is going to take a bit more finesse.....
The cat has a 13.27:1 ratio through the OC-12 out to the sprockets.
Sprockets are 12 tooth 4" pitch
Every revolution of the axle moves the cat 4 feet.
So at 2000 engine RPM the cat should make 7 mph (6.85) we don't sweat the small stuff

2000 RPM in the blazer with 3.73 butt gears and 30 inch tires is about 49 mph

The folks at Dakota digital were telling me about the various speed sensors they have available.....
We need to get things somewhat close and then the magic box will tweak it right in....
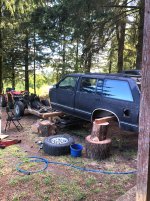
If we can get the dash to within a Cat Whisker...good to go.
The tach should be easy......

The fella I was chatting with on the phone was not totally up to speed with the high RPM vs the actual ground speed we are talking.....

But the adjustment available should get us in the groove......
Having a fully functioning dash will make this sweet....

The speed through the OC-12 and the track drive is equal to a rig with a 26.5:1 butt gears and 30" tires.

These numbers are fudged a tad....but close....


2000 RPM IS EQUAL TO 6.86 MPH (A 30" tire) vs 6.85 mph through the track drive as a comparison...

Should be able to get the Tech folks at Dakota digital to tell me what we need in the way of a speed sensor to drive the speedo..
THEY TALK ABOUT PPM (Pulses per mile on the pulse generator)
The TH350 tranny always used a gear driven cable.....But they have pulse generators that will connect to the speedo drive ..
A little old and a little new.....

Yeah buddy...
 
  • Like
Reactions: PJL
We have LIFT OFF... :clap:
Got on the beast this morning with the goal to have the rolling chassis sitting SOMEPLACE OTHER THAN UNDER THE BODY BY DINNER TIME.
Grabbed some tree rounds left from a fair sized Fir we cut down last fall (It died)

The tree rounds make good blocking....
Grabbed up a bunch of 2x6 and stuff to make dunnage....

Getting the rear wheels to clear the body was going to be a big hurdle..
Yanked the rear wheels off and set the brake drums on the ground....
Things went real well until the gas tank filler hooked the Driver side front support timber....Yarded it off the blocks....


YESSSSSSSSSSSSSSSSSSS...THINKS GOT REAL HINKY FOR A BIT.....OH CHIT....Thought the sucker was gonna TAKE A DIVE AND ROLL OVER ON ITS SIDE.

Grabbed the floor jack and got the timber jacked back up and secured.....A close one....

Been better if I had a helper watching....But not today.....

Chassis is out and sitting quietly waiting for it's new owners to come a get it......We just have to find them.....A craig's list add will gitterdone.
Though I had a buyer....Guy was just making noise.....


Body secured now and withing the next day or so I will get the body down on a big azz tire under the center of it....

I need to get the body mounts off the frame and in a box until we need them....

Then comes sorting out all the wiring.....

I need to get the vss sensor off the T CASE .

There is a bundle of wires going to the rear of the rig...It had 4 wheel ABS

Just need the pair that feeds the VSS ...... (Speed sensor) so we can make the cool digital speedometer

There will be a bit of fooling to get the lift rig modified to grab the "Family model"
Been a long day.....But a good productive one
 

Attachments

  • IMG_5316.jpg
    IMG_5316.jpg
    500.6 KB · Views: 75
  • IMG_5313.jpg
    IMG_5313.jpg
    517.3 KB · Views: 76
  • IMG_5312.jpg
    IMG_5312.jpg
    655.8 KB · Views: 71
  • IMG_5311.jpg
    IMG_5311.jpg
    701.4 KB · Views: 69
  • IMG_5310.jpg
    IMG_5310.jpg
    753 KB · Views: 75
  • IMG_5309.jpg
    IMG_5309.jpg
    649.8 KB · Views: 76
  • IMG_5306.jpg
    IMG_5306.jpg
    459.3 KB · Views: 75
  • IMG_5302.jpg
    IMG_5302.jpg
    441.3 KB · Views: 75
I have been concerned about lifting the body.....I just remembered parting out a 1984 K5 Blazer several years ago.....
We used the skid steer and the lift rig we used many years ago to lift our drag boats off the trailer to do repairs to the bunks.
The K5 body is heavier....even with the rear top removed.....
I do believe we should be good.
 

Attachments

  • Bodyoffframe4.JPG
    Bodyoffframe4.JPG
    42.2 KB · Views: 71
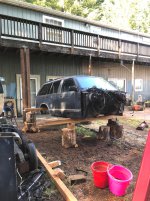
Finished getting the S10 body down off the cribbing.....

Sitting nicely on a big O'l tire.....

The Non AC heater box showed up today as well....
Nice heater box...All metal too.

That will get rid of the big AC box that we do not need any more....Clean up the area under the hood.

Stripped the tranny shifter rod and crank assembly off the chassis this morning....Having the complete assembly will make connecting the column shifter very easy....The rod will likely need to be lengthened a bit.....But having the factory parts will save a lot of misery.....

Not much more happening today.....
Time to start sorting out the cowl wiring and pruning out what is not needed.....

Should be quite easy to end up with a clean neat wiring harness for the engine bay......

AS SOON AS POSSIBLE....I want to get the body up onto the cat and get the body mounts dealt with..........

At present the mounting looks to be pretty easy. Just need to get more of the urethane biscuits.....

With the body down near the ground I think a good mucking out with the shop vac is in order...

The PO was a real hacker....Holes drilled in the firewall to run cables and wiring through....Butchered mostly....No rubber grommets....Just non needed holes now....Will clean up and fill with silicone to keep the water out....

The heater temp cable is stuck....But I FOUND ONE ON EBAY IN GOOD SHAPE.....Gotta take the entire assembly....No worries.....

The cables do not like sitting idle for long periods....THEY RUST INSIDE
 

Attachments

  • RenderedImage.jpg
    RenderedImage.jpg
    682 KB · Views: 66
  • IMG_5337.jpg
    IMG_5337.jpg
    555.8 KB · Views: 68
  • IMG_5334.jpg
    IMG_5334.jpg
    558.8 KB · Views: 65
  • IMG_5333.jpg
    IMG_5333.jpg
    596.3 KB · Views: 64
  • IMG_5332.jpg
    IMG_5332.jpg
    619.8 KB · Views: 62
  • IMG_5330.jpg
    IMG_5330.jpg
    564.7 KB · Views: 66
Good news and some just plain NEWS
Sitting in my favorite working chair in front of the body...Sorting out wires and generally getting ready to start "Pruning/Insulating" all the stuff we don't need.

Thinking about the stock tranny column shifter assembly laying close by...????????
Just had to grab that bad boy and see how it's going to fit in the tub of the cat and how that's all going to work.

The simple answer....IT IS NOT GONNA WORK.....
The exhaust head pipe on the driver side is just right in the way.....No way to do this either.......
Back to the floor mounted cable shifter.....Nuff said on this....

The tub is just too close in the area to even get worked up over this issue....Move on...

NEXT ISSUE

With the plan to use the stock front fenders , hood and core support to get a tilt forward front end well in the plan.....

The height of the chosen aluminum radiator is going to require that the entire body be lifted about 6" minimum.....

ORIGINAL PLAN WAS AN ANT EATER HOOD MADE TO FIT......

Since we need to modify the cab mounts anyway to get the "Family model" mounted.....This is not really an issue...just a little bit of mock up and a spacer on the front mounts.......
The plan is to get the 4 door body set on the 2100 chassis and then start adjusting the height to allow the front end to sit where it needs to and then fabricate the remaining mounting brackets to use the stock GM body mount parts (Cushions, steel retainers and bolts)

The front mounting beam took a fair bit of work and it is involved with other parts now....NOT GOING TO MESS WITH IT

We will add the appropriate spacer to get the A pillar location where it needs to be and go from there.

The beam under the rear of the single cab will need to be modified for the similar location on the "Family model"
Elevation is a bit different...No worries.

Overall ...the change to the 4 door body is for the better.....Far more room and creature comforts.....
Well worth the time......Actually not much extra cost if any.....Just time and fooling withe things.

All the bolts and goodies that came off the 4 door re all in good shape and will go right back into use as we get things together.

The goal for this summer is to at least get the body fully mounted and hopefully the tilt front end coming along well.....

Once this is done.....Then the body can come back off and the drive line finished.....The tranny rebuild can be a winter project .... A piece here and a piece there......
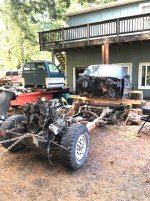
I really wish we had gone with this body type from the gitgo.....These 4 door models are tough to find ....Either they are absolute junk or they are $$$$$$$$$$$$$$$$$$$$$$$$$$$$$$$$$$

The rig we got was a stroke of luck.....It lost a soft plug....cooked the engine and then it sat in the driveway....People wanted it gone and answered my Craigs list ad.....
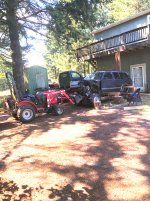
More as it happens...
 
Good news and some just plain NEWS
Sitting in my favorite working chair in front of the body...Sorting out wires and generally getting ready to start "Pruning/Insulating" all the stuff we don't need.
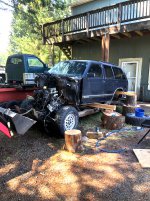
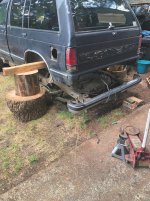
Thinking about the stock tranny column shifter assembly laying close by...????????
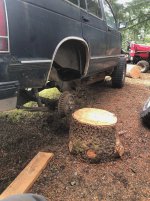
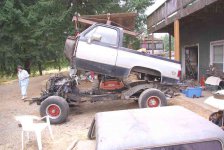
Just had to grab that bad boy and see how it's going to fit in the tub of the cat and how that's all going to work.

The simple answer....IT IS NOT GONNA WORK.....
The exhaust head pipe on the driver side is just right in the way.....No way to do this either.......
Back to the floor mounted cable shifter.....Nuff said on this....

The tub is just too close in the area to even get worked up over this issue....Move on...

NEXT ISSUE

With the plan to use the stock front fenders , hood and core support to get a tilt forward front end well in the plan.....

The height of the chosen aluminum radiator is going to require that the entire body be lifted about 6" minimum.....

ORIGINAL PLAN WAS AN ANT EATER HOOD MADE TO FIT......

Since we need to modify the cab mounts anyway to get the "Family model" mounted.....This is not really an issue...just a little bit of mock up and a spacer on the front mounts.......
The plan is to get the 4 door body set on the 2100 chassis and then start adjusting the height to allow the front end to sit where it needs to and then fabricate the remaining mounting brackets to use the stock GM body mount parts (Cushions, steel retainers and bolts)

The front mounting beam took a fair bit of work and it is involved with other parts now....NOT GOING TO MESS WITH IT

We will add the appropriate spacer to get the A pillar location where it needs to be and go from there.

The beam under the rear of the single cab will need to be modified for the similar location on the "Family model"
Elevation is a bit different...No worries.

Overall ...the change to the 4 door body is for the better.....Far more room and creature comforts.....
Well worth the time......Actually not much extra cost if any.....Just time and fooling withe things.

All the bolts and goodies that came off the 4 door re all in good shape and will go right back into use as we get things together.

The goal for this summer is to at least get the body fully mounted and hopefully the tilt front end coming along well.....

Once this is done.....Then the body can come back off and the drive line finished.....The tranny rebuild can be a winter project .... A piece here and a piece there......

I really wish we had gone with this body type from the gitgo.....These 4 door models are tough to find ....Either they are absolute junk or they are $$$$$$$$$$$$$$$$$$$$$$$$$$$$$$$$$$

The rig we got was a stroke of luck.....It lost a soft plug....cooked the engine and then it sat in the driveway....People wanted it gone and answered my Craigs list ad.....

More as it happens...
In a short time you will at the stage where you can sit in it and make engine noises. Every project has that stage.
 
Oh yesssss.
Sitting up there in the cab making Snowcat noises....And the neighbors wondering WTF.....
:lmao:

I got after the wiring....Sorted out all the stuff we need....Coil/ tach, water temp, oil pressure, alternator, speedo speed sensor, Starter solenoid.....And a few extras.....

I washed out the main cowl wiring plug with electronic cleaner....Going to pack the plug with dielectric grease and reassemble.

Trying to get a few of the factory rubber body mounts....I found a box with a few new ones left from a blazer I had years ago.....New parts.....still need some of the lower rubber parts.....These are available....$$$$$$$$$$$$$$$$$$$$

I scored some of the upper mount halves for $8 each....The lower parts.....arrrrrgh..$34 each...no way

Bone yard trip and find a few good ones.....

I want the soft rubber OEM parts instead of the urethane....Far less noise transferred through into the chassis
 

Attachments

  • IMG_5339.jpg
    IMG_5339.jpg
    620.6 KB · Views: 66
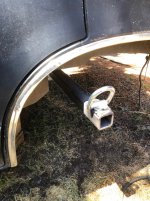
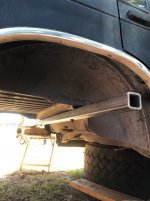
Picked up the 2"x2"x1/4" x 6' long steel tube to construct the rear lift bar for the body.
This unit will bolt to the mid body location behind the B pillar about 3 feet.....
Stopped off at the hardware store and got 4 fresh ratchet straps and 2 D Rings.
Will weld the D Rings to the outer ends of the steel tube to allow an easy grab using the straps up to the overhead spreader bar.

This SHOULD give us a really easy pickemup......

A bit of work needed on the tube....Gotta drill the tube to fit the nut plates in the body and add a 3" riser to get the unit to clear things and fit past the inner fenders in the wheelhouse....

Weld on the D Rings.....Get some longer metric bolts to fasten the lift rig to the body.....Good to go.
The lift bars I built for the standard cab will bolt to this body as well....Same parts...

Gonna be interesting to see how the skid steer handle the heavier rig....

I know the cat can do it....There is a fella online with a Dodge Durango on a 2100....

Fun stuff
 
I had not purchased any steel since last summer.....OMG......That 6 foot piece of square tube was $$$$$$$$$$

Local steel yard wanted $138.00
Another place a few miles away had the same material at $78 ....Helluva difference....A bit more of a drive.....but even with the added gas to go get it.....saved a bunch
 
Got the tools after that new steel.
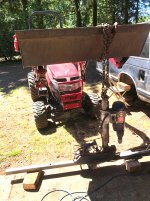
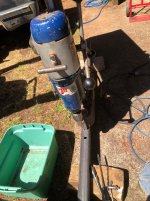
Grabbed the big Mag Drill to drill the holes to bolt the tube to the body mounting area in the midship location.

Trimmed the inner lower fender well to allow easy access to the mount once its on the cat and to allow the tub to fit up snug all the way across.

Welded the D Rings to the tube.....

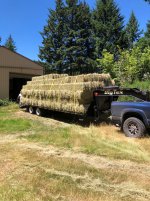
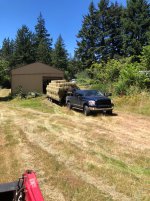
Son in law came in with our universal heavy hauler..

Big Dog pulling the Big Tex.....30 foot deck on that bad boy....Snow cat will fit too :clap:
102" wide deck....
The load of hay with trailer was 18000lb

Anyway

Lifting rig is looking good

The Few..The Proud....The 2100 owners......
 

Attachments

  • IMG_5354.jpg
    IMG_5354.jpg
    268 KB · Views: 67
  • IMG_5350.jpg
    IMG_5350.jpg
    584.1 KB · Views: 71
  • IMG_5349.jpg
    IMG_5349.jpg
    549.7 KB · Views: 66
  • IMG_5347.jpg
    IMG_5347.jpg
    490.4 KB · Views: 75
  • IMG_5346.jpg
    IMG_5346.jpg
    348.2 KB · Views: 70
  • IMG_5344.jpg
    IMG_5344.jpg
    669.8 KB · Views: 76
  • IMG_5343.jpg
    IMG_5343.jpg
    498 KB · Views: 70
Well now...
Today got off to a slow start...Managed to get the front lift rigging off the single cab and bolted onto the Family model....Then the Son In Law calls up.....He is heading up to Idaho for the big dirt bike ride next week and his big dog had a funny noise in the front end...

We found it....RH front axle U joint was shot....

We got that all wrapped up just before dinner time and that finished the day......

But at least something got done on the cat....NOT MUCH THOUGH

Hopefully within a day or so we can go for a "1st Pick" of the Little S-wagon and check out how the new rigging works....

If the rigging works well then we can get the S wagon out of the way and remove the single cab from the cat and get the Family model up in place....

Once in place we have some engineering to do to get the elevation spot on so the front end will tilt and MISS the top of the radiator......


Been a long day.....But the big dog lives :thumbup:
 
Top