-
Please be sure to read the rules and adhere to them. Some banned members have complained that they are not spammers. But they spammed us. Some even tried to redirect our members to other forums. Duh. Be smart. Read the rules and adhere to them and we will all get along just fine. Cheers. :beer: Link to the rules: https://www.forumsforums.com/threads/forum-rules-info.2974/
You are using an out of date browser. It may not display this or other websites correctly.
You should upgrade or use an alternative browser.
You should upgrade or use an alternative browser.
602 Restore
- Thread starter dlmorindds
- Start date
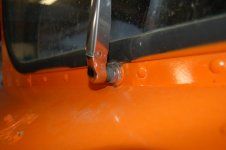
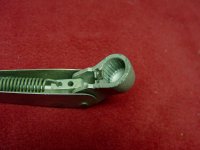
You should be able to pull wiper arm assembly towards you or rather away from windshield, while at the same time pulling or prying off of motor shaft. these steps must be done simultaneously. I hope this helps you.

dlmorindds
Junior Member
Thanks-will be given her a try tonight
dlmorindds
Junior Member
After a choice blessing they popped right off


Who knew that the wiper arms were religiousAfter a choice blessing they popped right off

NorthernRedneck
Well-known member
After a choice blessing they popped right off
Yep, carefully chosen vocabulary always seems to help in removing any part from any type of vehicle.

dlmorindds
Junior Member
Yep, carefully chosen vocabulary always seems to help in removing any part from any type of vehicle.
I think they call it THERAPY

dlmorindds
Junior Member
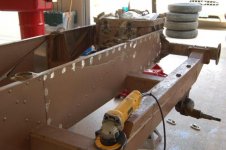
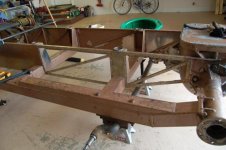
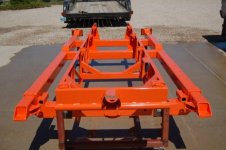
To make it official I am well into the intial stages of restoring, or maybe dissassembling my 602 would be more correct. For a little history, the cat spent its whole life in Duboise Wyoming at the High Plains Rural Electirc. The orignal registration was in the cat and dated 12 Dec. 1963. Serial numer is #166. I bought the cat in March from Safety One. The Hobbs read 922 with 3200 miles on the speedometer.
Weatherby's thread of his 601 restore is beyond awesome. The level of detail and the quality of documenting and photographing of his restoration is the true gold standard. The information in his thread has been a tremendous help so far in this prodject. Sooooo, this isn't a copy-cat thread of Weatherby's, just a thread putting to use a whole bunch of his information. I can only hope I can take this cat close to Weatherby's standard.
So pipe in tell me what you think or tell me what an idiot I am, or if you have advice, give it. More pictures soon


dlmorindds
Junior Member
dlmorindds
Junior Member
OK Weatherby--I just had to do some posing with something that is Thiokol Orange

dlmorindds
Junior Member
dlmorindds
Junior Member
Was there another color under the brown color, like orange or blue? I wonder why that color was used? What color is under the orange on the body, or is that the original color? Keep up the good work
Weatherby--there is orange under the brown/bronze paint. It is a little confusing since the whole frame is painted this color along with the interior of the cab. The exterior of the cab appears to have always(?) been orange.
dlmorindds
Junior Member
The inside collar of one of my hubs was fractured. Someone had attempted to repair this by brazing the missing fracture piece an. It had leaked like a sieve. I looked all over for a replacement hub but no luck. Instead, I had it machined down and restored to original dimensions with an insert sleeve
 . The race and seal fit perfect. Also, got the heater core back. The core had to be replaced.


 . The race and seal fit perfect. Also, got the heater core back. The core had to be replaced.


NorthernRedneck
Well-known member
I can sympathize with the hub. I usually go through 2-3 of those a season.
dlmorindds
Junior Member
dlmorindds
Junior Member
dlmorindds
Junior Member
Bobcat
Je Suis Charlie Hebdo
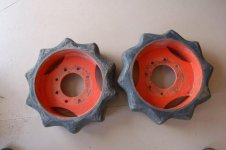
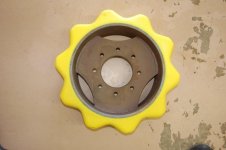
Just as a kick I thought I would post before and after pictures of the drive sprockets. Fallline recovered them with powder coating of all exposed metal surfaces. It will be awhile before these babies see the drive axles though
How much? I have several that need to be renovated.
dlmorindds
Junior Member
The summer special for the 600 series sprockets is $745 including shipping to Wyo. I believe each sprocket weighed 51 lbs.
Bobcat
Je Suis Charlie Hebdo
I should have mentioned that the sprockets that I need renovated are Kristi sprockets. Hopefully half the size and weight equals half the price.  My 601 sprockets look fine, except for one little chunk out of one tooth.
*wow, i used "my 601" in a sentence. sounds pretty good. My 601. yup, i do like the sound of that.*
*wow, i used "my 601" in a sentence. sounds pretty good. My 601. yup, i do like the sound of that.*

MNoutdoors RIP
Gone But Not Forgotten
The summer special for the 600 series sprockets is $745 including shipping to Wyo. I believe each sprocket weighed 51 lbs.
Is that each or for both?
dlmorindds
Junior Member
Is that each or for both?
Boogie-that is for both sprockets
dlmorindds
Junior Member
weatherby
Member
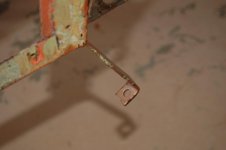
Does anyone know what this short, rather narrow, droopy appendage is on the left back side of the 602 frame??
View attachment 36286
View attachment 36287
I would say with 90% certainty that it was added at some point in the past for some sort of "owner added" item. My guess is it was probably used for a exhaust support of some sort in the past.



 . Just kidding, that"s a very nice tractor also