• Please be sure to read the rules and adhere to them. Some banned members have complained that they are not spammers. But they spammed us. Some even tried to redirect our members to other forums. Duh. Be smart. Read the rules and adhere to them and we will all get along just fine. Cheers. :beer: Link to the rules: https://www.forumsforums.com/threads/forum-rules-info.2974/

1989 Tucker 1644c

Making some progress again and thought some of the communications knowledgeable people might have an idea about this. Not that it's important or that I'm going to have a use for it, but just guessing for curiosity sake.

Again this cats first and only owner up until a couple years ago was BC Tel, so was used for their communications support equipment. You can see where it had different equipment mounted inside the cab and in the bed. The back seat removes by just pulling a couple hairpin keepers, so easy to have had equipment in the backseat area rather than passengers. This cat is also equipped with a Murphy shutdown system that of course shuts the engine down for high temp, low oil pressure. It also had a battery isolator system for three batteries, and has a factory installed second isolated battery. It also had roof mounted engine exhaust system.

This little blower was added under the console after the factory judging from the fact that it's bolts and brackets aren't painted. The power wire runs through, perhaps a set temp switch? The blower draws air into the cab through a 3" hose that goes from under the cab to the bed.

Perhaps the Murphy shutdown because this cat hauled temporary backup equipment and it was left up the mountain able to be running with that equipment functioning until new replacement equipment showed up? Something creating waste heat in the bed was used to heat the cab? Or perhaps cool fresh non carbon monoxide air into the cab?
20211022_181258.jpg
20211022_181252.jpg
20211022_181307.jpg
20211022_181337.jpg
 
My guess is either backup equipment as you posted, or they always left it running while on site. Either could allow for exhaust to gather in cab, so I think the fan was to keep a positive pressure in the cab.
 
Well I'm just about to the point that I've got to get the exhaust system mocked up. I read that the original Chrysler log manifolds aren't the best for performance, although that's generally considered to mean horsepower rather than torque, and they are probably less detrimental to torque than hp. But let's be honest, just look at the log manifold and one can't imagine they are good at scavenging the air out of the cylinder considering how/why headers actually work. If I had been thinking I would have had Frank bolt them on while the engine was on the dyno and see what the difference really is, as we ran it ten hours on there anyway for break in. But I didn't.
It's seems a shame to me to to do this kind of build and then chock it with the exhaust.

I can't seem to find an 1989 Tucker with a 360 Chrysler listed in the headers fitment page at Summit Racing. SO ....... does anyone here have any experience or thoughts about building the headers? Preferably out of stainless steel. I've looked at a number of manufactured headers for the la engines but my impression is that an automobile application is trying to stay closer to the block to clear fender wells, ect. A Tucker Snocat needs really the opposite due to the frame and the shape of the Allison Trans behind the engine.
 
Last edited:
I like to get 180 degree mandrel bent tubing and cut out the part of the bend needed. Mandrel bent insures perfectly round so it all matches up to the next piece. Tig together. may need gas to inside. Most machine bent tubing is crimped exactly where you don't want restrictions. Go heavy on the flange so you can mill it flat after all the welding. Match the flange to the ports. Sometimes the ports need matching. I did this on the Cat engine and it has 400,000+ miles and the headers support turbos. No leaks and still running.
 
1BG,

To expound a little bit on transmissions, some people think about the engines that the manufacturer has paired them with. For example Chevrolet put the Turbo 400 behind big-block engines for decades, or Chrysler put the 727 behind Hemis... so either should be more than sufficient in a snowcat....

But the typical automotive duty cycle is completely different than that of a snowcat. In an automotive application, the transmission is used to multiply the engines torques as it accelerates and shifts through the gears. Once up to speed, it really isn't subjected to all that much torque unless one climbs a long hill, and does so with a heavy load. Even in the Hemi example, in a drag race the transmission will shift from first to second and second to third...and that's it. Sure, it will be subjected to some serious shock loads and a lot of torque... for about 13 seconds at a time. But how much heat will the transmission build in 13 seconds? Now think about a school bus or a garbage truck. It weighs almost ten times that Barracuda or Charger/Challenger, and it is making frequent stops with accelerations between each; day after day after day. Almost always working...it's the difference between a thoroughbred and a pack mule.

In a rubber belted Tucker, the engine and transmission work hard almost continuously. For me, I think a transmission designed for medium duty trucks is more closely aligned with our needs than one designed for a station wagon or a muscle car. Back in the 1980s when Diesel engines were first introduced in pickup trucks, auto manufacturers paired those engines with one of their currently produced transmissions. And the result was a bunch of transmission warranty claims. Over the ensuing years, the Diesels have gained more power and the transmissions have gone through several evolutionary cycles of upgrades so they will hold up the rigors they're subjected to.

A turbo 400 transmission weighs about 135 pounds and a Chrysler 727 weighs about 160. Put them together and your right at what an AT545 weighs; about 289 pounds. I'm sure the difference in weight is not just the case, but rather beefier internal parts and clutches, etc.

But all that said, I'm not an automotive engineer. The above are the ramblings of a snowcat enthusiast, and Grade A knucklehead...
The Allison tranny...for sure is in a class all by itself.
As mentioned....the original diesels were tough on trannies.....
The TH400 and to a little bit lesser degree the TH350 can stand a beating IF THEY ARE BUILT RIGHT.
Shift kits (Transgo is my fav) are a must have to ensure longevity.

As mentioned...KEEPING THE OIL COOL is paramount...

The 727 TF is not a bad box....but in stock trim the shift timing was very poor.....(Seems Mopar engineers were more interested in making the big land yacht's operate smoooooooth and not shake grandma in the least)

The mushmellon shifts caused many premature clutch and and band failures....
I was working in a Mopar shop in the early 70's and the parade of big sleds with toasted trannies seemed way too common.

Shift calibration was the biggest issue.
The aftermarket companies came to the rescue and solved most of the ill's of the various gear boxes.

The TH400 has always been regarded as "Bomb proof" Well, somewhat would be my opinion. The 400 has been installed in some very large rigs over the years...and they have done well.....

Still...the big three auto makers never seem to include the tranny in their thinking when they added more power.....
Dodge came out with the 6.7 around 2006/2007 and the auto tranny was a joke.

If you were serious about working the big 6 cyl oil burner....you needed a tranny shop close by.

Later years have seen a lot of improvements......But the gear boxes always seem to be the last part of the equation to catch up.

The older Allison AT 545 IS A BEAST by any definition .....Firm shifting and made to deal with very demanding loads.....

The internal parts are very robust and there is really no standard pickup/car tranny that compares..

Then we can look at one of the worst gear boxes produced in recent history....The GM 700R4 (4L60 OR 4L60E)

There area always service bulletins that come out on just about every design....A book/binder with a modest amount of pages was is common...The 700R /4l60 THE LAST TIME I BOTHERED TO COUNT....HAD service bulletins that filled a shelf about 8 feet long in the office......

Design errors and corporate bean counters contributed to most of these.

The current crop of stuff from the manufs are outside my wheel house as I have not followed the trannies since the addition of the 6 through 10 speed models.
The old stand by boxes for sure can be upgraded to handle some pretty tough jobs.....Just always look at keeping the oil temp in check...

Another point

Just because you have a particular model of gear box does not always mean much....What engine was bolted up front of it ??? This will often spell out what clutch packs are/were used as well as a host of other differences in the inner workings.
4 pinion planets or 5...A heavier duty application most likely will have more robust parts.
Number of clutch friction plates......Lighter duty can/will have less friction plates in the clutch packs.....
Some light duty components were made of aluminum instead of steel....

The aftermarket has provided a wide variety of goodies to make your tranny better....
Heavy duty planet carriers
More robust sun shells
Better friction plates as well as better steel plates (Go between the frictions) and more of them.
Better bands with stronger anchors and better friction materials.
Higher output oil pumps.
Better bushings and thrust bearings.
In some cases....stronger input/output shafts.
Various little gizmos to stop case wear on some models..

An entire industry sprang up to deliver shift kits to fix various issues of internal oil leaks, shift timing, oil volume to the servos and on it goes.

You want an entirely manual (Select shift) No worries....it's available.
Governor calibration
Throttle pressure fixes
Vacuum modulator modification...

Complete valve bodies...yup, these too.
Torque converters of all sizes and stall speeds
Welded turbine and pump blades .....
If the box has a lockup converter.....Better lockup clutches and in some multiple disc clutches.

The original lockup clutch was simply a device to help get the "CAFE" Numbers up by eliminating the slipping in the converter at cruise speeds...... (Corporate average fuel economy)

THESE CLUTCHES ONLY OPERATED AT LIGHT TORQUE CRUISING SPEEDS....and could not hold heavy torque loads....and were released when the throttle was increased much....

The later boxes have multiple disc lockup clutches and in many cases are engaged at various times and shift points...especially with the diesels...

Beefier is better if you are going to get rough on things...or push things.

You can't have too tough of a tranny. Build the damned thing stout and set it on KILL.....Build it as strong as you can....If there are parts to make it twice as strong as you need...GET THEM....This stuff is pennys compared to what it costs to get your cat dragged out of brush 20 miles in..

More clutches do not hurt anything....just cost the OEM more $$$ and if the engineers say 3 clutch plates in 3rd gear is fine...they do it.
5 clutches are far better and will last a lot longer......

A needle bearing thrust assembly....far better than a plastic thrust washer, or even a steel backed bronze washer.

This subject can go on for pages and pages......but the bottom line.....IF YOU VAN GET A BIG HERKY BOX IN YOUR CAT....DO IT

The only real downside to the big Allison is parasitic drag.....Not worth worrying about in a rig that goes 12-15 mph

But the herky parts inside can give piece of mind to the owner while out in the back country....
 
Last edited:
I've been getting a little done here and there, better hurry snow and snowcat events are coming up quick.

Engine, radiator, transmission, and transfer case are in.
Screenshot_20211107-204851_Gallery.jpg


Cab is on.

Screenshot_20211107-195649_Gallery.jpg


Visor and cab extensions on.
Screenshot_20211107-195722_Gallery.jpg
Screenshot_20211107-195726_Gallery.jpg


Electrical mostly complete, just waiting on plug wire loom.
Screenshot_20211107-195709_Gallery.jpg


Fuel injection system ecm.
Screenshot_20211107-195800_Gallery.jpg


I decided on the sump with a high pressure pump, hope it's more trouble free.
Screenshot_20211107-195714_Gallery.jpg


Still waiting on exhaust system parts.
Screenshot_20211107-195808_Gallery.jpg


Hydraulic system hooked up.
20211102_090806.jpg


No big revelations going back together, just a couple little items like the throttle cable plate at the carb. But all in all, this is where staying with the same engine/trans pays off.
Screenshot_20211107-205057_Gallery.jpg
 
Scheduled into the paint shop again the week after Thanksgiving. This is a base coat on the cab and hood, the rest is power coated. I was thinking that I was going to do an artic camo paint job, but that's not going to come together like I wanted, so on to plan b. I was just mocking up some ideas about paint using black tape to see the look,, figure that's easier than not liking it once the paint is on.
Screenshot_20211107-200029_Gallery.jpg
Screenshot_20211107-200043_Gallery.jpg
 
1BG,

You’ve been making some serious progress!

Before The Infamous WBJ1 decided on the hideous BSG color he wanted a military camouflage paint scheme. A good friend of mine photoshopped some different schemes on a picture of the 1643 that became Putri-Zilla.

The US Army’s Mobility Equipment Research Design Command (MERDC) designed a number of different camouflage schemes and the “snow, temperate with trees” design was forest green, with white, black and sand colors as well. There was also a “snow, temperate open terrain” which was white with “field drab” (a brown color) sand and black.

The overall design was such that the first two colors each covered about 45% of the surface area and the last two colors about 5% each.

Any of those would have been a eeeuge improvement over the BSG color WBJ1 chose.

If you haven’t totally decided against a camouflage design, rather than paint you could chat with a company that does vehicle wraps. I think the sky is the limit when you go that route. For example, a number of years ago at SEMA I saw a brand new truck covered with a brushed stainless steel wrap. It looked fantastic.
Well my wrap story isn't that good. I've known a guy for many years that has a wrap company and he gave me this mock up, but I just can't deal with him.

When I got my vette I took it by his place to have the clear rock chip guard put on, ......... "yeah we'll get that done". 8 months later he calls and says he could getr done. Same story with my jeep. I'd been using them, it was a little late for the chip/scratch guard by then. Still I had him give me a mock up of the snocat camo. Was supposed to have it to me in three days, after three weeks and much complaining I got this, which imo a 5th grader could have done in 15 minutes. Yea I'm complaining, ..... this guy does work that goes to Sema ........ but I just can't deal with it. So I run this by 3 other wrap shops and they all tell me that for this application the wrap will shrink, it won't hold up, it'll have to be rewarpped in 3 years maybe. Idk, so I decided to paint it on and even had my paint shop friend talked into hand taping and painting it in multiple steps.

I like the camo but ..... the more I put things together, the more I realize I'm not going to be happy with the frame, the bed, everything that's not going to match that cab and hood. So as I said, thinking to plan b, or maybe it's really back to plan a.

I do remember the mock up photo of the camo on Snowzilla, and I liked that a lot as well, but what with the frame, diffs, bed, ect, already powdercoated, maybe I'm just past the point of that?

Screenshot_20211106-094833_Gmail.jpg
Screenshot_20211105-095227_Gmail.jpg
 
A couple steps closer.
Headers on. Still waiting for more exhaust parts.
20211120_185917.jpg


Someone out there must know more than I do. 42 years this company has built headers, and they still send bolts instead of studs. I don't know what kind of magic it takes to get the four bolts in the holes where the tube bends over the hole, but ...... Better to use anti seize on studs and then still hope you never have to take them out of the aluminum heads, I think.
20211120_075301.jpg


Sanderson says no gasket needed, just 1/8th inch bead of silicone dry overnight then bolt up. Frank had told me this was 'the' gasket to use, so I went with that.
20211120_073058.jpg
20211120_073037.jpg


With the headers on, the batteries could go in. The looms came for the spark plug wires too so thats done.
20211120_185901.jpg


And the sun sets on another weekend, a couple steps closer to snow.

20211121_174132.jpg
 
Last edited:
1BG,

That really looks nice - truly a first class job!!! I can completely empathize with the supplied bolts being incompatible with the manufacturer's own product design, and they should know better.

While looking at the photos a couple things struck me, and these are issues we discovered when testing Thundercat. Your experience may be different, but we were surprised by how much heat the engine produced. Things in relatively close proximity to the exhaust manifolds did not enjoy the experience, and had battle scars to show for it.

In "normal operation" they might have fared better, but testing done by "Mr. Destructo" (AKA: Scott) is done with a "If we're going to test, let's make it tough" philosophy. So a significant amount of time is spent under full throttle, or close to it. We replaced the stock Tucker battery mount with a new one of our own design, and the battery is located lower, which means closer to the exhaust manifold. The battery's plastic case now has some deformation and we surmise that's because it received too much heat. We need to fabricate a shield to provide some protection.

The hydraulic hoses that connect to the hydraulic tank bore evidence of heat exposure as well. One hose needed to be replaced, and we covered the new hose, as well as the hydraulic pump supply hose, with Parker Firesleeve, which offers protection from high temperature exposure.

We also saw heat damage to the spark plug boots and replaced the spark plug wires. When we did that we added spark plug boot heat protector sleeves.

As I said, you may not have these issues, but I thought I would share our experience for your consideration.
 
BFT,
thanks for the compliment. A compliment from you regarding a Tucker rebuild is saying something in my book.

The truth is I've not done nearly the amount or quantity of work that you and Scott have done there, perhaps a third of what you've put into Snowzilla or Thundercat. The quality of your work is enviable, and your sharing it has been a great help. But being my first rebuild, I would know to look for certain things and address them perhaps a bit differently next time, I'm guessing most people would say the same. Of course rebuilding or upgrading the original components helps save time, and having a one piece cab and not trying to refurbish it at this time helps.

Although I have done somethings just because I wanted to, that makes it 'my cat', but basically I want to have a high degree of confidence that it will get myself and/or Lil Capt into the backcoutry and home again for many years to come.

I find thatTucker had improved a number of things by the C model that were issues in the earlier years. Perhaps the heat shields are one of them. They were not all in place in those other photos, so here's a couple other shots.

For the alternator.
20211123_152338.jpg


Hydraulic hoses driver side.

20211123_144941.jpg


Hydraulic hose passenger side.
20211123_143512.jpg


These MSD plug wires are supposed to have high temp plug boots, so I'll have to watch and add the heat covers if need. You can see on the pump supply line a cloth cover, I was going to pull it but it's crimped under the fittings so I'll just see what kind of heat covers they have next time I get to Motion and Flow and put over that and couple other spots. They will likely have that Firesleeve.

I had originally thought that things like the dual batteries, batt isolator, Murphy shutdown, ect were done by Tucker at the factory, but now I think those things were probably added by BC Tel. As such the battery that is mounted on the frame is pretty close to the exhaust, and although there was no previous signs of extreme heat exposure on that battery, it will be prudent to make a heat shield for that I'm sure.

You know, more power, more work in a given time span, more heat. I recall reading about some of the heat issues you had with Thundercat and have asked everyone who has helped on this engine if they thought I might have an overheating problem, and the concensus is unanimously no at this point, since it hasn't been in the field yet I can still be optimistic. 😁
We'll see. And thanks for the heads up.
 
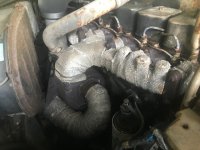
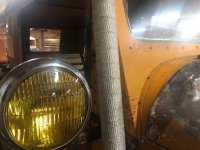
Why not take care of the heat issue at the source? Heat wrap is very functional in retaining the heat within the pipes. Good to prevent over heating adjacent components and hands. Also keeps heat in to maximize turbo efficiency. Secure with 1/4-inch stainless Bandit. No asbestos in the new stuff.
 

Attachments

  • Exhaust wrap 2.jpg
    Exhaust wrap 2.jpg
    91.7 KB · Views: 116
  • Exhaust wrap.jpg
    Exhaust wrap.jpg
    87.7 KB · Views: 108
Why not take care of the heat issue at the source? Heat wrap is very functional in retaining the heat within the pipes. Good to prevent over heating adjacent components and hands. Also keeps heat in to maximize turbo efficiency. Secure with 1/4-inch stainless Bandit. No asbestos in the new stuff.
sno-drifter,

These are ceramic coated headers, so while not nearly as good as heat wrap, still some help. Not stainless as I had hoped for, but I couldn't find anyone that made the stainless for these old la engines. Stainless Works makes a kit that looks pretty good but I was afraid mine would end up looking like they had a lot in common with Frankenstein. Wrapped stainless would be the best of course. I think the square inches of venting out the sides of the hood was increased on the C models as well. I'm hoping that all things combined will help enough that I won't have problems.
 
I think the square inches of venting out the sides of the hood was increased on the C models as well.
Personally, I think this is the single biggest issue. You can have all the radiator and fan size you want, but the air has to have some where to go. I've seen several tuckers that I doubt there was as much outflow area as the radiator area. Lack of space combined with the air having to work around all the obstructions makes for reduced flow and thus high heat retention. There should be more outflow room than inflow anyway.
 
earlier tuckers used venting in the top on the hood which always helped to defrost the windshield, thinking cowl induction ie '72 chevelle or 65 mustang hood scoop turned around, might add hood louvers at the back of the sides and top on the hood

but sure with all your talents you will come up with a great solution and design
remember there are no engine to frame side panels and heat rises....
 
When you want to start pumping fluids and playing with the ecm app but you're short of exhaust parts.

I call this the hook and latch system. For that real rat rod rumble.
Screenshot_20211127-202814_Gallery.jpg
Screenshot_20211127-202824_Gallery.jpg
Screenshot_20211127-202834_Gallery.jpg


Considering that everyone except Hughes said this was going to be way to much cam, it's pretty smooth. Can't put it in gear yet to see if it dies, but so far so good. 🤷


Thats idling around 950, I'll try to go down a little with it tomorrow, but I see people have a lot of the strokers idling about there.

Engine oil, hydraulic, coolant, trans, transfer case, gasoline; no leaks, so thats good.
 
That has no where near the 'lopeyness' that I was expecting. Wonder how it sounds around 600 :unsure:
 
EPA/DEQ approved irrigating exhaust system...
The USFS approved spark arrestor cert might be the tough one 🤔


That has no where near the 'lopeyness' that I was expecting. Wonder how it sounds around 600 :unsure:
This first one is at 600 rpm in neutral. The second, I was in the cab with the transmission in drive, but holding the brake at the transfer case, so the same as stopped and putting it in gear. Foot off the throttle in both.

After playing with it a little I think I'm likely to start out at about 700 and see how that goes in the field.
 

Attachments

  • 20211203_150617.mp4
    7.8 MB
  • 20211203_150752.mp4
    8.7 MB
Last edited:
  • Like
Reactions: PJL
Top