Lyndon
Bronze Member
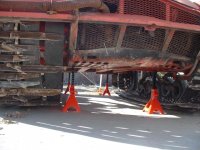
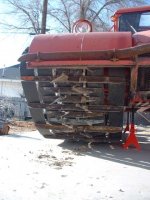
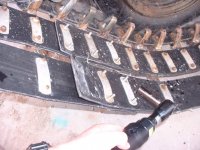
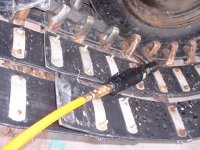
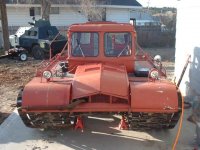
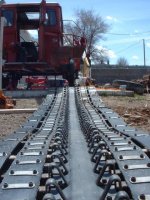
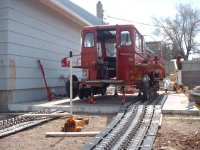
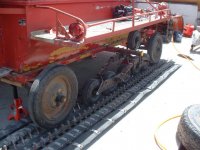
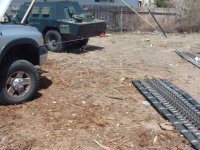
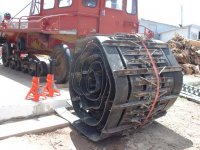
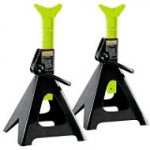
On most types of snow cats there is some sort of splice where you "Break" the track. On many machines it's a set of pins one removes. On Snow Track and all it's variants it is a bolted lap joint. It really helps if you put the machine on jack stands so that you can run the machine "In-Place". For most machines, except those with continuous belt, spliceless tracks, you need to get the splice into a position where you can get at both sides of the track. This means positioning the track right where it is coming off the ground and goes up to the drive sprockets. Taking them off is easy, just take the bolts at the splice out. For major overhaul of a machine I find that this makes the machine much easier to deal with. An ST4 sitting on it's bogey wheels can be easily moved around by one person with a floor jack, or by hand with 2 people.Now it's easy to get on and off the trailer to take to say the glass guy, painter, exhoust shop ect. Once you get the tracks off roll them up into a big 'wheel' and tie the end with a piece of stoute wire or rope. Now depending on the size and weight of the tracks, one or 2 people can roll them out of the way for storeage. To Rebuild a track set it on edge (Takes 2 people) in a serpentine layout. Now you can get at both sides with the rattle gun or electric impact rench. USE 6 POINTS SOCKETS ONLY! Do not burn the bolts out with a torch. You will ruin the Grousers(Cleats) & guides! For the bolts that will not break off, grind them off or drill a small hole in the nut and crack it with a cold chisle and big hammer.with 2 people have one hold the chisle with big pliers, vicegrips or channellocks to prevent hand damage! Then you can crack off even the most stubborn bolt with a sledge with just one whack.A complete set of hardware from a fastener supply place will run you about 100 to 150 dollars. Use Nylocks instead of nuts and lock washers. I did my last 2 or 3 track rebuids in Stainless steel for only about 30$ more than the standard grade 5. The Stainless is harder and you can break them back apart even after years of operation. Don't use the old belts as a template. You need to figure out the "PITCH" and space them according to that. If you don't know how ask a belting guy. I actuall use a template to drill out the belting. Some belting places will do it for you for a very reasonable price.
Tracks ON: Roll the tracks out. roll the machine on to the tracks. Make the splice point where you can get at it. I've see all type of guys struggling with clamps and come-alongs, forget it! Wedge some short plank's from the body or bogey assemblies so that the track won't pull out from under the rig. work the track over the return tire and get it as close to the drive sprocket as you can, then tie a piece of wire on the second or third grouser. Take the coil wire off! Now use the starter in first, second or reverse to pull the track right into position. Make sure you've de-adjusted the track tension adjustor fully. You can usually get that board that you were using to keep the track from pulling out from under the rig to wedge in the tire guides. With the help of one of my associates I can comfortably put a track on in about 20 minutes. My record time is about 20 minutes by myself. Works for all makes of snow cats. It helps also to deflate the tires, not all the way flat as you may roll the tube around in the tire. It takes a full day to bust down a track, and thats a long hard day. Same with building a new track up. Tools that are helpfull: lots of phillips screwdrivers to get the holes lined up for rebolting the splice. The proper size of nut driver to get stubborn bolts to start.3/8 Butterfly Ratchet is a lot lighter than a standard 1/2 rattle gun which will wear out your arms lifting it so much. Remember on an ST4 there are 480 Bolts, Nuts, and washers, per track and more on a Snow Master, and most all other machines. When you are initially trying to make the splice it helps if you run a complete set of bolts in without putting the guides and grousers on. Just thread in the bolts, no nuts and it will pull the track together nicely, now you can put a grouser and guides on one of the positions and tighten it up. You'll have to back out the first set of bolts but with the little butterfly air rench it goes pretty fast. PUT AIR BACK IN ALL THE TIRES BEFORE YOU GO ANY FURTHER! Ready for track tensioning. This process works for Snow Track, and it's cousins, thiokol,LMC,Bombardier,Kassborrer and kristi and Tucker steel tracks. I havn't tried it on Hagglund or new style Tuckers but they have one piece continuous belts that would require a different procedure. "IN ORDR TO OWN A TRACK RIG YOU HAVE TO BE A GLUTTON FOR PUNISHMENT". With the new belting technology a set of tracks can be made to last 20 years.Most types of belting do not like being left out in direct sunlight as they get UV Damage, so thro a tarp over it in the summer. Also some manufacturers recomend letting the tension off when storing for long periods of time. this prevents having streeched spots. On My J5 and Snow Tracks I just let the rear tire down for the summer. But don't forget to air it up before you go to move it.
Tracks ON: Roll the tracks out. roll the machine on to the tracks. Make the splice point where you can get at it. I've see all type of guys struggling with clamps and come-alongs, forget it! Wedge some short plank's from the body or bogey assemblies so that the track won't pull out from under the rig. work the track over the return tire and get it as close to the drive sprocket as you can, then tie a piece of wire on the second or third grouser. Take the coil wire off! Now use the starter in first, second or reverse to pull the track right into position. Make sure you've de-adjusted the track tension adjustor fully. You can usually get that board that you were using to keep the track from pulling out from under the rig to wedge in the tire guides. With the help of one of my associates I can comfortably put a track on in about 20 minutes. My record time is about 20 minutes by myself. Works for all makes of snow cats. It helps also to deflate the tires, not all the way flat as you may roll the tube around in the tire. It takes a full day to bust down a track, and thats a long hard day. Same with building a new track up. Tools that are helpfull: lots of phillips screwdrivers to get the holes lined up for rebolting the splice. The proper size of nut driver to get stubborn bolts to start.3/8 Butterfly Ratchet is a lot lighter than a standard 1/2 rattle gun which will wear out your arms lifting it so much. Remember on an ST4 there are 480 Bolts, Nuts, and washers, per track and more on a Snow Master, and most all other machines. When you are initially trying to make the splice it helps if you run a complete set of bolts in without putting the guides and grousers on. Just thread in the bolts, no nuts and it will pull the track together nicely, now you can put a grouser and guides on one of the positions and tighten it up. You'll have to back out the first set of bolts but with the little butterfly air rench it goes pretty fast. PUT AIR BACK IN ALL THE TIRES BEFORE YOU GO ANY FURTHER! Ready for track tensioning. This process works for Snow Track, and it's cousins, thiokol,LMC,Bombardier,Kassborrer and kristi and Tucker steel tracks. I havn't tried it on Hagglund or new style Tuckers but they have one piece continuous belts that would require a different procedure. "IN ORDR TO OWN A TRACK RIG YOU HAVE TO BE A GLUTTON FOR PUNISHMENT". With the new belting technology a set of tracks can be made to last 20 years.Most types of belting do not like being left out in direct sunlight as they get UV Damage, so thro a tarp over it in the summer. Also some manufacturers recomend letting the tension off when storing for long periods of time. this prevents having streeched spots. On My J5 and Snow Tracks I just let the rear tire down for the summer. But don't forget to air it up before you go to move it.

