• Please be sure to read the rules and adhere to them. Some banned members have complained that they are not spammers. But they spammed us. Some even tried to redirect our members to other forums. Duh. Be smart. Read the rules and adhere to them and we will all get along just fine. Cheers. :beer: Link to the rules: https://www.forumsforums.com/threads/forum-rules-info.2974/

Shower Drain leak

jwstewar

Active member
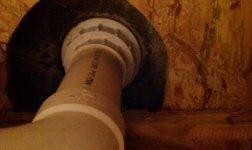
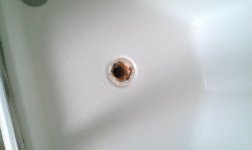
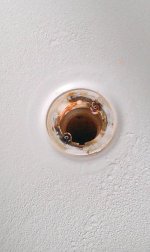
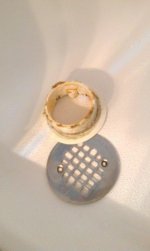
We've been noticing a bit of water coming from the ceiling of our utility room. At first wasn't bad, but now it is coming in at a good clip. So I cut a hole in my ceiling today. The drain is leaking. Now, how do I get it apart? I figure I will have to cut several pieces out and replace but I don't know how to get the actual flange out of the shower stall. Anyone have any ideas? I've attached a pic from below and a couple from above. Does the piece on the top of the shower stall unscrew? Everything from below appears to be glued.
 

Attachments

  • IMAG0219.jpg
    IMAG0219.jpg
    45.9 KB · Views: 56
  • IMAG0220.jpg
    IMAG0220.jpg
    32.4 KB · Views: 56
  • IMAG0221.jpg
    IMAG0221.jpg
    36.4 KB · Views: 57
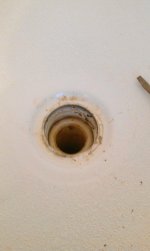
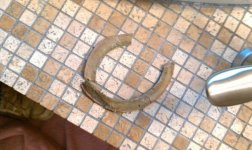
Well, I got it apart. I took a screwdriver and a hammer and was able to back it out from the top. On the underside there was a rubber gasket and a cardboard gasket. The cardboard gasket had failed. I'm not 100% sure how this should have gone together, but I don't believe the cardboard gasket should have ever come in contact with water. Looks like the plastic piece has plumbers putty between it and the shower stall. So I think I'm going to go to town and get some plumbers putty and put it back together with just the rubber gasket between the bottom piece and the shower stall. Any thoughts?
 

Attachments

  • IMAG0222.jpg
    IMAG0222.jpg
    30.7 KB · Views: 55
  • IMAG0223.jpg
    IMAG0223.jpg
    31 KB · Views: 54
  • IMAG0224.jpg
    IMAG0224.jpg
    71 KB · Views: 55
I'm no plumber. I'm an electrician by trade. So, like all sparkies, we know enough about plumbing to be dangerous.

You need to do your loosening and tightening down below your stall. The piece you removed up top needs to have plumber's putty under it and then re-installed and tightened from below using channel locks aka water pump pliers. Never heard of a cardboard gasket in that application. Get a new rubber gasket.
 
Jim ..Ive done lots of shower pans...Its hard to tell from your pics.,,In first pic with the knurled collar..seems it would be a compression fit from collar to pan should be a rubber gasket on top of collar to the pan...Does the drain screen screw into the flange.. and then the ears with screwholes just hold the screen in place..The kinda off centered pipe in your last pic..is it threaded inside..hard to tell..this seems screwy.. Do you know the brand name of the pan....B,
 
In order to tighten from below, it looks like I will have to cut the current drain out and replace as it is glued in place. I expected to have a coller or something there to tighten up, but it doesn't.

At least you were in the housing trade, I'm in IT..:brows:
 
Jim ..Ive done lots of shower pans...Its hard to tell from your pics.,,In first pic with the knurled collar..seems it would be a compression fit from collar to pan should be a rubber gasket on top of collar to the pan...Does the drain screen screw into the flange.. and then the ears with screwholes just hold the screen in place..The kinda off centered pipe in your last pic..is it threaded inside..hard to tell..this seems screwy.. Do you know the brand name of the pan....B,

The shower stall is an AquaGlass. Yes, the screen screws to the flange. I'm not saying it is right because obviously it failed, but above the shower pan the only thing there was plumbers putty. Not that I've done many, but the shower drains I've seen has the rubber seal. I looked at the other shower like this one in the 1st floor bath (I didn't take it apart), but I don't see any rubber gasket on top of the shower pan either.
 
Exactly ..What i was thinking..Rubber goes againt pan ..cardboard is so collar does'nt bunch rubber(slip joint)..you should be able to couple your down pipe after re-install to pan...:whistling:
 
Alot of times i've seen the rubber gasket under the drain screen..It goes below the pan..from below not the top..:biggrin:
 
Jim, it's been a few years since we remodeled 2 bathrooms but I can't remember there being any cardboard gasket and don't see any use for one in a position where it might come in contact with water but since it did, the rubber gasket has to be leaking.

As I remember it the rubber gasket was a compression fit on the drain pipe and the shower pan. It was pretty simple to install, no cardboard gaskets, wax rings or plumber's putty required.
 
The rubber washer below did not fail. The putty failed due to flexing of the center of the shower pan because there is no support under the pan. Replacing the putty and tightening the insert from above with a spanner wrench, and tightening the gasket with the nut, will solve your problem. The paper gasket is there between the rubber gasket and the nut to provide a smooth surface for the nut to rotate on. You'll find that trying to tighten without it will simply rotate and twist the rubber gasket due to the friction created by the rubber. There is a reason for every component shipped with plumbing fixtures. Good luck.
 
Jim, it's been a few years since we remodeled 2 bathrooms but I can't remember there being any cardboard gasket and don't see any use for one in a position where it might come in contact with water but since it did, the rubber gasket has to be leaking.

As I remember it the rubber gasket was a compression fit on the drain pipe and the shower pan. It was pretty simple to install, no cardboard gaskets, wax rings or plumber's putty required.
The cardboard ring should never see water ..it's under the rubber so you can tighten the compression ring to pull rubber to pan..
 
Shower pan and bathtub manufacturers, particularly fiberglass and acrylic units, give recommended installation directions. Most recommend the pans and tubs be set in a grout bed of mortar to eliminate flexing (eventually cracking) due to uneven floors and voids created by the manufacturing process. Some actually have foam blocks to guaranteed support against the floor, and no grout is needed. If you tap the floor with your knuckles and it sound hollow, there is no support under the pan. A solid sound means grout support. The hole for drain connections is also sized to accommodate the drain pipe and basket, and to keep the voids to a minimum. Again, everything for a reason, not just extra parts. I'm always surprised at how many plumbers ignore manufacturers recommendations, and good folks end up with problems like you are experiencing due to their laziness. I see it every day, and it really pisses me off.
 
Shower pan and bathtub manufacturers, particularly fiberglass and acrylic units, give recommended installation directions. Most recommend the pans and tubs be set in a grout bed of mortar to eliminate flexing (eventually cracking) due to uneven floors and voids created by the manufacturing process. Some actually have foam blocks to guaranteed support against the floor, and no grout is needed. If you tap the floor with your knuckles and it sound hollow, there is no support under the pan. A solid sound means grout support. The hole for drain connections is also sized to accommodate the drain pipe and basket, and to keep the voids to a minimum. Again, everything for a reason, not just extra parts. I'm always surprised at how many plumbers ignore manufacturers recommendations, and good folks end up with problems like you are experiencing due to their laziness. I see it every day, and it really pisses me off.
I always set pans and tubs in a bag of perlighted plaster..unless there cast iron...:beer:
 
At least you were in the housing trade, I'm in IT..:brows:

Not housing. I stayed away from that. The new term is Heavy Electrical. Power Distribution and High Voltage. But I did stay at Holiday Inn Express last night.

I knew the plumbers would show up and set you on the straight & narrow.

Good luck.
 
Thanks for your help everyone. I ended up going to Lowes and picking a new drain assembly up. Cut the old one out and installed it last night using silicone on top of the shower pan and under the top flange per the directions. Under is the rubber washer up against the shower and then the fiber ring and then finally the nut. The one I cut out was glued in and didn't have a nut, the whole assembly had to turn so I couldn't turn it from below to tighten it up. I watched turned the water on and watched it for a few minutes and it appeared to stay dry. I will leave it open a few days to make sure as well as let everything dry out really good. Then I need to find someone to patch and match the ceiling in. The builder is having an open house today....I'm tempted to make a visit:whistling: Worst case, maybe he could pull a favor with his ceiling guy.:biggrin:
 
Depending on what size hole you cut they make plastic plumbing access covers for jobs like this. They are easy to install.
 
Depending on what size hole you cut they make plastic plumbing access covers for jobs like this. They are easy to install.
Here's a website for access panels. Comparable pricing with Lowes, but bigger selection including a 14" x 29" unit. Very good idea to have access at all hidden plumbing locations. Saves money down the road if the plumber has to punch a hole in the wall to get to stuff.

http://www.pexsupply.com/Plastic-Access-Doors-976000

Now that is something worth knowing. I've never seen them before. Last time I had to tear through a wall to get to pipes I had to patch the wall and I remember thinking that, "I hope I never have to do that again". In one wall I framed in and built a small access hatch. Those access panels are a lot, lot easier. Thanks JEV.
 
I put them in on a lot of shower jobs as well as in ceilings under drain traps. Especially the drains when the folks have kids. They tend to plug up tub drains a lot.
 
I also have used these ..Just found out our local Ace Hardware has some in stock.. 8"by 8"..and 14" by 14"..Thats alot better than going to the big box so called lumber co..miles away..:beer::whistling:
 
I like these. I told Monica yesterday that I was tempted to just put a door up there. She gave me "The Look." I sent this on to her to see what she has to say, I certainly like the price.
 
Now that is something worth knowing. I've never seen them before. Last time I had to tear through a wall to get to pipes I had to patch the wall and I remember thinking that, "I hope I never have to do that again". In one wall I framed in and built a small access hatch. Those access panels are a lot, lot easier. Thanks JEV.
You're welcome. I use them whenever I punch a hole in a wall for access. They are a flush fit, and can be painted to match the wall/ceiling and blend in nicely. Customers appreciate the clean lines.
 
Top