• Please be sure to read the rules and adhere to them. Some banned members have complained that they are not spammers. But they spammed us. Some even tried to redirect our members to other forums. Duh. Be smart. Read the rules and adhere to them and we will all get along just fine. Cheers. :beer: Link to the rules: https://www.forumsforums.com/threads/forum-rules-info.2974/

Prehung Interior Doors

rlk

Bronze Member
I'm doing a small remodeling job and had to purchase 2 interior doors, one for a bathroom and one for a closet.

These doors are prehung and have the hole for the lockset already bored. You have probably seen them in the box stores. Granted these are not the best quality doors available, but I have run into a problem and would like to know how you handle it.

The trim is stapled to the door frame. That is o.k., but about half of the staples are not countersunk. They need to be countersunk so I can caulk the holes prior to painting.

Now comes the question: How the heck do you countersink the staples? A regular nail sink will not work (the kind used for finish nails), and I do not know of a tool that is made for countersinking staples.:confused:

Anyone have any ideas?

Thanks, Bob
 
Get a small cold chisel and grind the point to fit the staples ?

Or maybe a screwdriver ?
 
Thanks guys. I tried using a screw driver on the inside of the closet, but the screw driver kept slipping off of the staple and denting the wood beside the staple. I was able to get one staple pounded in, but ended up with a large hole to caulk. It looks like crap.

I even tried holding the screw driver cross ways to the staple. That worked, but again I ended up with a hole shaped like a + . The hole can be caulked but creating a hole that large is not a sign of quality workmanship.

Bob
 
Forget the caulk Bob . Set the staple anyway you can , I,m assuming you will be painting the trim . Use Bondo a automotive type body filler to fill the cavity you made with chisel, screwdriver whatever . I Prefer the 2 part evercoat brand polyester filler .

Sand it smooth Then brush a few coats over the area to kind of seal it & paint the entire trim . It will last much longer then caulking & you shouldn,t have to mess with it again .


Just because the door frame came prepainted ( Primed Actually ) dont mean its goin to last . You do get what you pay for . But You allready mentioned they weren,t the highest quality door & frames . Just a thought . :biggrin:
 
I use Polyseamseal caulk and a flexible putty knife for filling the holes. It is paintable and cleanup is with water, so you can wipe out the excess on trim like colonial casing and ogee moldings. I also use Fast-n-Find lightweight spackling by Dap. Apply with a flex knife and it dries fast as well. No sanding required and it does not shrink. Just make sure whatever you use it says it is paintable. Stay away from ANYTHING with silicone in it, as it will reject paint.
 
I'd use a nail set and gently tap in the staple a little at a time. To fill nail holes in trim I'm gonna paint, I use window glazing. Like JEV's method, apply it smoothly, plus, it won't shrink.
 
I'd use a nail set and gently tap in the staple a little at a time. To fill nail holes in trim I'm gonna paint, I use window glazing. Like JEV's method, apply it smoothly, plus, it won't shrink.
The only problem with window glazing is that some of them have oil in them, and will reject latex paint. Back "in the day" when people replaced their single glazed windows and used glazing points and glazing putty, they also used mainly oil based paints for exterior painting, so the paint and putty were compatible. Single glazing is a dinosaur with thermopane glazing set in silicone caulk replacing them.Today's "paintable" products are designed to be quick drying and paintable with latex or oil based paint.
 
The only problem with window glazing is that some of them have oil in them, and will reject latex paint. Back "in the day" when people replaced their single glazed windows and used glazing points and glazing putty, they also used mainly oil based paints for exterior painting, so the paint and putty were compatible. Single glazing is a dinosaur with thermopane glazing set in silicone caulk replacing them.Today's "paintable" products are designed to be quick drying and paintable with latex or oil based paint.

I haven't had any paint issues with the glazing. I use DAP if that means anything.
 
Cowboy, I'm sure your method is great, however, I detest sanding. It also makes quite a mess.

I use Polyseamseal caulk and a flexible putty knife for filling the holes. It is paintable and cleanup is with water, so you can wipe out the excess on trim like colonial casing and ogee moldings. I also use Fast-n-Find lightweight spackling by Dap. Apply with a flex knife and it dries fast as well. No sanding required and it does not shrink. Just make sure whatever you use it says it is paintable. Stay away from ANYTHING with silicone in it, as it will reject paint.

Jev, I'm not familiar with the caulk & spackling you mentioned. I'll have to give that a try.

I usually use painter's caulk - dab some over the hole, push it in with my finger, then immediately wipe with a damp cloth. The caulk always shrinks but the hole it leaves is not deep enough to apply more caulk, therefore my caulking job leaves a lot to be desired.

Thanks for the recommendation to try a different type of caulk or spackling.

From what I have read so far, looks like my best bet is to use a screw driver, even though it leaves a larger hole, then use a better caulk or spackling.

jpr62902, how do you hold the nail set on the staple so it does not slip off and go into the wood. This afternoon I tried several times and never could get the staple sunk with the nail set.

Oh, regarding your comment about using window glazing: a long time ago I worked for a painter while school was out for the summer. We were painting exterior windows with oil based paint. The painter used plumbers putty on the nail heads. The oil in it did not interfere with the oil based paint, and plumbers putty will not shrink. Have not used this since, but have used a lot of window glazing.

Thanks to all for the recommendations.

Bob
 
jpr62902, how do you hold the nail set on the staple so it does not slip off and go into the wood. This afternoon I tried several times and never could get the staple sunk with the nail set.

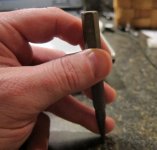
Hold the nail set with your bottom finger resting on the trim material to keep it placed squarely on the staple, like this:
 

Attachments

  • IMG_0141.jpg
    IMG_0141.jpg
    45.9 KB · Views: 56
You could consider a staple setter, though some don't sound any better than a screwdriver this sounds as if it has real potential.

Does your staple gun run out of oomph during jobs?


Staples that aren’t set flush can be unsightly and dangerous. Things have a tendency to get caught on them – like your skin. Using a hammer alone just flattens them out but doesn’t really set them below the surface. FastCap has a unique little tool that drives them about 1/16” below the surface with the tap of a hammer. The crown of a ¼” staple fits perfectly into the recess of the setting tool. Made in China.


http://www.mcfeelys.com/product/FSC-6044/Staple-Setter
 
The tip of a nail set is concave, and is designed to contain the head of a finish nail in the tip. There are different sizes of sets for the different sizes of finish nails. I have used a slot head screw driver to do this job, as well as nail sets. Depends which is at hand.
 
You could consider a staple setter, though some don't sound any better than a screwdriver this sounds as if it has real potential.

Does your staple gun run out of oomph during jobs?

Staples that aren’t set flush can be unsightly and dangerous. Things have a tendency to get caught on them – like your skin. Using a hammer alone just flattens them out but doesn’t really set them below the surface. FastCap has a unique little tool that drives them about 1/16” below the surface with the tap of a hammer. The crown of a ¼” staple fits perfectly into the recess of the setting tool. Made in China.


http://www.mcfeelys.com/product/FSC-6044/Staple-Setter

Thanks Bamby, I just ordered one. At first it sounded just like a screw driver until I read "The crown of a ¼” staple fits perfectly into the recess of the setting tool." If it is recessed so that it does not slip off of the staple, then it will be well worth the $10 cost, plus $7 shipping.:unsure:

jpr62902, I tried holding the nail set like you showed. It worked some, but the nail set still kept slipping off of the staple. Maybe I'm just not strong enough to hold it in place.:sad:

JEV, what is a slot head screw driver? Is that a flat blade screw driver? If yes, then I tried that as well with little to no success.

I'm seriously thinking about cutting a notch in the end of a flat blade screw driver that will fit over the staple to keep the screw driver from slipping off the staple. Hopefully I'll end up with a hole that looks more like an X than a +.

Thanks for all the suggestions so far. Bob
 
I've acutally ground the staples down with a dremel and then added some of my own brad nails to hold the trim on. On one door I was putting in my basement, it was so bad, I just pulled the trim off, pulled out all the staples and reassembled it.
 
I never use staples on that kind of work. Course, I build my own doors and frames too. Just finished a door and frame for a lady. Frame was white oak. She wanted it painted green. The door itself was pine frame overlaid with cedar panel. I planed the cedar and immediately secured it to the frame and then used polyurethane to fix the color of the wood. I used glue on the interior and and brads to secure. It came out great. She paid and extra 100.00 for the quality without me asking.
 
When I trim a door I don't use staples either. This was a pre-hung door from Lowes. It matched the rest of the doors in the house. Unfortunately the quality on the door was pretty bad with many staples that had not been sunk.

loboloco I really like seeing the work of a true craftsman, and it sounds as if you are one.

Bob
 
You could consider a staple setter, though some don't sound any better than a screwdriver this sounds as if it has real potential.

The crown of a ¼” staple fits perfectly into the recess of the setting tool. Made in China.

http://www.mcfeelys.com/product/FSC-6044/Staple-Setter

I just received the Staple-Setter that Bamby recommended, and it looks like it will do the job. The entire tip of the device is recessed, so the whole staple fits inside the tip, which will solve my problem of the traditional nail set slipping off the staple.

I'll be trying it out soon to see how it works.

Thanks Bamby for a great suggestion.

Bob
 
Top