-
Please be sure to read the rules and adhere to them. Some banned members have complained that they are not spammers. But they spammed us. Some even tried to redirect our members to other forums. Duh. Be smart. Read the rules and adhere to them and we will all get along just fine. Cheers. :beer: Link to the rules: https://www.forumsforums.com/threads/forum-rules-info.2974/
You are using an out of date browser. It may not display this or other websites correctly.
You should upgrade or use an alternative browser.
You should upgrade or use an alternative browser.
oil leak fix on 1982 cj7
- Thread starter m1west
- Start date
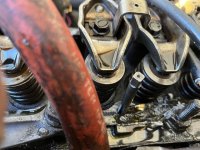
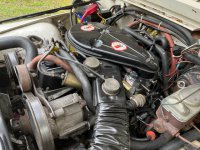
So today, I spent a couple hours removing the original crappy plastic valve cover. What a mess someone made trying to seal it up. It had 2 gaskets, looked like a home made rubber gasket and a fiber gasket. There was a lot of silicone and sealer of every type gooped on everything even a couple rocker arms, and it still had a massive leak.
The whole design is crap, and famous for it. Plastic valve covers held on one side with 1/4" bolts and the other side had big nuts with a flange made on that threaded onto the head studs and pushed down on the flange of the valve cover when tightened. The new aluminum cover calls for tapping 2- existing holes 5/16" to eliminate the clamp nuts, The holes I tapped were receiver holes for a post cast on the valve cover meant to index the valve cover, so when you tightened the flanged nuts, it doesn't push the side of the cover off the gasket. It didn't work. The flange nuts were so loose that I removed them with just a socket and didn't need the ratchet. Next go I will clean it all up and get the new aluminum valve cover installed. I hope this fixes it and I don't end up dropping the pan. It was leaking so bad the previous owner parked it.
The whole design is crap, and famous for it. Plastic valve covers held on one side with 1/4" bolts and the other side had big nuts with a flange made on that threaded onto the head studs and pushed down on the flange of the valve cover when tightened. The new aluminum cover calls for tapping 2- existing holes 5/16" to eliminate the clamp nuts, The holes I tapped were receiver holes for a post cast on the valve cover meant to index the valve cover, so when you tightened the flanged nuts, it doesn't push the side of the cover off the gasket. It didn't work. The flange nuts were so loose that I removed them with just a socket and didn't need the ratchet. Next go I will clean it all up and get the new aluminum valve cover installed. I hope this fixes it and I don't end up dropping the pan. It was leaking so bad the previous owner parked it.
So today I had some time and put the valve cover on. What a pain in the ass. First I used studs so I could get the sealer on the flange then put the gasket on and it would stay where you put it. So I did that, took a few minutes. When I went to put the cover on there was zero clearance and couldn't get it on. Had drill all the holes out for clearance. Got the cover on easily after that. The nuts went right on the 1/4" studs. The 5/16" studs that I had to tap the holes in the head for, you can't get the nuts on, because the casting around it doesn't have enough clearance. I was able to rig a way to clamp that side using the original flange nuts that went on the head bolts with a piece of key stock to bridge the gap to the flange. It worked good enough until my new nuts from McMaster Carr show up. They make a flange nut that 5/16 x 24 that takes a 7/16" socket in stead of 1/2". I have used them on headers for the same reason. Seems like nothing fits as it should anymore. Glad I used studs though. it would have been difficult with lots of screaming and a big mess trying to get bolts in the cover, on the firewall side. You would think a straight 6 in a jeep would be easy to work on. You would be wrong.
Couple days ago the high torque nuts showed up and got them on. I let it set for a few days, then today I put everything back on that I had to remove to do the valve cover, along with a new pcv and ccv. Started right up and after driving it around. its fixed, no more oil pouring. In all I have about 6 hours in a job that shouldn't have taken more than a couple hours. Does the new aluminum cover work, yes but it fought me all the way. I think they should have put a few more vacuum lines on it. 
The next move on it, will be to get it smoged and registered. The transfer case shifting is stiff, so I will change all the fluids to synthetic, check all the drivelines and lubricate and repair as needed. Long range plan. 2-1/2" lift with new black wheels and 33" tires, then new paint and carpet. It gets much better milage than the Dodge so it will be the new bad weather driver. Thinking on selling the Dodge, with the new engine its a great truck that is very capable off road, but $350.00 trips to the cabin ain't gonna cut it.


