
pixie
Well-known member
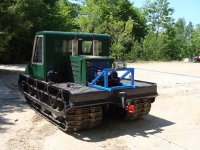
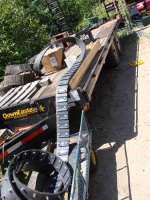
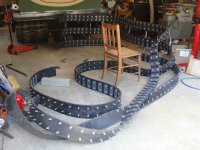
I like having a summer project. It means I have an excuse to stay in the cool garage on those hot days. I wasn't really planning on putting new track rubber on ... that's OK...them's the breaks. It will be great having less scary tracks.
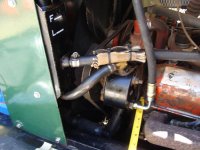
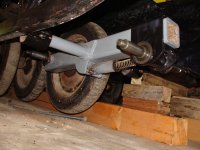
I got the hydraulic winch that I used on my Imp mounted to the Muskeg but the little power steering pump didn't have enough power to run it so it was upgrade time. I did some math and then guessed a lot about which pump to buy. And ordered some regulating valves and new pulley. Still need to get a tank and have some leads on used ones.
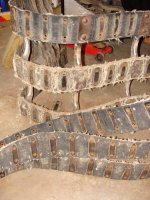
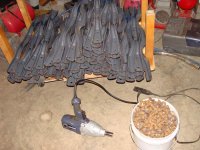
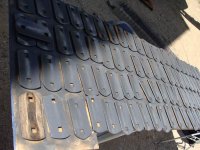
Benz9 has gone thru a lot getting his tracks apart so I feel bad saying that it took me 8-9 hours to strip my track.
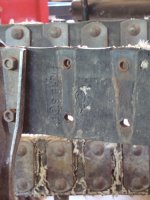
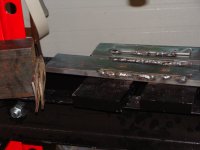
Check the writing on the rubber in one of the pictures.
I got the hydraulic winch that I used on my Imp mounted to the Muskeg but the little power steering pump didn't have enough power to run it so it was upgrade time. I did some math and then guessed a lot about which pump to buy. And ordered some regulating valves and new pulley. Still need to get a tank and have some leads on used ones.
Benz9 has gone thru a lot getting his tracks apart so I feel bad saying that it took me 8-9 hours to strip my track.
Check the writing on the rubber in one of the pictures.

 . Is that from one of your trips to the maple leaf country or do they have CT in your neck of the woods?
 I'll take a pic and show y'all today.

 . Total cost with plastic case, 42$ Canadian, hey!
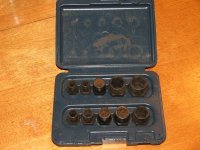


 )
)