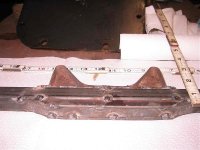
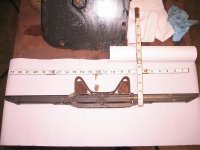
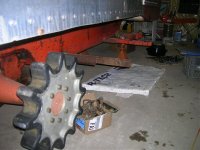
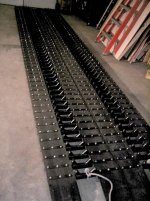
Im building all new grousers for my IMP 1404 WT and tacked up with this prototype. I wont be traveling in deep power mostly grooming a ski trail and hauling fire wood in fall / winter, I thought the drop center style 24" grouser would be better for turning and low or no snow conditions, Also easier on the OC4 rear end. Any comments?
-
Please be sure to read the rules and adhere to them. Some banned members have complained that they are not spammers. But they spammed us. Some even tried to redirect our members to other forums. Duh. Be smart. Read the rules and adhere to them and we will all get along just fine. Cheers. :beer: Link to the rules: https://www.forumsforums.com/threads/forum-rules-info.2974/
You are using an out of date browser. It may not display this or other websites correctly.
You should upgrade or use an alternative browser.
You should upgrade or use an alternative browser.
Imp Grouser construction
- Thread starter IMP
- Start date
Snowcat Pat
Active member
I like your ambition. The way you have it configured it would not be a drop center grouser and that will affect the pitch. That is to say the original belt hole spacing will be too short for the muskeg sprocket without a true drop center. You will have to adjust the hole spacing to get the track to fit the that sprocket. Though it may fit the wide track sprocket which would require the standard 4 inch hole spacing. Getting the pitch to match can be a little tricky, I missed it when I built my first set of tracks from scratch, and I was only 1/16 inch too long, better to be too short for belt stretch. My homebuilt uses the muskeg sprocket and if you are going this way I can help you get the exact hole spacing. Its approx. 4.8 inches, yours may need to be a little shorter for the tire guide bump.
What is that material you have for the tire guide it looks like its rounded on one side-I want some
-Pat
What is that material you have for the tire guide it looks like its rounded on one side-I want some

-Pat
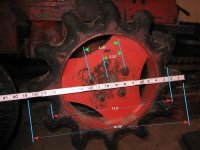
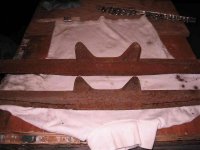
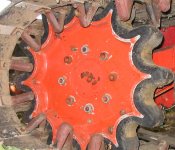
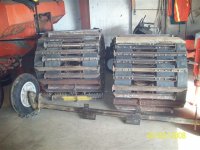
I sure hope I did this right... All my steel is cut, drilled and half tacked together. I have good used conveyor belting I plan to replace all the track belting with. Its heavier, but other local people have told me it works fine for this application. I matched my original grousers(see photo) hight / width but not length. I assumed the original grousers are the correct pitch. Original spacing between grousers is 4" with a 12 tooth drive sprocket. the rubber on my drive sprockets are pretty chewed up and I assumed it was from the poor repair job someone did welding / reinforcing original grousers. They welded .25" flat stock end to end on the grouser, both sides, making them wider and with sharp edges against the rubber drive sprocket... So how do I make sure I get the pitch correct? Sorry, the rounded edge tire guide material was cut off my original grousers. I don't know where you could buy some. But I was a nasty job removing them.
Attachments
Snowcat Pat
Active member
I didn't notice that you wrote that your machine is a WT. The sprocket you show had me confused for a bit, it isn't the muskeg sprocket for drop center grousers. I was thinking you had drop center grousers to begin with. I had a big explanation all typed up but it doesn't apply. The bottom line from what I can see is you doing fine if you use that sprocket, with your new grousers and 4 inch spacing on the belt holes.
Could you show a photo of your old grousers?
Could you show a photo of your old grousers?
Pat I would be interested in learning from your "big explanation all typed up" if you don't mind. What is the method for determining pitch when the tire guide contact diameter changes? Imp- those look like A-Model Spryte grousers alright. Is there a chance the machine was retracked with them?
mkntrakes
Active member
are the sprocket in the pictures the sprocket on your machine? not sure but it seems to me all wt imp axles had a 8 bolt pattern not 5 do you have any pictures of rear axle assemble?the cleats in pictures look to me as all terrain cleats that where where only 24,28,30 inch wide depending on application verses the snow cleats that were 36inch
IMP. Also if you can and I dont know BUT if you can I would recommend fliping the sprocket around. So the back is now facing you. I dont know if they are spaced diffrently from front to back but if you can you will get alot more life out of it. Its starting to hook.
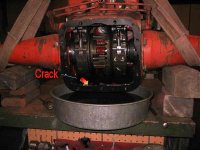
mkntrakes. Yes, these are my sprockets and this machine did not have factory belting on it when I got it. original cleats were 32". Its an early 1970's ser#600 machine. I can take a better photo from the rear tomorrow if you want it. Does anyone know what the factory track belting length is supposed to be for a Imp of this configuration? I measured 18' 3" of original track belting before I dismantled them.
Attachments
Snowcat operations, Yes I can, They have already been flipped once in there life time and I plan to do it again. They are already really deteriorated with chunks missing and metal showing. If I can just get this rig running and use it for once and see how much fun it is, next year I will be ready to spend the $1000. to get the sprockets rebuilt.
Sounds like a good plan. HOW MUCH FUN? Remember when your first girlfriend didnt stop you? Its kinda like that. Especially if she had big........
mkntrakes
Active member
if you get some time take a picture of axle to extension hosing?you may also want to measure the width of the sprocket they may be 1200 sprockets my suggestion on belting is lay them out before cutting take a silver pencil and mark out pitch of 4inch remember that is the center of the hole also if you are going to use in all seasons do a over lap splice and not lacing's this will be a lot stronger and no chance of ripping lacing's out of belting
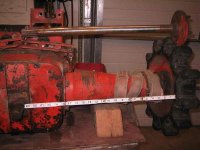
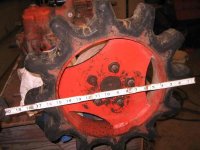
Mkntrakes, Here is a photo of my axle extension housing and my spare axle resting on top. The axle is 25.5" end to end. also a photo of my sprocket. I like your overlap suggestion to join the belts. Would you overlap 4" and terminate the belt ends under cleats? Or overlap and bolt between cleats? I noticed on my old track the lacings were ripped out in places. Are there any disadvantages to overlap vrs lacings? I have already purchased lacing's but would rather go with whatever is stronger.
Attachments
mkntrakes
Active member
learned something new never knew they made a wide track imp with 5 lug axle's.lap three bars cut 1/2 inch past last set of holes this works very well only disadvantage is that it is a lot harder to take track on and off but then there is nothing worse than having your track laying behind you with the bolt ripped out of the lacing's
learned something new never knew they made a wide track imp with 5 lug axle's.lap three bars cut 1/2 inch past last set of holes this works very well only disadvantage is that it is a lot harder to take track on and off but then there is nothing worse than having your track laying behind you with the bolt ripped out of the lacing's
My Imp is the wide track and a mid 70's sometime, don't know the exact year, but my sprocket looks different than yours, does anyone have thoughts on that?
Is there a chance that his transmission and sprocket was changed out with an older Imp?
Attachments
My Imp is the wide track and a mid 70's sometime, don't know the exact year, but my sprocket looks different than yours, does anyone have thoughts on that?
Is there a chance that his transmission and sprocket was changed out with an older Imp?
Here's a 1200 sprocket...same bolt and tooth count...
Attachments
Re: Track from scratch Job finished!
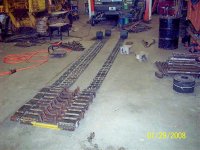
I dont think I would recommend to anyone to build your own tracks unless you have allot of time and like that sort of work. That was a big job and Im glad its done. I am happy with the way they turned out. The conveyor belting was used and free and the steel cost me about $350. bolts was 160. I went through 2.5 tanks of welding gas and my electric bill about doubled for a few months. But It sure was fun driving my 1404 IMP for the first time today.
I dont think I would recommend to anyone to build your own tracks unless you have allot of time and like that sort of work. That was a big job and Im glad its done. I am happy with the way they turned out. The conveyor belting was used and free and the steel cost me about $350. bolts was 160. I went through 2.5 tanks of welding gas and my electric bill about doubled for a few months. But It sure was fun driving my 1404 IMP for the first time today.
Attachments
Imp , Nice job on those tracks !! How many hours to construct your tracks?? I just finished mine and I figured 60-70 hrs into them ,for narrowing them (8 inches each side) and adding anther 5 inch belt to the inside. 68 grousers on each side ,1450 bolts roughly, and about 14 broken or cracked grousers on each side ..I dont recomend drilling these grousers!
 How many hours to construct your tracks?? I just finished mine and I figured 60-70 hrs into them ,for narrowing them (8 inches each side) and adding anther 5 inch belt to the inside. 68 grousers on each side ,1450 bolts roughly, and about 14 broken or cracked grousers on each side ..I dont recomend drilling these grousers!
Attachments
Its hard for me to even guess the number of hours. I did it over a period of 4 months. But I would say 2 or 250 hrs. The grouser pattern I chose required allot of steps to construct each one from scratch. When you multiply each step by 110. It adds up. I had about the same number of broken / cracked grousers as you that were unfixable. The only thing I reused was the tire guide. Its a good job finished!!

