• Please be sure to read the rules and adhere to them. Some banned members have complained that they are not spammers. But they spammed us. Some even tried to redirect our members to other forums. Duh. Be smart. Read the rules and adhere to them and we will all get along just fine. Cheers. :beer: Link to the rules: https://www.forumsforums.com/threads/forum-rules-info.2974/

1989 Tucker 1644c

1boringguy

Well-known member
GOLD Site Supporter
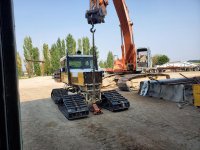
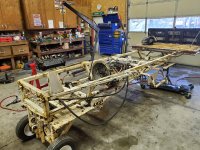
I'm sure I'm going to end up thinking this winter that I should have started this project way sooner than this, but here it goes.

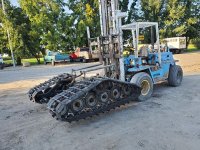
Resto-mod? Restoration? I don't know, maybe a retro-mod. I'm sure I have a pair of PRE 1500 205cm from back in the day I could use for skis. I'd have the only 1624 in existence.
20200902_142524.jpg
 
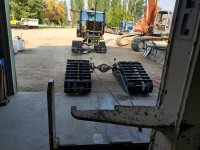
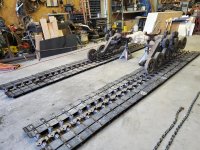
So first order of business is the track journals.

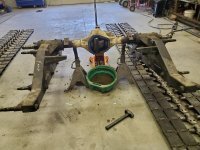
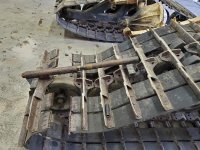
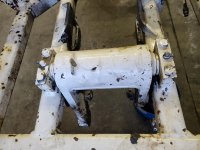
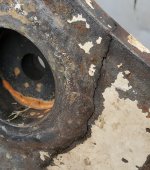
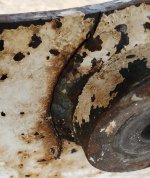
When jacked up off the ground side to side play seems excessive and sitting on the ground can see that outer edges of the track are higher than inner edges. Also as measured with a straight edge across both tracks. That would indicate journal wear. Since in the end it will get a coat of paint, complete removal of diff housings seems appropriate.

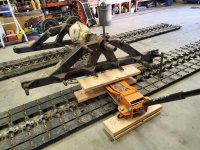
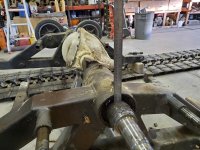
Checked freeplay movement between track carriers and diff housing as shown. Fronts weren't as bad as the back when checking by hand before disassemblely, backs were the worst. Haven't got the back all apart yet but will share numbers later. The fronts weren't as bad as I thought. Much of the side to side movement is simply the track carrier moving side to side on the journal from snapring to to snapring stops. I would never have guessed that the track carriers were meant to have that much sloop, but then we're not talking 60mph.

Plan to have the gear shop inspect/repair the diffs before reassembly. Was considering installing lockers too thinking front and rear were open diff. The front is open, haven't cracked the rear yet, but seems to be spooled. So might decide I'm ok with 3 tracks driving full time and skip the front locker. We'll see.

Also, handy little track tool that came with this cat, works good, wouldn't be hard to make.
 

Attachments

  • 20200829_170333.jpg
    20200829_170333.jpg
    137.8 KB · Views: 437
  • 20200829_172441.jpg
    20200829_172441.jpg
    128 KB · Views: 442
  • 20200829_195739.jpg
    20200829_195739.jpg
    162 KB · Views: 433
  • 20200902_080854.jpg
    20200902_080854.jpg
    146.1 KB · Views: 432
  • 20200902_080903.jpg
    20200902_080903.jpg
    120.9 KB · Views: 426
  • 20200902_144348.jpg
    20200902_144348.jpg
    110 KB · Views: 437
  • 20200902_185058.jpg
    20200902_185058.jpg
    125.2 KB · Views: 422
  • 20200902_190045.jpg
    20200902_190045.jpg
    214.9 KB · Views: 431
  • 20200903_102857.jpg
    20200903_102857.jpg
    142 KB · Views: 437
Looks like the right equipment to make that job easy.

You going with the bearing tape or the expensive uhmw sleeve repair for the slop?
 
Looks like the right equipment to make that job easy.

You going with the bearing tape or the expensive uhmw sleeve repair for the slop?

Yea i need all the easy i can get, because when I'm doing it, even easy ain't that easy.

I talked to Clyde at Tucker a couple times about the journals. I'm inclined to do the sleeve, thinking I'm going to have this cat around for a long time. Tucker can sell and install the new sleeve journals (same ones used on new cats today) onto the diff housings. And of course they have the UHMW sleeves. But seems to me, the trouble with that as an entire fix, is that half the wear is in the track carrier tube part of the journal assembly, and without replacing that, while going the sleeve route, one has only solved half the problem. Tucker would also sell me the tube piece thats welded into the track carrier but would not install that into the carriers. Guessing, their busy time of year, don't have a jig for that? Perhaps either I could do both ends or the local machine shop I use could.

So I stopped by the machine shop with pictures in hand. My thought is if the wear isn't as bad as I expected it to be, and not much material would have to be removed to true them up, then maybe they could turn the journals right on the diff housings and the tubes right in the carriers. Would save a lot of trouble. Seemed like a long shot, but I have taken them a lot of odd requests over the years and we often figure something out. They laughed. They make and repair large mining equipment, and do similar things to much larger pieces, so just bring them by when I have them all apart and let them have a look at the actual pieces. Cool, hoping I get them there tomorrow or Tuesday. Depending on how much material has to be removed, I was thinking about wrapping the entire journal with the tape, essentially creating a sleeve and easy to replace. Or the machine shop said they could make sleeves for whatever gap is created.

So right now I still need to see what the maximum out of round is on the rear tracks and how much material has to be removed, and consequently how much that will take from the thickness of the original parts and make decisions from there. I'm definitely hoping to machine the original parts, and add UHMW in one form or another. We'll see.
 
Probably people are going to be thinking tmi, but thinking someone now or in the future might be looking at the same problem, so I'll share anyway.

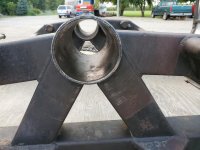
Track carriers and journals.
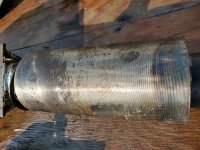
The tube in the carriers that I have are the same as Tucker uses on the new machines today. The journals on the diff housings used today are smaller OD and this allows for the sleeve. New and old are the same width. The sleeve is made up of plastic composites that Tucker has made, and is 5.073 OD and 4.765 ID and 10 17/32 long. Cost of parts for the new size journals and sleeves for all four tracks is just under $2,800.00 So thats the background.

Measuring with a bore gauge and caliper yielded the measurements in the photo below. Normal wear should elongate the ID of the tube of the track carrier vertically and the OD of the journal horizontally.

Of note from the chart. All of the tubes in the carriers are elongated horizontally rather than vertically. I can only attribute this to being pulled from the wwlding into the carrier framework. At any rate doesn't indicate excessive wear.

The journals are elongated horizontally which would indicate some wear vertically, ranging from .010 to .024.

Anyway indications are that the wear is very small compared to the gap that is the factory tolerance when this cat was made, generally about .015 compared to. 090.

I measured the thickness of the journal at .280. To turn the journals down to 4.765 ID of the sleeve, would leave the journals just over 1/8 th inch thick. Doesn't seem good to me.

Conclusions,; the wear on my journals/carriers is small. The gap from the factory (most of the machining marks are still on the parts) is surprising to me. The parts used today are a press fit and are greaseless, fyi. If I replace the journals and used the new style sleeve, I'll still have roughly .025 to .050 gap between the sleeve OD and my carrier ID. That seems like a lot compared to a press fit. My machine shop said they use UHMW to machine wear bushings all the time with good results. If I put it back together the way it is, it will be near new tolerances as is. If I use the UHMW tape to fill the gap and it gets beat out in time am I any worse off the original tolerances? McMaster-Carr has UHMW tape available in various thickness from .005 to .065. Wrapping the entire journal to create as tight of a fit as possible and let it self conform with use, seems like the best option for my conditions.
 

Attachments

  • 20200916_234502.jpg
    20200916_234502.jpg
    103 KB · Views: 316
  • 20200905_194356.jpg
    20200905_194356.jpg
    93 KB · Views: 334
  • 20200905_102400.jpg
    20200905_102400.jpg
    152.9 KB · Views: 326
The wear should be all on the left and right top one side bottom the other. Should be little to no wear in the middle section.

Tape is cheap and a tighter fit even if you had to re do very few years but I don't think you will have to.

Serviceable upgrade that won't need to be done until the baby can do next when old enough!
 
Another trick I do each year is to jack the axles and let the carrier hang. I use a needle greaser to blast lubriplate in the tolerance areas. The grease fittings aren't in the correct spots to get the grease where you need it. A few extra zerks in better locations could help!
 
Can you make your own sleeve that will take into account the wear ?????
Basically build each sleeve to fit whats there now.....
This approach should give you many years of good service

I know this would be a bastard part.....but the cost savings could be a bunch of $$$$$$

Just a thought...
 
Another trick I do each year is to jack the axles and let the carrier hang. I use a needle greaser to blast lubriplate in the tolerance areas. The grease fittings aren't in the correct spots to get the grease where you need it. A few extra zerks in better locations could help!

We do the same thing when greasing the king pins (front end) of trucks. Gets the grease clear around the pin, lasts twice as long. Good thought, might be worth adding a couple zeros while I have the carriers on the shop floor.
 
Can you make your own sleeve that will take into account the wear ?????
Basically build each sleeve to fit whats there now.....
This approach should give you many years of good service


I know this would be a bastard part.....but the cost savings could be a bunch of $$$$$$

Just a thought...

Thats basically my thought with using tape of various thickness. Machine shop could turn sleeves, but still have a round sleeve for an elongated hole and they would be pretty thin.
 
Toss the track frame in the Mill and bore the hole to a nominal round diameter and then do the custom bushings

UHMW is really great stuff
Basically just a really dense polyethylene
Add grease and it will last forever
 
if you decide to change the journals and go poly sleeves PM I have 8 weld on journals and sleeves and 4 internal snap rings on hand.

I have seen lots of journals and yours are above average. the plug weld suggests to me some one has been there.

Mike
 
Actually
I have a plan
Turn the uhmw bushings so the can be pressed into the track frame and conform to the shape of the existing bore
A tight fit ...real tight

Then bore the poly out with the unit assembled to get a nice slip fit over the journal
 
if you decide to change the journals and go poly sleeves PM I have 8 weld on journals and sleeves and 4 internal snap rings on hand.

I have seen lots of journals and yours are above average. the plug weld suggests to me some one has been there.

Mike

From the factory they were never plug welded?
 
Actually
I have a plan
Turn the uhmw bushings so the can be pressed into the track frame and conform to the shape of the existing bore
A tight fit ...real tight

Then bore the poly out with the unit assembled to get a nice slip fit over the journal

That would be the ultimate fit, but for lack of tooling and expertise on my part I would have to have the machine shop do that. Probably just going to try the tape in the shop here first and see how that turns out.
 
Still haven't figured out what makes it keep time, but it's getting easier to get at :confused2:
 

Attachments

  • 20200909_080157.jpg
    20200909_080157.jpg
    148.1 KB · Views: 313
  • 20200913_192835.jpg
    20200913_192835.jpg
    162.1 KB · Views: 309
At the moment I'm thinking I'm going to powercoat basically everything from the cab down. Does anyone know if there is anything internal on these two pieces that would be hurt by 400°F?
 

Attachments

  • 20200917_194659.jpg
    20200917_194659.jpg
    106.9 KB · Views: 289
  • 20200917_195832.jpg
    20200917_195832.jpg
    49.9 KB · Views: 281
What color(s) are you thinking about? Definitely an 80’s paint job. Reminds me of the cool white wheels on my ‘88 Beretta.
 
What color(s) are you thinking about? Definitely an 80’s paint job. Reminds me of the cool white wheels on my ‘88 Beretta.

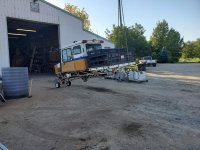
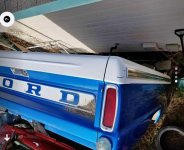
Haven't made up my mind for sure yet. White was the original color from Tucker for this cat. I'm not even sure the two tone was from the factory since its white behind the fuel tank, back of the cab, but the two tone nor the blue reflective tape that says BC Tel in it, extents around the cab behind the fuel tank.

I kind of want to stay with the white, and was going to LineX the whole bottom white but apparently white is the only color that works really bad as LineX. My body shop buddy also said powdercoat tends to get in the nooks and cranys better and so stops the rust and lasts better in the spots that are tough to get at. So powdercoat it is.

I'm thinking white with black accent, something along the lines of the corvette and Pete below. Or white and a blue, as the blue on the side of the bed looks. Its kind of the right era.
 

Attachments

  • 20200921_215633.jpg
    20200921_215633.jpg
    97.1 KB · Views: 411
  • 20200921_142909.jpg
    20200921_142909.jpg
    39.8 KB · Views: 411
  • 20200921_222040.jpg
    20200921_222040.jpg
    96.6 KB · Views: 397
That would be the ultimate fit, but for lack of tooling and expertise on my part I would have to have the machine shop do that. Probably just going to try the tape in the shop here first and see how that turns out.

I can see that.

Guess I take having the lathe and mill at my command too much for granted.....

My project would not be very far if it were not for the machine tools...

The tape should work fine.....This is not a high speed part...so as long as you can get the thing tightened up and get grease in it....:thumbup:
 
Progress Report.

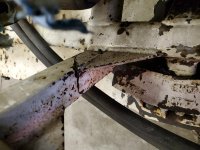
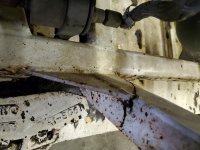
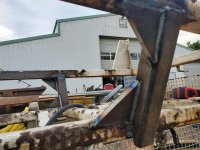
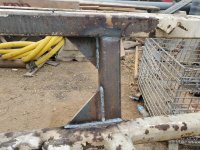
I think the c model came out about the second half of 1988. Anyway I've been pleasantly surprised that some of the issues I've read about on the earlier Tuckers, like frame tubes that are open at the top and unable to drain at the bottom, had been dealt with by 1989. Aside from surface rust, compliments of BC winter road de-icer, I've only found one real issue to this point. These frame uprights that are at the point of the front motor mount. Clyde said they see some machines with this problem, due mostly to the rigidity of the engine/trans mounts but that the blade might also be a contributing factor. They cut them out and replace with thicker wall tubing, so I did the same.

The gear shop said the diffs look great, but since it's 30 years old we're going to put bearings in while they are out, as prevention medicine.

Weller truck parts shop pulled the pan on the allison AT545 and said there was hardly even a shaving on the magnetic plug, like its had very little use. So new filter and oil and that should be good for a long time to come.

The machine shop said the same thing about the block, really no wear. Same for the parts when I pulled it down. Felt bad about pulling parts out of an engine that looked so good. Ahh but such is the road on to bigger and better things.

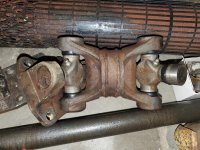
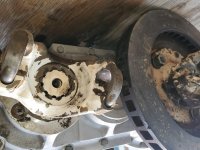
Also interesting, the drive shaft between the transmission and the transfer case is very short, not possible for a slip joint, so the yoke on the transfer case is left free to move slightly to accomplish that. Note from paint that a bolt was never used.

All in all pretty happy about these findings so far.
 

Attachments

  • 20200911_161343.jpg
    20200911_161343.jpg
    106.8 KB · Views: 387
  • 20200911_161353.jpg
    20200911_161353.jpg
    102.5 KB · Views: 380
  • 20200923_181036.jpg
    20200923_181036.jpg
    103.1 KB · Views: 376
  • 20200923_180951.jpg
    20200923_180951.jpg
    155 KB · Views: 382
  • 20200914_143847.jpg
    20200914_143847.jpg
    143.2 KB · Views: 379
  • 20200914_140826.jpg
    20200914_140826.jpg
    104.7 KB · Views: 387
Haven't made up my mind for sure yet. White was the original color from Tucker for this cat. I'm not even sure the two tone was from the factory since its white behind the fuel tank, back of the cab, but the two tone nor the blue reflective tape that says BC Tel in it, extents around the cab behind the fuel tank.

I kind of want to stay with the white, and was going to LineX the whole bottom white but apparently white is the only color that works really bad as LineX. My body shop buddy also said powdercoat tends to get in the nooks and cranys better and so stops the rust and lasts better in the spots that are tough to get at. So powdercoat it is.

I'm thinking white with black accent, something along the lines of the corvette and Pete below. Or white and a blue, as the blue on the side of the bed looks. Its kind of the right era.

I was thinking of doing this kind of paint on my snow cats.
https://www.google.com/url?sa=i&url...ved=0CAIQjRxqFwoTCLD4_6n3hOwCFQAAAAAdAAAAABAE
 
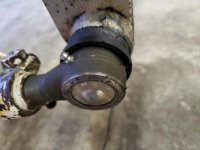
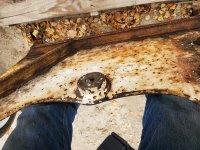
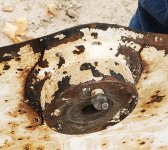
Found another problem. Glad to find this one in the shop and not a failure 20 miles out on a trail. I'm thinking maybe I'll have to just cut a section out of the 5th wheel plate, maybe a foot square, and replace that whole area. Thought about v-ing it out, welding it, and then cutting a donut out of 1/2" plate and over laying that on the bottom side. The metal right around the bushing has got to be fatigued right? Anyone see this before? What was your solution? Also rear 5th wheel has about .015 wear in the male and female parts, so needs to get cut and bushing installed anyway.
 

Attachments

  • 20200925_180340.jpg
    20200925_180340.jpg
    171 KB · Views: 360
  • 20200926_220043.jpg
    20200926_220043.jpg
    157.4 KB · Views: 363
  • 20200926_220257.jpg
    20200926_220257.jpg
    202.3 KB · Views: 355
  • 20200926_220316.jpg
    20200926_220316.jpg
    194.9 KB · Views: 360
Getting a little stumped on this one. Maybe someone here has some knowledge/experience on this.

Neither parts nor service depts at Tucker had any real experience with this issue.

First, I decided to build the chrysler 360 thats in my 1644 to a 408 stroker rather than go other routes. The 360 is an externally balanced engine, and the stroker will be an internally balanced engine. A new damper for an internally balanced crankshaft solves the front end. The rear of the crankshaft has a counterweight spacer that bolts up to it, and the flexplate with that, and then the torque converter bolts to the flex plate.

I need a spacer thats balanced rather than weighted. I could have the weighted one cut down and balanced, but the internal parts from the 360 look very good and perhaps someone might reuse some of them, so I kind of hate to destroy a rare as hens teeth part that goes with that crankshaft to an at545. So far no luck finding another part to cut and balance, or really anyone having any knowledge of this. I'm sure the machine shop i use could make one if nothing else, but thought I'd see if anyone here had experience with this.

Also heres the bell housing, don't know if that number will help anyone chasing that part or not, but share in case.

My 2 cents, I am a Dodge guy, Go to pick and pull and get a 5.9 Magnum. They make more power, have a roller cam( no more flat cam lobes plus more power potential ), don't leak oil and the flywheel is available from Ebay to mate it to your transmission. Just make sure you get one from a standard shift vehicle or jeep to have a crankshaft wth the pilot hole drilled like the old school motor you have. If you can't find one there is one made that presses in the bigger register for a torque converter, has a roller bearing for the pilot bearing but you have to shorten the input shaft on you're transmission an inch. Everything from you're motor will fit except the intake manifold, flywheel and harmonic balancer. I used the Edelbrock RPM air gap, Demon mechanical carb. headers and a cam ground 110 degree lobe centers .500 lift and 230 degrees at .050. I am very happy with it and it makes a lot more power than the old LA 360 that the cam went flat and ruined the whole engine in a few miles. ( a few years back I built a Magnum 408 stroker with ported iron heads and a bigger cam at 250 degrees at .050 and 108 degree centerline. 10:1 compression, still run on pump gas ( premium ) I duplicated a build from Mopar magazine. That motor made 550 hp at 6000 rpm and 510 ft pounds of torque at a little over 3000 rpm to 5000. You most likely don't want to turn that much rpm in a snow cat. a cam around 218 degrees @.050 and 110 degree lobe centers would make a lot of low end, just watch you're compression ratio on that short of a cam with tight lobe centers.
 
Top