• Please be sure to read the rules and adhere to them. Some banned members have complained that they are not spammers. But they spammed us. Some even tried to redirect our members to other forums. Duh. Be smart. Read the rules and adhere to them and we will all get along just fine. Cheers. :beer: Link to the rules: https://www.forumsforums.com/threads/forum-rules-info.2974/

1971 Jeep CJ-5 Build

Eric L

Member
This project actually started several years ago, and has been progressing slowly since then. I brought it home this past weekend from our old house in Sonoma County CA.

Short version of how it all started:

My buddy Mike has a Jeep, and he wanted to restore it. I offered him a better body that I had laying around, as his was real rusty and full of bondo. Mike removes old body and sets it out behind the dumpster...

...My wife finds out that theres a "free Jeep" over at mikes shop. And the fun begins..

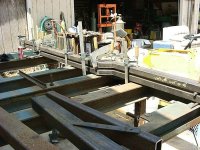
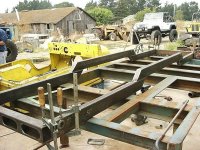
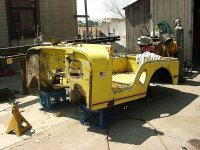
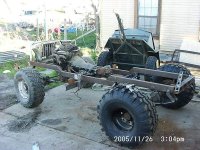
Start with one bare Jeep body, make a few notes, build a new frame taking into account some future modifications
 

Attachments

  • 08040002smaller.jpg
    08040002smaller.jpg
    95.9 KB · Views: 960
  • 08040010smaller.jpg
    08040010smaller.jpg
    120.1 KB · Views: 948
  • 08040004smaller.jpg
    08040004smaller.jpg
    91.7 KB · Views: 933
Hey Eric that yj in the background how much lift is on it. what size tires are on it?? I have a yj with 4in lift and 33in tires yours looks cooler!!
 
mbsieg said:
Hey Eric that yj in the background how much lift is on it. what size tires are on it?? I have a yj with 4in lift and 33in tires yours looks cooler!!

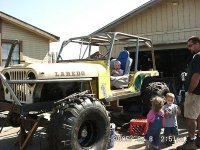
The YJ is not mine, It's a friends who had stopped over to check progress on my project and talk to me about doing some welding for him. It's probly got 9" of lift :confused2: 4" springs over the axles with longer shackles. 37" tires (Goodyear MTR).

Eric
 
I had a 76 CJ-5 when I went to school.. was always going off road.. and getting stuck. Had to rebuild the engine after breaking an engine mount and poking a hole in the oil filter.

Went one whole winter using an Army poncho as my jeep top.. had to wear my Army coat too(cold). Luckily I was in Army Rangers in ROTC when I was in school.

While cruising around one day w/ a group of friends.. a backfire caught the gas tanks breather hoses on fire. We didn't even know until the car next to us yelled at one guy in the back seat.. he stood up and yelled "We're on Fire!". I jumped the curb to get out of the road(we were stopped at a traffic light). A man came up and gave me a small fire extinguisher.. good enough to put it out. Of course a fire engine showed up(afterwards).. and sprayed the whole inside of the jeep down.

I check the main gas lines.. started it up.. we all climbed back in and left for home. I rebuilt the whole backend w/ 1/4 steel to support the roll bars.. enclosed all the gas lines w/ radiator heater hose.

I was always working on something.. but it was a fun experience.
 
Eric L said:
...My wife finds out that theres a "free Jeep" over at mikes shop. And the fun begins..


Free Jeep:yum: :yum: :yum: :yum: :yum:


No such thing.

Jeep=

Just
Empty
Every
Pocket


All bs aside, what happens when you try to register or title it? In other words how do you get a VIN?:weneedpic
 
I've got an '81 sitting next to my shop in about the same condition....:pat: One day I might put it together....:whistle:
 
Sorry, I been gone for a bit with a PC issue.

The Title and VIN can be worked around, either by taking it in and getting a new vin assigned, or by screwing a license plate from another rig onto it.

Heres more pics...

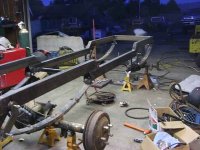
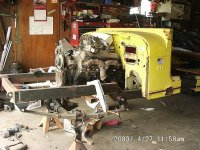
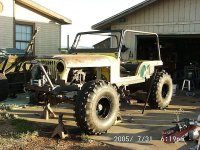
next add axles, a motor, trans, and tranfercase... cut the body in two and set on the frame to see if its all gonna work... note the 12" gap in the rocker panel area.
 

Attachments

  • 11170015.JPG
    11170015.JPG
    37.6 KB · Views: 858
  • 04270002smaller.jpg
    04270002smaller.jpg
    102.7 KB · Views: 867
  • 11260016smaller.jpg
    11260016smaller.jpg
    100.3 KB · Views: 858
Good pics Eric. Keep em coming as you progress. :thumb:
 
I don't know the specs on the Unlimited Wrangler, but yeah ...kinda.. her wheelbase is 100" vs. stock @ 81", the body is stretched 12" in the door area to allow people taller than 5'-4" to drive it, and still have room for a rear seat for the kids.

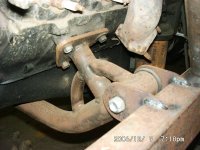
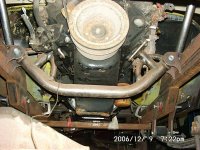
Heres what the motor mounts look like. I wanted to keep the attachment point as close to the frame because I've seen a lot of rigs where the motor has pushed the frame rails outward with the leverage/weight. I dont know if a person has to jump the rig, or how high of a launch it takes to do this. The isolator is a universal polyurethane bushing, much like a leaf spring bushing.
 

Attachments

  • 12090001smaller.jpg
    12090001smaller.jpg
    64.7 KB · Views: 837
  • 12090008smaller.jpg
    12090008smaller.jpg
    95.5 KB · Views: 835
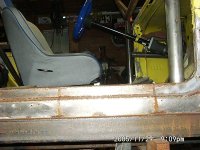
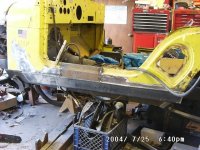
heres the 12" stretch. you can see the welds by the rusted area, AKA Heat Affected Zone or HAZ.

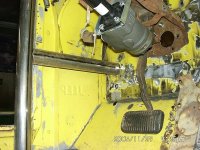
The tube at the rocker panel is 3X3 square tube, this will serve several purposes. It acts as a straight edge to keep the splice in line, it replaces a bunch of rusty sheet metal. This tube will be a significant structural part when its all tied together. The door opening looks real big, but it's still a smaller opening than a CJ-7, and it keeps the classic lines.

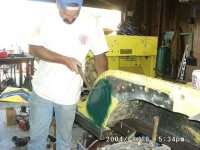
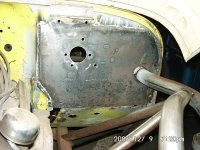
In the last pic you can see the end of the rocker tube, and I'm working on the area where the fuel filler hole used to be. The green paint was all I had around to give it some gloss to see how bad things were going.
 

Attachments

  • 11290002smaller.jpg
    11290002smaller.jpg
    86.5 KB · Views: 806
  • 07250007.JPG
    07250007.JPG
    110.1 KB · Views: 792
  • 08180006.JPG
    08180006.JPG
    43.7 KB · Views: 817
Next we start building the roll cage

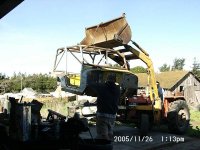
Material is 2.00" OD x .120" wall HREW tube on the main cage.. other pcs will be 1.5 or 1.0. at this stage there is nothing tying it to the frame permanently, this will happen later in the project. I needed the cage to hold it all together long enough to remove the body for some work to be done in areas that will not be accessible later. last pic is mostly completed cage being set off with the FEL... and yes, ....I know theres no less than 10 safety violations in that pic, but we stayed out from under it.

Eric
 

Attachments

  • cge2.jpg
    cge2.jpg
    94.3 KB · Views: 777
  • cge3.jpg
    cge3.jpg
    79.1 KB · Views: 756
  • cge1.jpg
    cge1.jpg
    110.8 KB · Views: 783
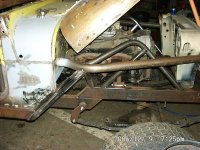
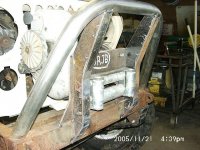
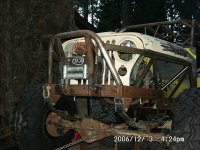
Here's some shots of the tube work forward of the firewall and the winch mount.

The tubes lust below the hoodline pass through the firewall and tie into the main cage. The tubes weld off to the firewall to seal and tie the body to the cage.

there will be more added later, including a removable bar over the engine, but this is the main structure.
 

Attachments

  • front1.jpg
    front1.jpg
    77.4 KB · Views: 729
  • front2.jpg
    front2.jpg
    91.3 KB · Views: 733
  • front3.jpg
    front3.jpg
    89 KB · Views: 718
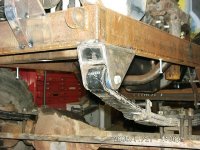
winch mount...and new spring hangers, I hated the old ones, which were standard CJ-7 issue.
 

Attachments

  • winchmount.jpg
    winchmount.jpg
    76.8 KB · Views: 722
  • winchmount1.jpg
    winchmount1.jpg
    87.5 KB · Views: 715
  • new hangers.jpg
    new hangers.jpg
    69.1 KB · Views: 710
mbsieg said:
You do some damn fine work !!!!!! I envy you and your skills.

Thank you :tiphat: I've been doing it for a bit.

Most leaf springs for these things (Jeeps and 4X4s) are made in Canada these days, and have been for quite some time.. I used to know the name of the company that makes 'em but I cant remember it right now.

Eric
 
cj7 said:
What springs are you using on your SOA?

Those are 2" or 2.5" BDS YJ springs. Theyre not the greatest (bestest?) but they're cheap for me (I get the hook-up) and I needed something to start with. the shackles and hangers are by me... well, the fixed end of the rear is still a CJ-7 hanger, and it doesnt bother me as much as the fronts did cause I cant see them as easily. I dont like the way the YJ spring bushings have a different radius than the bracket.

Eric
 
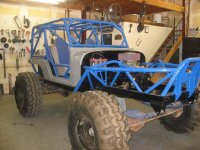
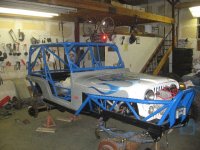
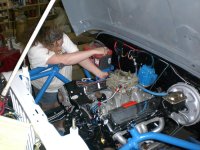
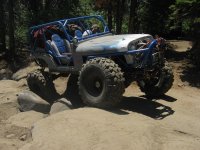
A blast from the past.. I actually finished it.. here's some pics..
 

Attachments

  • bodydone.jpg
    bodydone.jpg
    77.1 KB · Views: 341
  • grillhood.jpg
    grillhood.jpg
    251.6 KB · Views: 342
  • CIMG0013smaller.jpg
    CIMG0013smaller.jpg
    128.5 KB · Views: 334
  • IMG_2967smaller.jpg
    IMG_2967smaller.jpg
    99.3 KB · Views: 341
Nice setup!

How do I get a ride in the Tucker :D I'm just 15 minutes down the hill from you.

I grew up around a '70 CJ5, and bought it back from the guy who got it from my Dad. It's gone now. But, you are totally correct; those short doorways and limited leg room were a bummer.
 
Nice setup!

How do I get a ride in the Tucker :D I'm just 15 minutes down the hill from you.

it still needs some love, but shoot me a PM for my contact info


Very nice Eric L !:clap: Glad you stopped by , Where ya been ?

Been stayin' busy, work is steady.. still think about all you guys here.. Tucker is coming into the shop real soon for some much needed love and $$. I'll be posting up more when I get a little further along.

Eric
 
Top