• Please be sure to read the rules and adhere to them. Some banned members have complained that they are not spammers. But they spammed us. Some even tried to redirect our members to other forums. Duh. Be smart. Read the rules and adhere to them and we will all get along just fine. Cheers. :beer: Link to the rules: https://www.forumsforums.com/threads/forum-rules-info.2974/

1968 Tucker 442 New to Me

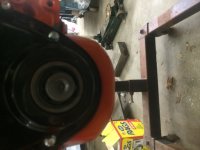
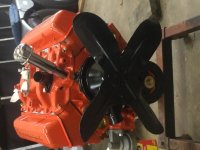
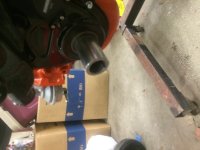
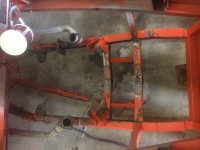
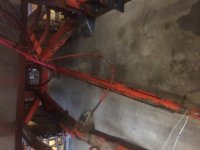
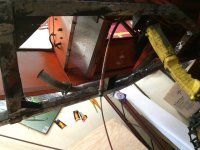
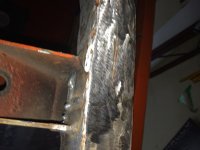
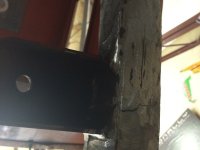
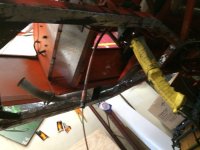
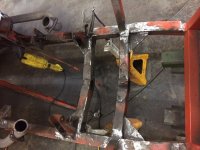
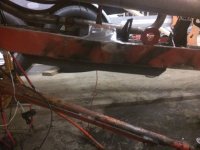
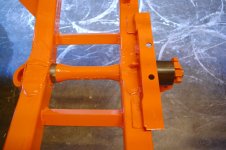
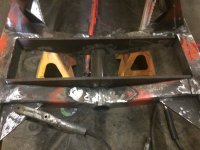
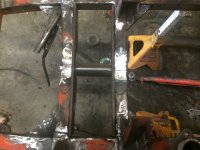
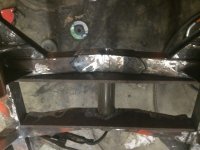
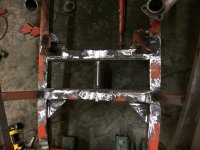
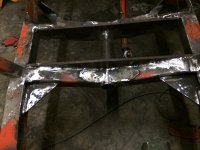
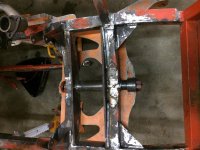
Little more progress.

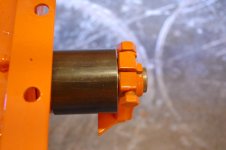
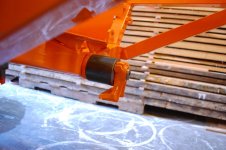
Though you guys would appreciate this tool a guy on line made and rents. Doesn't seem to be a lot of old chevrolet v8 tuckers but if you have an old small black this may be useful.

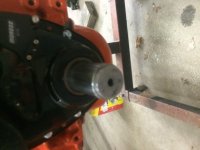
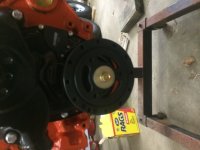
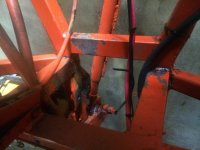
Chevy only started threading the crank on the chevy 283 in 1968. Prior mine and others are just pounded on the shaft. As people built the motors they started having issues especially if you add pulleys etc. My hydraulic drive runs off the balancer with a pulley bolted to. Was concerned it would be an issue over time and my balancer was junk. Rubber was cracked. Got a new one from Jegs and rented this tool for 30$ to drill and tap crank. 10 minute job.

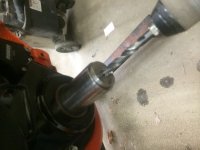
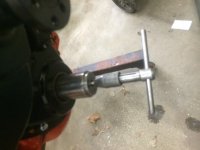
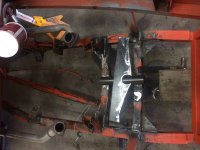
Came with taps, drill, bore guide, and a pusher and puller tools.

You can rent it here: Jerry Herbison <actionenterprise@yahoo.com>
Put Drill Guide in subject line.
 

Attachments

  • IMG_1272.jpg
    IMG_1272.jpg
    45 KB · Views: 492
  • IMG_1273.jpg
    IMG_1273.jpg
    47.9 KB · Views: 493
  • IMG_1274.jpg
    IMG_1274.jpg
    43.7 KB · Views: 485
  • IMG_1275.jpg
    IMG_1275.jpg
    39.8 KB · Views: 484
  • IMG_1276.jpg
    IMG_1276.jpg
    51.7 KB · Views: 481
  • IMG_1277.jpg
    IMG_1277.jpg
    43.9 KB · Views: 477
  • IMG_1280.jpg
    IMG_1280.jpg
    55.6 KB · Views: 484
  • IMG_1271.jpg
    IMG_1271.jpg
    46 KB · Views: 497
Pounding the balancer on with a hammer is a good way to mess up the bond of the rubber between the inner and outer parts of the balancer. I like to thread grade 8 ready rod or a long threaded bolt deep in the crank and use a grade 8 nut turning on the ready rod to preserve the threads in the crank and get static pull on the crank threads. Good lube on the threads is good too.
 
Put the center chunk back in the front axle housing. Dragged Tucker out and degreased and power washed frame.

There are some ugly welds in here and some hairline cracks in a few other spots from what I can tell.

Nothing some grinding and welding can't fix!
 

Attachments

  • IMG_1294.jpg
    IMG_1294.jpg
    50.7 KB · Views: 465
  • IMG_1295.jpg
    IMG_1295.jpg
    48.3 KB · Views: 452
  • IMG_1296.jpg
    IMG_1296.jpg
    55.3 KB · Views: 457
after I install the new trunion tube and line everything up. That plate on top will be 1/4 and will sister up on the inside of both cross members and weld to the outside and tube.

Should be stronger than ever. Right now that thin square stock is the weakest part of the rig in my opinion. Seems like Tucker could have made a beefier design here.
 
Grinding alone. Note to the group. Help is good but not when they are drinking Fireball wiskey and welding and you have to grind everything!!

Looks good now but. This frame was wrapped with 1/4 steel top and outside front to just before the transfer case where there is more framing. They stopped about six inches from there so I will finish their work. Need to just double check the brake clearance. Hopefully this is not why it stopped there.
 
Toward the end of the job you always find the easiest way to work on stuff. Which I had lifted this thing weeks ago.

two more nights welding and grinding and the frame is back to mint and better than new. Someone did a nice job boxing this frame in life already but their welding and grinding leaves much to be desired. I do have a nice welding tan!
 

Attachments

  • 2014-05-13 20.23.26.jpg
    2014-05-13 20.23.26.jpg
    59 KB · Views: 382
Finished grinding welding and getting the frame back nice. Hoping to install the new trunion tube tomorrow night and add a few more braces.

The frame cracked in life real good right under the bellhousing mounts on both sides. This is clearly why they rapped the frame. Seems to be a weak point but it won't when I am done!
 

Attachments

  • IMG_1358.jpg
    IMG_1358.jpg
    64.4 KB · Views: 494
  • IMG_1360.jpg
    IMG_1360.jpg
    46.4 KB · Views: 497
  • IMG_1359.jpg
    IMG_1359.jpg
    39.1 KB · Views: 502
  • IMG_1357.jpg
    IMG_1357.jpg
    55.1 KB · Views: 495
  • IMG_1356.jpg
    IMG_1356.jpg
    68.8 KB · Views: 498
I know that's going to have to be done on mine when I get to that point. How are your holes where the spring shackles attach?
Mine are so worn (paper clip shaped) I'll either need to have everything filled, then redrill, or if there's enough material, just drill to insert a bushing so there isn't direct wear on the aluminum. Kind of crazy that it's like that to begin with, but there doesn't appear to have ever been a bushing in those locations. And that gives a TON of body/chassis slop & rocking when it gets worn, which just promotes more wear.
 
shackle holes are good. Let me know when you get to the turn table. I can part with the light casting one I have which is mint!
 
Dumb question, but what's the difference between the light casting & a regular one? More material removed from between the webbing?
 
I would advise anyone doing this trunion/5th wheel work to check for correct alignment as per the photo in the snowcat repairs section, Thread: Tucker 442 front trunion issues post #25. The gap between the frame and 5th wheel should be the same front to back when all the slack is out of the rear pivot point and at the front roller. Like it would be when the weight of the cat is resting on the 5th wheel, not with the 5th wheel hanging. Having this equal gap insures that the 5th wheel will not hit the frame when 5th wheel is tilted to the stop and turning.
 
We took that into consideration before welding in place with jack applying pressure. These Tucker's will hit the Frame when it is tilted all the way over. It does need to touch evenly on them so it does not dig but the frame has pads and that is the stop.

Shouldn't have to be that hard over on these in use. At least not me
 
Trunion is in. Needs a little finish grinding and the grease fittings. Need to turn down the trunion again. The heat from welding tightened it up a bit.

Also added some stiffeners to the frame below the bellhousing mounts where it cracked before. Overkill but this will be the last time anyone has to fix it!
 

Attachments

  • IMG_1379.jpg
    IMG_1379.jpg
    58.8 KB · Views: 457
  • IMG_1380.jpg
    IMG_1380.jpg
    58.3 KB · Views: 441
here is our finished front cross member repair
 

Attachments

  • DSC_0459.jpg
    DSC_0459.jpg
    78 KB · Views: 448
  • DSC_0458.jpg
    DSC_0458.jpg
    41.3 KB · Views: 444
  • DSC_0460.jpg
    DSC_0460.jpg
    84.2 KB · Views: 442
Here is my reinforcement for the front trunion. I think the factory design is weak and I have the room so this should be indestructible!
 

Attachments

  • IMG_1382.jpg
    IMG_1382.jpg
    62.5 KB · Views: 432
  • IMG_1383.jpg
    IMG_1383.jpg
    64.8 KB · Views: 424
  • IMG_1384.jpg
    IMG_1384.jpg
    55.7 KB · Views: 483
Welder is put away. Grinding done. Back to civilized work. Few more parts to remove tonight. Power wash next week. Paint work and done till september except the occasional puttering.
 

Attachments

  • IMG_1394.jpg
    IMG_1394.jpg
    66.1 KB · Views: 389
  • IMG_1395.jpg
    IMG_1395.jpg
    63.1 KB · Views: 398
Don't know if you tied the motor mounts together before welding but if not it will save you much time, beer, and cursing to check out the center to center spacing of the frame mounting holes vs. the distance on the block. A brace across the frame is well worth the cost of matl. used temporarily during the welding.
 
One last thing, I would drill and tap the rear frame journal on the top so that grease gets to where it should be and put a plug that does not touch the tronion or just leave the bottom zirk there. Our '59 has not been given this treatment yet but will. We will run piping to the front for ease of lubing.
 
I ended up putting the rear one under where it was and has access. With the chevy V8 and my supports added it is impossible to get to it from the top.
 
Top